![paragon logo-1.png]](https://support.paragon-erp.com/hs-fs/hubfs/paragon%20logo-1.png?width=240&height=75&name=paragon%20logo-1.png)
Introduction
In order to send out any emails from Paragon, you must first set up your company's email server, port number, main username, and password. Here, we'll walk you through the steps of configuring your company's email account.
Go to Settings
From the home page, click on the settings button in the top right corner of the screen. This will bring you to the settings page.

From the settings page, click on email settings in the communications tab.

Setting up the email settings
When you click on email settings, the modal below will pop up:
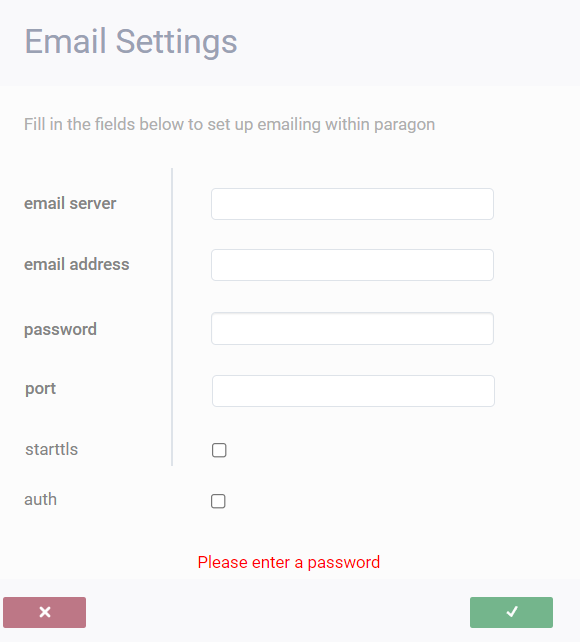
1. Enter your company's email server. This is where the emails will be received and sent out from Paragon.
2. Enter the email address of the main user.
3. Enter the password of the main user.
4. Enter your server's port number.
Once all the fields are filled out, click the accept button, log out, log in and your company's email will now be ready to receive and send out emails and reports through Paragon.
Instructions for Gmail
If you are using Gmail, you will need to follow the steps below for emailing within Paragon:
- Access https://myaccount.google.com/security and log in with your email and password
- Under the heading How you sign in to Google, select 2-Step Verification
- Follow the setup procedure that Google provides
- You will receive a notification that you have successfully setup 2-step verification
- Go back to https://myaccount.google.com/security
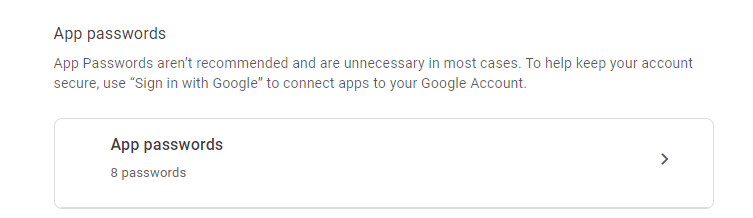
- Under the heading How you sign in to Google, select 2-Step Verification, scroll down and click on App passwords
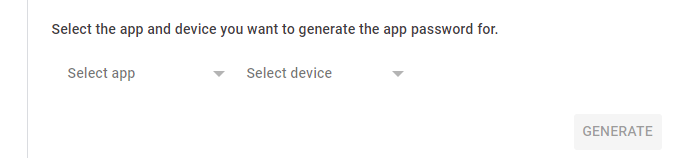
- 2 drop downs will appear. Select the app type to Other (Custom name)
- The drop downs will then change to a text field
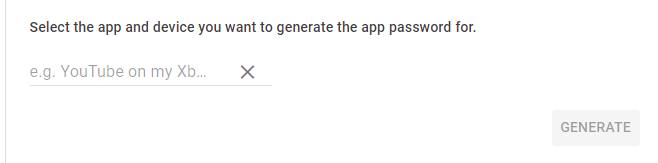
- Enter the name paragon (or whatever you please) and click on generate
- You will be given a 16 digit password code with spaces (#### #### #### ####), this password is what you will use for email authentication. Save the code somewhere and click done
- Go back to https://myaccount.google.com/security
- **Optional**: At this point you are setup, but if you want to turn off 2-Step Verification you can do this now, under the heading 2-Step Verification
- Click turn off at the top of the screen and confirm the decision
- Now access Paragon and login
- Click the settings button at the top right corner of the page
- In the settings card, scroll to the end and select email settings
- Set email server to smtp.gmail.com, port to 587, Email Address to your gmail email, and password to the password generated by google, and ensure that the starttls and auth boxes are both checked
- Click the accept button
- Log out Log in
If you receive this email in your inbox it means the email set up is well configured.

What's next
You may also find the following articles helpful.
Emailing transactions and attachments
How to configure conditional custom PDF printing and emailing