![paragon logo-1.png]](https://support.paragon-erp.com/hs-fs/hubfs/paragon%20logo-1.png?width=240&height=75&name=paragon%20logo-1.png)
Introduction
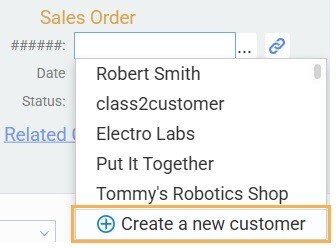
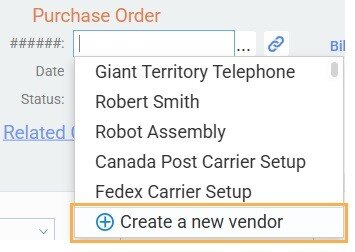
When creating a transaction, you may realize that the customer or vendor that you are creating the transaction for does not exist yet. Without disrupting your workflow, you have the ability to create a customer or vendor on the spot, rather than having to go to the customer or vendor module to create one.
Create a transaction
You will not be able to create new customers or vendors in the receive payment or make payment modules.
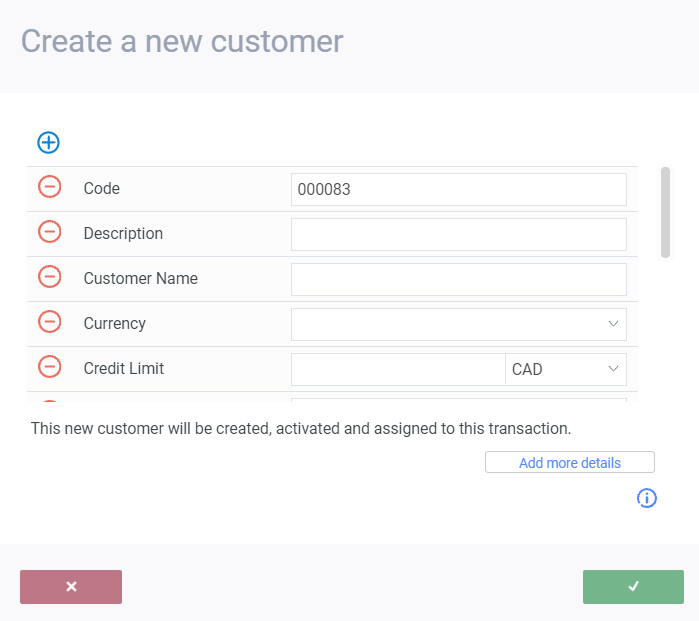
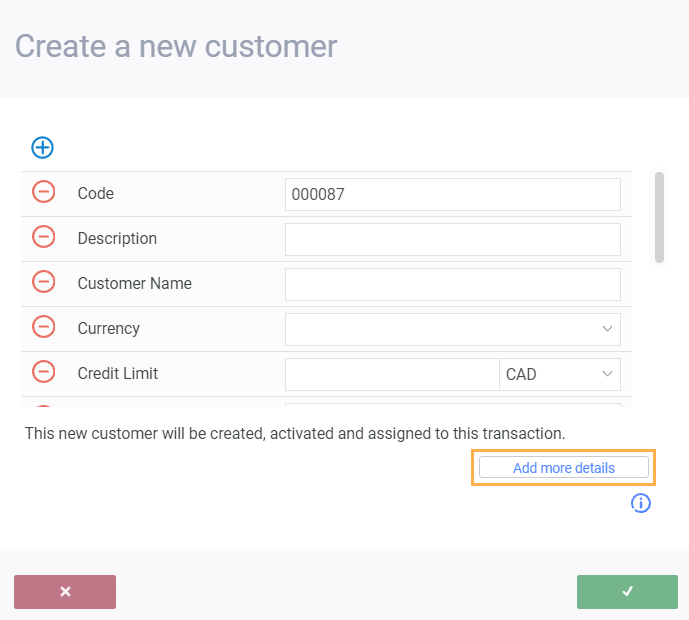
Create a new customer or vendor
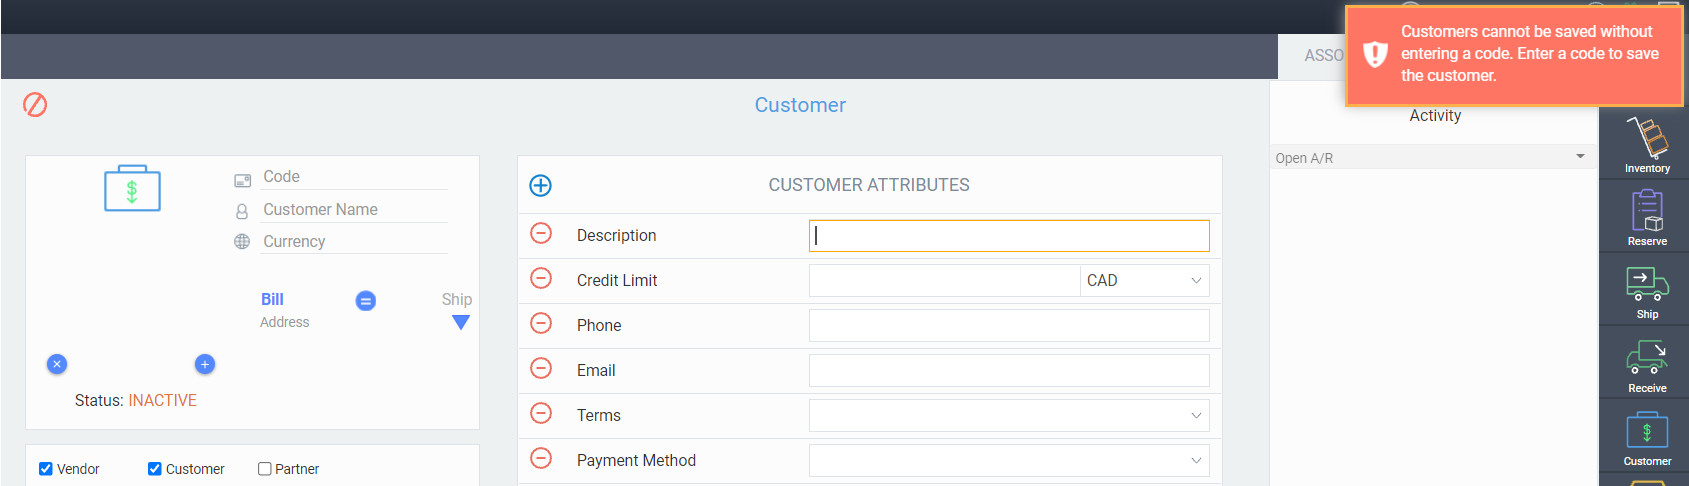
A customer/ vendor must have a code before you click accept otherwise it cannot be created.
Creating a customer/vendor without a code
If you do click accept on your newly created customer and it is missing a code, you will receive a toaster informing you that the company could not be created and you will be taken to that company module to finish setting up your customer or vendor manually from the corresponding module.

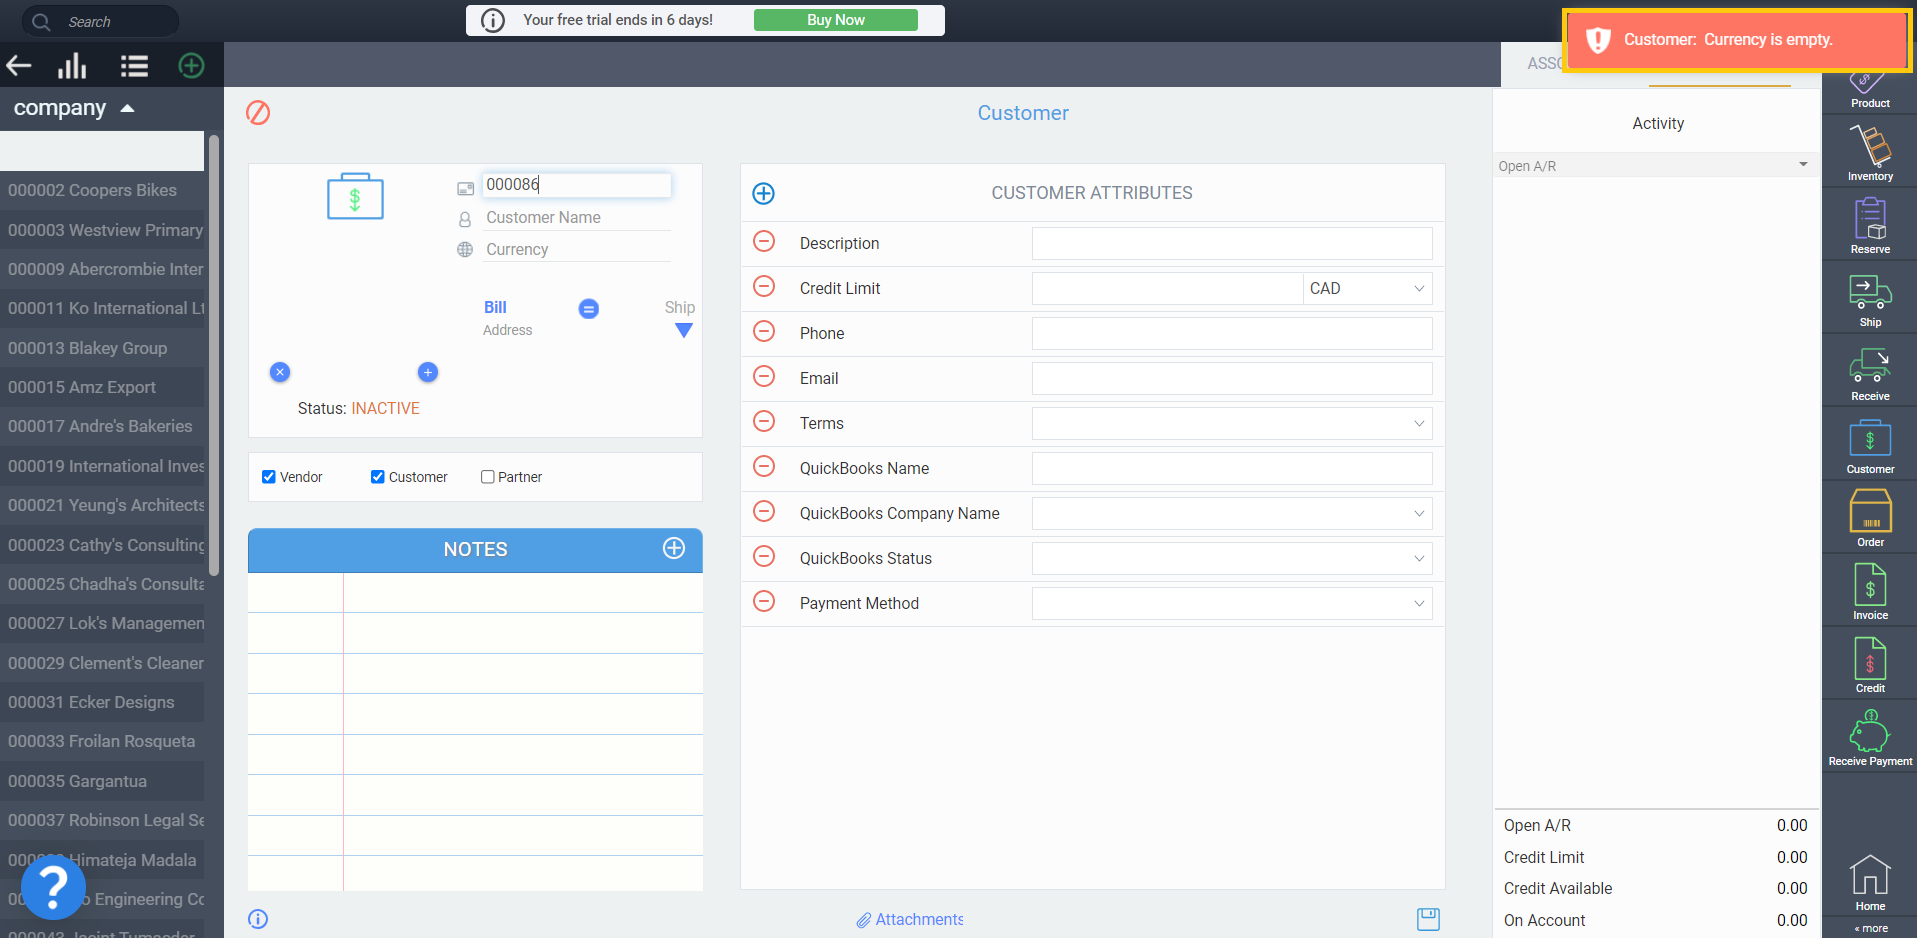
Creating a customer/ vendor with a mandatory attribute
Similar to creating a company without a code, if you try to create a customer or vendor without filling in a mandatory attribute, you will also be redirected to the corresponding module to fill out the necessary attributes. Any information you already filled out will be transferred over. For more help with mandatory attributes, take a look at our article on setting up reference screens.
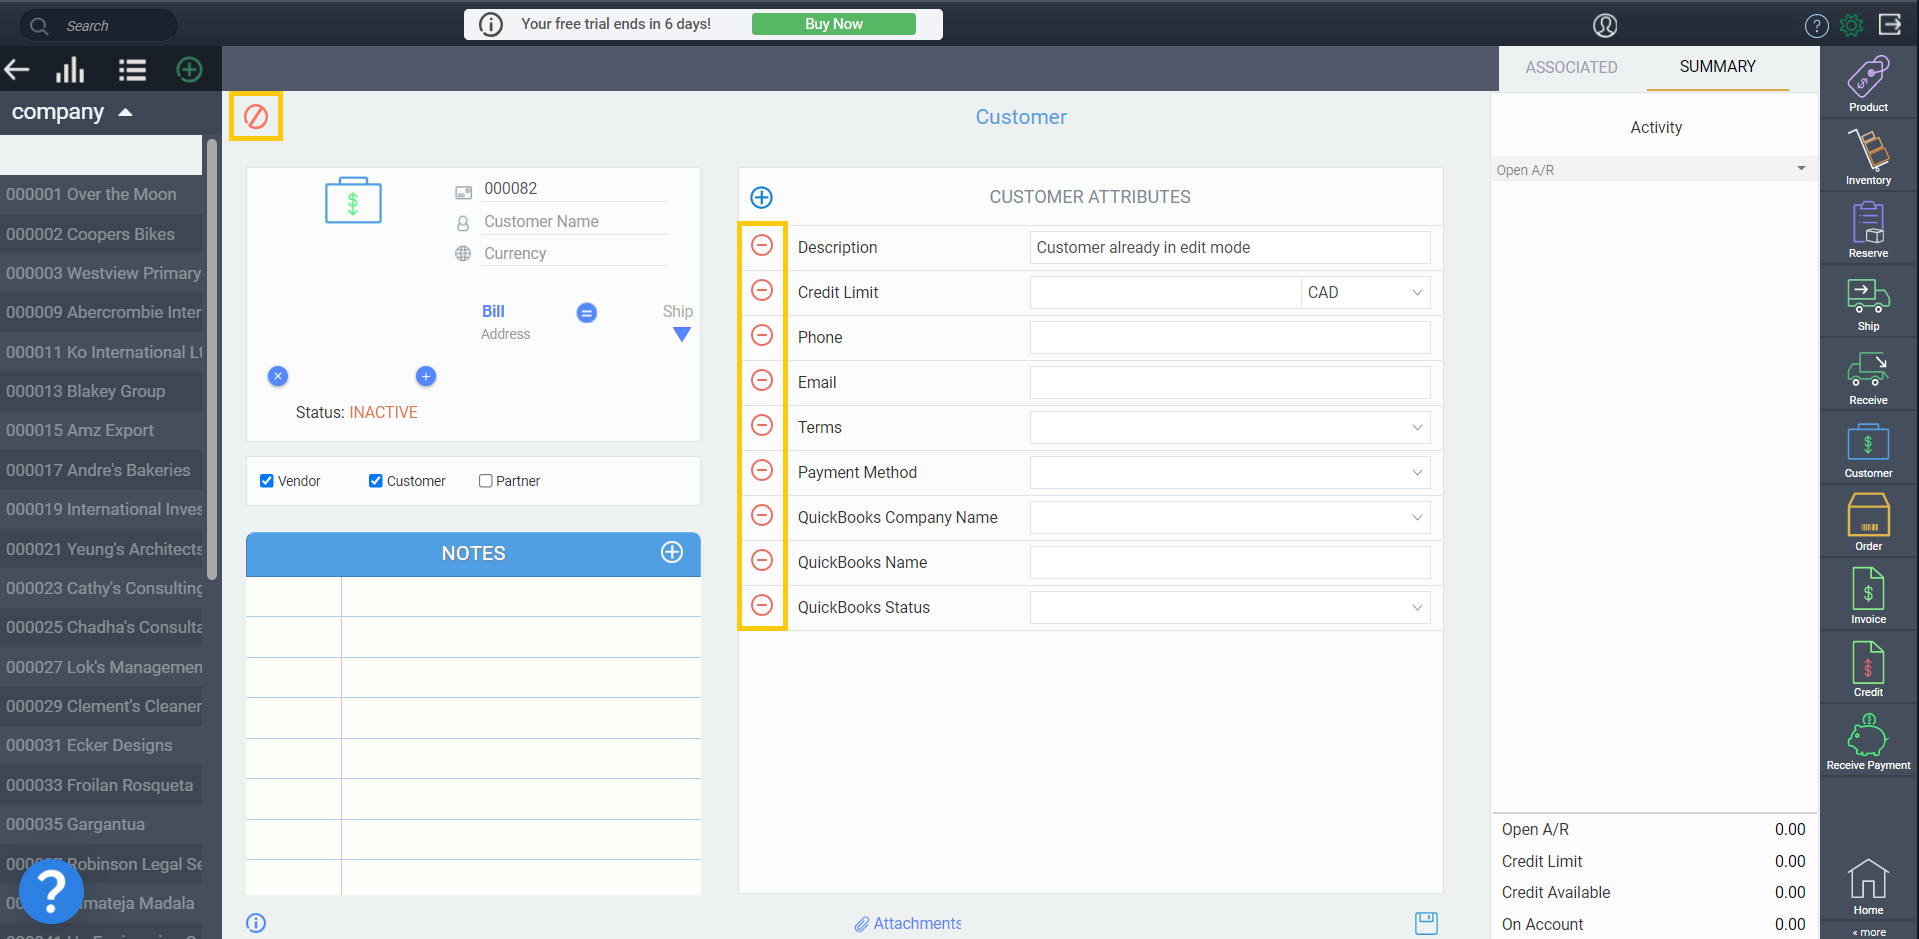
Leaving a customer/vendor in edit mode
If you are already editing a customer or vendor in its module and try to go back to the transaction to create a new one, a notification will appear informing you that you already have a customer or vendor being edited. Simply click the cancel or save button to take your customer/ vendor out of edit mode and you can create a new one as needed.

Add more details
If you want to have access to all of the information you can attach to a customer or vendor, such as notes and attachments and the associations tab, you can click add more details to bring you to the full module. This allows to you create a customer/vendor as normal, but it will already have any attributes you have already filled out.
Save and select your new customer/ vendor
After finalizing your customer or vendor and clicking activate, you can navigate back to your transaction as usual. Your customer or vendor will have been saved and activated and will automatically be selected for your transaction. You can also check your drop-down menu to see your newly activated customer or vendor in the list.
What's next?