![paragon logo-1.png]](https://support.paragon-erp.com/hs-fs/hubfs/paragon%20logo-1.png?width=240&height=75&name=paragon%20logo-1.png)
Introduction
The pack module is based on Paragon's standard transaction screen, to get a better understanding of navigating these screens, check out our guide on How do transaction screens work.
Open the pack module
Open the pack module by selecting it in the right-hand navigation bar or in the more menu.

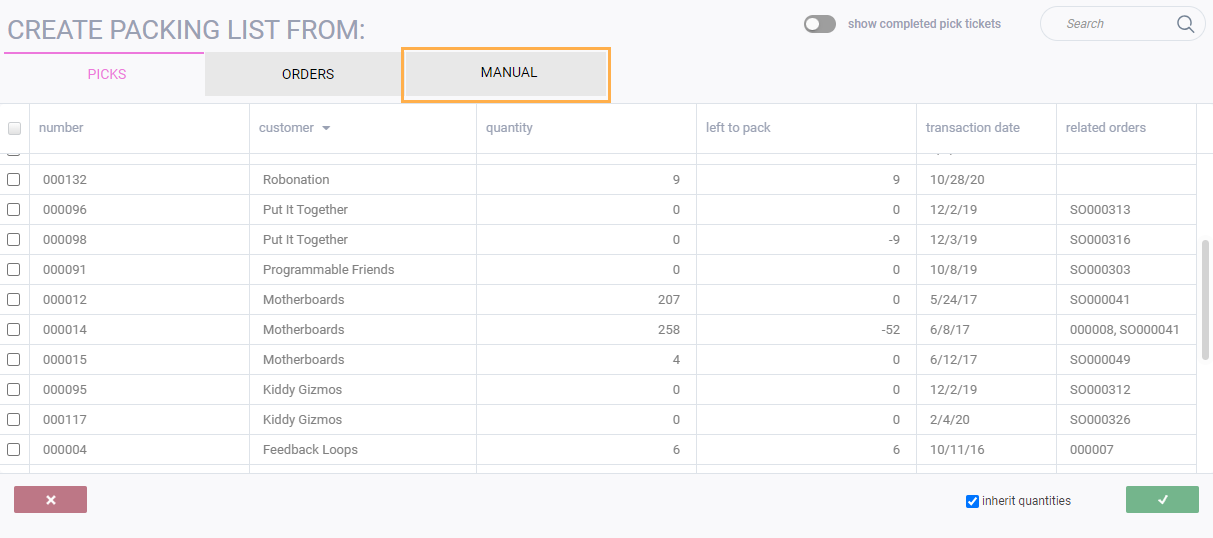
Creating a packing list manually
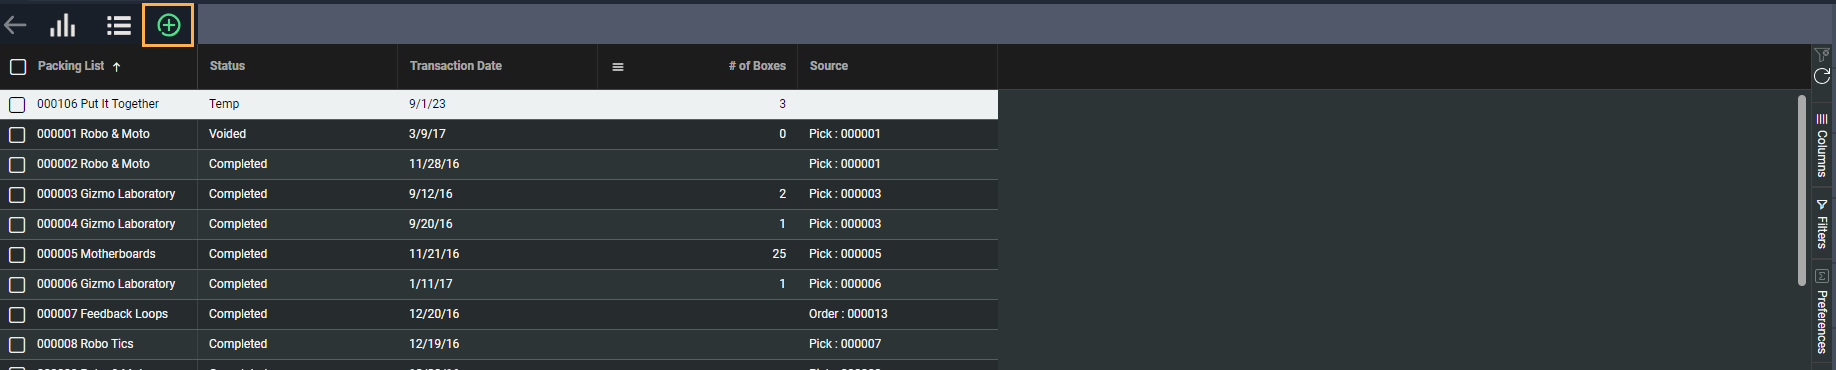
This is the list view of the packing list module. To add a new packing list, click add new packing list.

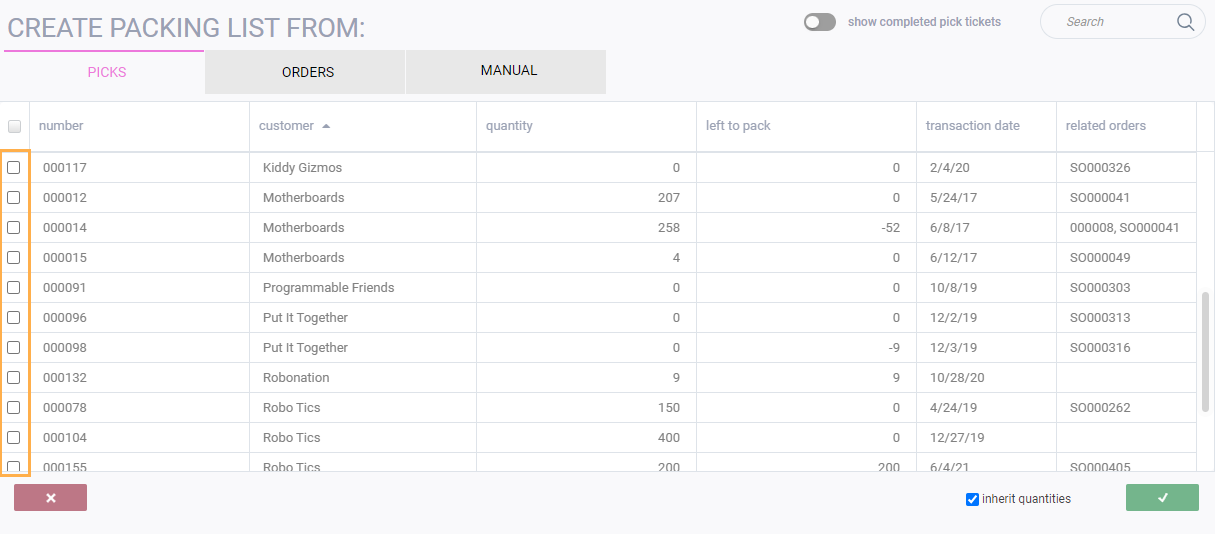
Select the method you want to create the packing list from. In this case select manual.
Enter in general information
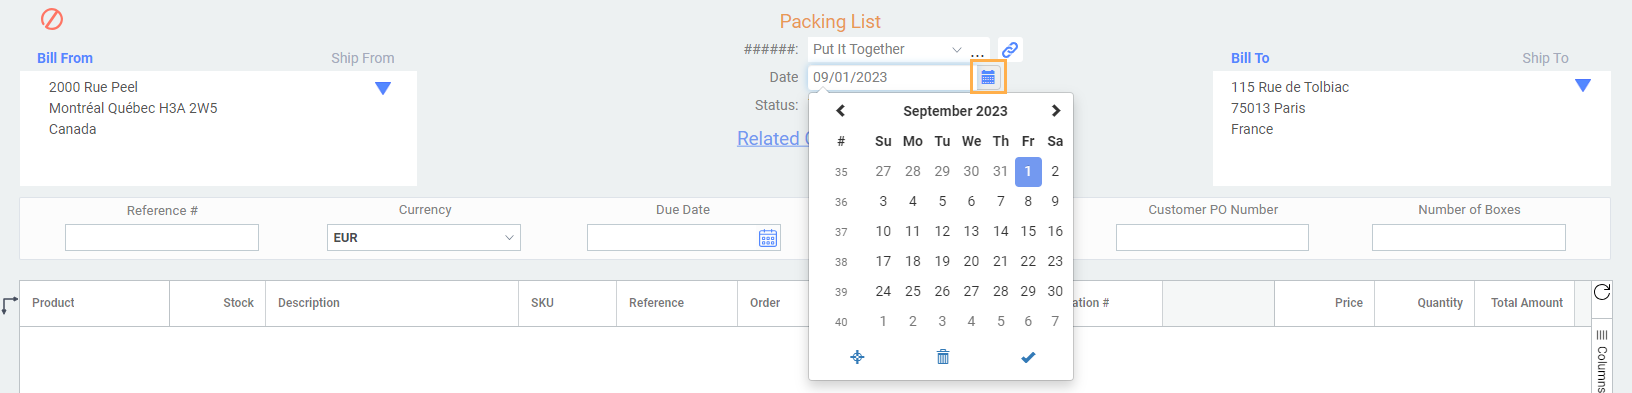
Select the company name from the drop-down menu.

Once the company is selected, it will auto-populate all the addresses from the customer file.

Note that the packing list will not have a transaction number until the packing list is saved. Once a transaction number is assigned, it will replace #####.
Select the date by clicking on the calendar icon and selecting the appropriate date.
Enter information in the business terms
Enter information in the business terms by clicking on the field and typing in the correct information or selecting it from the drop-down menu.
Note that the business terms will be slightly different based on how the pack module was configured.

To add a product or line item to your packing list, click the add button in the bottom left-hand side of the line item area.

Select all the items you would like to add to your packing list by checking off the boxes on the left. If you would like to cancel the addition of line items or products, click cancel.
To add all the products, click accept.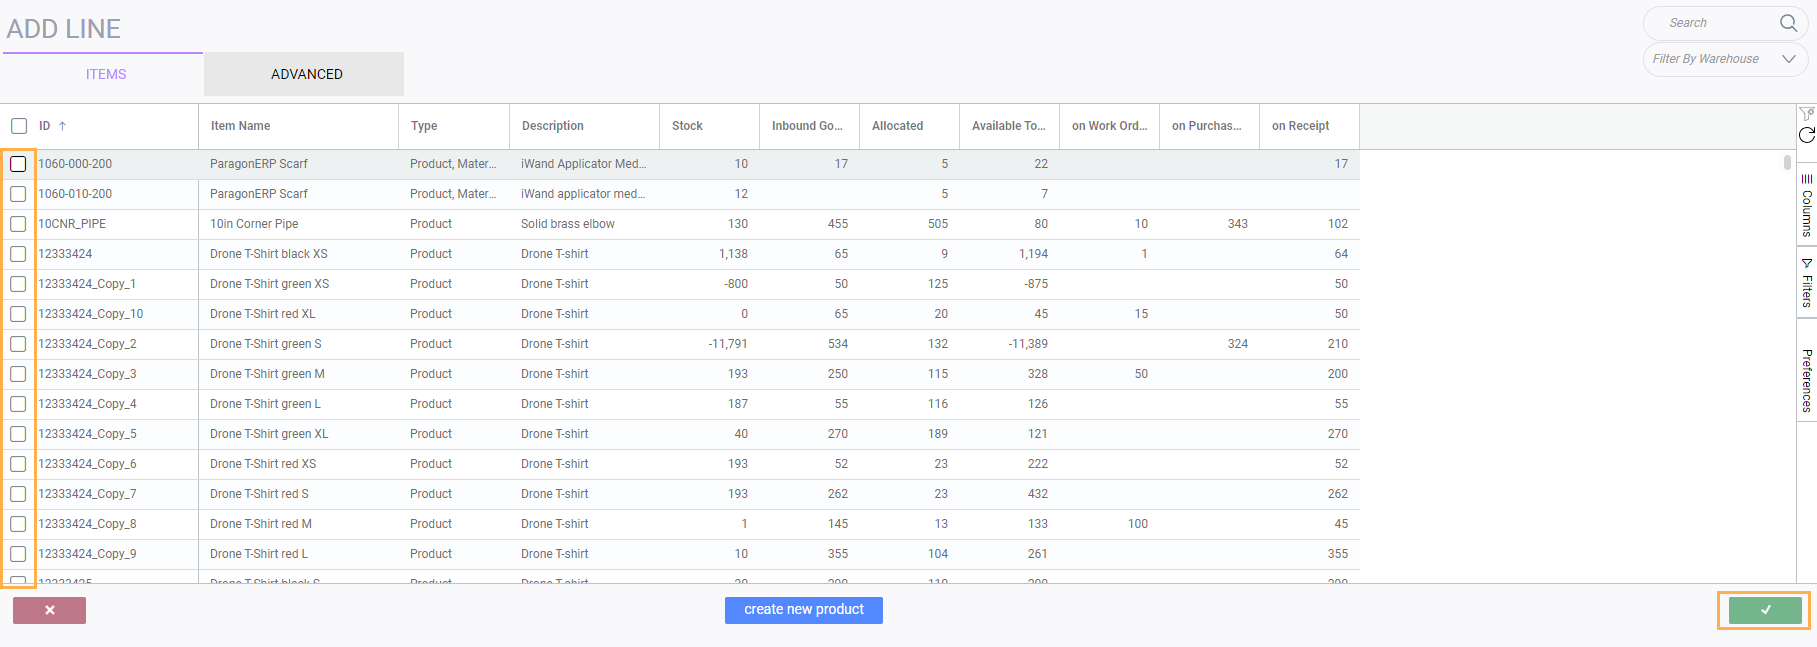
Once the items have been added, you can edit the price and quantity as needed. Right-clicking on an item will allow you to add attributes, discounts, notes, and attachments to that line.
You can also add more line items by selecting add product again.

If necessary, add any relevant notes by typing in the note section. These notes won't affect anything in the system. They can be used for reminders or internal communication.
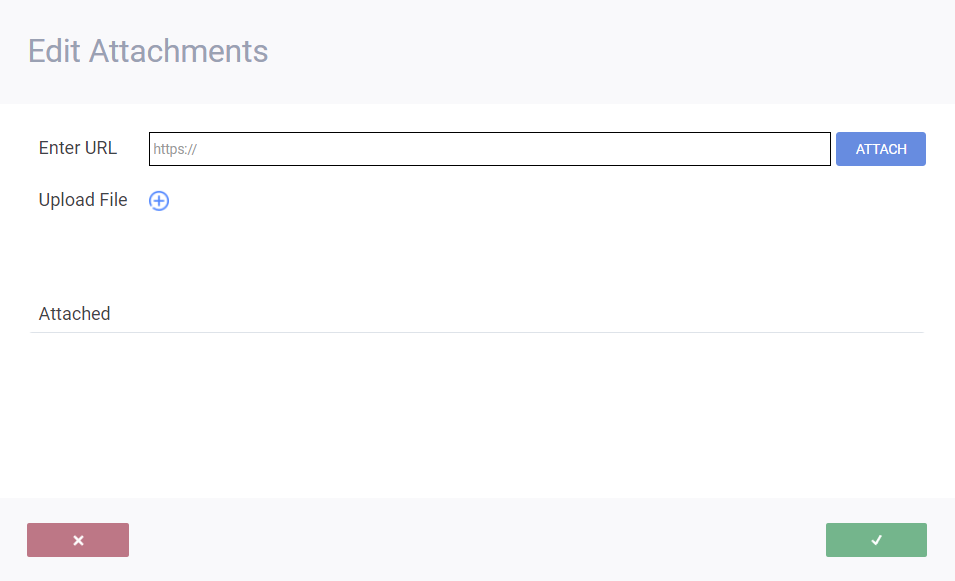
You can also upload attachments or attach URLs to the packing list by clicking the attachments button.

Canceling a packing list
A packing list can be canceled at any point before it is saved by clicking cancel in the upper left-hand corner.
![]()
Once you have filled in all the relevant information you can save your packing list by clicking save in the bottom right-hand corner.

 Once the packing list is saved, it will automatically be assigned a transaction number and a temp status.
Creating a packing list from a pick ticket
This is the list view of the packing list module. To add a new packing list, click add new packing list.
Select picks
Select the method you want to create the packing list from. In this case select picks, it will be selected when it is highlighted in pink.
Select one or more pick tickets by ticking the boxes on the left and then click the accept button to proceed.


Creating a packing list from an order
Select the method you want to create the packing list from. In this case select orders, it will be selected when it is highlighted in orange.
Select one or more orders by ticking the boxes on the left and then click the accept button to proceed.

I've created my packing list, now what?

What's next?
Once you have created packing slips, you can use the boxing function in ParagonERP. Here are some articles related to boxing.