Exporting references such as customers and products from Paragon to QuickBooks
Introduction
Paragon offers many ways to keep your data in sync with your QuickBooks Online accounts. Exporting your references from Paragon to QuickBooks is one more way to do this and here we will show you how to export them automatically in the future.
Export products automatically
Once you have connected to QuickBooks you will need to activate the automatic product export attribute from the QuickBooks setup page. Simply look for QuickBooks in the add-ons card from the settings page.

From here you can select automatic product export. Click the edit button and make sure this box is ticked for the automatic export of your products.

Creating a product
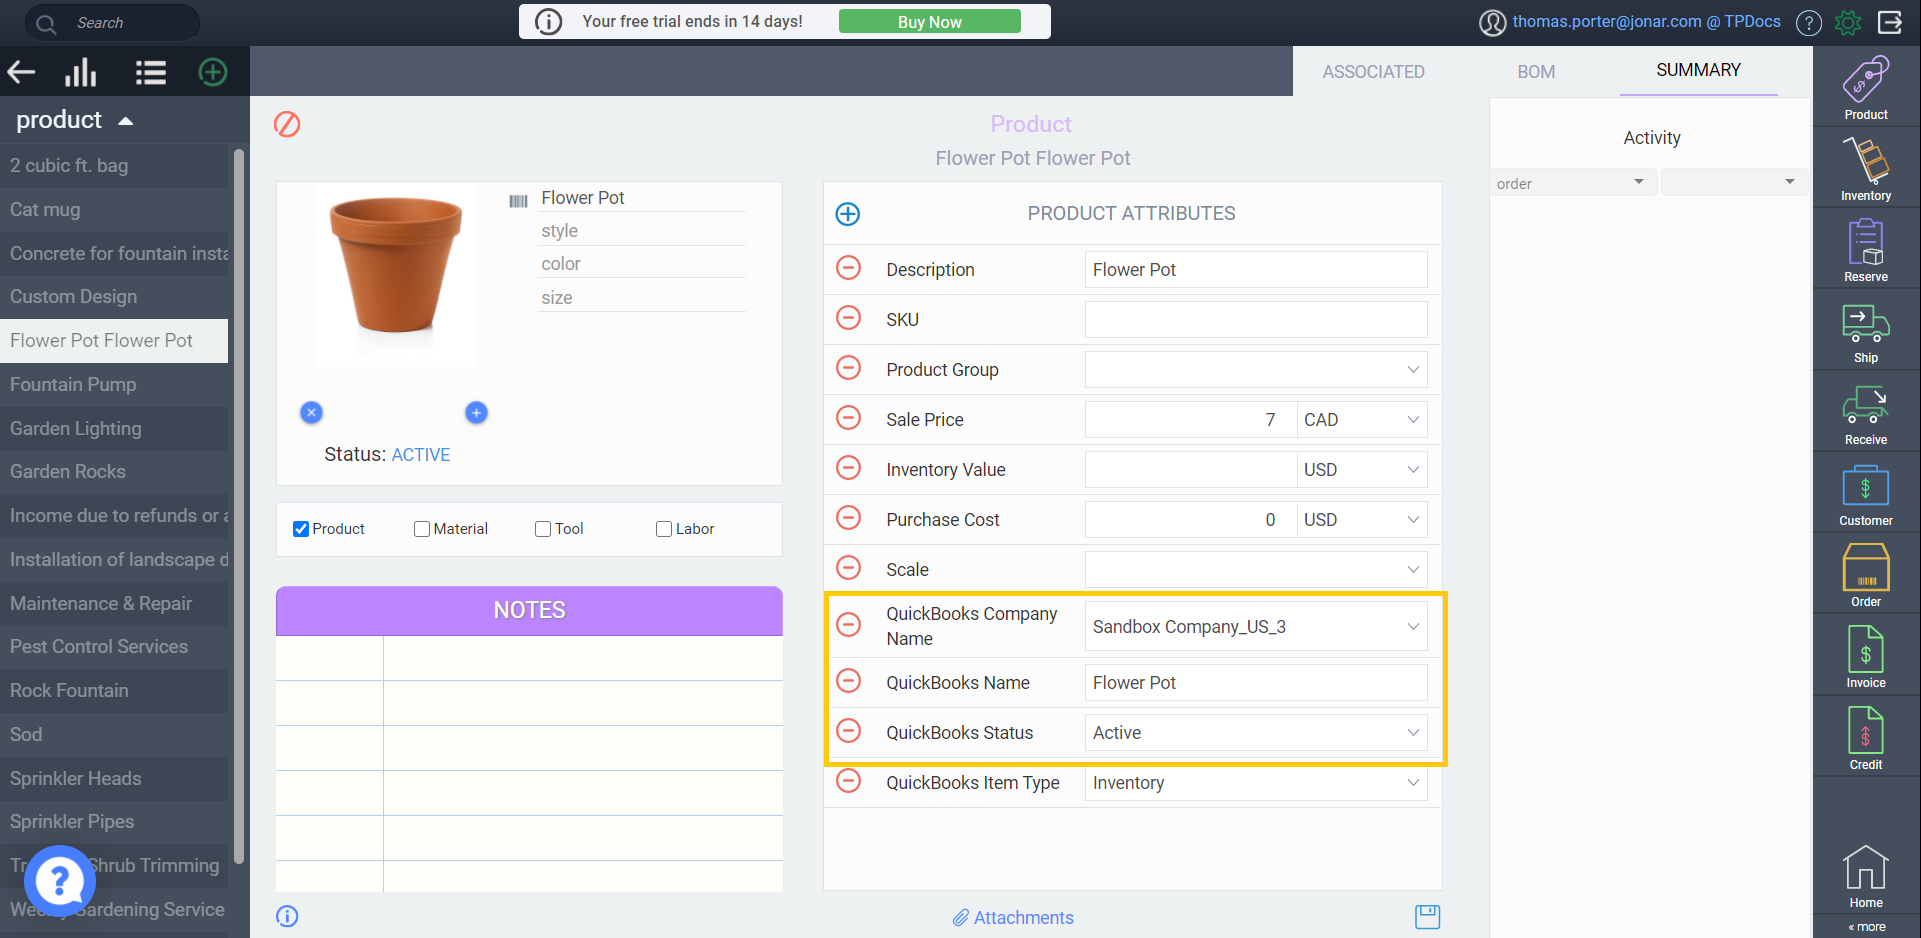
When you create a product in ParagonERP for use with QuickBooks, it is mandatory to fill in these attributes: QuickBooks Name, QuickBooks Company Name, and QuickBooks Status. You will need to fill out each of these to be able to export your products. Once these are filled in you can save and activate your product from the action button.

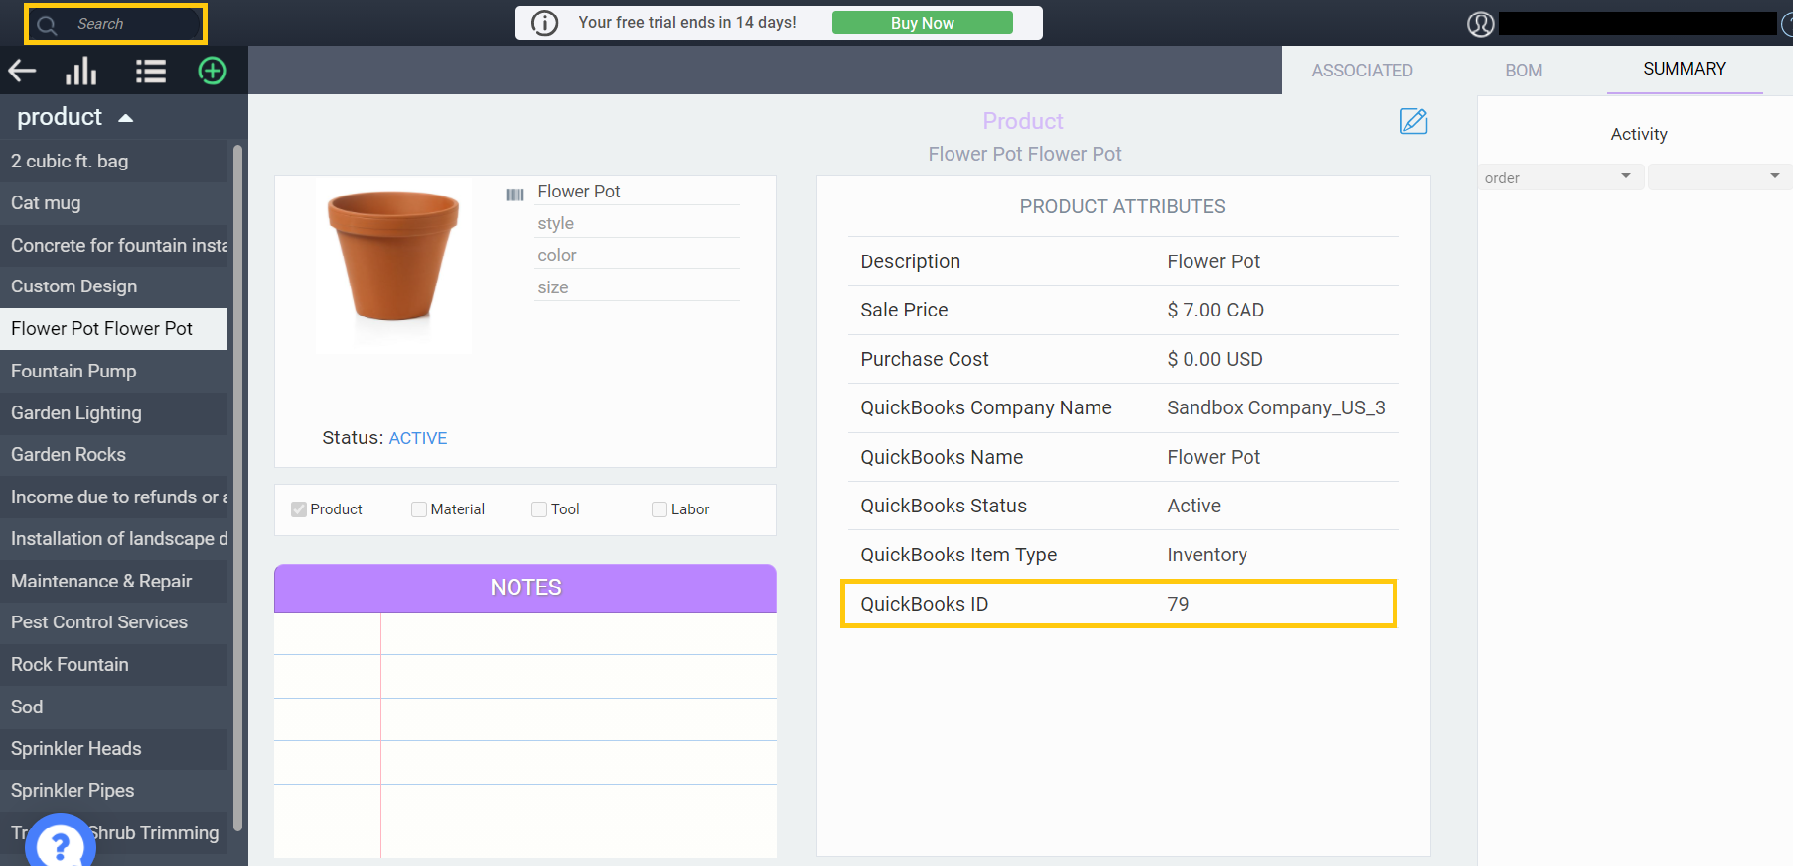
Once activated you can refresh Paragon by pressing enter in the search bar. You will now be able to see all attributes that have been added and the product now has its own QuickBooks ID.
If you are already signed into QuickBooks, refresh and you will be able to see your newly exported product there as well.

Product export log
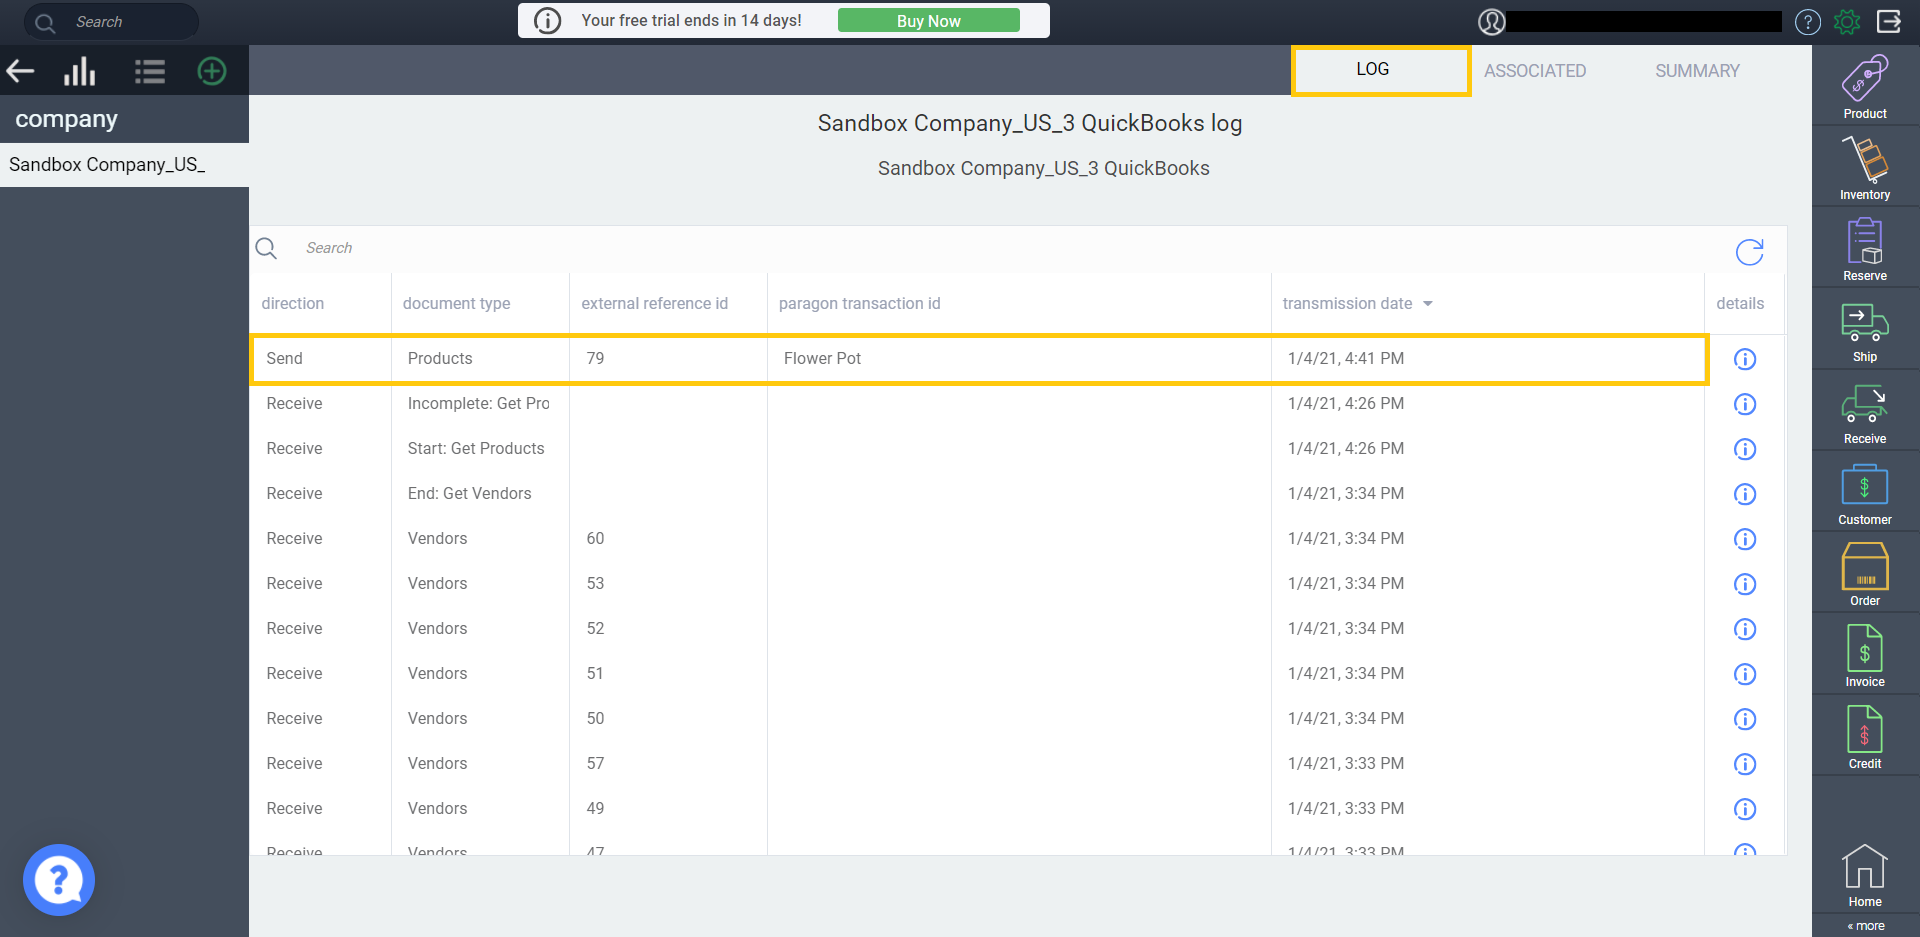
Return to the QuickBooks setup page in Paragon and click the log tab. You will be able to see your exported product as the most recent log entry, complete with a Paragon transaction ID and external reference ID (QuickBooks ID).
Exporting customers automatically
Just as we set up automatic product export, you will need to navigate to the QuickBooks setup page and make sure that automatic customer export has been activated. Simply click the edit button and tick the box before saving.

Creating a customer
When you are creating a new customer in ParagonERP to be used with QuickBooks, it is mandatory to fill out these attributes: QuickBooks Company Name and QuickBooks Name. Don't forget to save and activate your new customer to proceed.
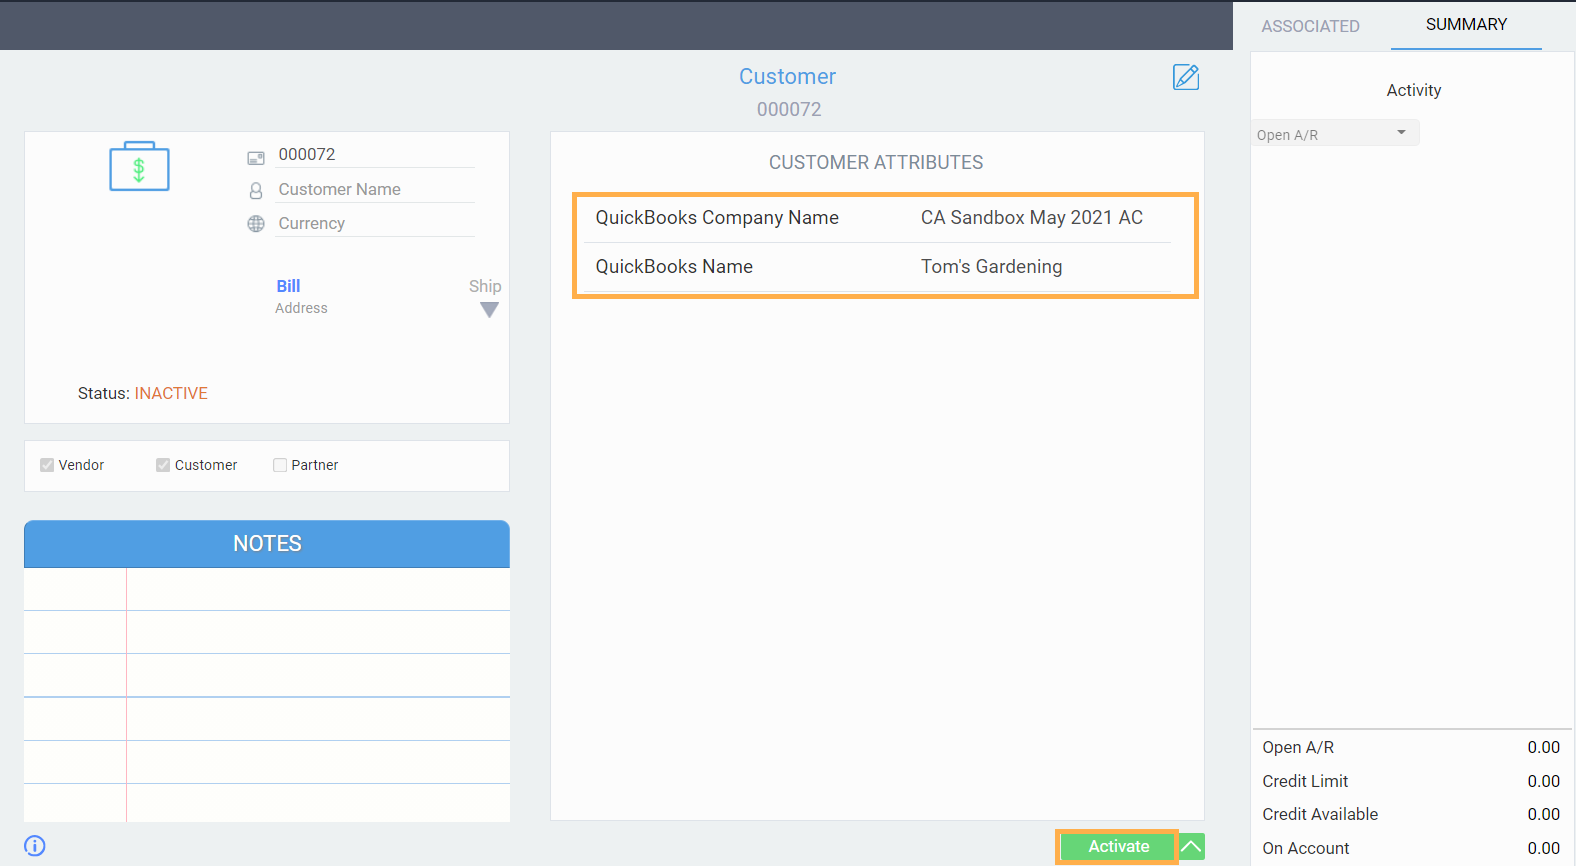
You can now refresh Paragon by pressing enter in the search bar. Your new customer will be updated with a QuickBooks ID attribute.
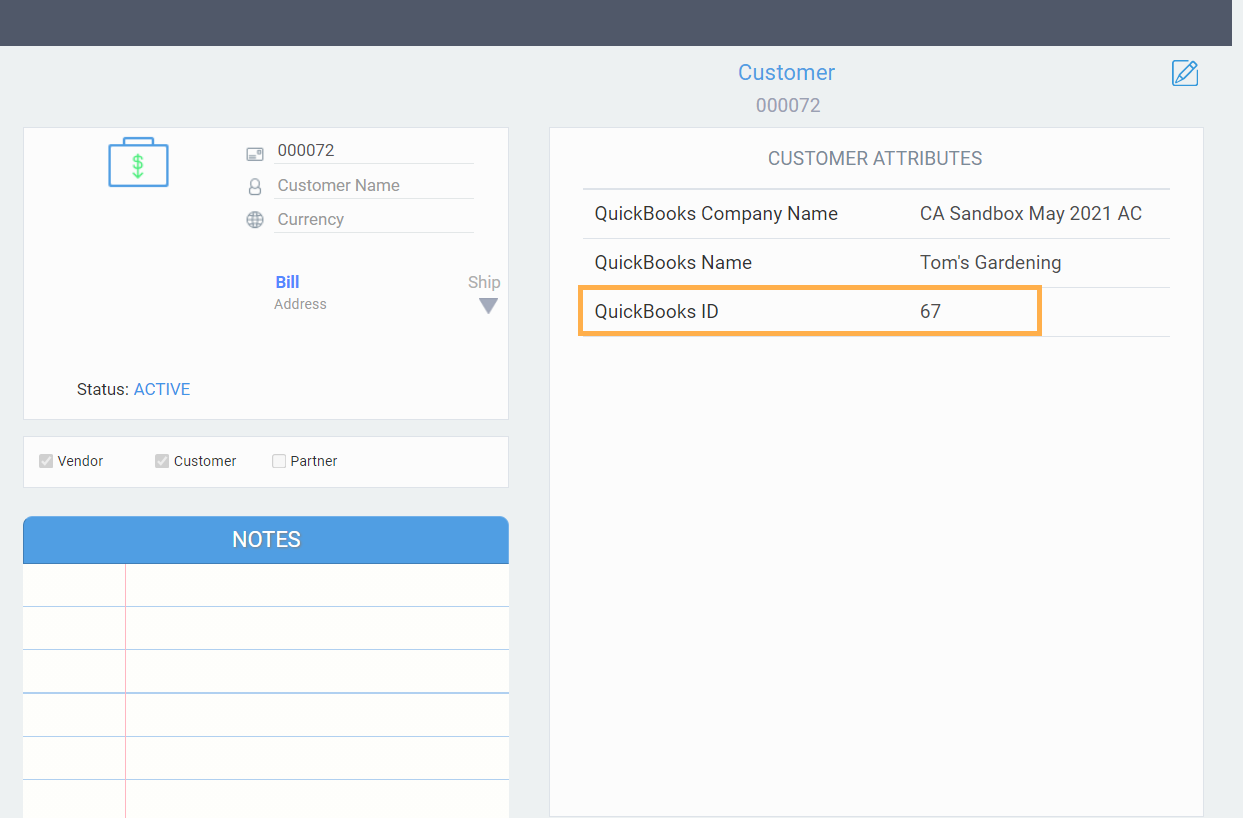
If you are logged into QuickBooks, click refresh and you will be able to see your newly created customer in the list there as well.

Customer export log
Return to the QuickBooks setup page in Paragon and click log. You will be able to see your new customer entry, complete with a Paragon transaction ID and external reference ID (QuickBooks ID).
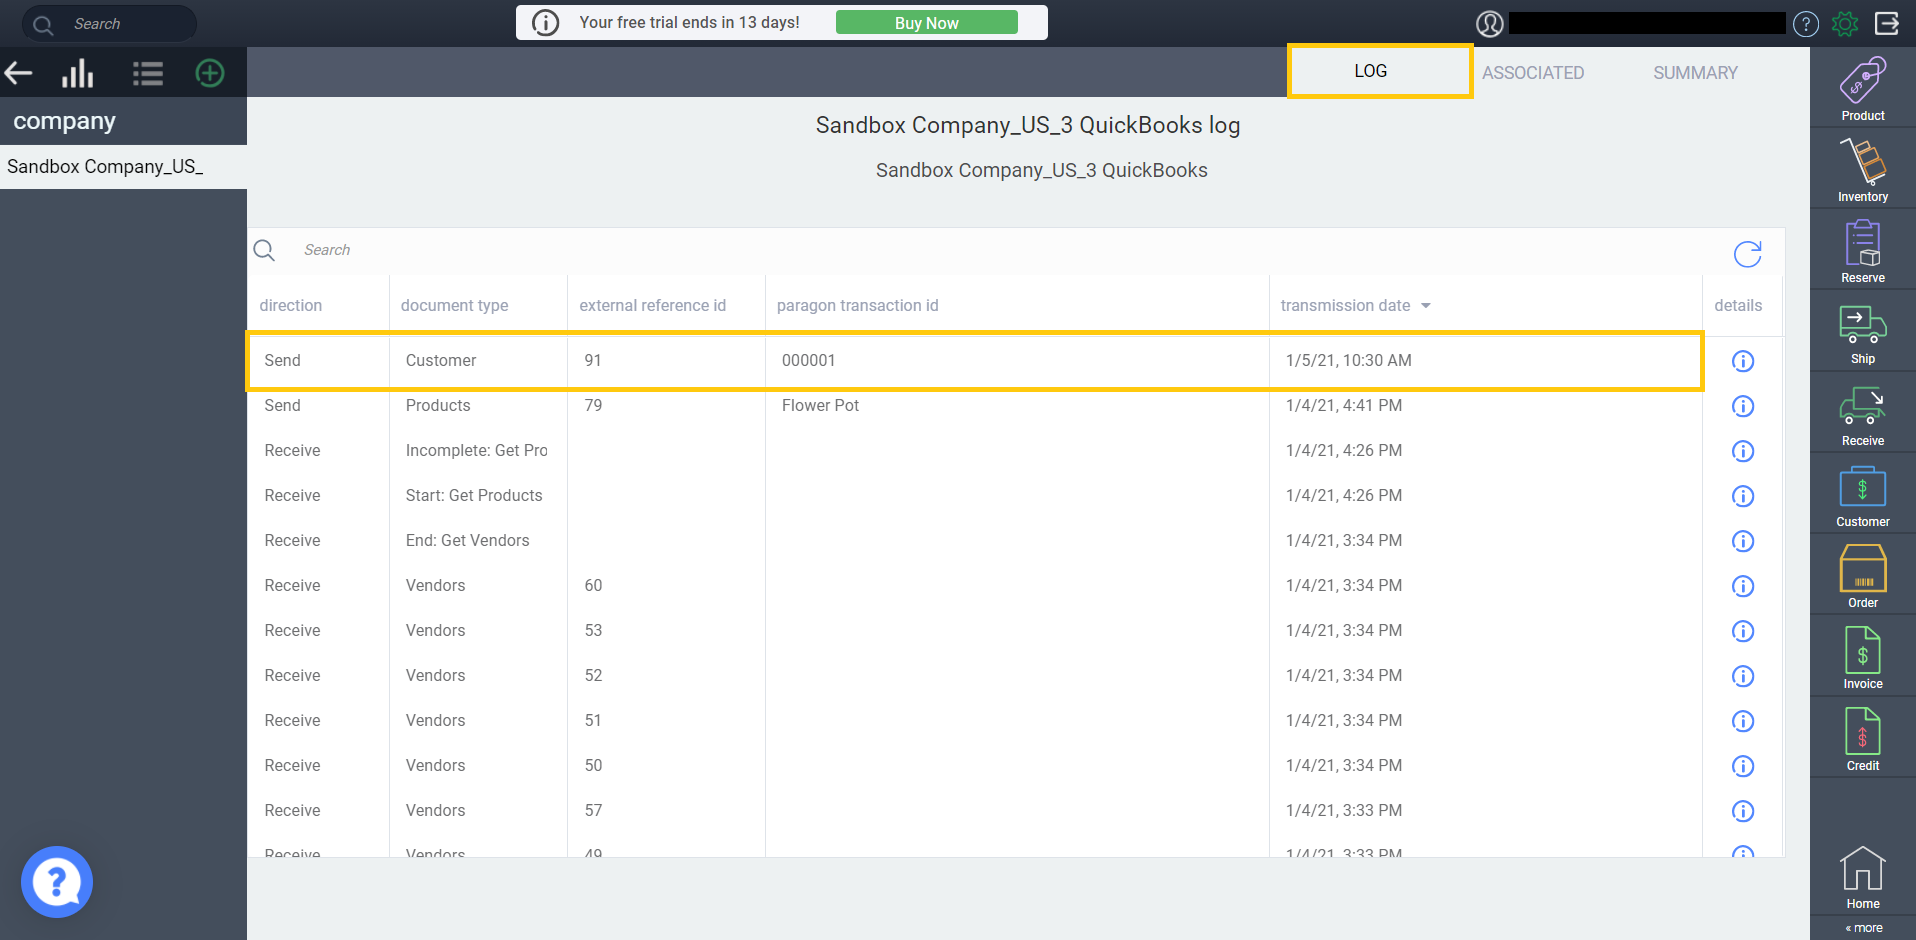
Editing a customer in Paragon
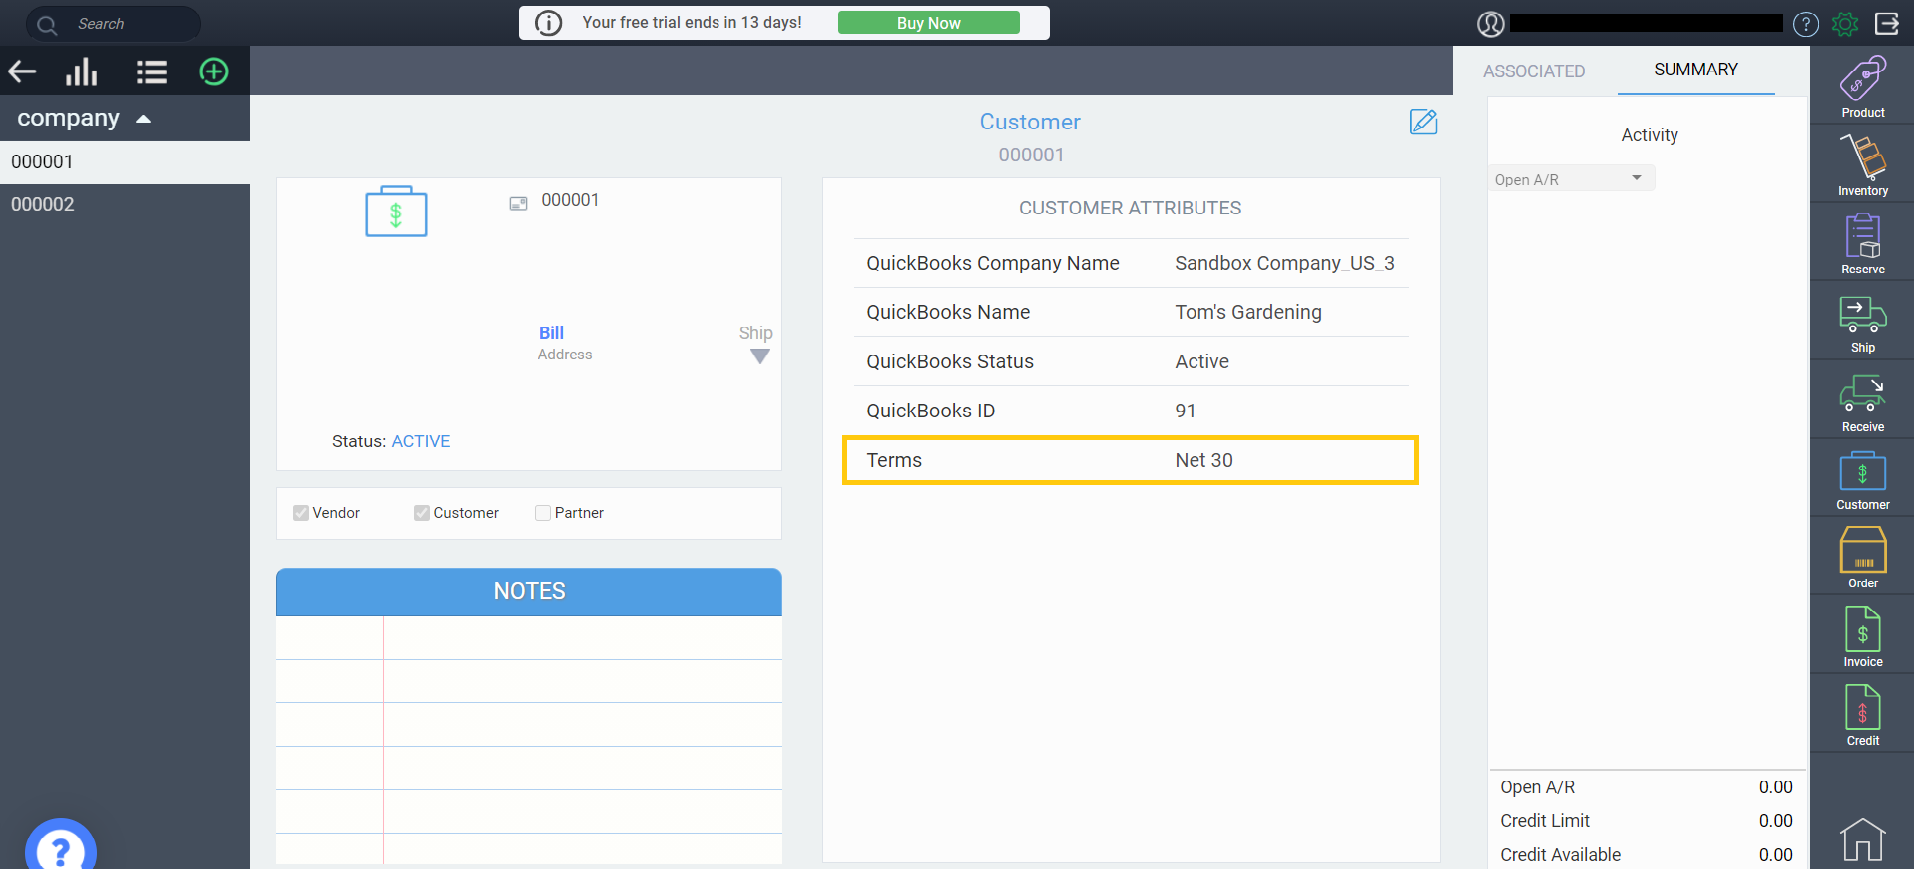
Each time you edit and save a customer in Paragon, it updates the customer in QuickBooks. For instance, if you want to edit the terms for your customer, simply click edit, update the terms attribute, and save your changes.
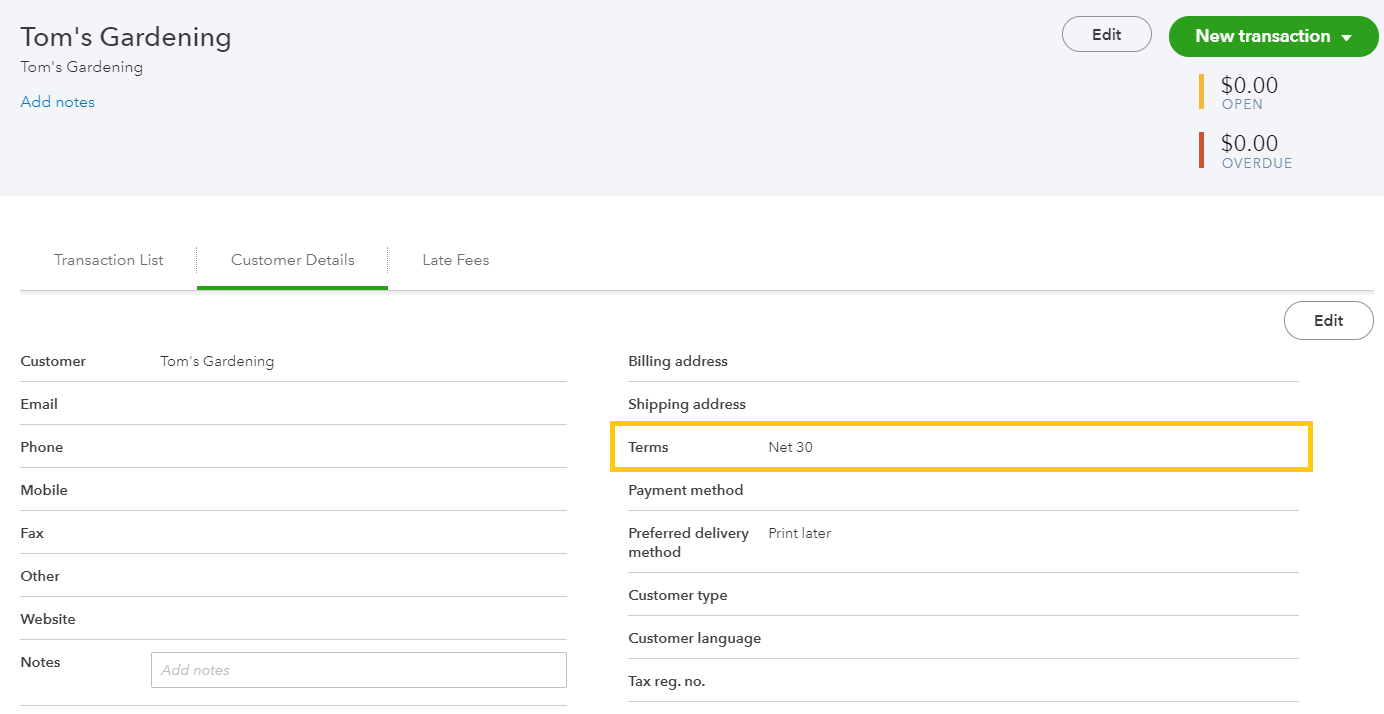
Go back to QuickBooks Online and refresh your customers. You will be able to see your updated customer in the details section.
What's next?
As mentioned, there are several ways to export data from Paragon to QuickBooks Online. Check out some of our other articles to help you:
![paragon logo-1.png]](https://support.paragon-erp.com/hs-fs/hubfs/paragon%20logo-1.png?height=50&name=paragon%20logo-1.png)