Create transactions from the action button
Introduction
Easily creating transactions within your business workflow is key to managing all the information that flows through your ERP system. Paragon makes creating these transactions even easier and more flexible by giving you the option of creating them from the action button of the previous transaction in your workflow - whatever that may be.
Transaction screen set up
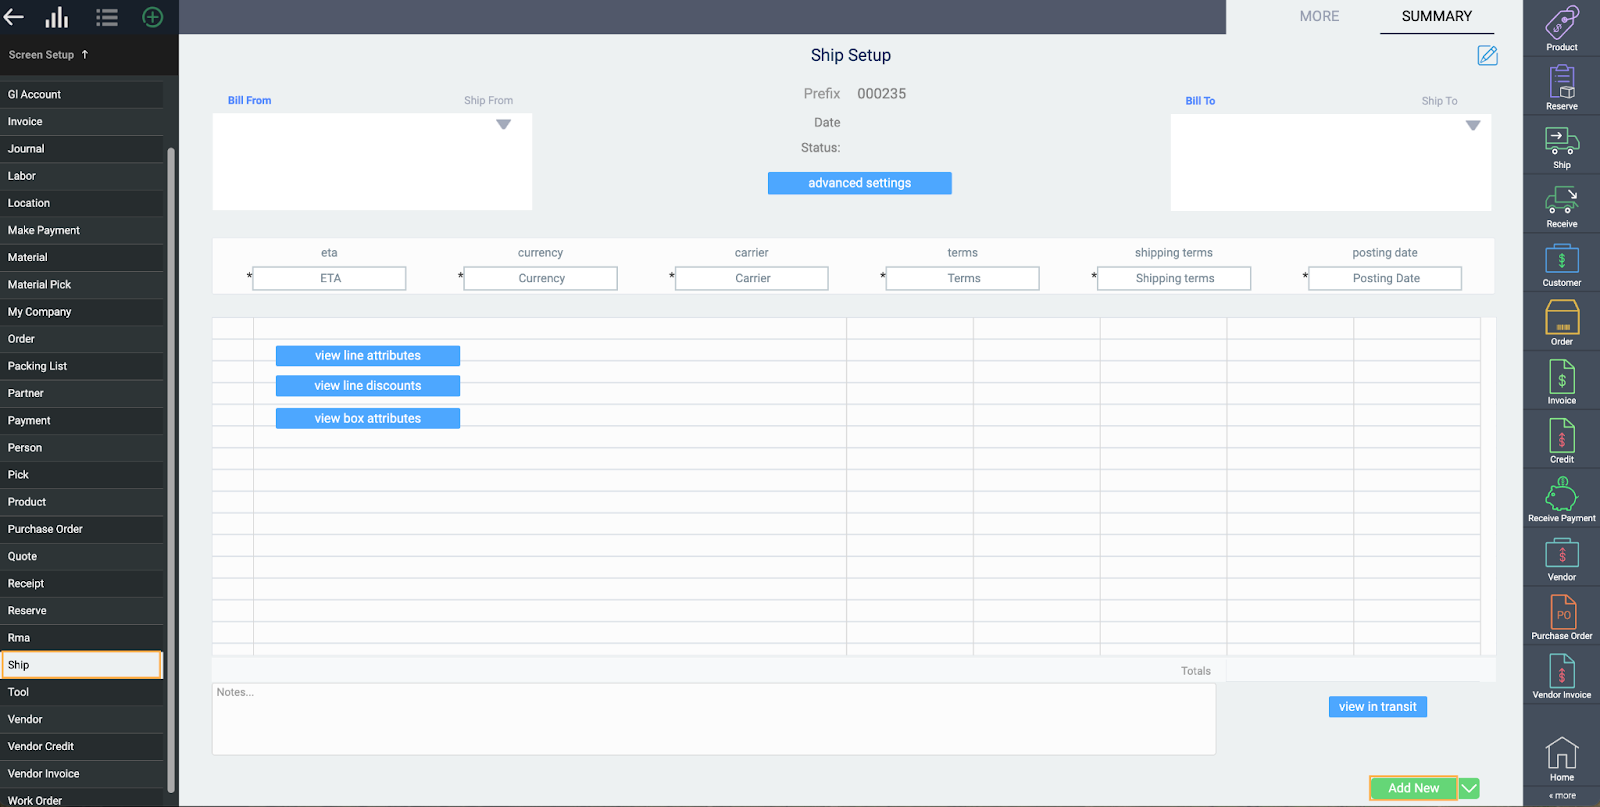
To get started with creating transactions from the action button, we first need to go to screen set up. Simply click the settings button and select screen set up under the system card.
Action Button Options
Once you are in screen set up, select a transaction to configure. In this example we will be using Ship.
Within most transaction action buttons, Paragon comes equipped with the option to create the next transaction in the typical workflow. For example, once you’ve approved and issued an order, the next step might be to create an Invoice, which can be done directly inside the Ship module. For users with specific roles, this avoids jumping around the system to create the follow-up transactions for other departments to begin approving.
Within most transaction action buttons, Paragon comes equipped with the option to create the next transaction in the typical workflow. For example, once you’ve approved and issued an order, the next step might be to create an Invoice, which can be done directly inside the Ship module. For users with specific roles, this avoids jumping around the system to create the follow-up transactions for other departments to begin approving.
To add a new create transaction, click add new from the bottom right of the setup screen for your chosen module.
From there, a modal will appear. The first dropdown allows you to select an action for the button. Select Create New Transaction.

Note: Not all transaction modules have the option to create a new transaction from an action button. You will only see the option in the dropdown if the selected module has the feature
The modal has three dropdown options to choose from:
- Transaction Type - allows you to select which transaction you want the button to create. The options differ based on the module you’re creating this on
- Context Rule: this allows you to select a rule to the function of the button. For more help, please contact us at support@paragon-erp.com
- Status for New Transaction: allows you to select the status of the newly created transaction. You can select from Temp, Issue, Complete or Hold

Only transactions relating to the current module will be available. You are not able to create duplicates, any button you create will be removed from this list after creation.
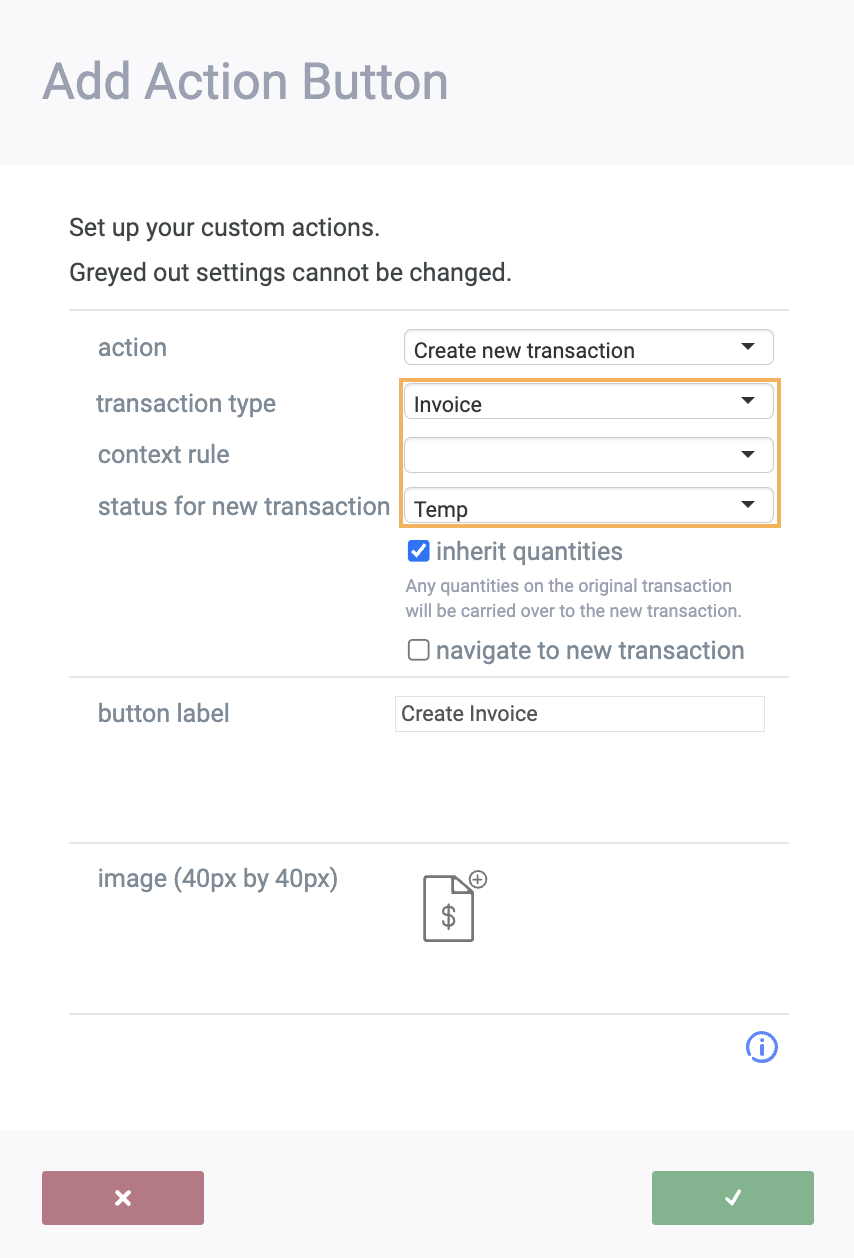
There are two checkbox options to configure:
- Inherit Quantities: Any quantities on the source transaction will be inherited on the new transaction
- Navigate to new Transaction: if this option is checked, you will be immediately navigated to the new transaction as soon as it is created from the action button
You also have a text box labeled Button Label, giving you the option of customizing the name of your action button.

To finalize your action button, simply click accept to proceed. At any time, you can click on the cancel button if necessary.
After clicking accept you will return to the transaction screen set up where you can click the arrow on the action button to see your new transaction button.
Create a transaction from the action button
Now we're ready to use the new action! First up, head over to the module that you added your new action button to by using the sidebar or more button. In this case, we will be navigating to the Ship module.
From here we can create a completely new Shipment or select one that is already in issued or completed status.
If you created a new transaction, make sure that you issue or complete it before proceeding or your button won't appear
Click on the action button to create an Invoice. Clicking the create transaction button will present you with a notification confirming the new transaction was successfully created.
What's next?
If you would like more guidance about screen configuration and the action button, you can read our other handy articles:
How to set up transaction screens
How to set up transaction screens
Related Articles
How to use the action button
Introduction Action buttons are used throughout Paragon. They always appear on the bottom right corner of the screen. This button allows you to perform a variety of actions including but not limited to changing the status of your references and ...How to create a shipment from multiple transactions
Sometimes, you may have invoices billed to different customers that are crossing borders in one shipment for customs purposes. Or, you may have invoices for different stores that are shipped together to a central location. This article explains how ...Creating items on the fly in transactions
Introduction When creating a transaction, you may realize that you need to create a new product to put on the transaction. Without disrupting your workflow, you have the ability to create those products on the spot, rather than having to go to the ...Create a custom PDF template for any transaction
Introduction Although we have default PDFs that perfectly highlight the details of your transactions, you may want to build your own template(s) to suit your business needs. Our report template editor provides you with the flexibility to customize ...Add more options to the action button
Introduction Surely, if you've used Paragon, you will know that on the detail view of any object - every single person, item, transaction, etc. - has a little green button on the bottom right hand corner called the action button similar to this one: ...