Here, we’ll walk you through the steps to create a manual payment receipt. You can also create a payment receipt from an invoice.
Step 1: Open the receive payment module
First, click on the more tab at the bottom right of the home page and navigate to the receive payment module.
Step 2: Add payment receipt manually
Now, hit the create new receive payment button at the top left hand side of the screen.
Step 3: Select the manual option
A new screen will appear where you can select how you would like to create the receive payment. In this case, make sure to select the manual tab.
This screen will automatically be displayed after selecting manual.
Step 4: Select a company
From a drop down bar, the selected company will be added to the receive payment. The company’s relevant information will also appear.
Step 5: Select an invoice or a credit
Click on the add icon.
This screen will automatically appear, where either invoices or credits can be added.
Whether invoice or credit options are selected, the chosen selection will be added to the receive payment by checking the box(es) at the left of the screen.
The selected invoices and/or credits will appear once you hit the green accept button:
Once you’ve clicked on the accept button, you’ll be redirected to the receive payment page. It is to be noted, that the header payment amount and the line payment amount must be equal to ensure that the unapplied amount equals 0 in bottom right corner of the screen, right above the “payment total”.
Make sure you fill in the mandatory fields as selected such as bank account, reference and currency.
Once you’re done entering the payment amounts, click the save icon at the bottom right corner of the screen. Once saved, you can issue the payment by clicking the green action button, and clicking issue.
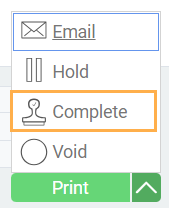
Finally, you can then complete your transaction.