Creating items on the fly in transactions
Introduction
When creating a transaction, you may realize that you need to create a new product to put on the transaction. Without disrupting your workflow, you have the ability to create those products on the spot, rather than having to go to the product module and create one manually.
This article will walk you through creating products whilst creating your transaction, allowing you to keep on track without leaving your transaction module!
Create a transaction
To get started you will first need to create a transaction, so simply choose the necessary module from the sidebar or by clicking the more button from anywhere in Paragon. For this example, we will be using the order module.
Create new item
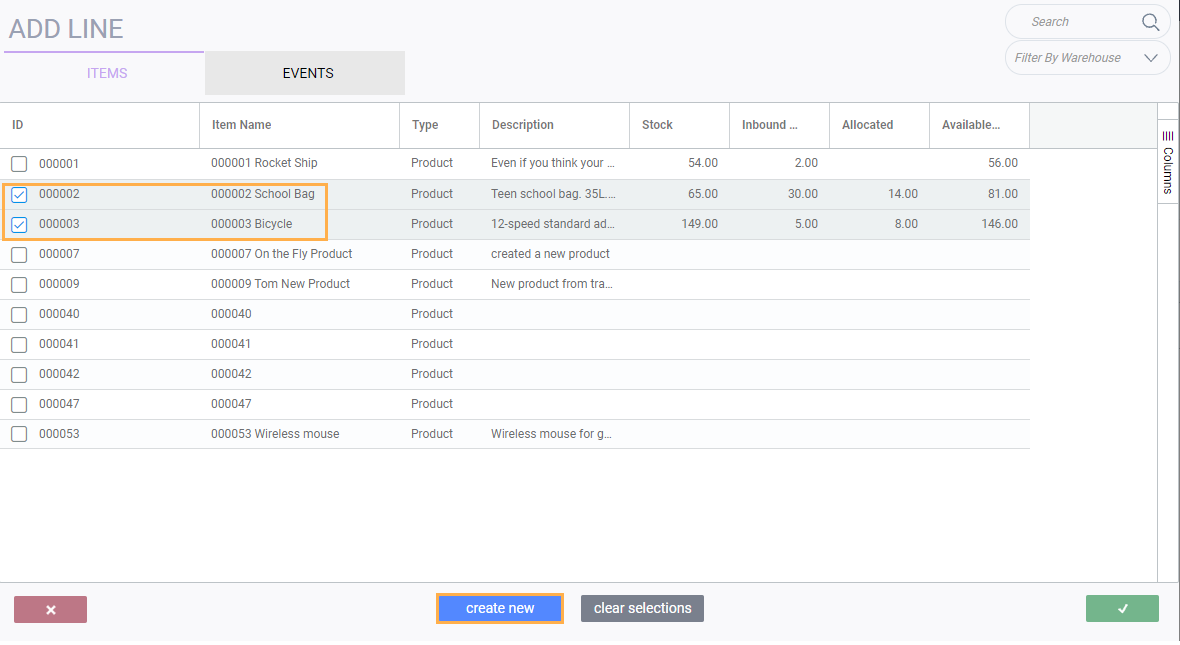
When you have created your transaction, you will need to click the add item button from the bottom left to open the item modal.
When you have opened the add item modal, you will notice a button labelled create new. Click this button to start creating a new item on the fly.
Fill out new item information
Clicking create new will open a new modal allowing you to create a new product. The code attribute will automatically be filled in with the next number in sequence (if automatic sequencing is turned on) but you can change this as necessary as well as filling in any other attributes that you have set up for your products. To learn more about attributes and attribute setup, take a look at our article on What are attributes and attribute values?
When you are happy with your product details either click accept to continue or cancel if you have changed your mind. Clicking accept will automatically save and activate your new product.

A product must have a code before you click accept otherwise it cannot be created.
In the product module, you will be able to see that your new product has been given an active status and can be edited as necessary.
Creating a product without a code
If you do click accept on your product and it is missing a code, you will receive an error message informing you that the product could not be created and you will be taken to the product module to finish setting up your product manually.
Creating a product with a mandatory attribute
Similar to creating a product without a code, if you try to create a product without filling in a mandatory attribute, you will also be redirected to the product module to fill out the necessary attributes. Any information you already filled out will be transferred over. For more help with mandatory attributes, take a look at our article on How to set up reference screens.
Leaving a product in edit mode
If you are already editing a product in the product module and try to go back to the transaction to create a new one, a notification will appear informing you that you already have a product being edited. Simply click the cancel or save button to take your product out of edit mode and you can create a new product as needed.
Add more details
If you want to have access to all of the information you can attach to a product, such as notes and attachments and the associations tab, then you can click add more details to bring you to the product module. This allows to you create a product as normal but it will already have any attributes you have already filled out.
Adding products before creating new ones
If you already started selecting products to add your transaction before creating a new one, you may wonder if your selections will be saved - well they are! Any products you chose before creating and saving a new product will be added to your transaction after you click accept.
First, select the existing products you want to add to your transaction.
Then create your new product and hit accept.
After clicking accept, you can see your existing selections and the new product in your transaction lines.
What's next?
If you're looking for more help on creating products, attributes and screen set up, take a look at these handy articles and explore further!
Related Articles
Creating a product
Introduction So you buy or make goods and want to sell them - sounds like a plan! Paragon has many features to help make this process simple and easy to manage. In order to track the goods you sell, you need a place to create those items, fill them ...Using the add item modal
Paragon ERPs grouping grid is an integral part of how users interact with Paragon. You will find it in multiple places in Paragon - one of which is whenever you add an item. Its purpose is to help you group products based on certain criteria or ...Reorder line items on transactions
Paragon allows you to reorder line items in your transactions. In other words, you can choose the order in which to list the line items, regardless of the sequence in which they were entered. This can be used for different purposes, such as grouping ...Setting up Transaction Screens
Introduction Information that may be important to see on an invoice may not be as relevant to see on a shipment. For this reason, Paragon allows you to decide on a module by module basis how all your screens are configured. This article will explain ...Create transactions from the action button
Introduction Easily creating transactions within your business workflow is key to managing all the information that flows through your ERP system. Paragon makes creating these transactions even easier and more flexible by giving you the option of ...