Using the boxing function
Introduction
When it comes to packing and shipping your products, Paragon helps to streamline your process by allowing you to box your items from any transaction in the order to cash process: order, invoice, pick, pack and shipment.
Access the boxing modal
To get started, navigate to any module with boxing enabled (it could be order, invoice, pick, pack, and/or shipment). Go to one of those transactions in issued or complete status, click the more action arrow, and click Box.
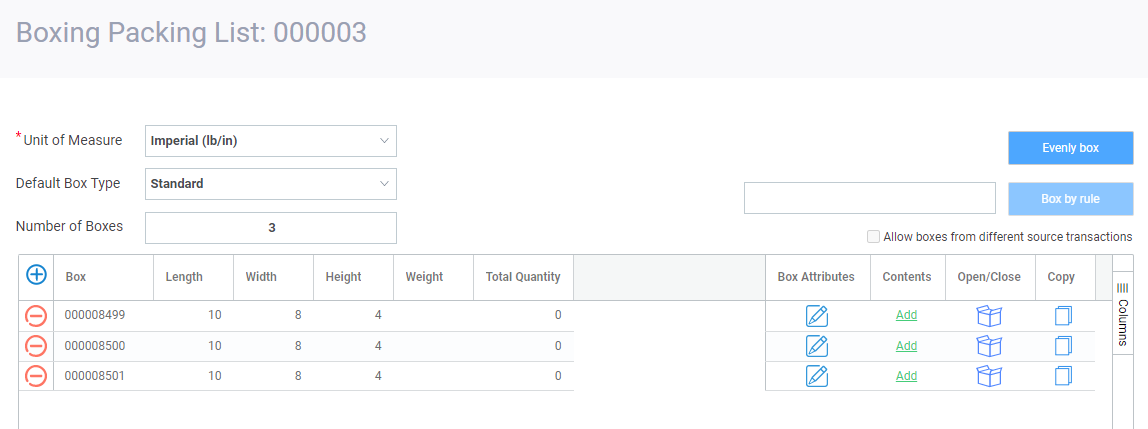
You will be brought to the boxing modal.
Unit of measure and default box type
First, you will need to select a unit of measure and a default box type.
Unit of measure is a mandatory attribute. Click on the field to select imperial or metric.
Default box type will display any template you have set up in the attribute box template in attribute setup.
If you have selected a default value, the dimension uom value for that template will be displayed in the unit of measure attribute when you open the boxing modal:
Number of boxes
You can manually enter the number of boxes you would like. If you put 3, Paragon will automatically generate 3 boxes with the selected unit of measure and default box template:

If you have the attribute # Boxes in the business terms or in the more tab of the transaction, the value entered in that attribute will be carried over to the boxing modal. Therefore when you enter the boxing modal, the boxes will be already created:

Please note that if you enter a large number of boxes in # Boxes (i.e 500 boxes or more), it can take some time to open the boxing modal.
Add additional box(es)
Click the add new box button to add a new box. Each time you add a box, the number of boxes attribute will be adjusted.

If you want to add a large number of boxes, the system will ask you if you would like to proceed because it could take some time.
After creating the large number of boxes, if you would like to cancel using the cancel button, you will see this notification:
Remove box(es)
If you enter 0 in the number of boxes attribute all boxes will be automatically deleted:
You can also delete individual boxes using the delete button on each box line:

Please note that only open boxes can be deleted.
Adding content to the box(es)
Evenly box
Click on the evenly box button to distribute contents across boxes.
After the action is done. you will get a success notification asking you to review the boxes and contents.
Adding quantity manually
To add contents one box at a time, click on add button in the contents column for a specific box:
This will open the box contents modal.
By manually entering the quantity of each item to be added to the box, the number of items still to be boxed will automatically be calculated. If there are 5 to be boxed, and you enter 5 for your quantity, to be boxed will now be 0.
Enter the desired quantity for the items and click on the accept button.
Copy contents
To save time, you can also click on the copy button, it will open a modal asking you how many copies you want. 1 will be entered by default.
Enter the number of boxes you would like with the same content:
Click accept and your boxes will the created with the items from the copied box.
Adding weights to the box(es)
You can add the weight directly to the grid. Simply put the cursor in the weight field of the first row, input a value then use the down arrow to keep entering values for each box line.
Close box(es)
To close a box you can click on the open/close box button. Once the box is closed, the line will be greyed out and won't be editable.
You can re-open the box by clicking on the open/close box button.
You can also close all boxes at the same time by clicking on the close all boxes button.
Finish and print box labels
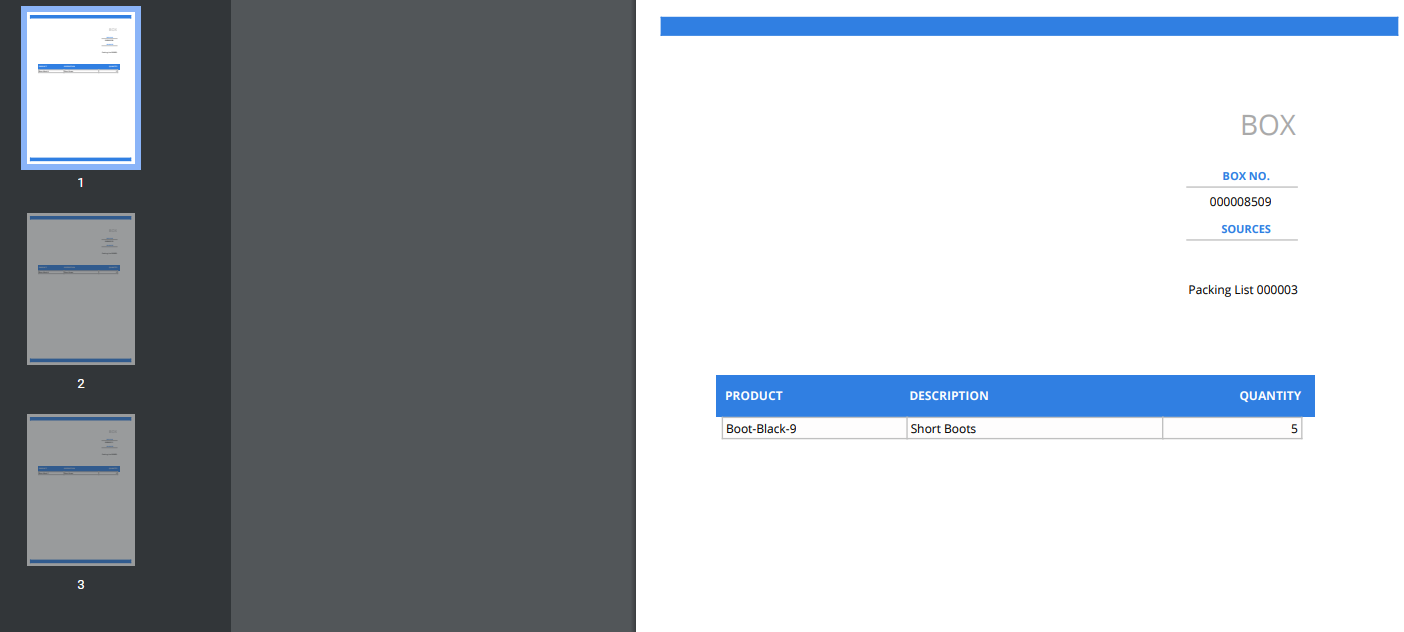
After you have finished reviewing your boxes, you can proceed by either clicking accept or finish & print box details. By clicking on the finish & print closed boxes button, a print preview of box labels will be generated and the modal will be closed.

Box by rule
For more complex boxing requirements, reach out to us at support@paragon-erp.com to learn more about custom rules.
What's next?
Now that you're all caught up on boxing your pack lists, why not read some of our other useful articles on the boxing feature:
Related Articles
Configuring your boxing screen
Introduction Shipping goods to your clients is likely the central function of your business. Once ordered goods are ready for shipping, one possible warehouse workflow would be to pick and then pack those goods to prepare them for transport. This ...Box Detail WIGO report
Introduction When it comes to tracking your inventory, it can be very time-consuming to break down everything that has been packed and shipped, especially if you need to locate specific products quickly. Warehouse supervisors can now rest easy with ...Fix pivot view using the rebuild function
Sometimes it happens that your items do not pivot horizontally in transaction screens even if pivoting had previously been enabled. In these circumstances you see all items (SKU's) vertically aligned one under the other, like the below image. This ...Using the Bulk Pick by Receipt Function
Introduction With certain business models (like a make to order or seasonal make to stock businesses), it can be very advantageous to have the ability to pick, pack, and ship goods out as soon as they are received into your warehouse. The less time ...Using the Bulk Reservation Function
Introduction The Bulk Reservation function allows you to reserve inventory in bulk by allowing you to select multiple orders that you want to create reservations for. In this function, you can filter through your issued orders by an item’s ...