Using the test mode manager
Introduction
The test mode manager lets you practice using and configuring Paragon without risk to your live information. If you'd like, you can copy your live data into this test mode environment and make changes that won't affect anything in your live system.
Access the test mode manager
From the Paragon home page, click the settings button.
From the settings page, under the system card, select test mode manager.
Enable test mode for the first time
 Test Mode must be reset before you use it the first time. You will not be able to access Test Mode until it has been reset at least once.
To do that, simply click the reset test mode button:
Another modal will appear to confirm you'd like to proceed.
Click the accept button. When the reset is finished a success notification will be displayed on the top right of the screen.
You are now able to log in to test mode!
Log in to test mode
You will not be able to access Test Mode until it has been reset at least once.
To log in to your test mode, click the start test mode button from the test mode manager:
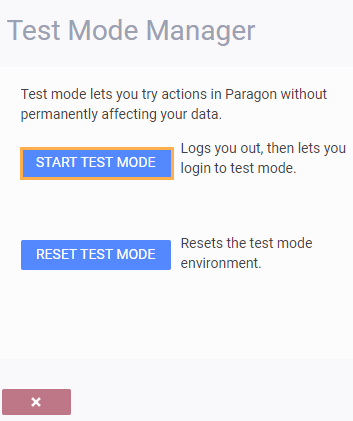
You'll be automatically logged out of your current Paragon session and brought to a log-in screen. Note that there is an indicator that you are logging in to test mode. Use your usual live system credentials to log in.
You can always tell when you're in test mode by the indicator on the Paragon header bar:
When you want to update your test system to have the most current data and settings from your live system, log in to your live system, and reset test mode.
Reset test mode
To reset test mode, click the reset test mode button from the test mode manager:

All your current test data will be lost if you reset test mode. It will be replaced by a copy of your current live data.
Another modal window will appear to confirm you'd like to proceed.
Click the cancel button to abort the reset. Click the accept button to continue. This might take a minute.
You can always leave this screen and return to your regular work while you wait for the reset to complete. When the reset is finished, a success notification will be displayed on the top right of the screen.
What's next?
If this is your first time working with Paragon and you want some tips, check out our getting started document.
Related Articles
AGLV - Using List View
Introduction Navigating to most modules in Paragon will bring you to the list view page. The list view neatly arranges your records in a vertical list. Its purpose is to help you easily analyze information by grouping and/or filtering your data based ...Using the list view
Introduction When you open any module in Paragon, you land on the list view. The list view neatly arranges your records item-by-item in a vertical list. Many of the records in each list view may not always be relevant, so we've created this document ...Using the activity panel
Introduction The activity panel is a very helpful tool that allows you to get a quick understanding of the activity related to a specific customer, vendor, or product. Let's say you want to view all quotes that have been created for a particular ...Using the boxing function
Introduction When it comes to packing and shipping your products, Paragon helps to streamline your process by allowing you to box your items from any transaction in the order to cash process: order, invoice, pick, pack and shipment. Access the ...Using the 2Ship integration
Introduction No matter what your business shipment workflow is, the volume of products you ship, or where you ship to and from, 2Ship can be used by everyone. It allows you to make decisions on cost versus efficient shipping, such as which carrier is ...