![paragon logo-1.png]](https://support.paragon-erp.com/hs-fs/hubfs/paragon%20logo-1.png?height=50&name=paragon%20logo-1.png)
Introduction
Do you have a third-party vendor that manages your inventory? In some cases, a company will use a third party logistics warehouse (3PL) to store and ship its products. Sometimes a company will use more than one third-party vendor, and have their items shipped between the related warehouses.
This document will show you how you can ship between related warehouses in ParagonERP.
We'll use the following scenario: You issue a PO, and you would like to receive that PO into your 3PL. Once received, you would then like to ship the goods from one 3PL and receive the goods into another 3PL.
Of course, you're going to want to make sure the 3PLs are setup as related warehouses in the my company settings.
Receive your PO into your 3PL
The first step would be to receive your goods into the 3PL of your choice. To access the related companies modal, make sure you are in edit mode on your receipt and then click related companies.

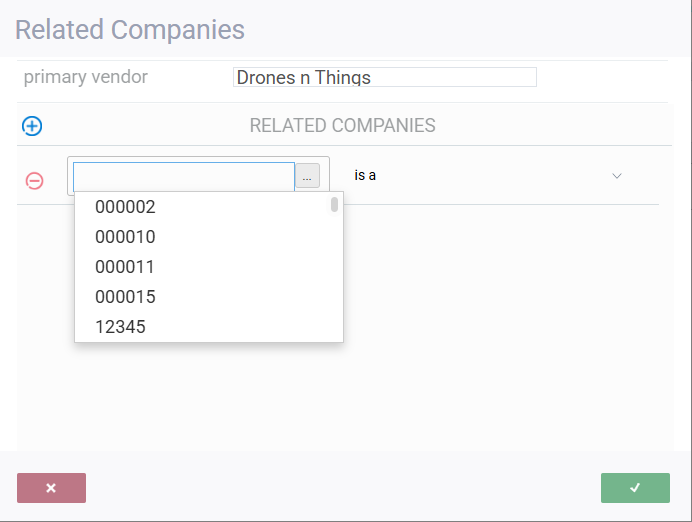
Enter the code for the 3PL warehouse in the search field. Once it is selected, choose Third Party Warehouse from the drop down, and click accept.

In order to receive your goods into the warehouse, the receipt must be in complete status.
Ship from one related warehouse to another
Once you've received your goods into your first 3PL and verified that the inventory is correct, you can create a shipment to your second 3PL of your choice, and receive it.
First, click the shipment module and create a manual shipment.
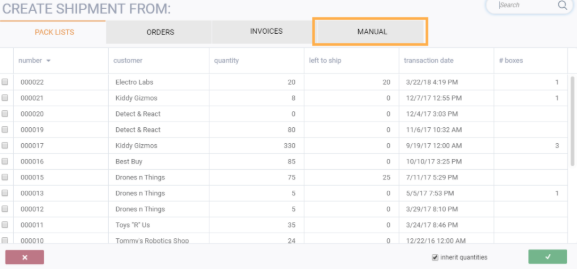
Set the recipient as your own company, and choose the products you wish to ship from your first 3PL. Add the products using the add button.
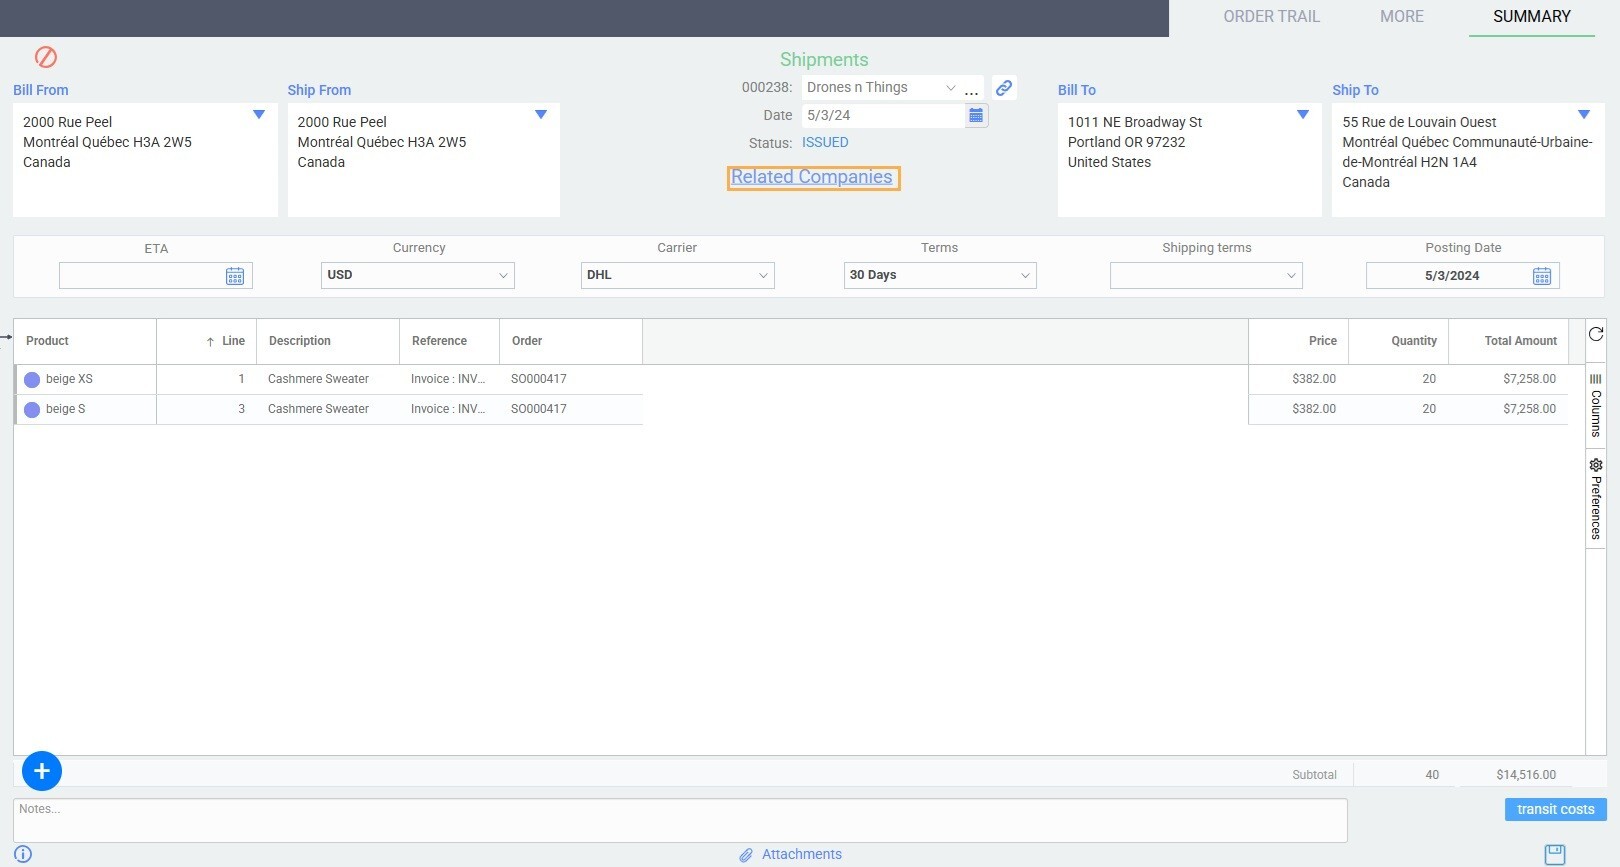
Once you've added the product and entered the quantity you'd like to ship, click the related companies link right below the transaction status.
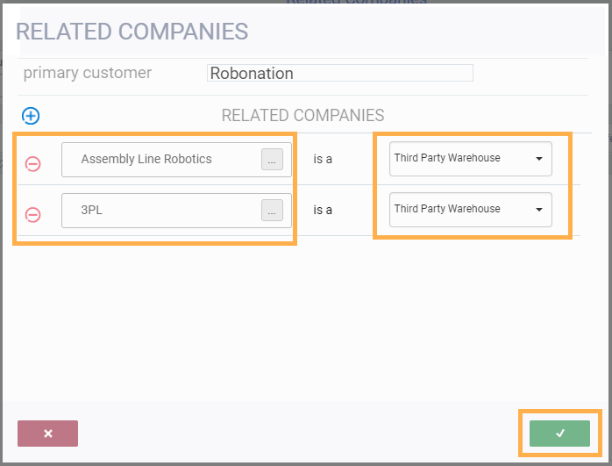
Select the two 3PLs you are dealing with. Here, we chose 3PL and Assembly Line Robotics. We've flagged them as third party warehouses.
Click the accept button once done.
Now, click the ship from button. Choose the first 3PL that you initially received into. Here, we'll choose our 3PL address.

Once the ship from address is chosen, click the ship to address. Choose your other 3PL address. Here, we'll choose our Assembly Line Robotics address.

Once you're done, save and issue your shipment.
Create a receipt from the shipment
Once you've issued your shipment, and are ready to receive the goods into your second 3PL, navigate to the receipt module, and create a receipt off of the shipment.
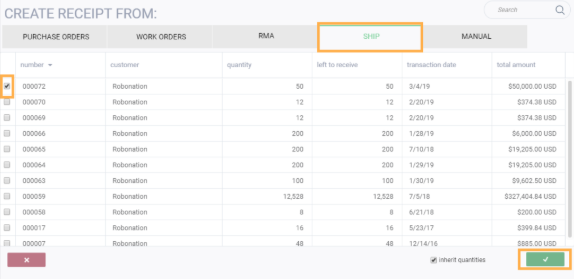
From here, follow the same steps as above:
Choose your own company as the recipient.
Click the related warehouse link under the status.
Select your two 3PLs. Make sure the ship from and ship to addresses are correct.
Save, issue and complete your receipt in order to see the inventory movement in your warehouses.
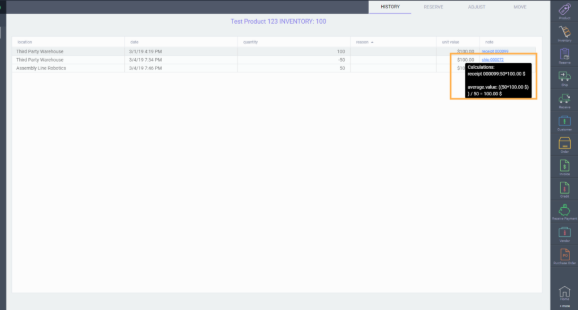
Verify your inventory
If you would like to make sure your goods were received in the right warehouse, navigate to the inventory module.
Search for your product, or select it from the list view.
Double click into detail view, and click the history tab. Here, you can see the activity of your inventory movements.
If you hover over the shipment transaction, the system will show you how it calculated the inventory value (FIFO or LIFO method) based on the shipment in transit costs.
Since we did not put any shipment in transit cost (duty, insurance, freight..) there was no change in the inventory value.
What's next?
Now that you are able to transfer inventory from one warehouse to another, these articles may help you track your inventory movements.