Setting up GL links
Introduction
Go to GL setup
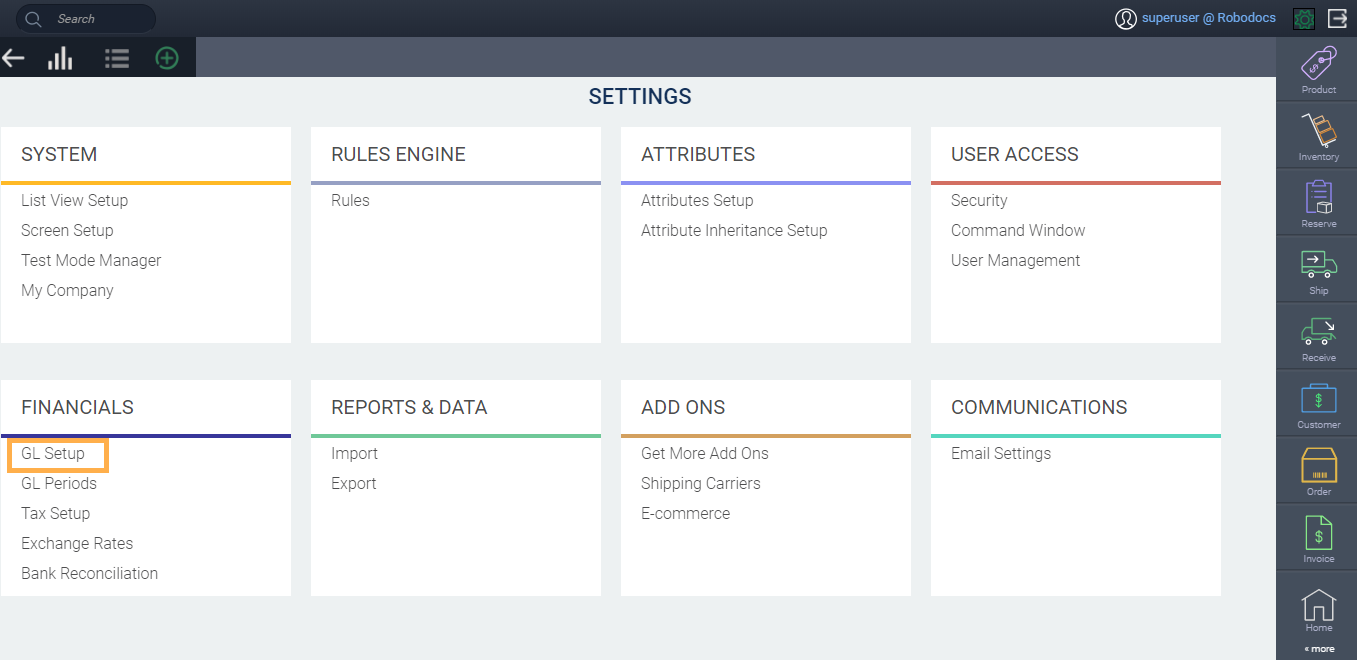
From any screen in Paragon, click the settings button.

Under the financials tab, select GL setup.
Verify current links
On the left-hand side, there is a list of transactions. Invoices and credits are grouped in one line because they are opposites. A revenue GL account will be credited for an invoice and the same GL account will be debited for a credit.
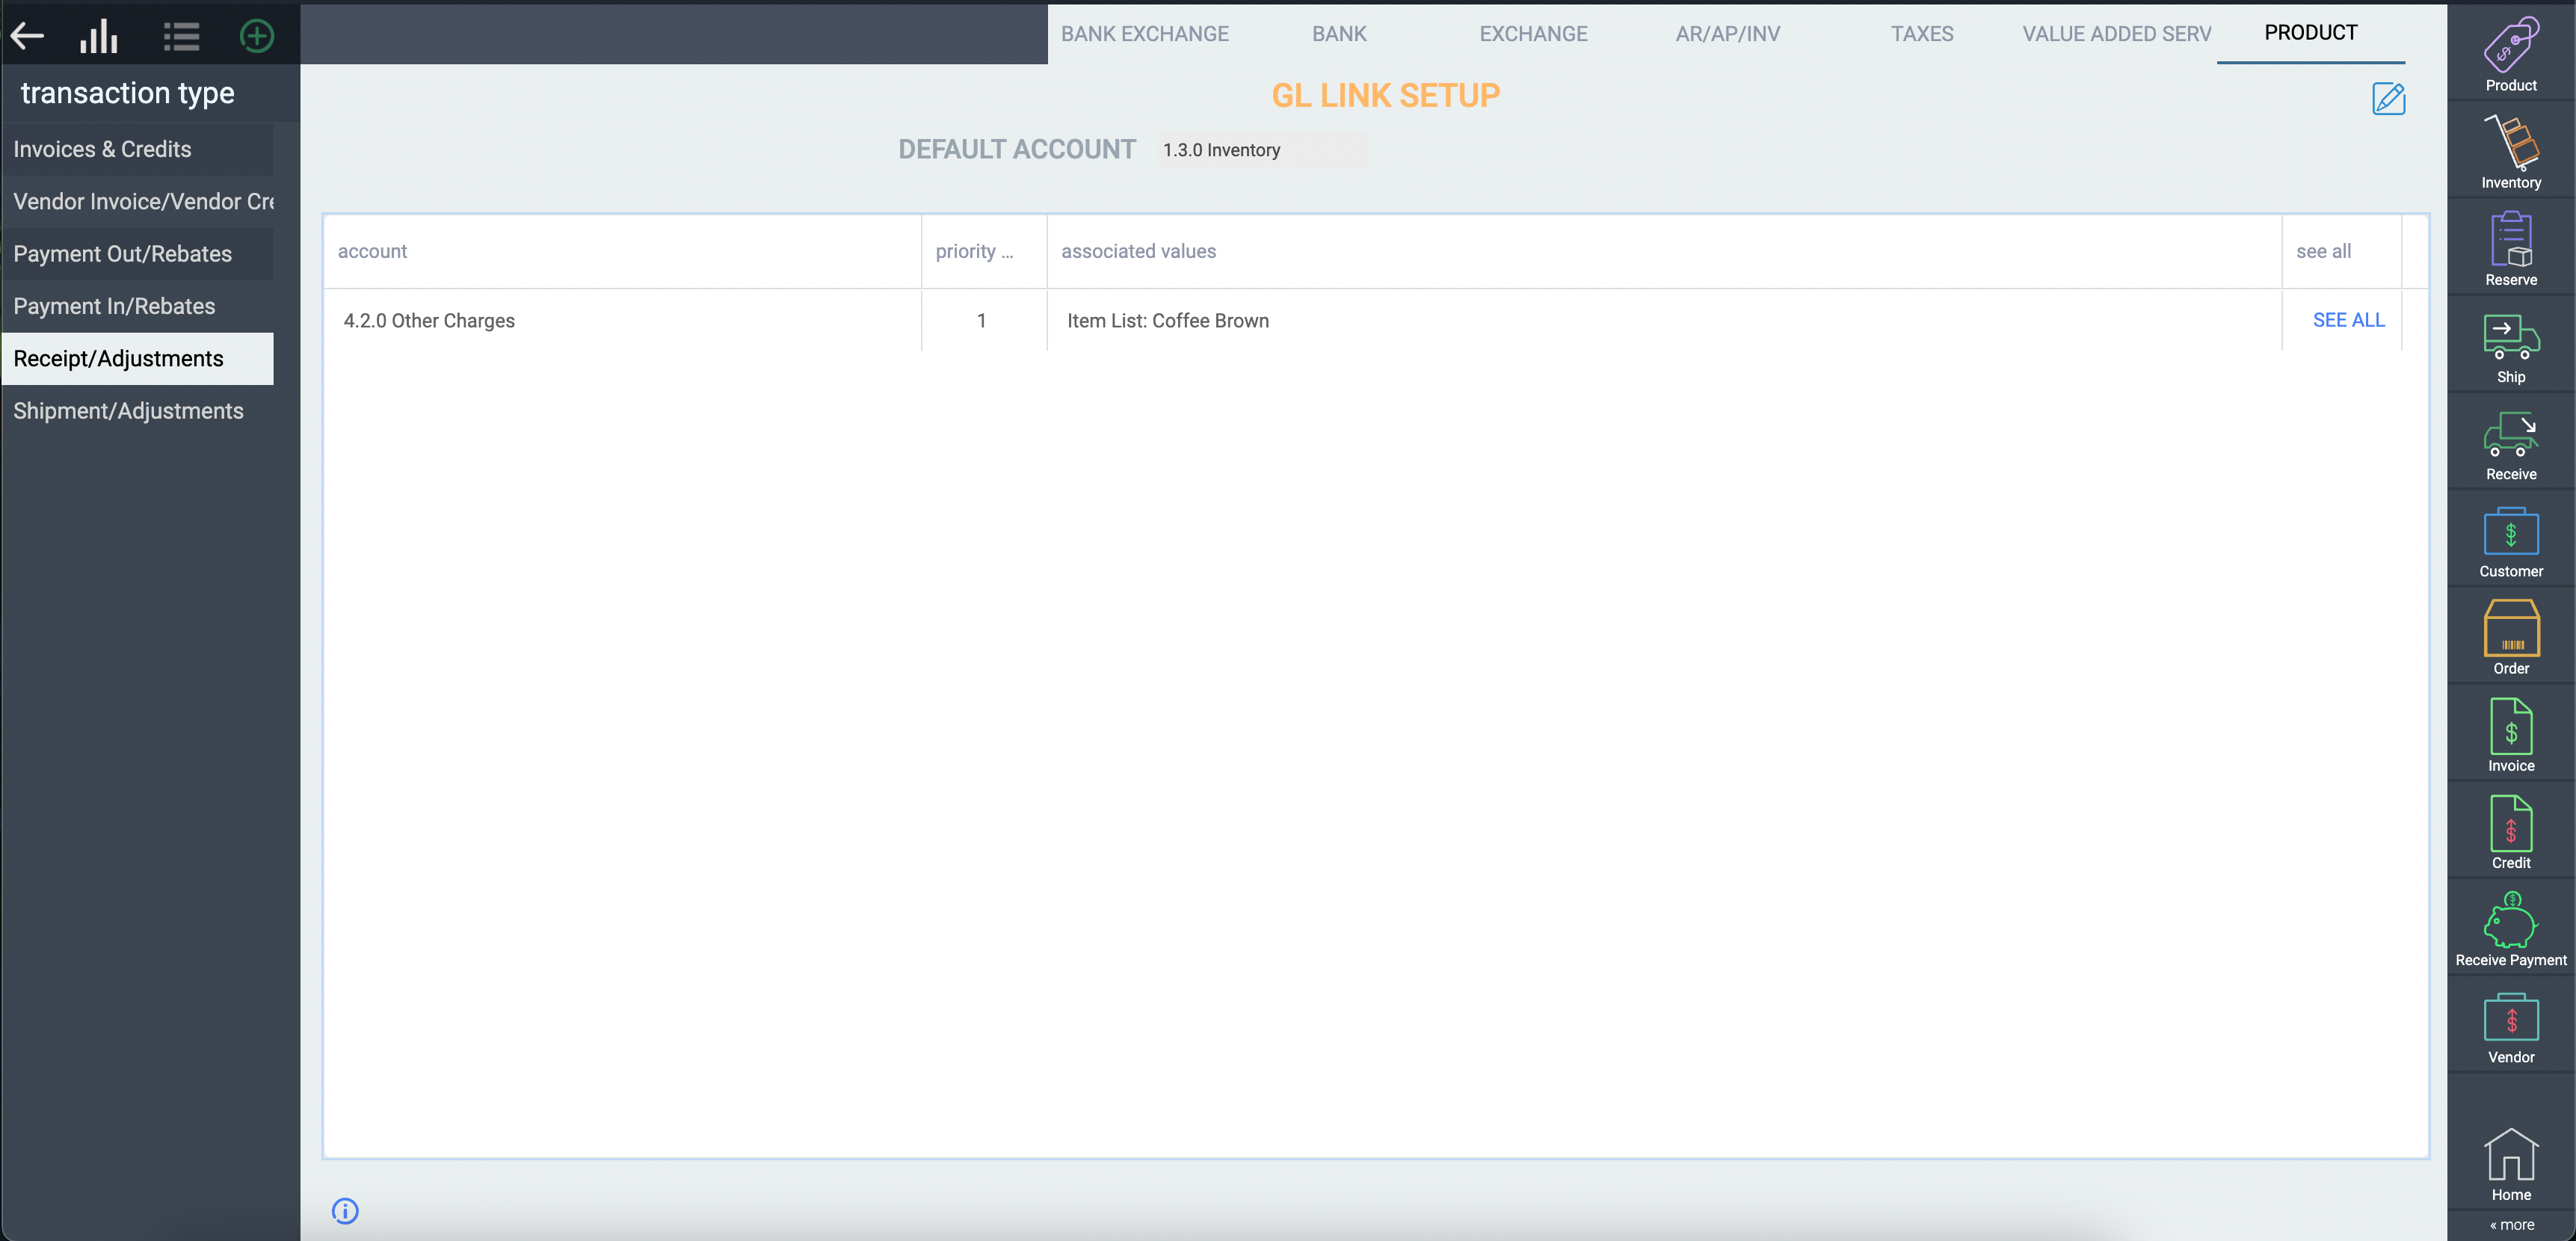
The various pieces of each of the transactions that you want to post to different areas of the GL are listed on the top row.
It should be noted that ParagonERP does not allow posting to parent accounts.
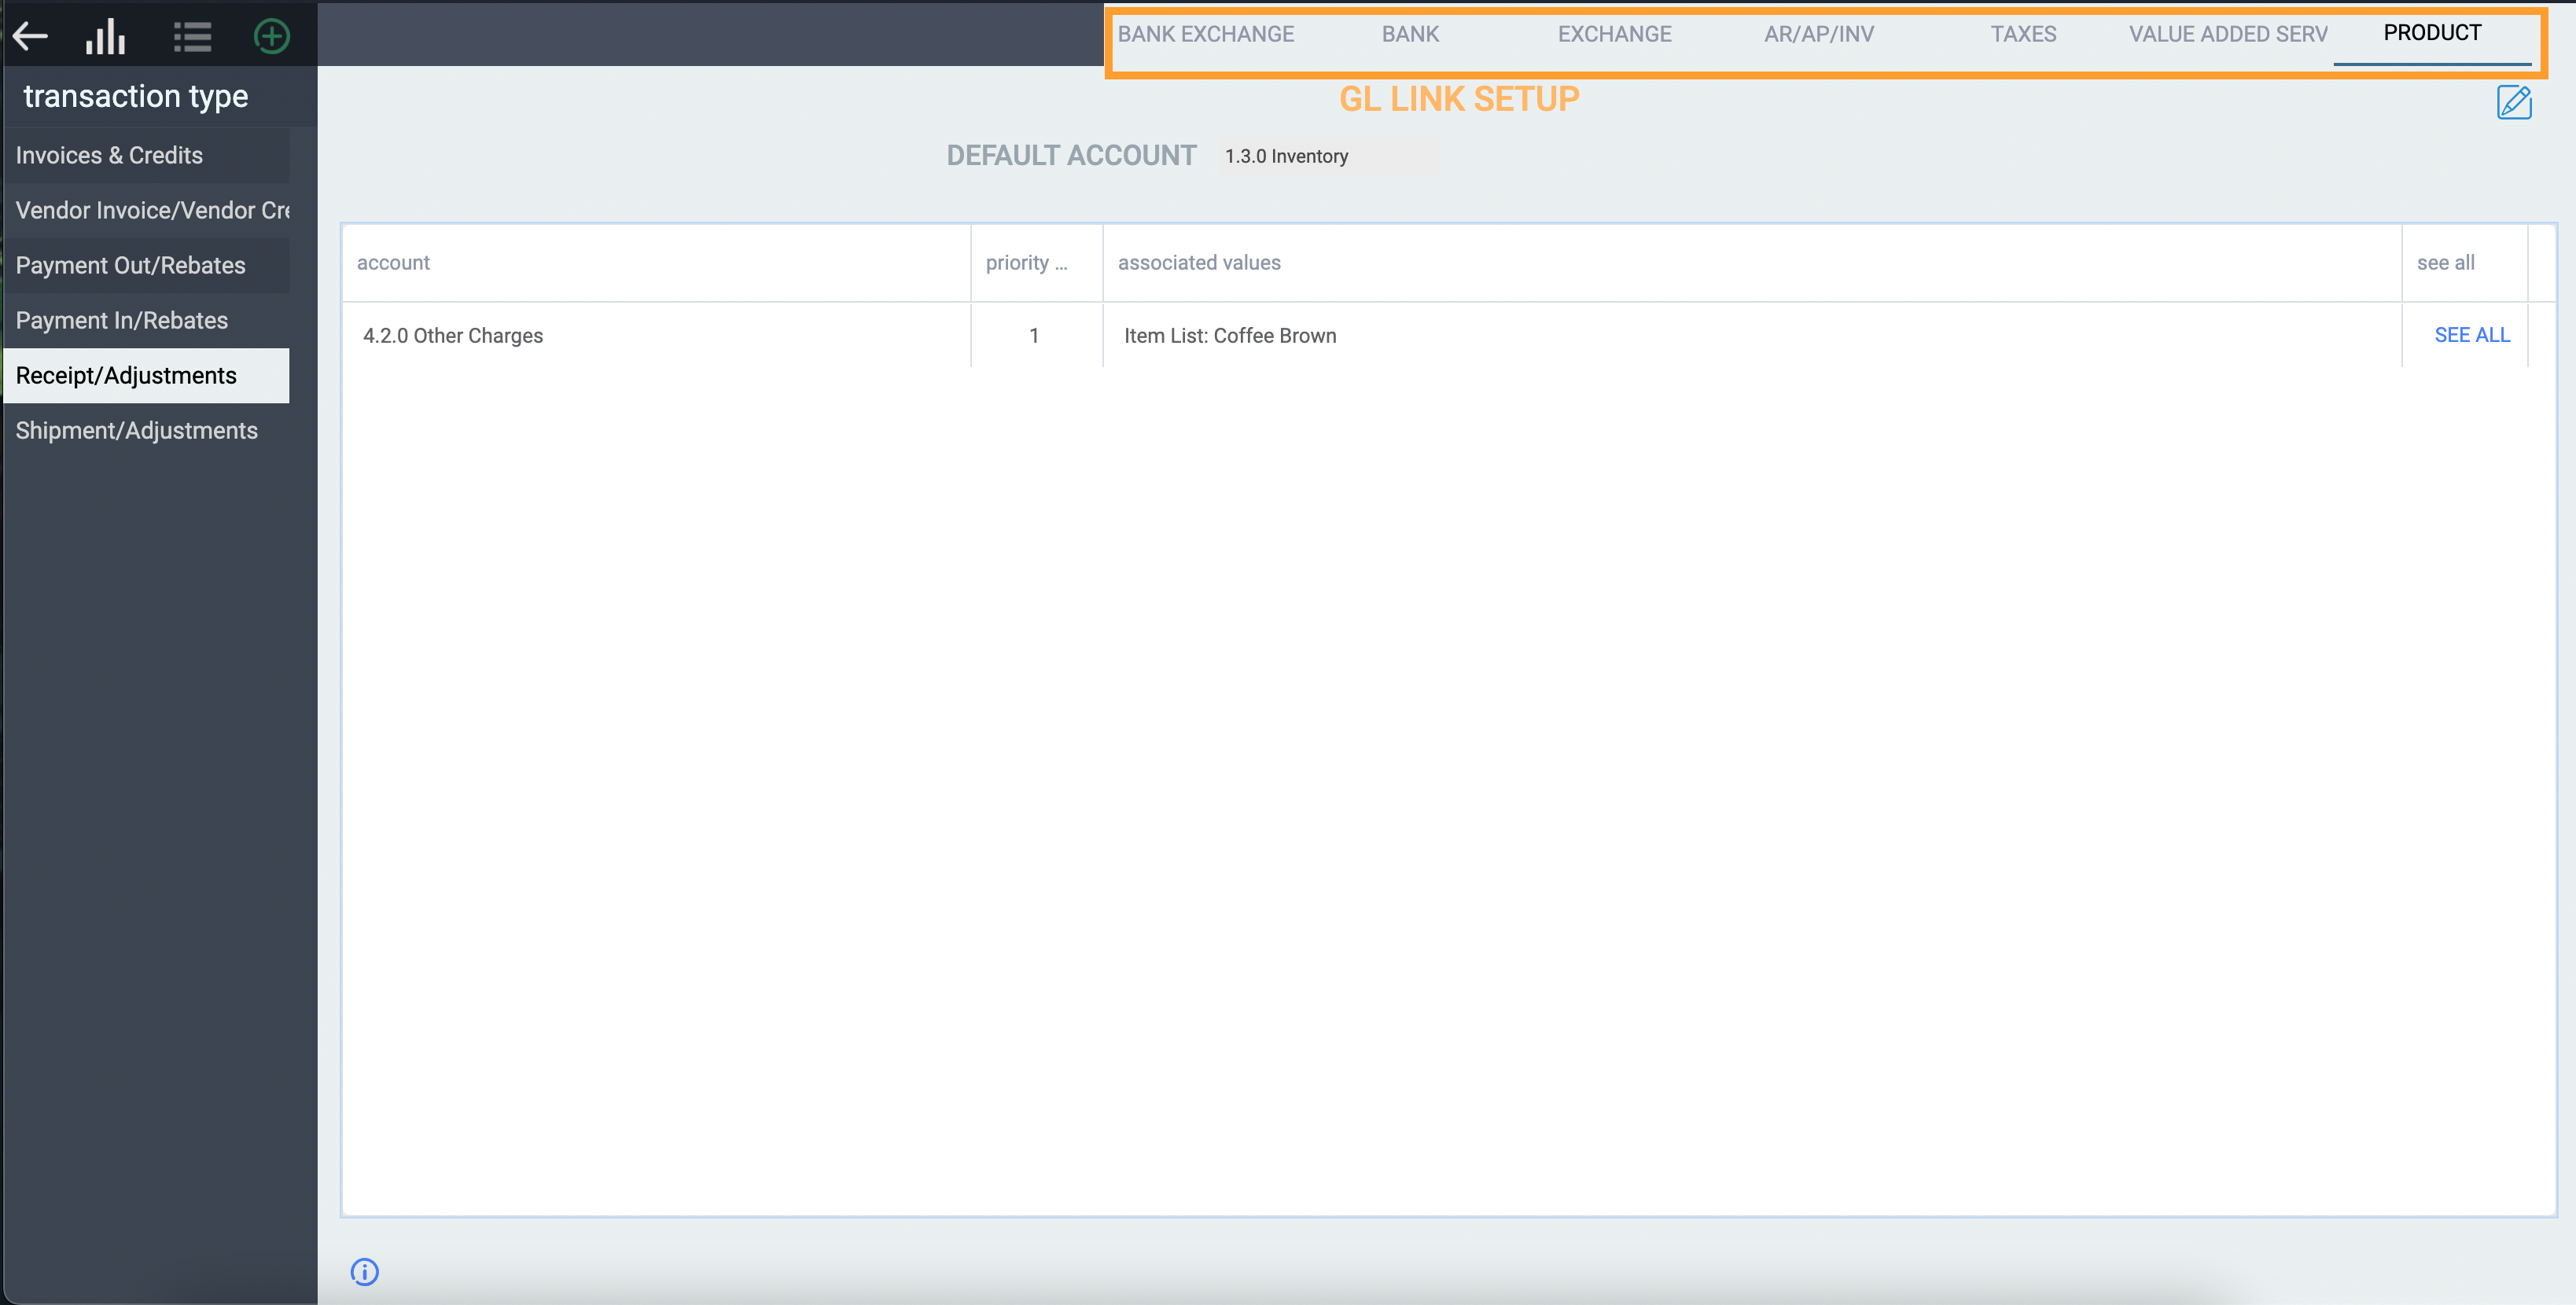
The GL accounts that are affected by the different parts of each transaction are listed in the middle.
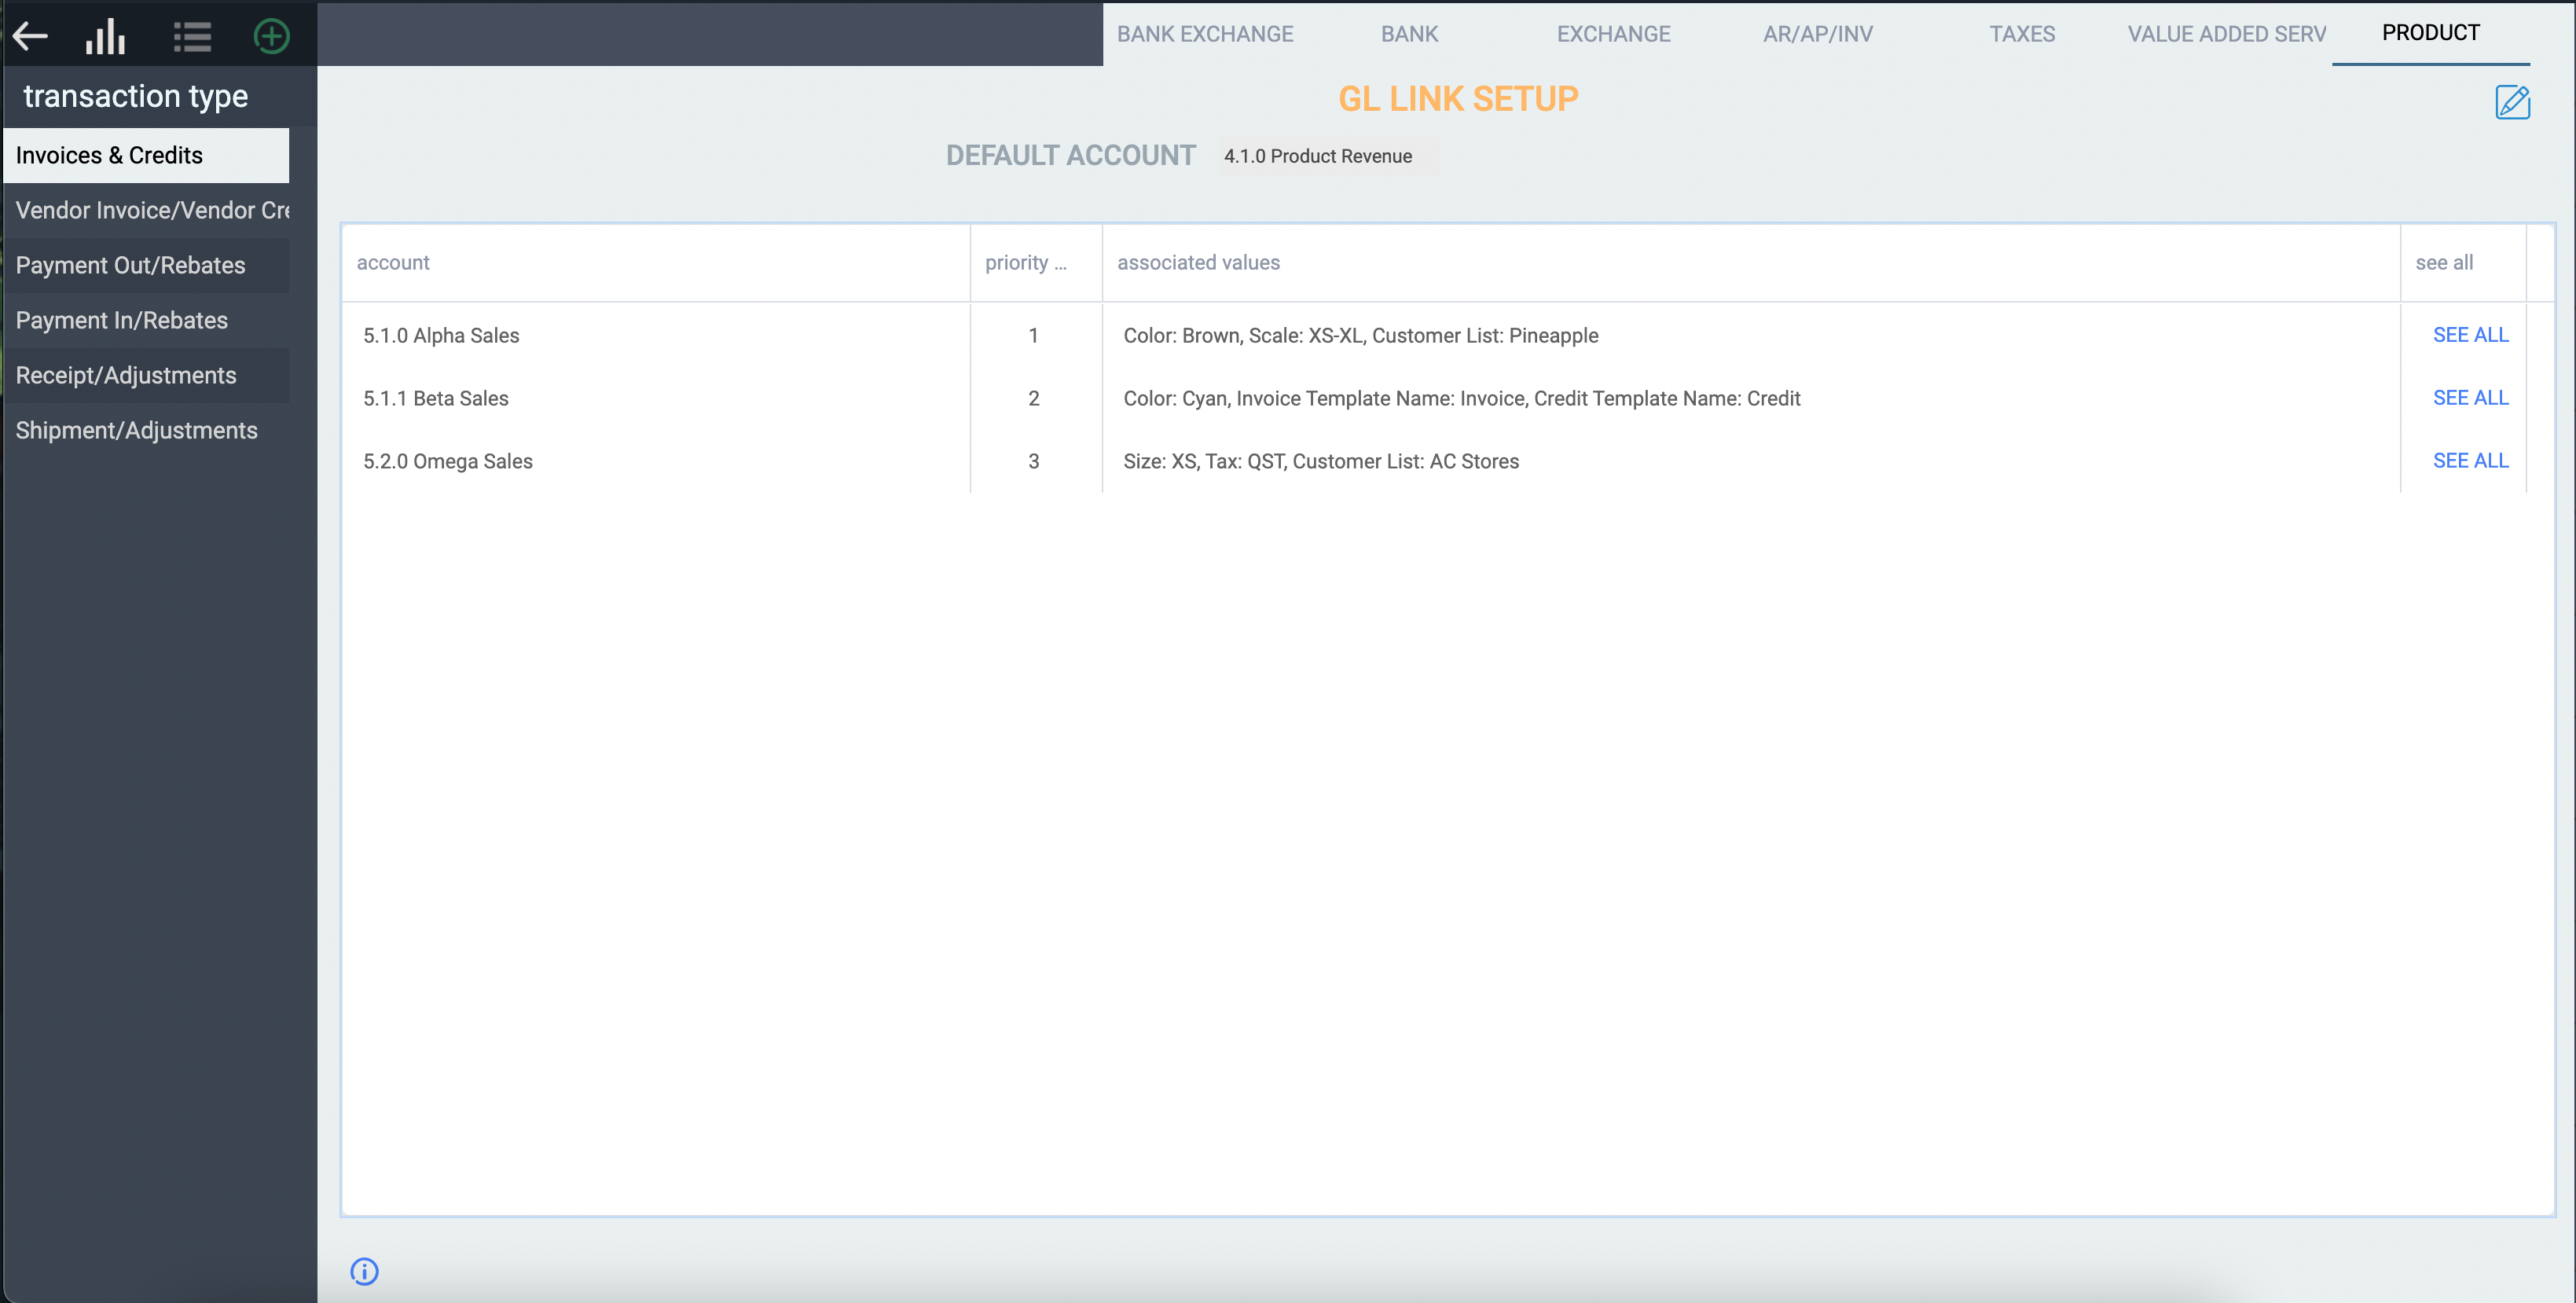
For example, revenues from product sales on invoices and credits will affect the GL account called 4.1.0 Product Revenue by default.

Edit current links
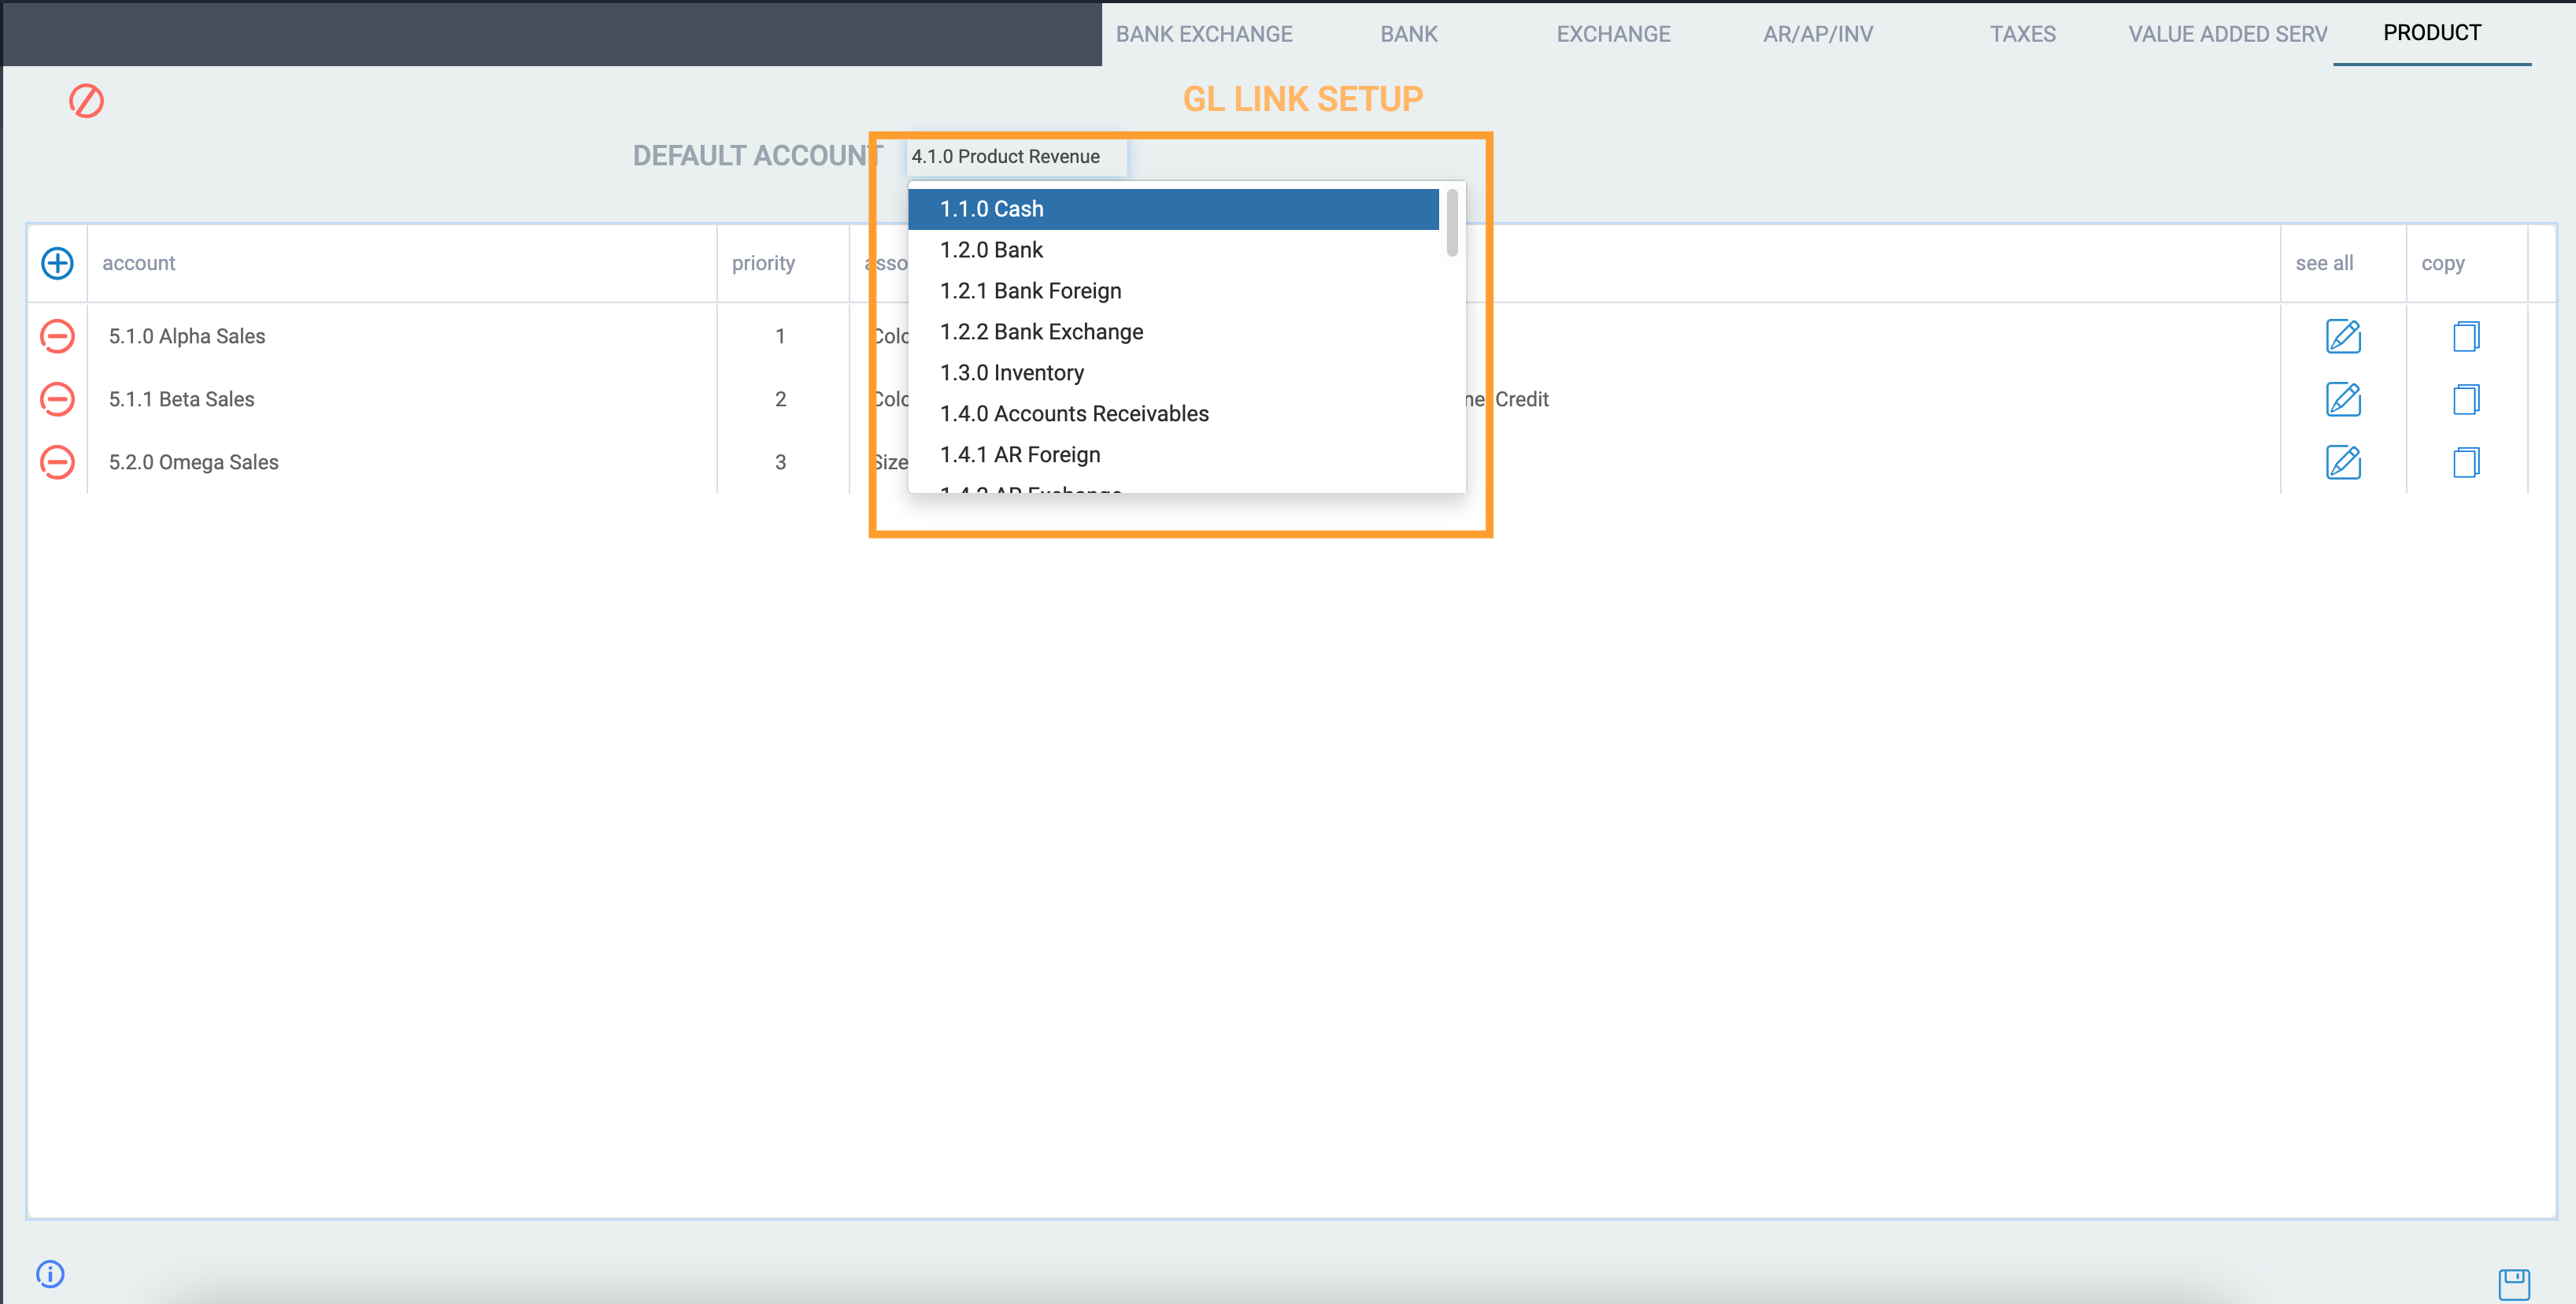
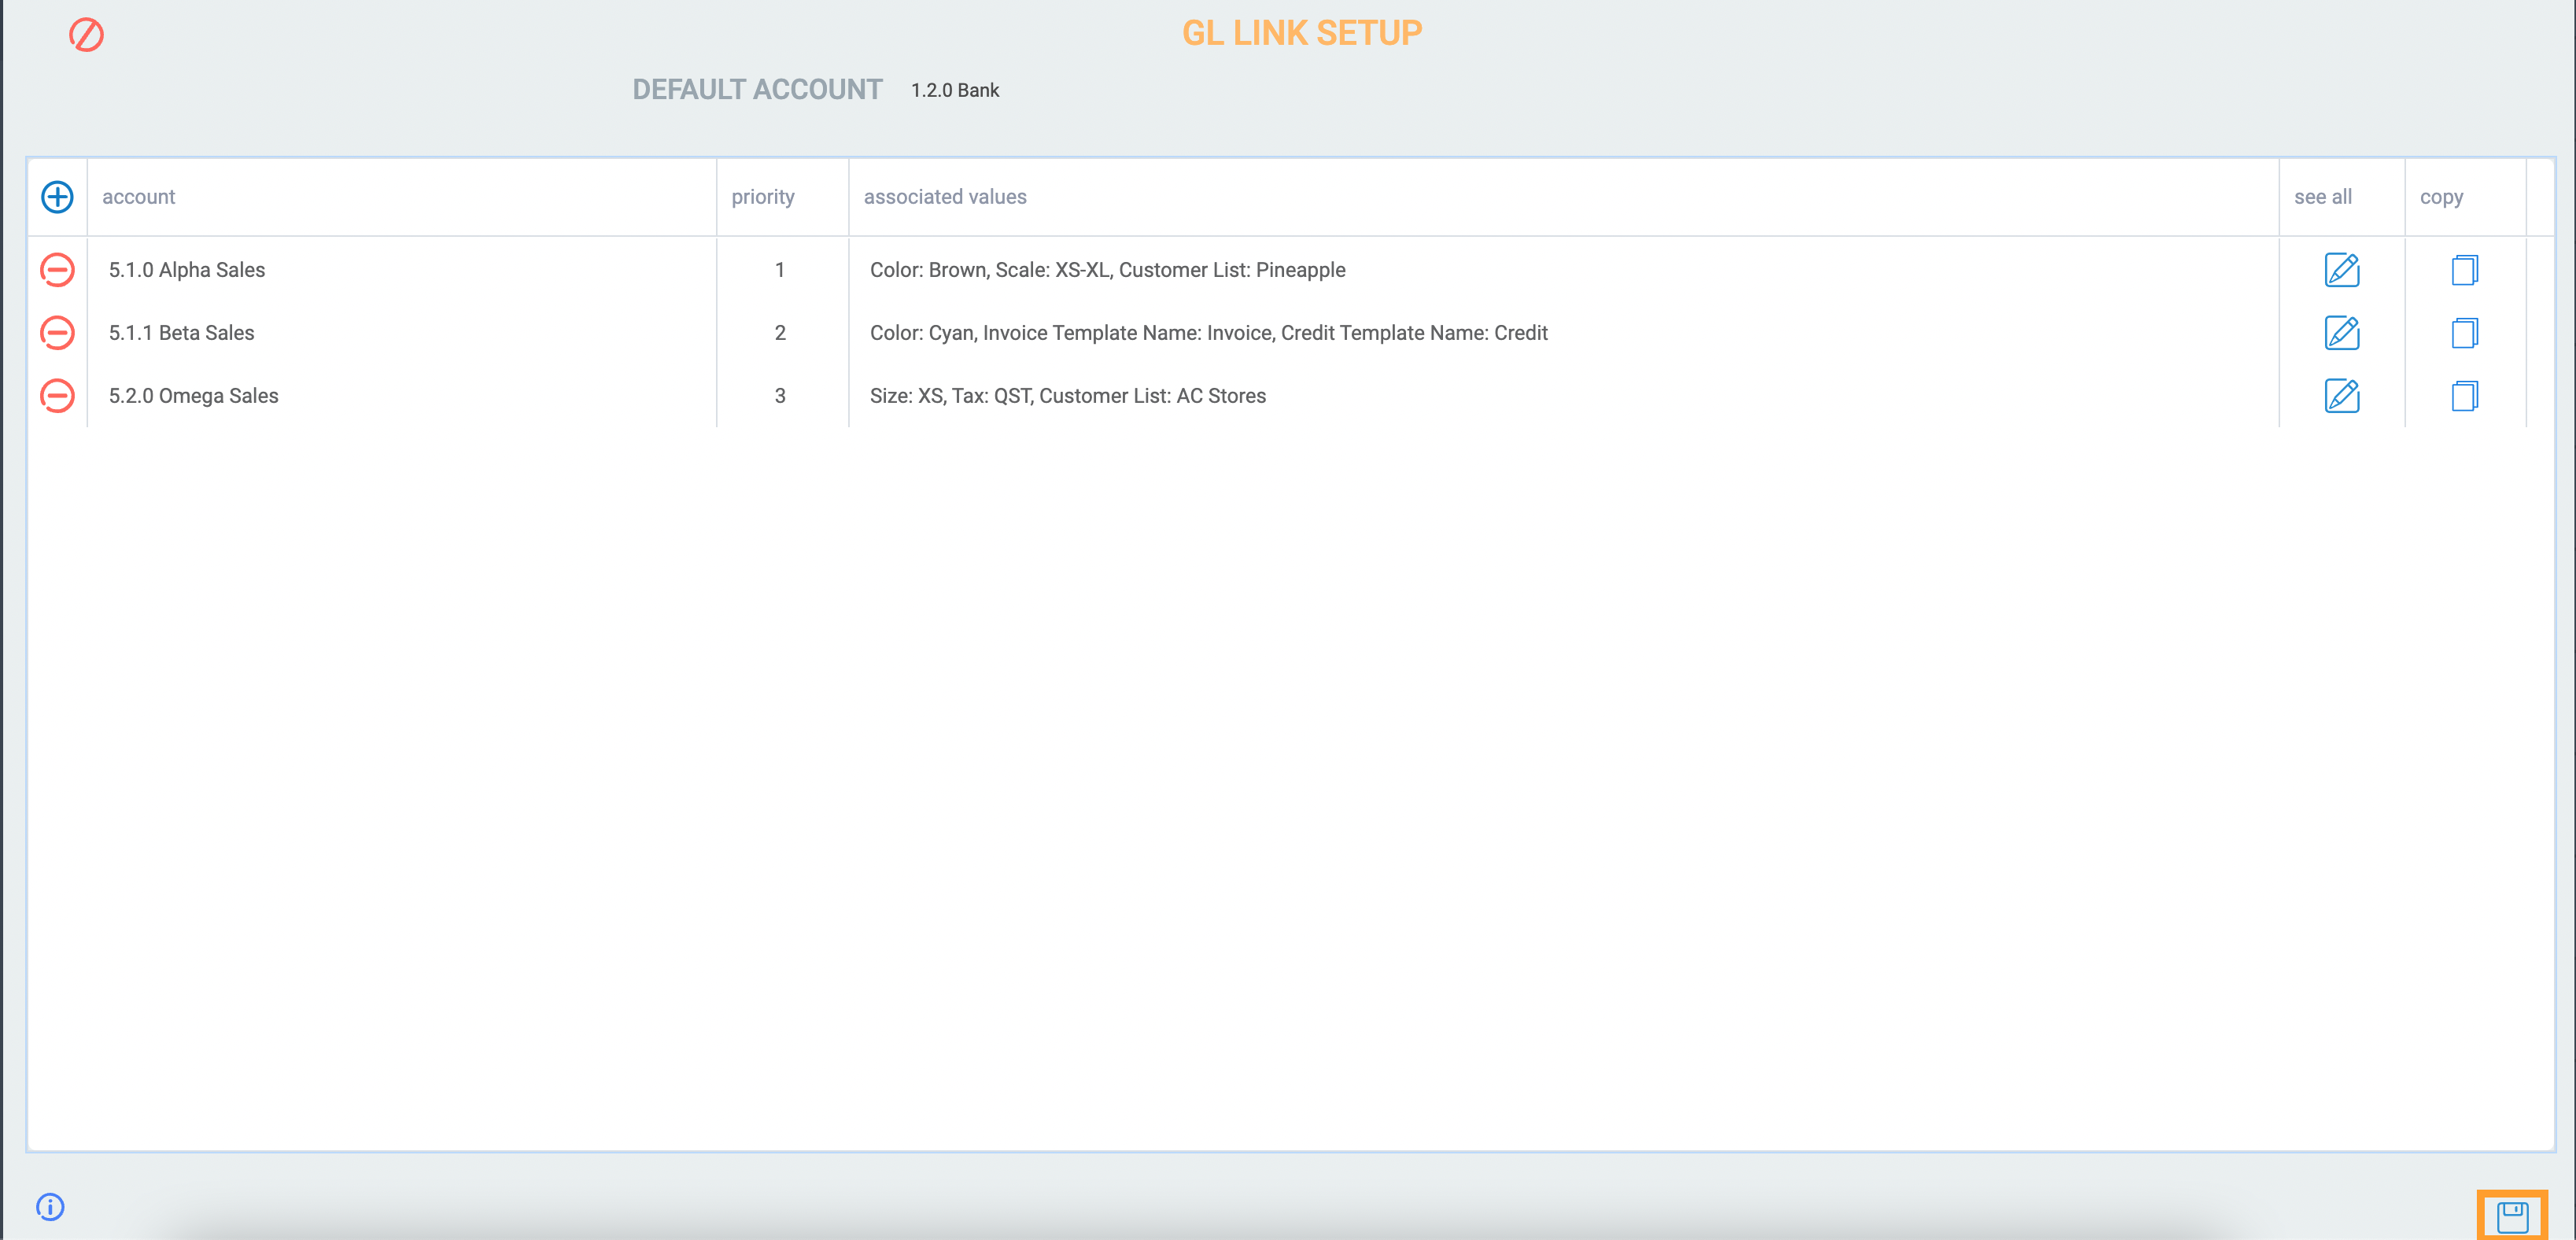
Click the edit button to change the GL account for any sections of the transaction.

Add more links
If you want to add more specific links for different transaction types, you can do that as well.
Let's say you want the revenues for products of the color white to go to a different GL account than the default. To do this, you need to add another level of links to the invoices & credits and product GL link.
First, click the edit button at the top right-hand corner of the screen.

Then, click the add new link button at the top left-hand corner of the screen.
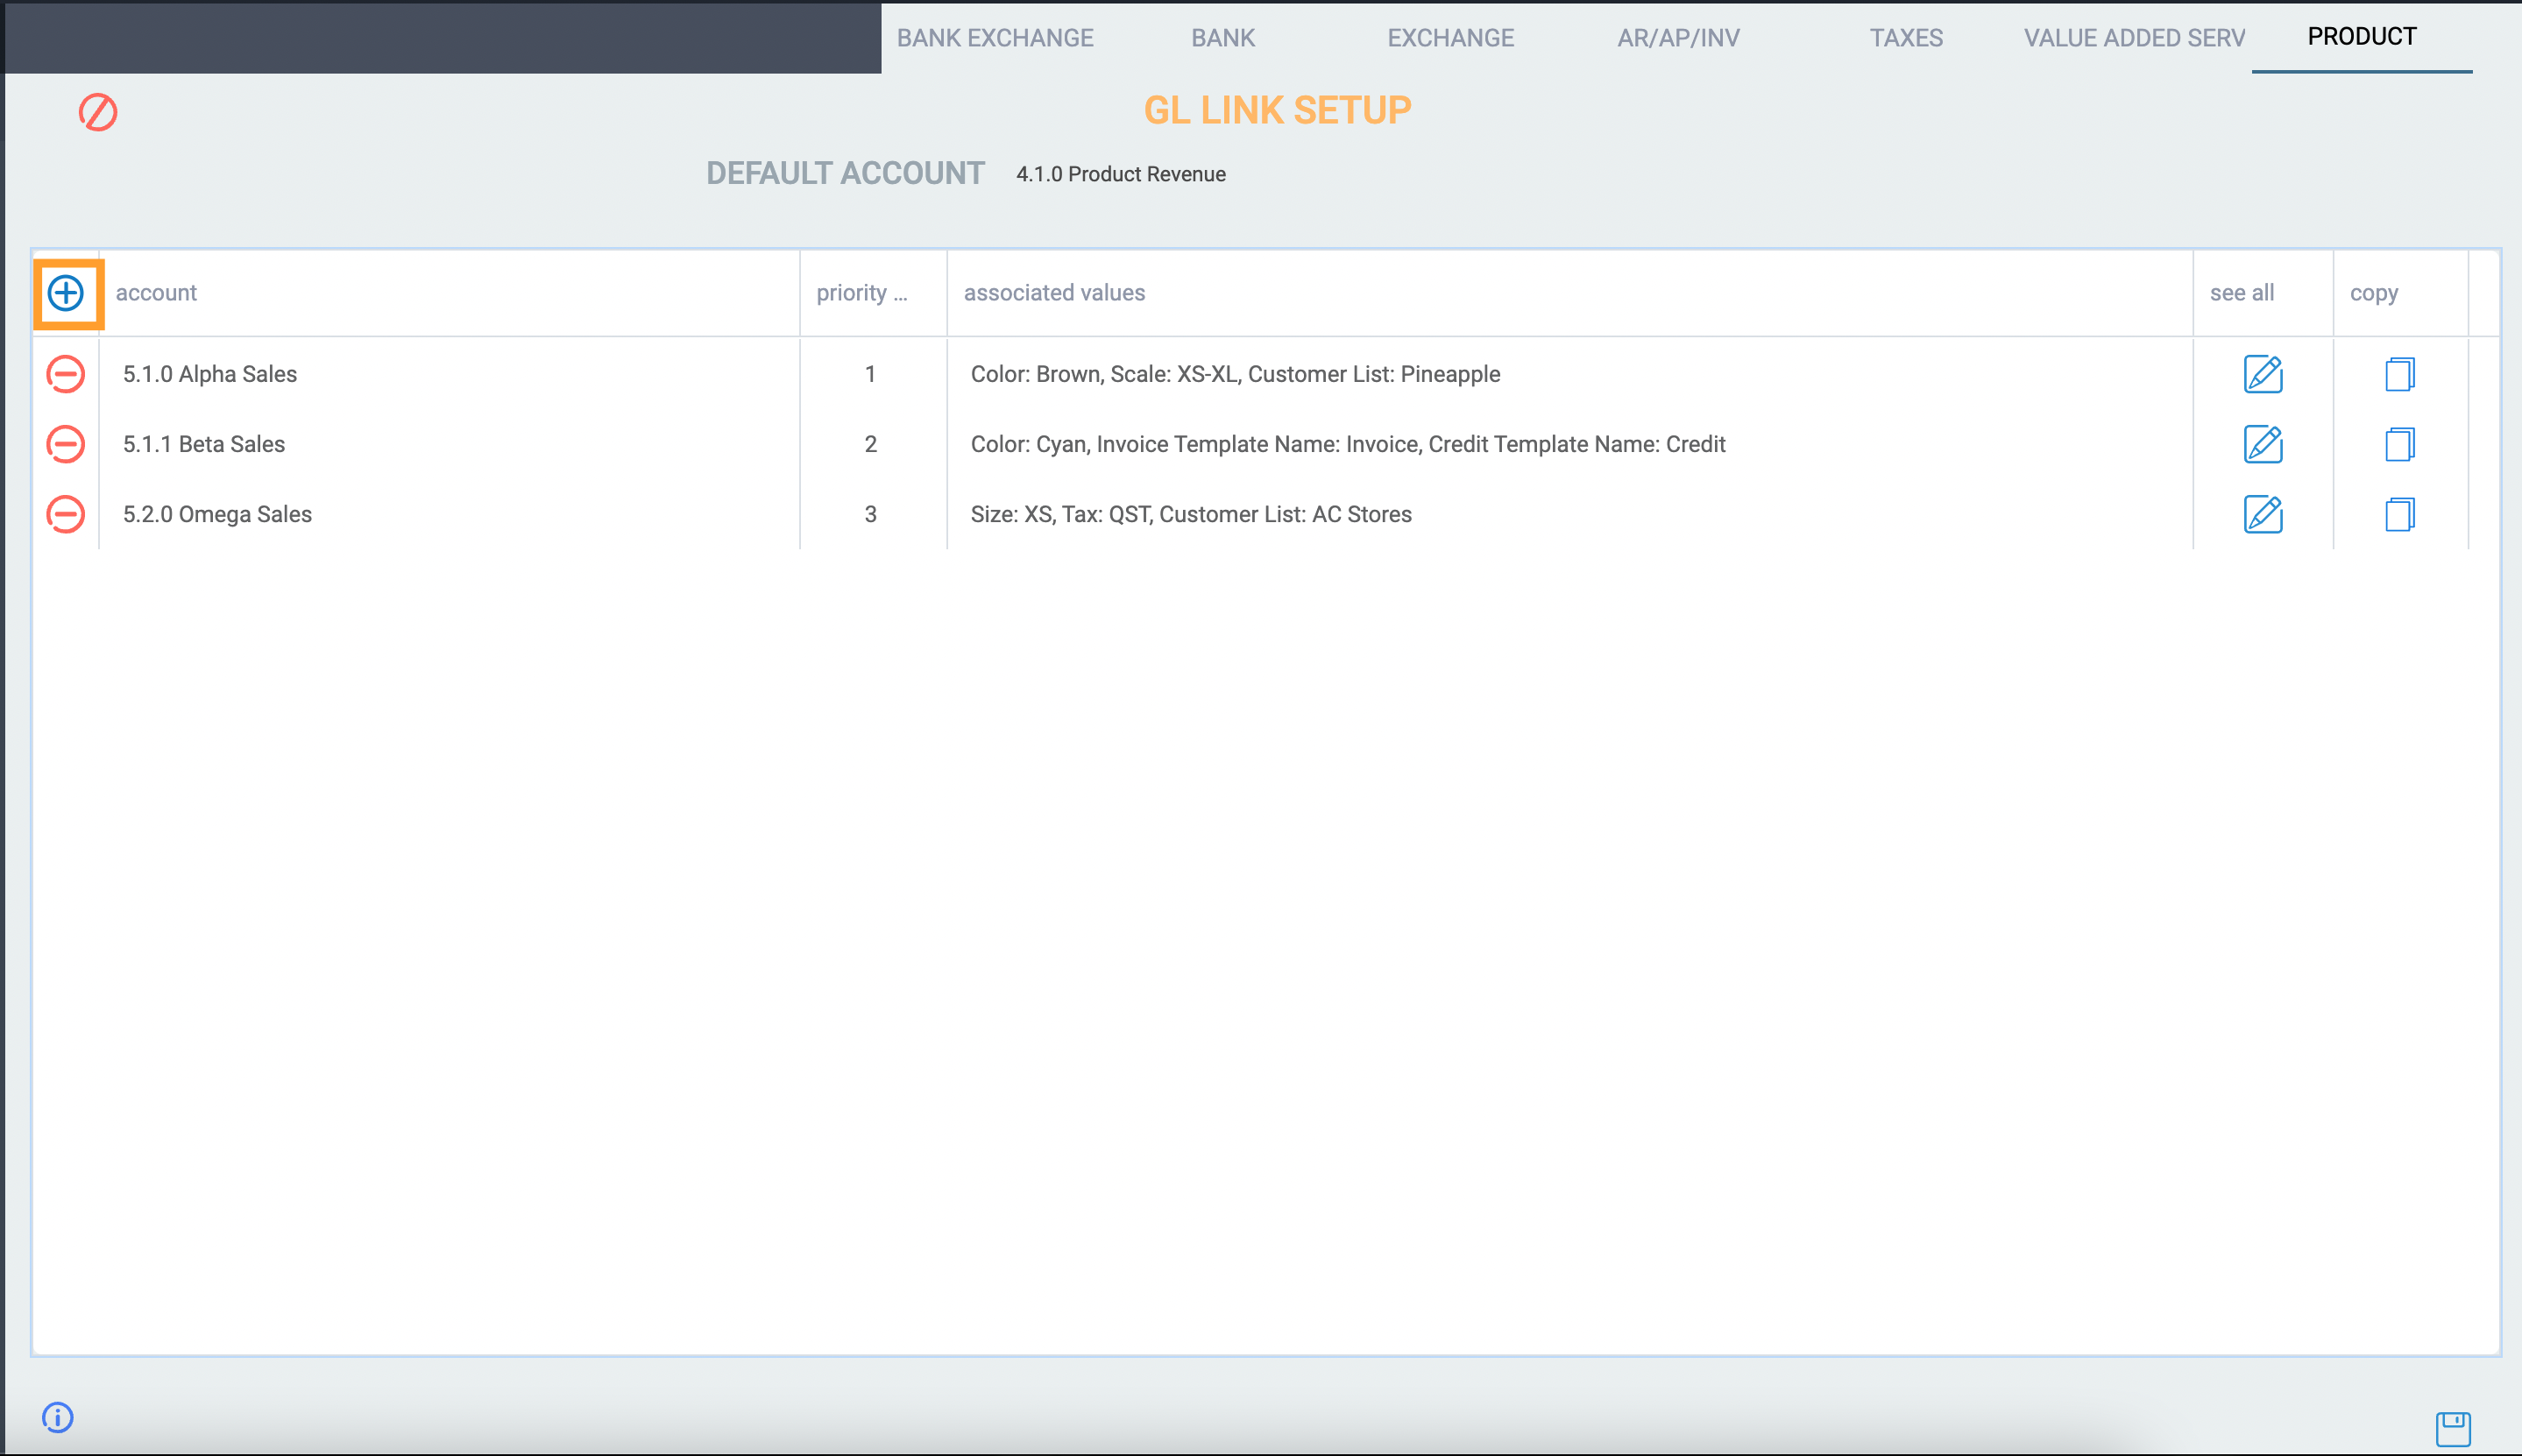
Once you do this, a new line will appear under the default GL link.

First, you will need to determine what GL account the revenue for this particular product should touch. To do so, click into the field called account and choose from the list.
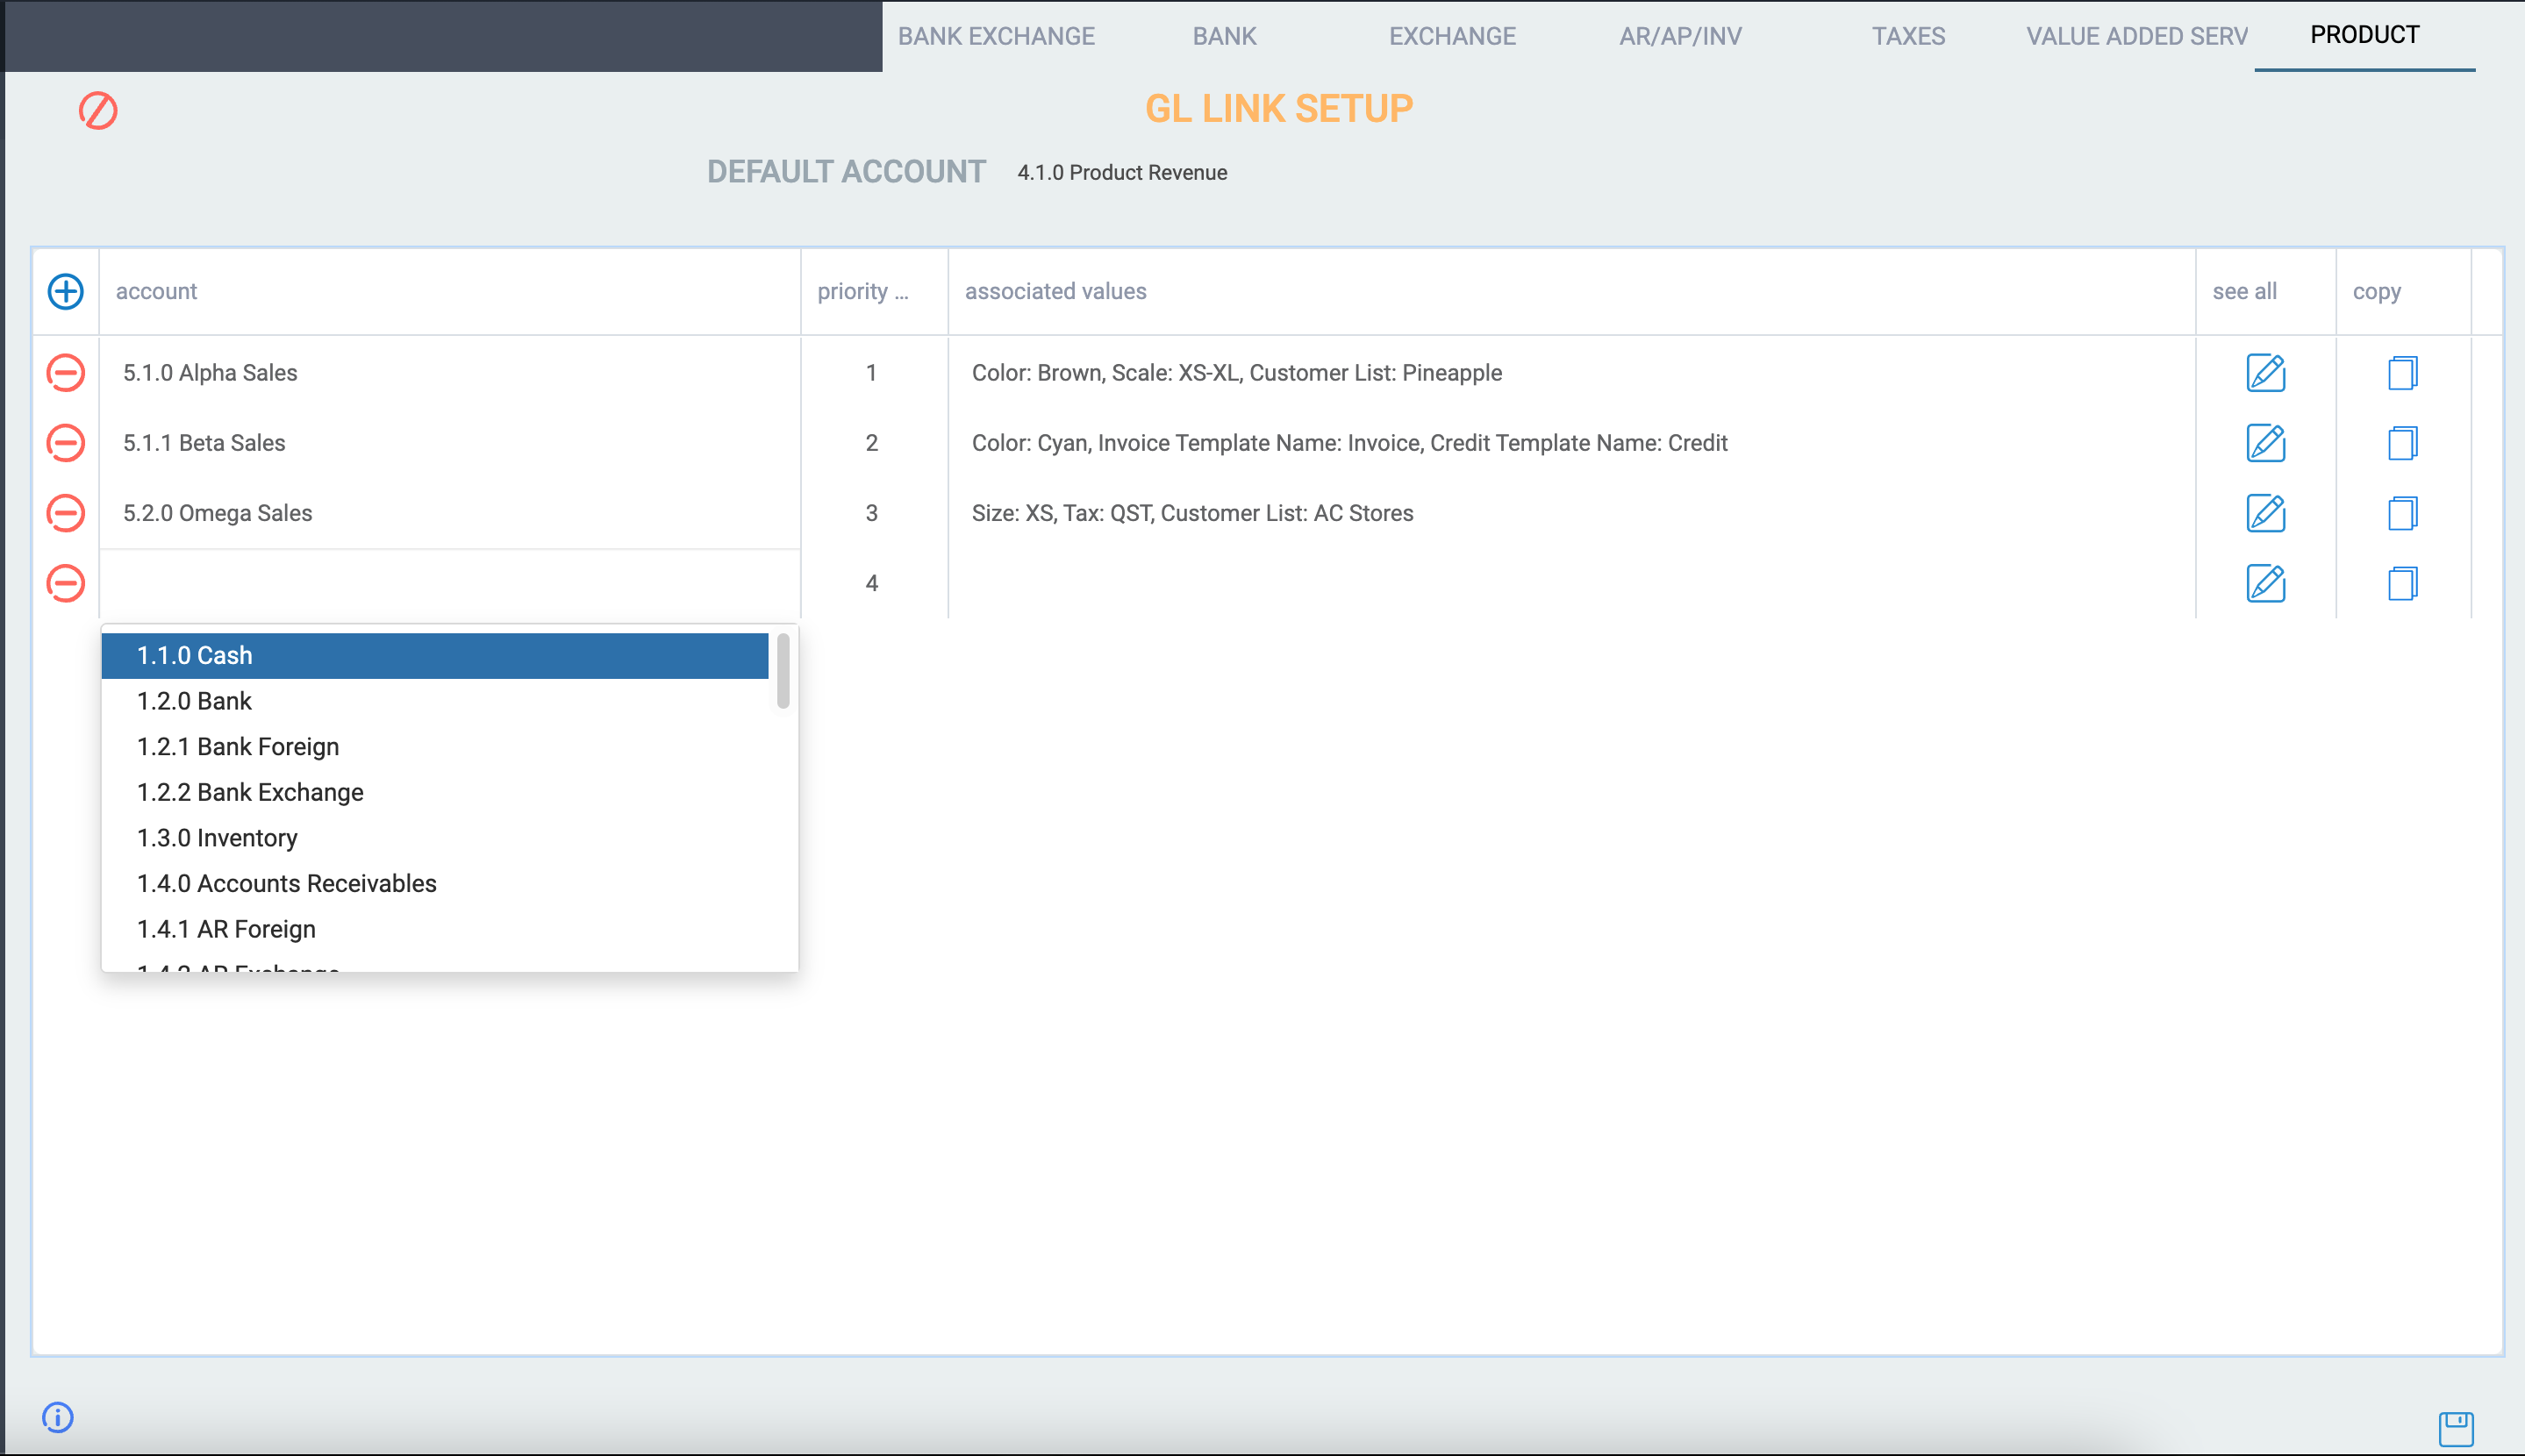
Once a new line is created, the priority number will be the previous one plus 1.

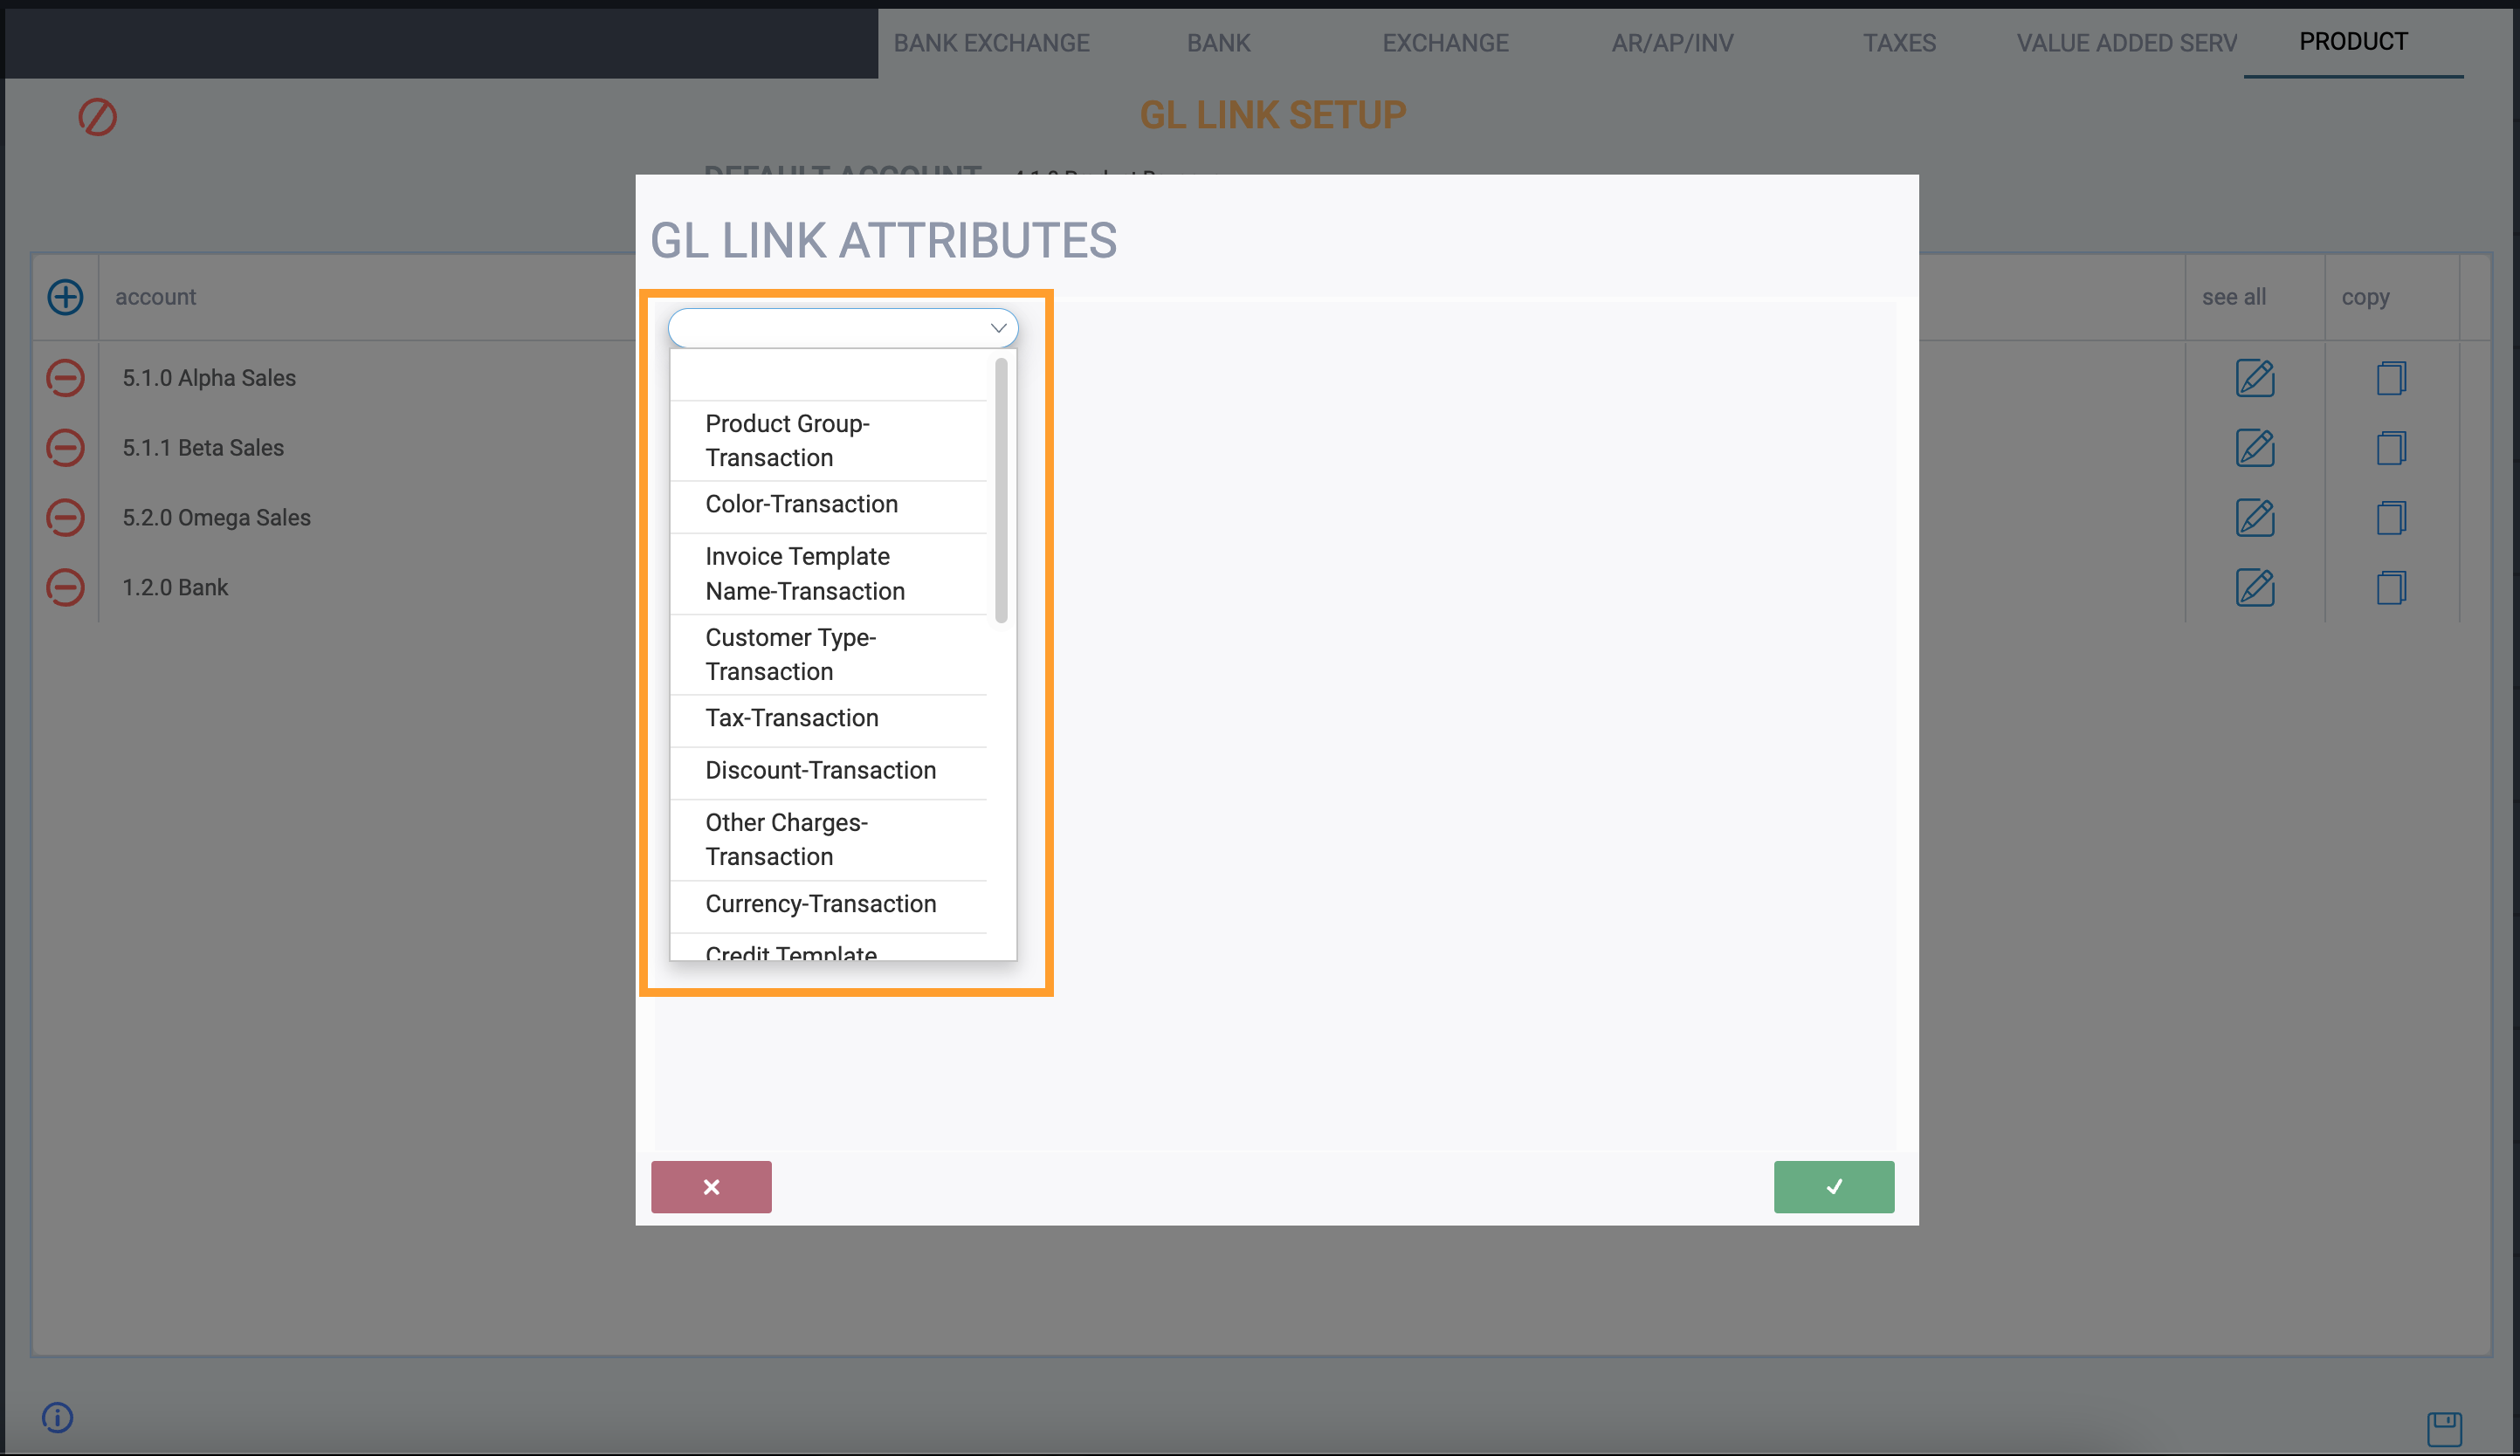
Then, you need to enter the associated values which are attributes that you select to be associated to the GL account you set up. To do so, click the edit button.

Select one or more attributes from the drop down list.
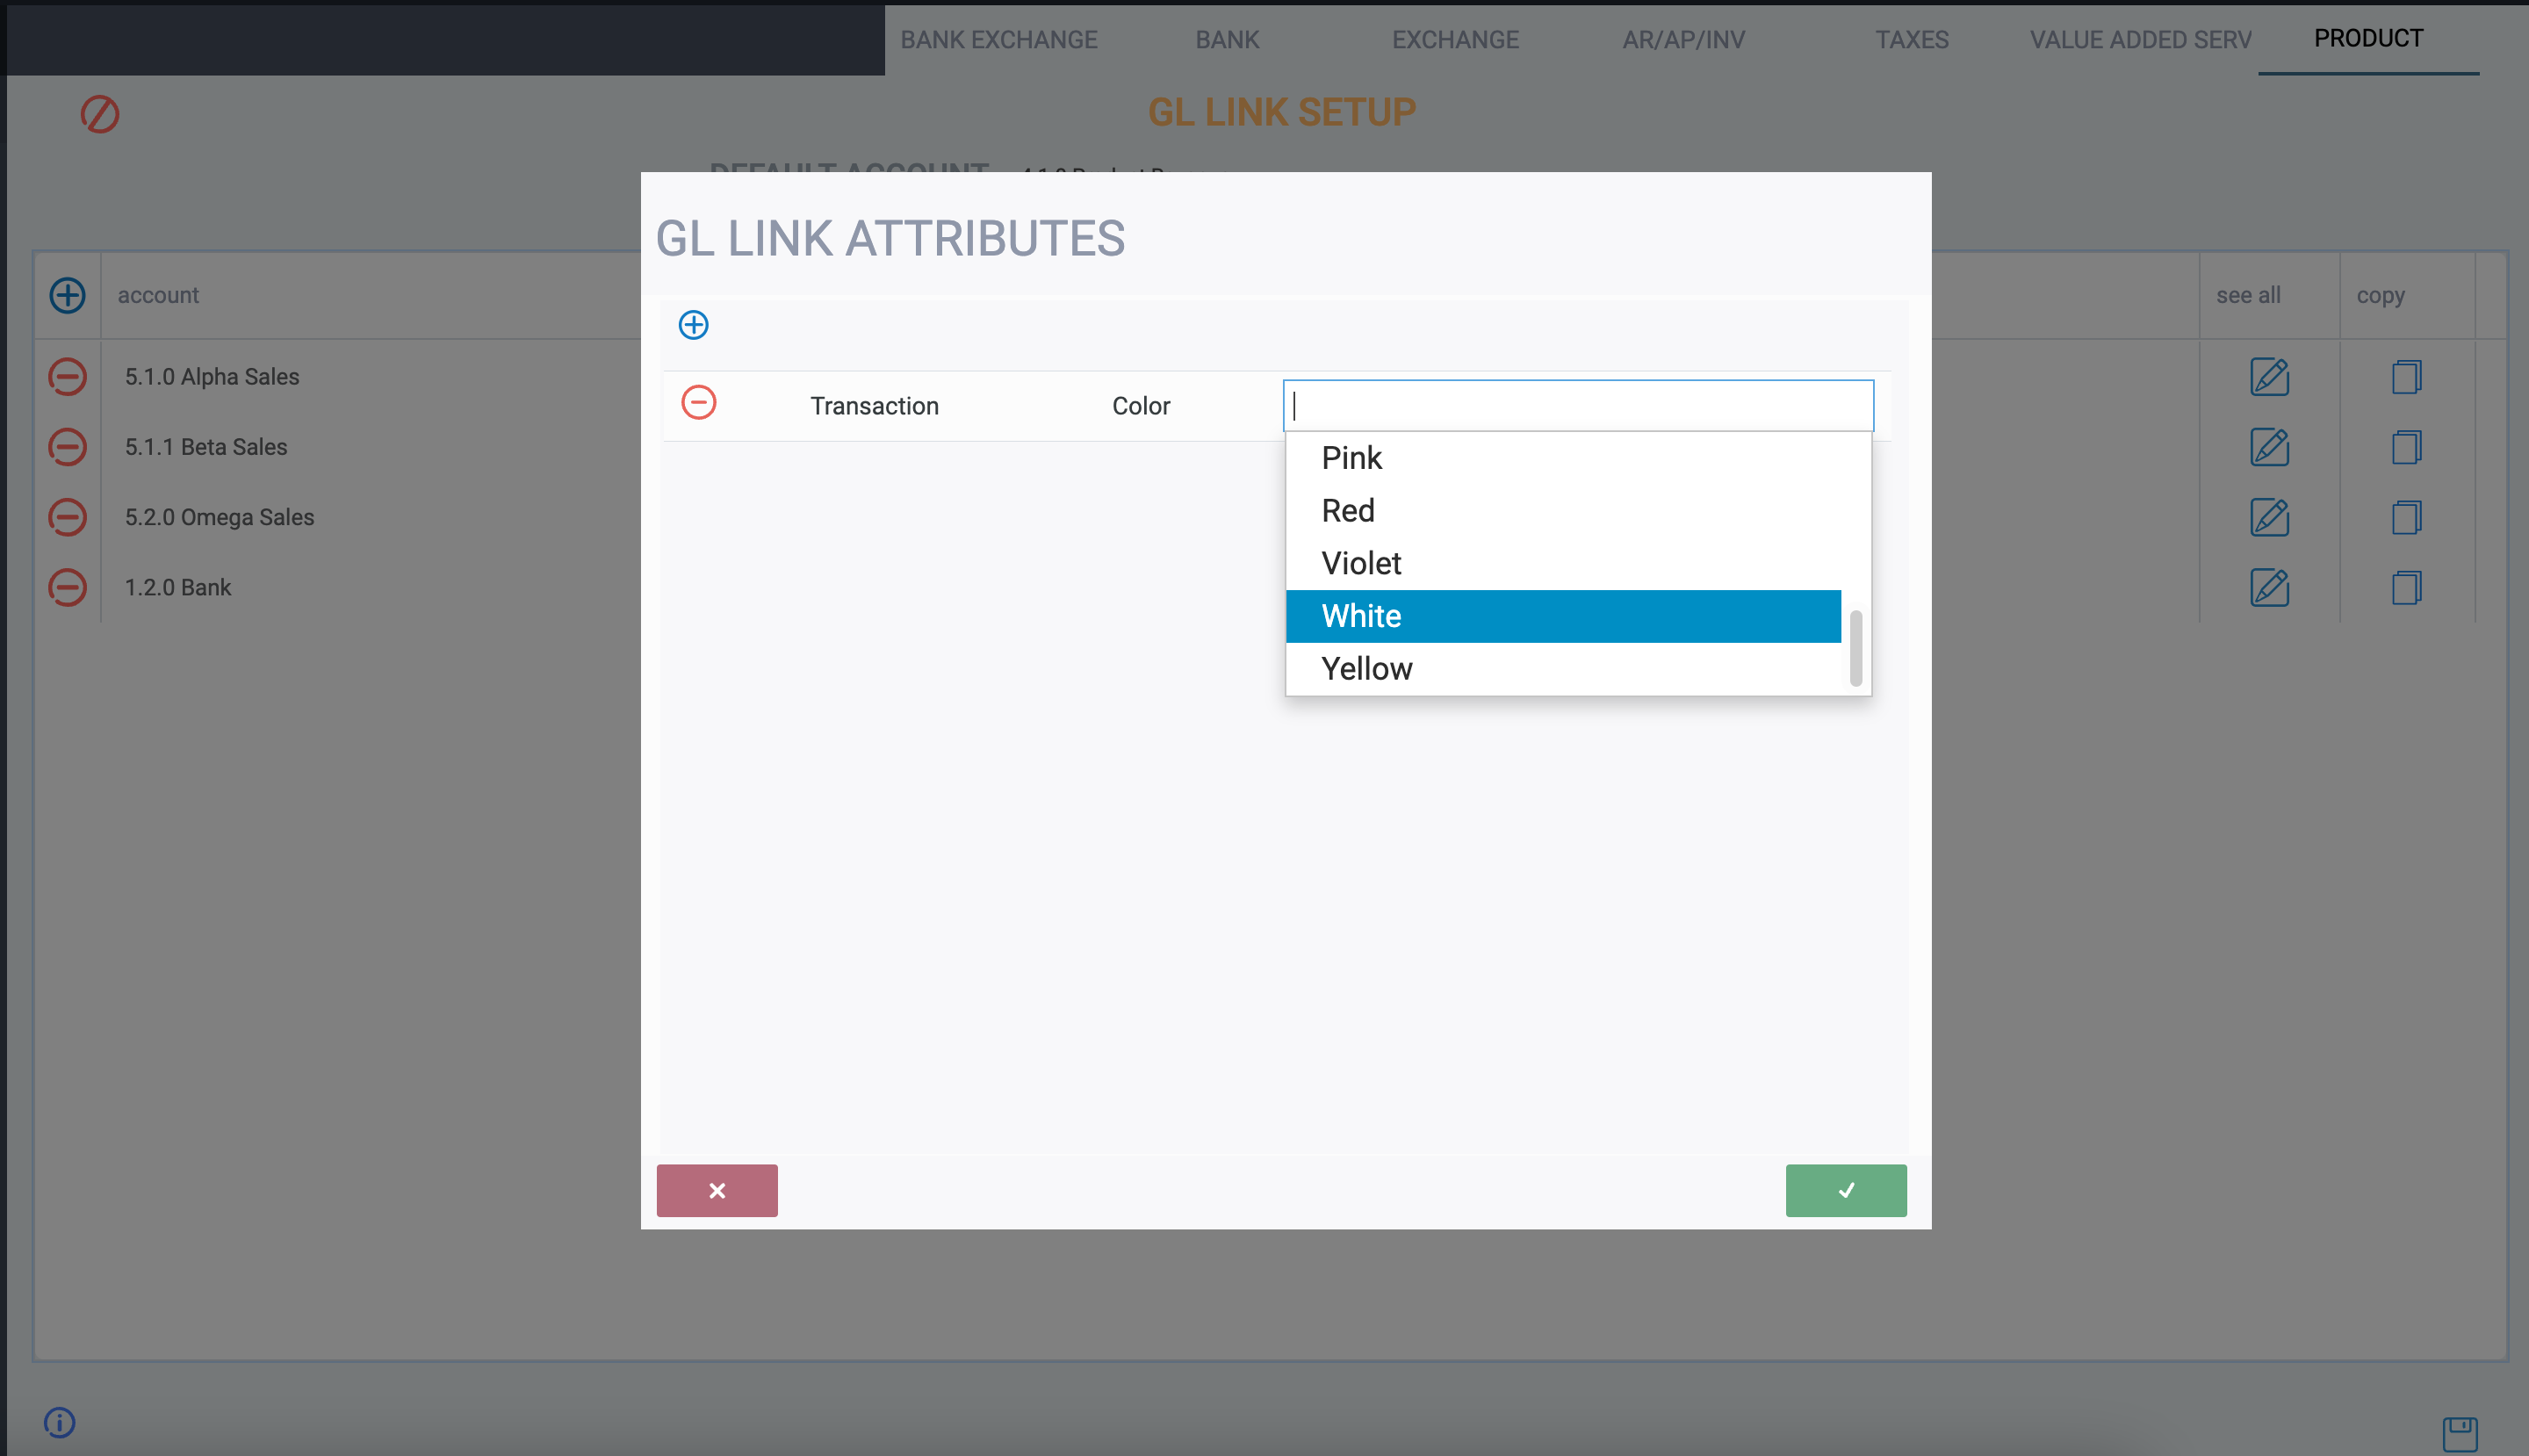
Then, select the right option for the attribute chosen and click the accept button.
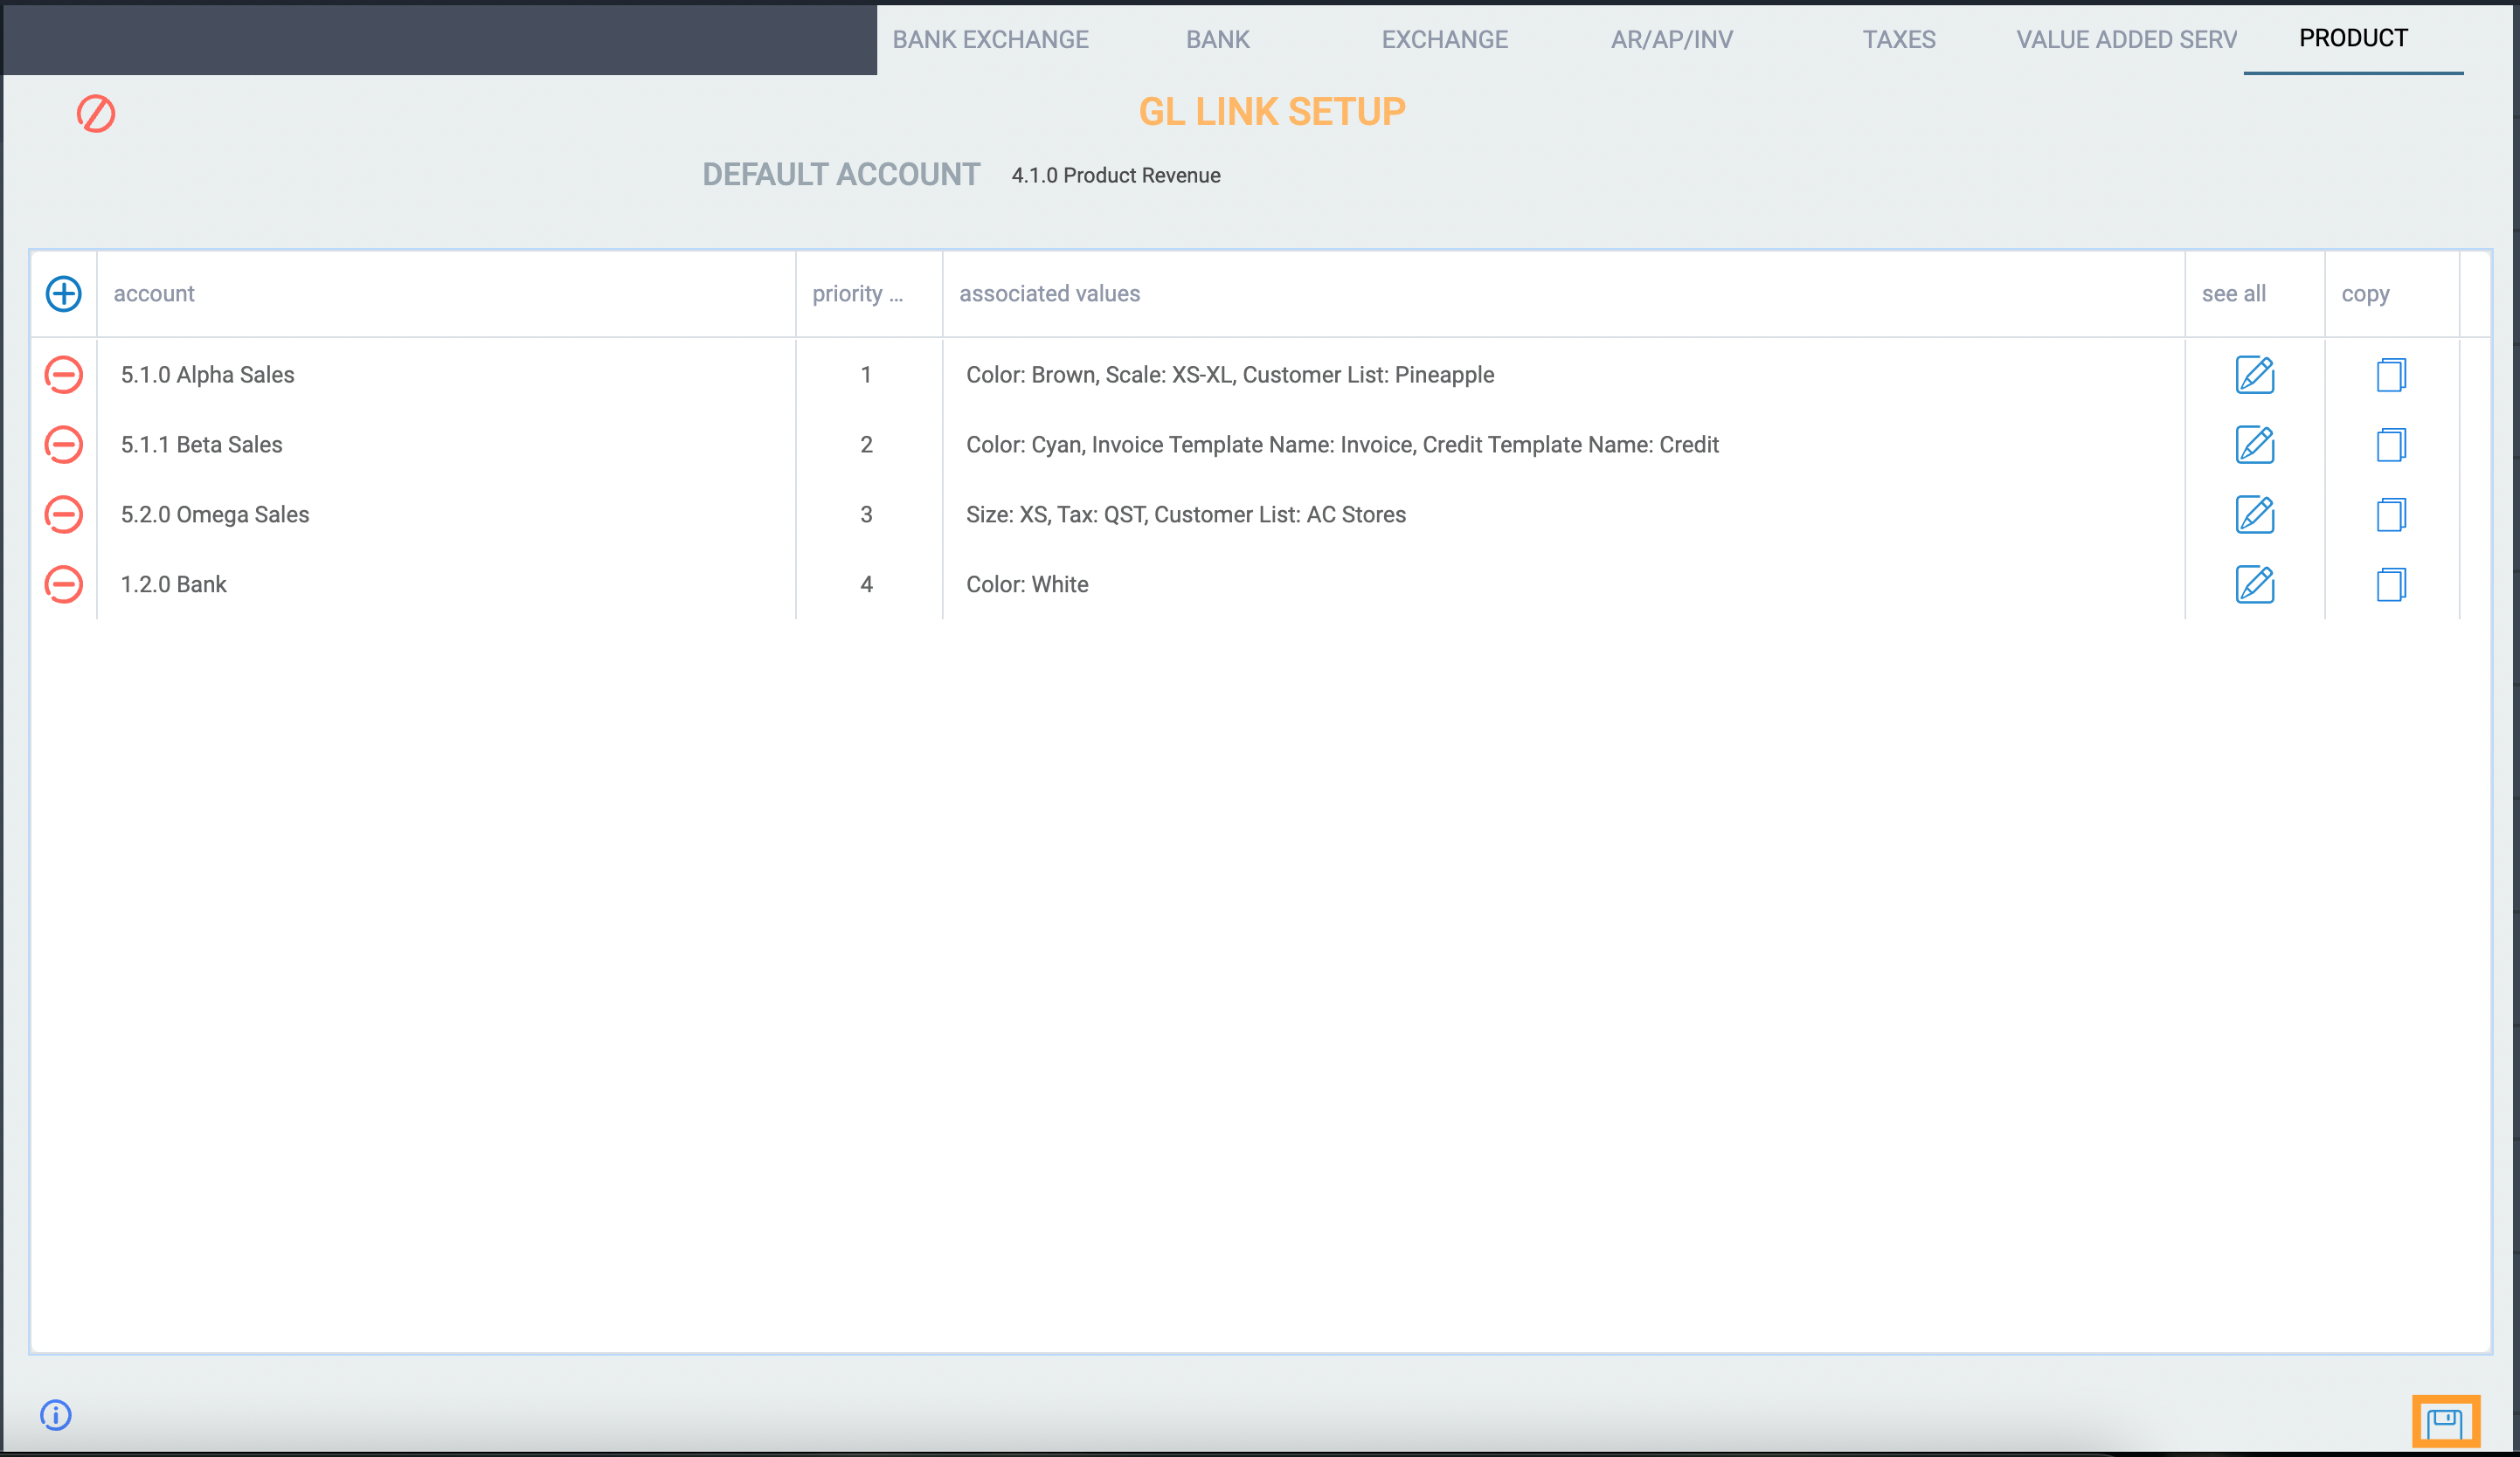
When you are ready to save your changes, click the save button.
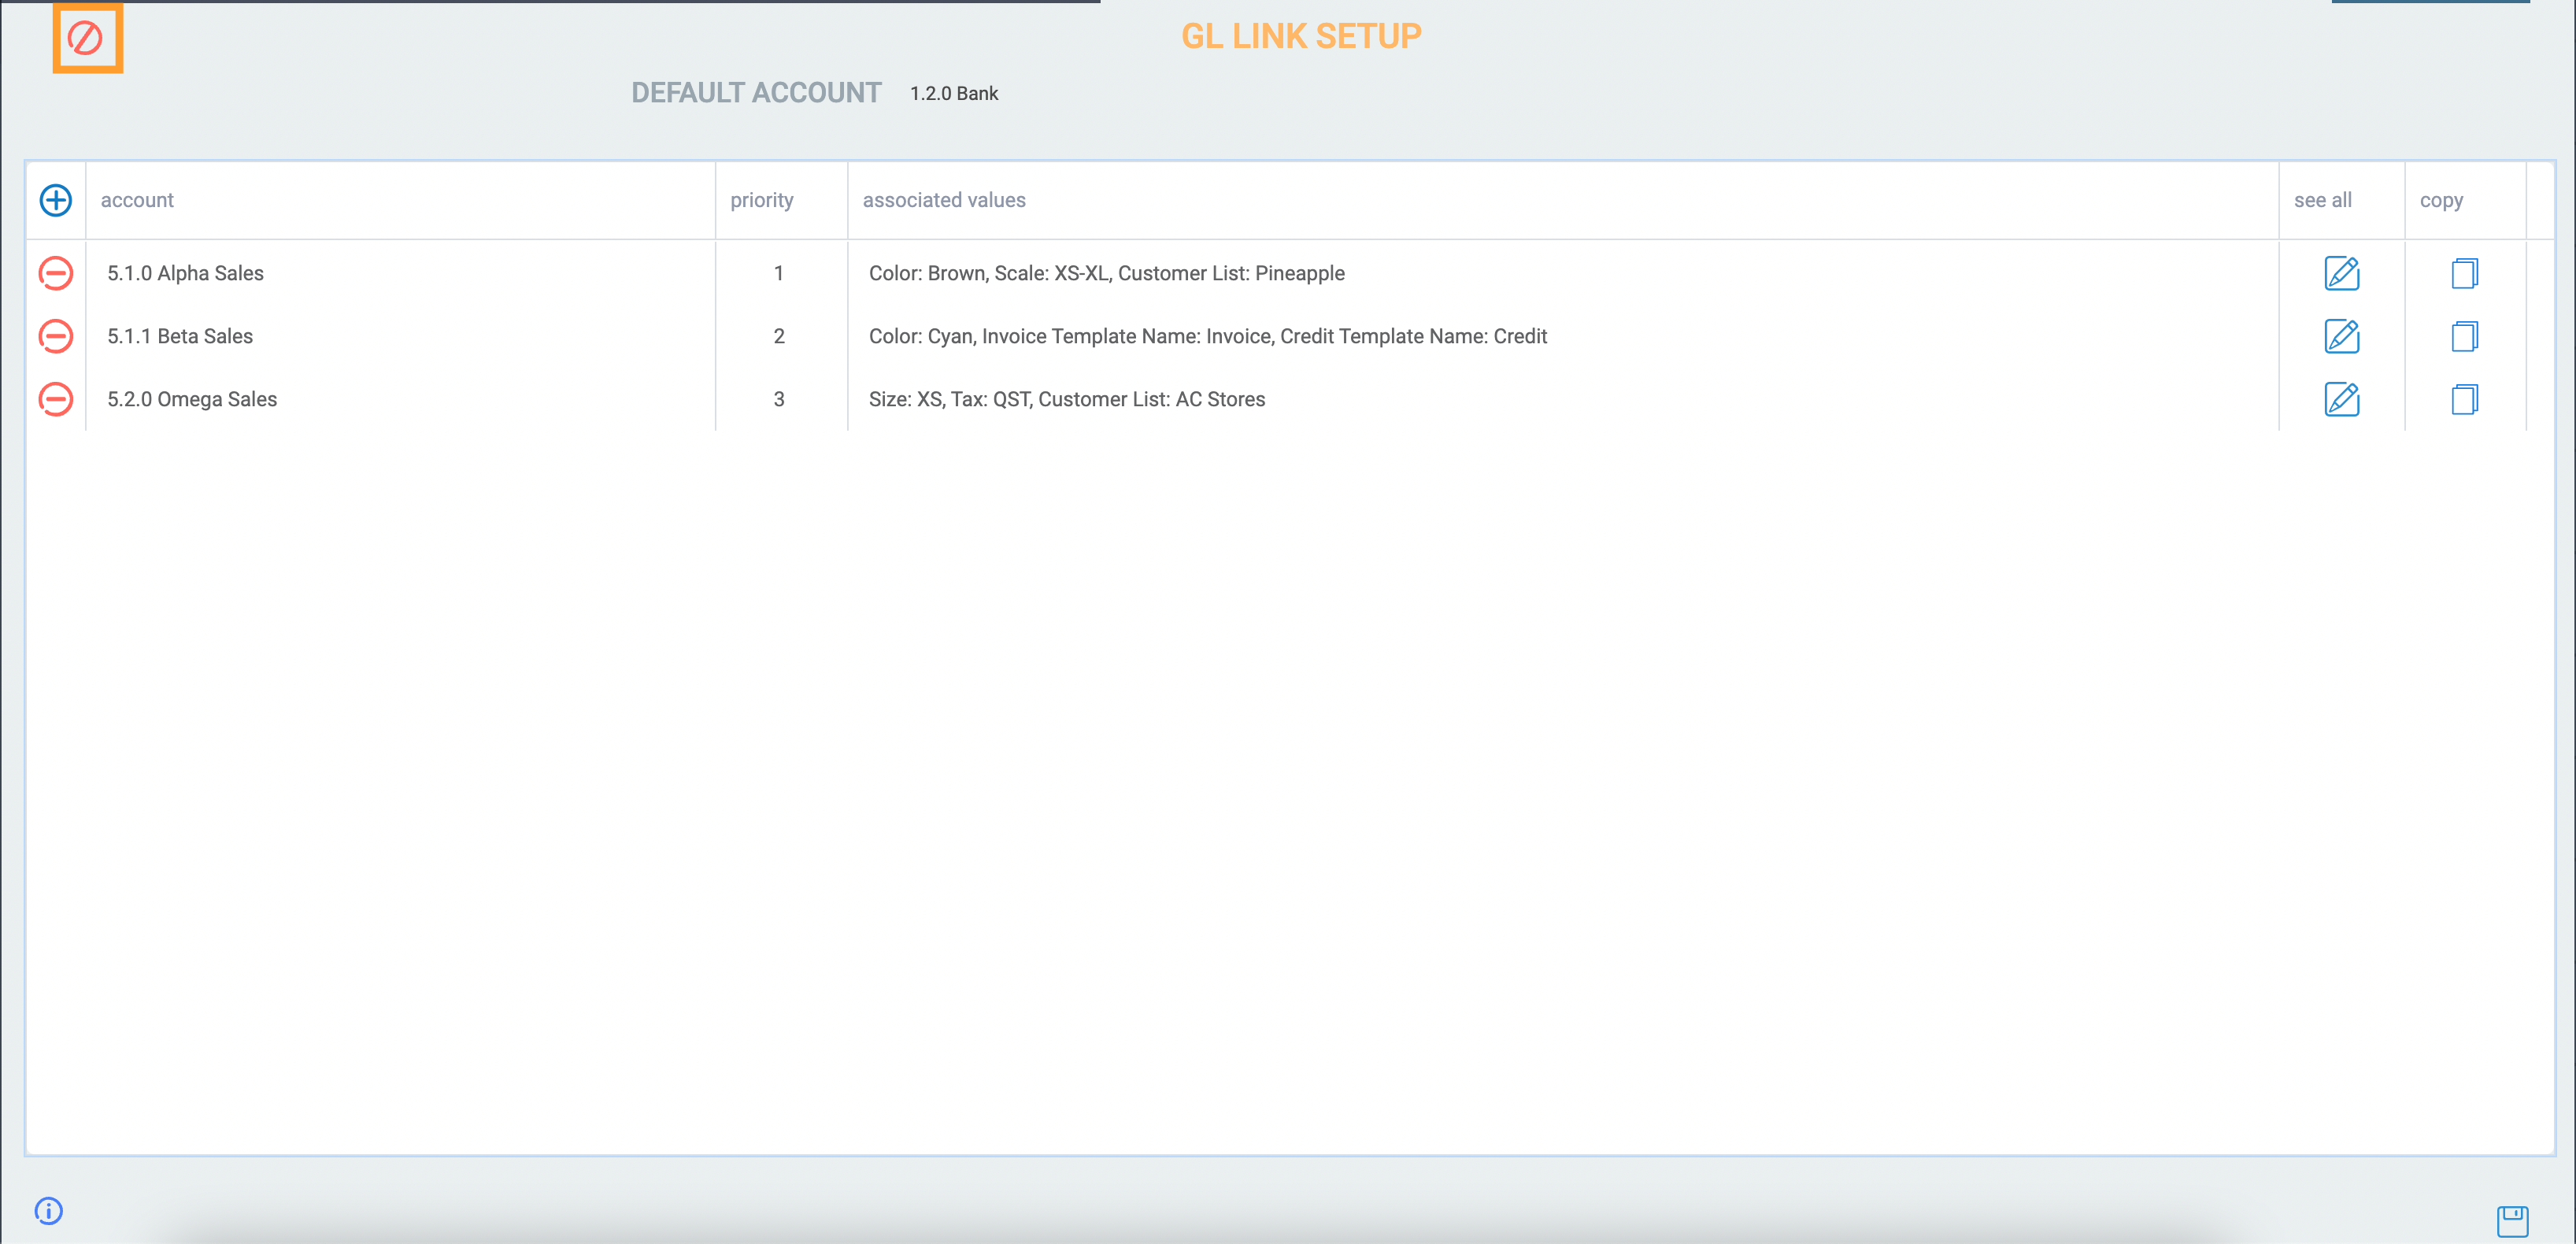
You can also cancel at any point before saving by clicking the cancel button at the top left-hand corner. If you do this, the link will not be saved.
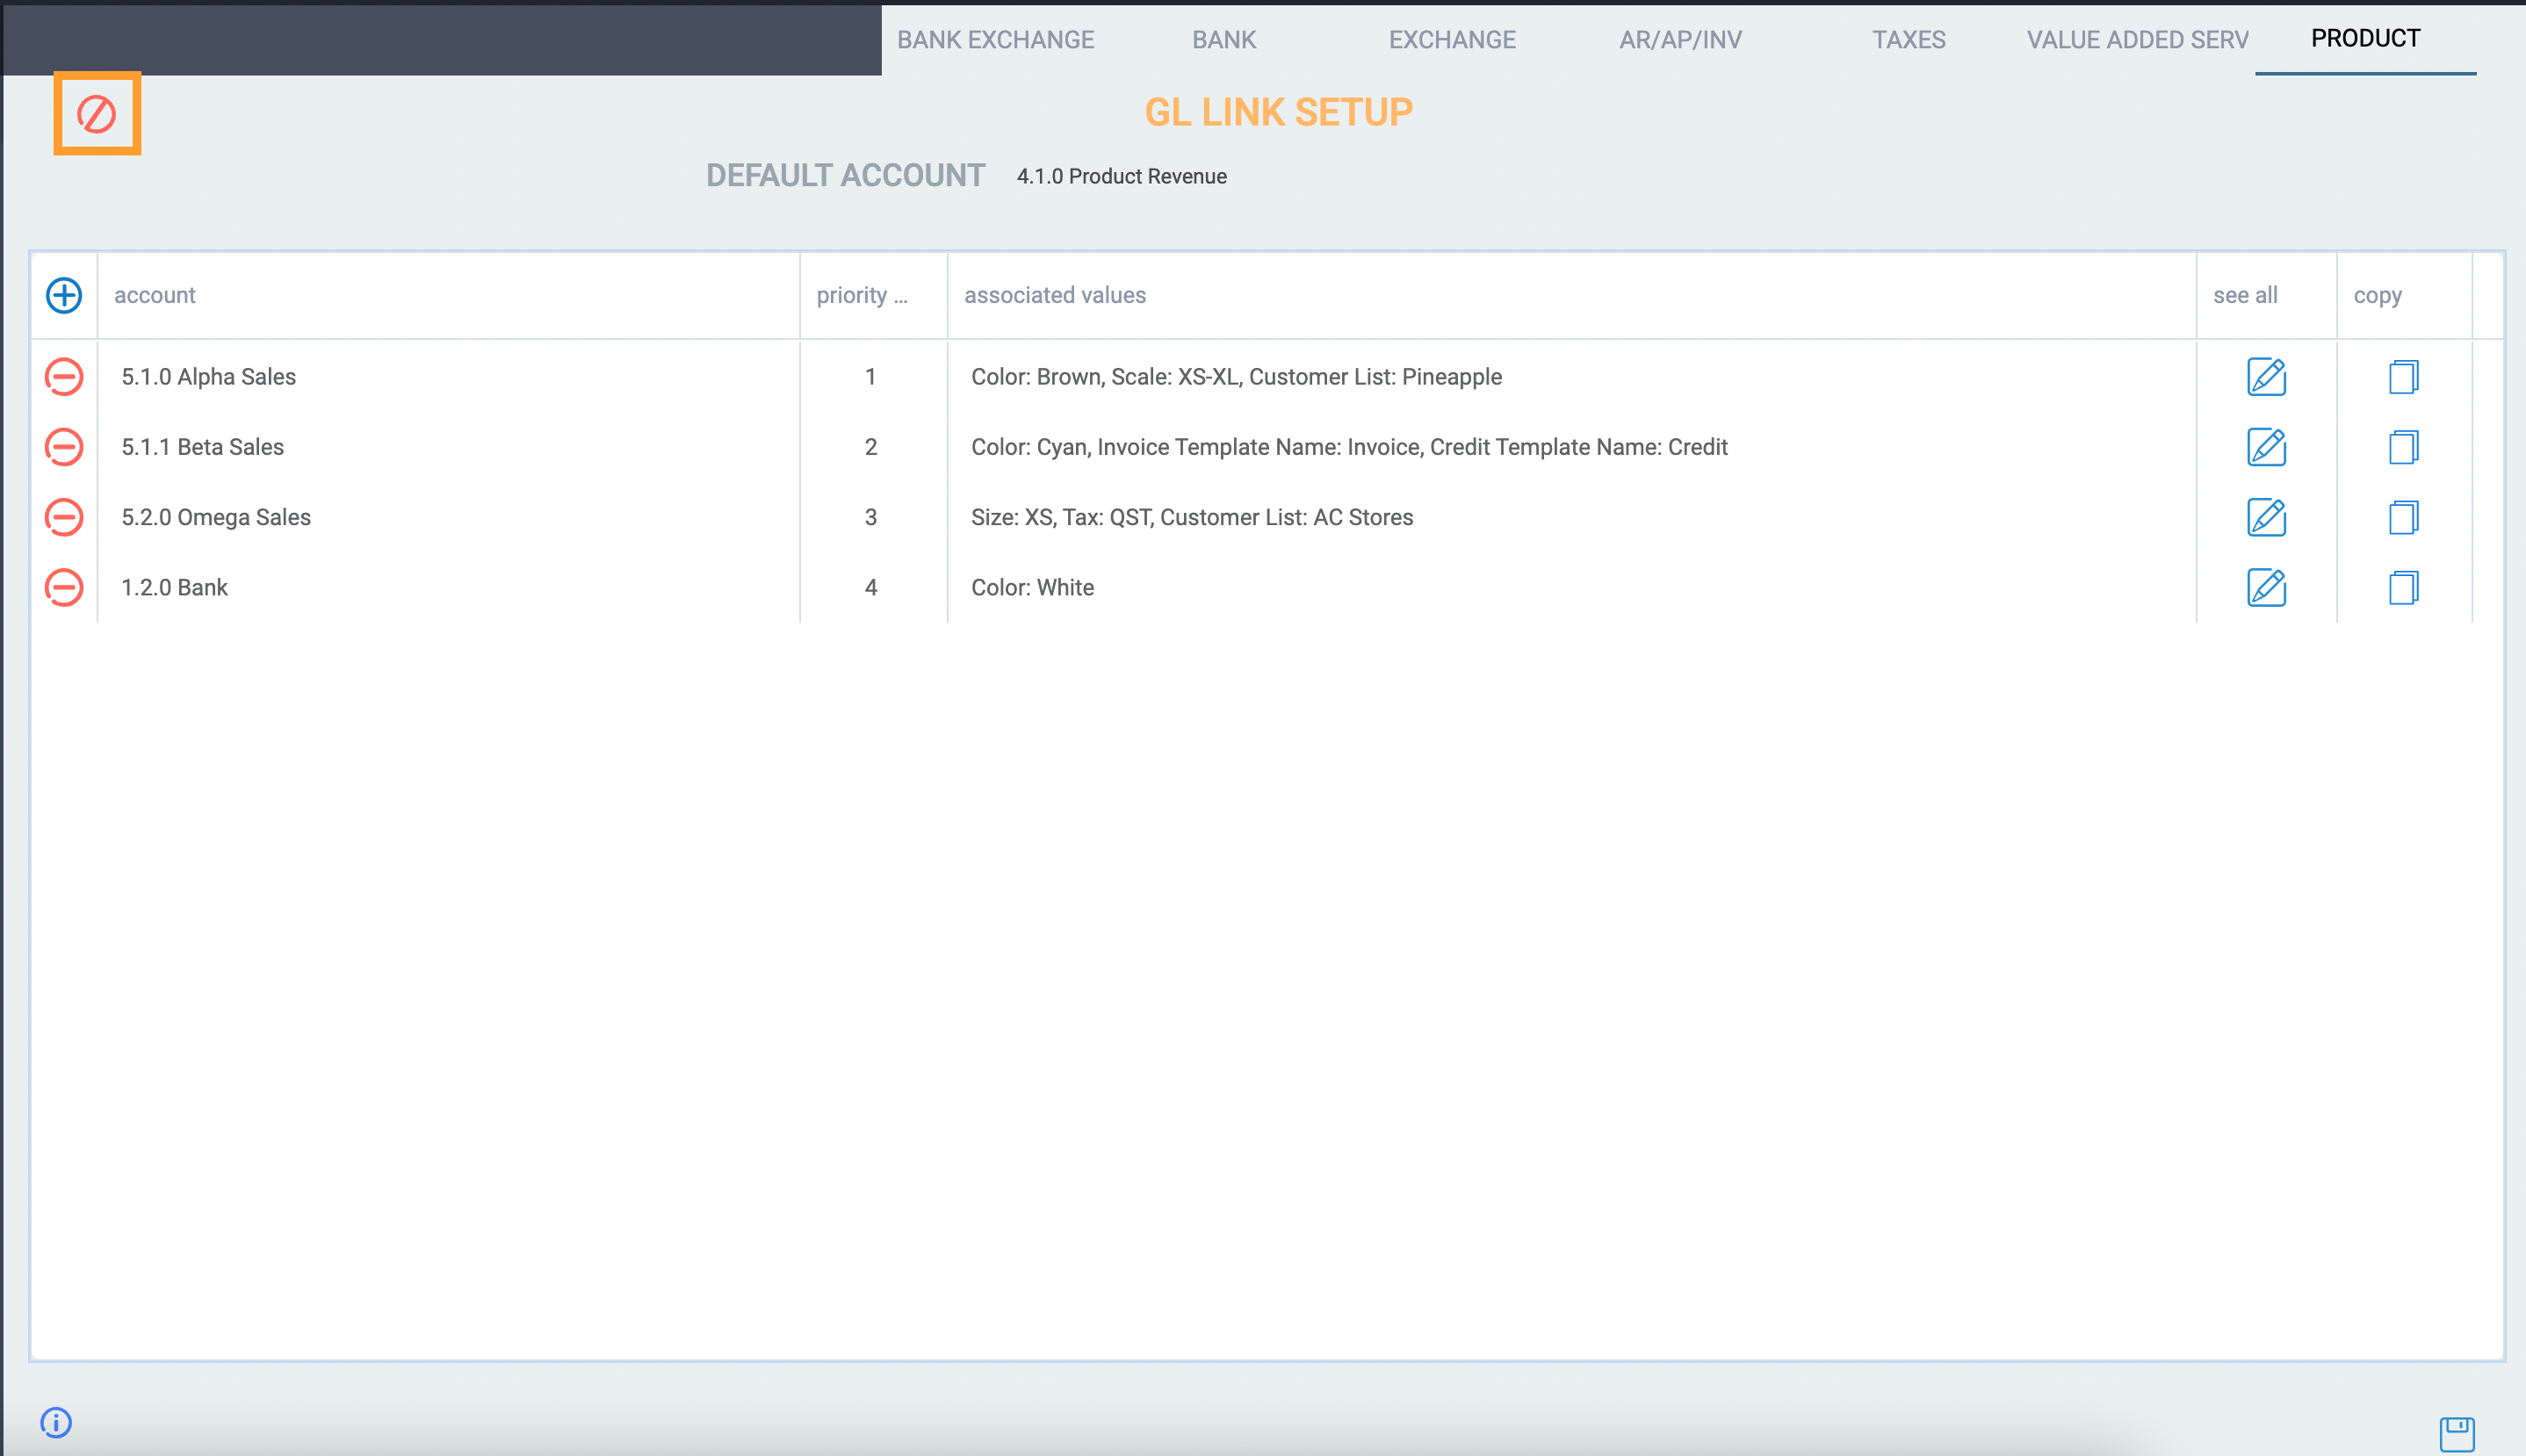
When you have saved the new link, you will be brought back to the same screen where you began. With the setup outlined above, the revenue from an invoice for a specific product will affect a GL account that differs from the default.
You can repeat the same process for different transactions or different parts of the current transaction.
Copying GL Links
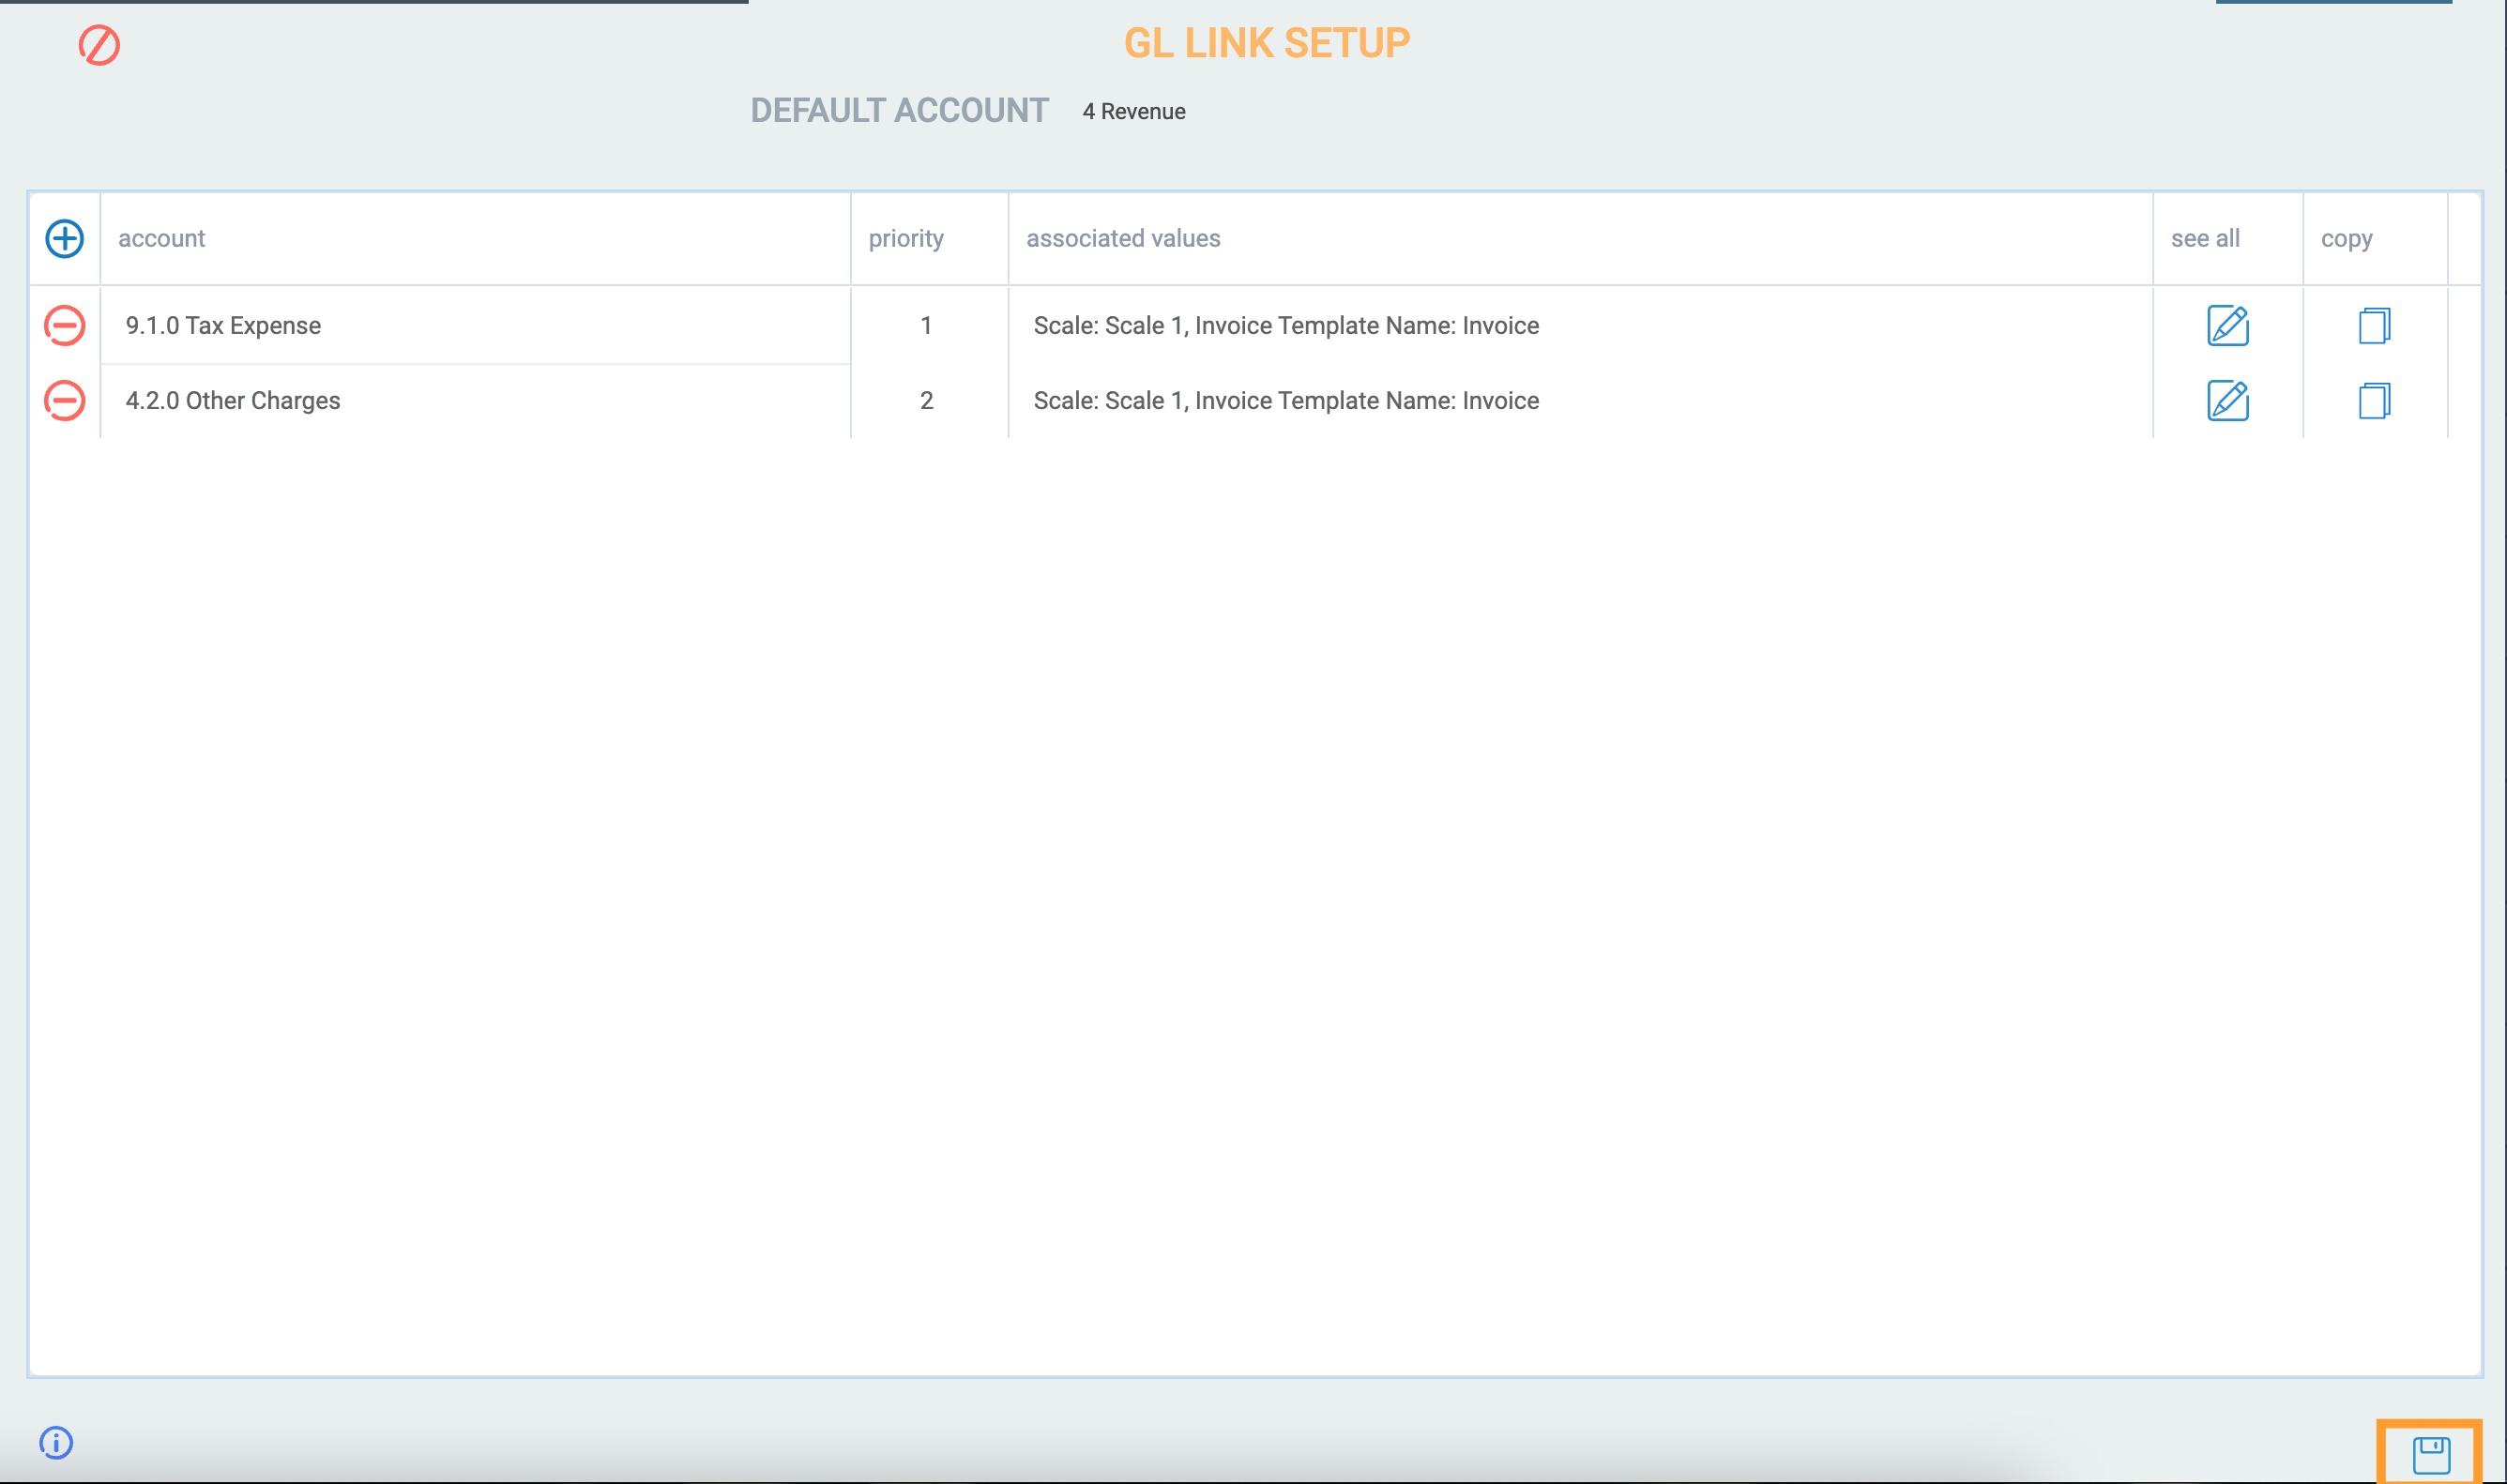
If you have to route multiple scenarios to multiple accounts, you may want to copy GL setup links using the copy column. This will save time and avoid errors.
First, click the edit button at the top right-hand corner of the screen.
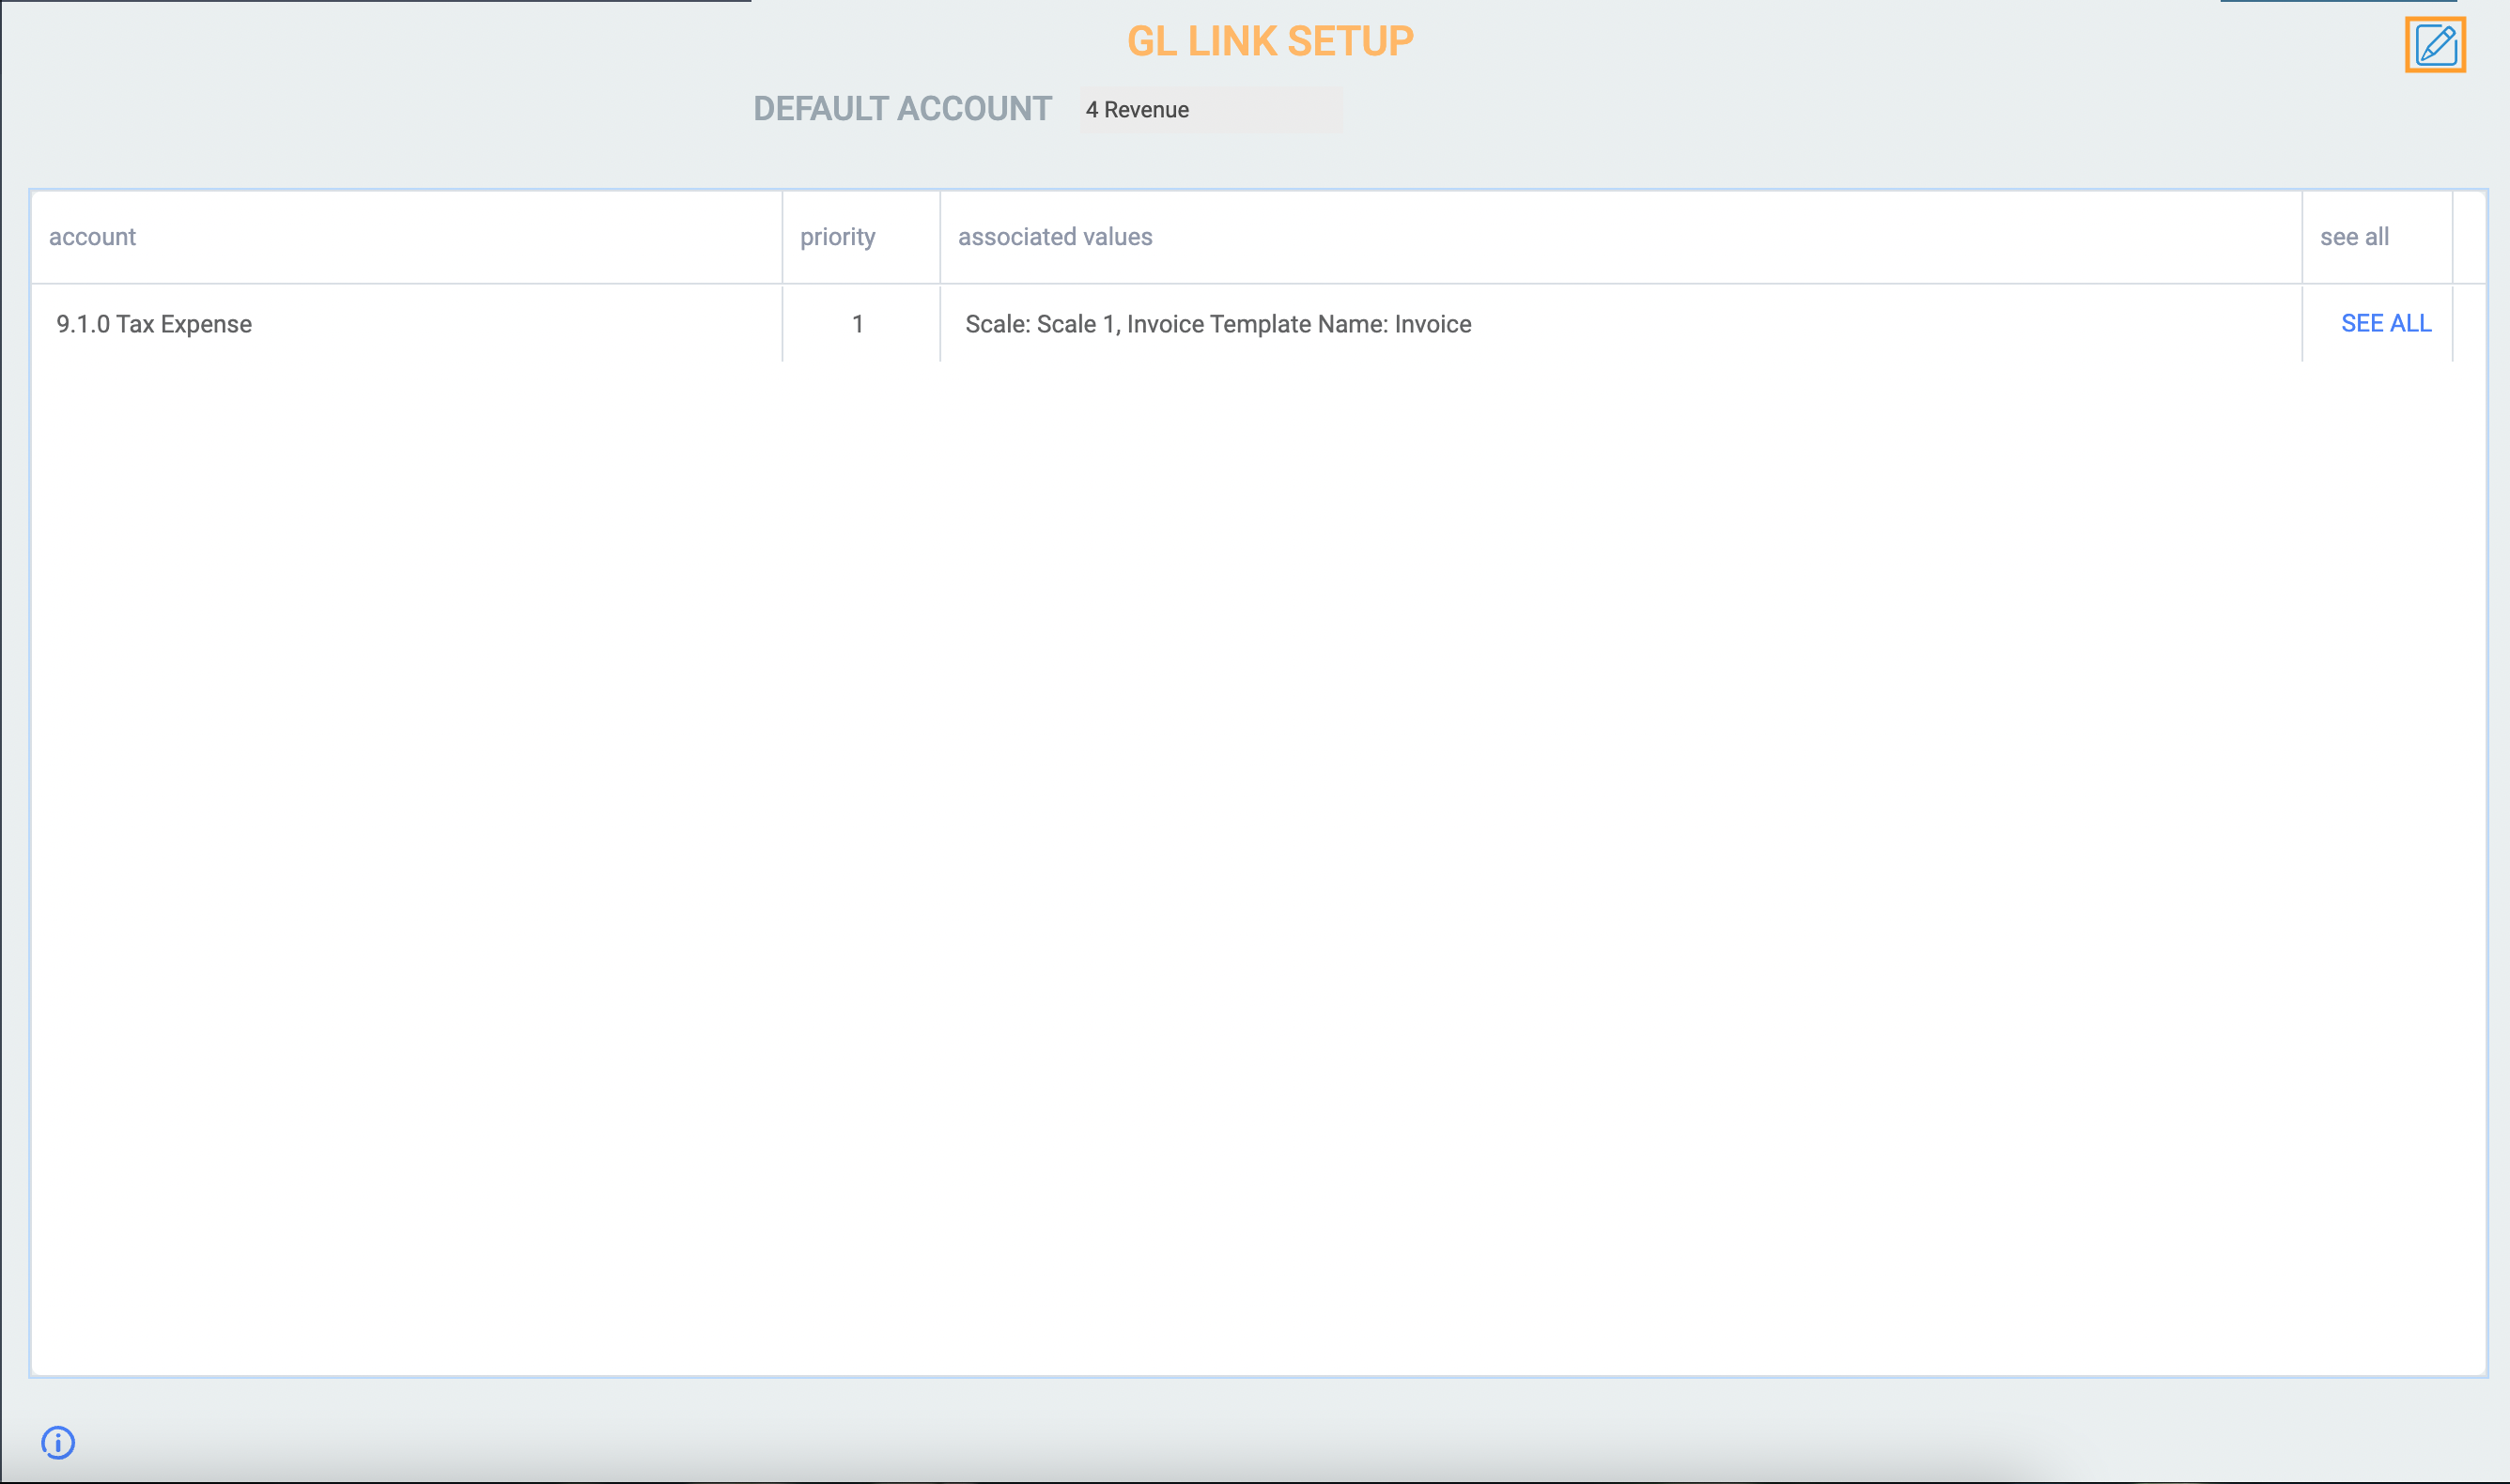
The default account drop-down list will be opened. Click anywhere on the screen if you don't wish to make any changes to the default.

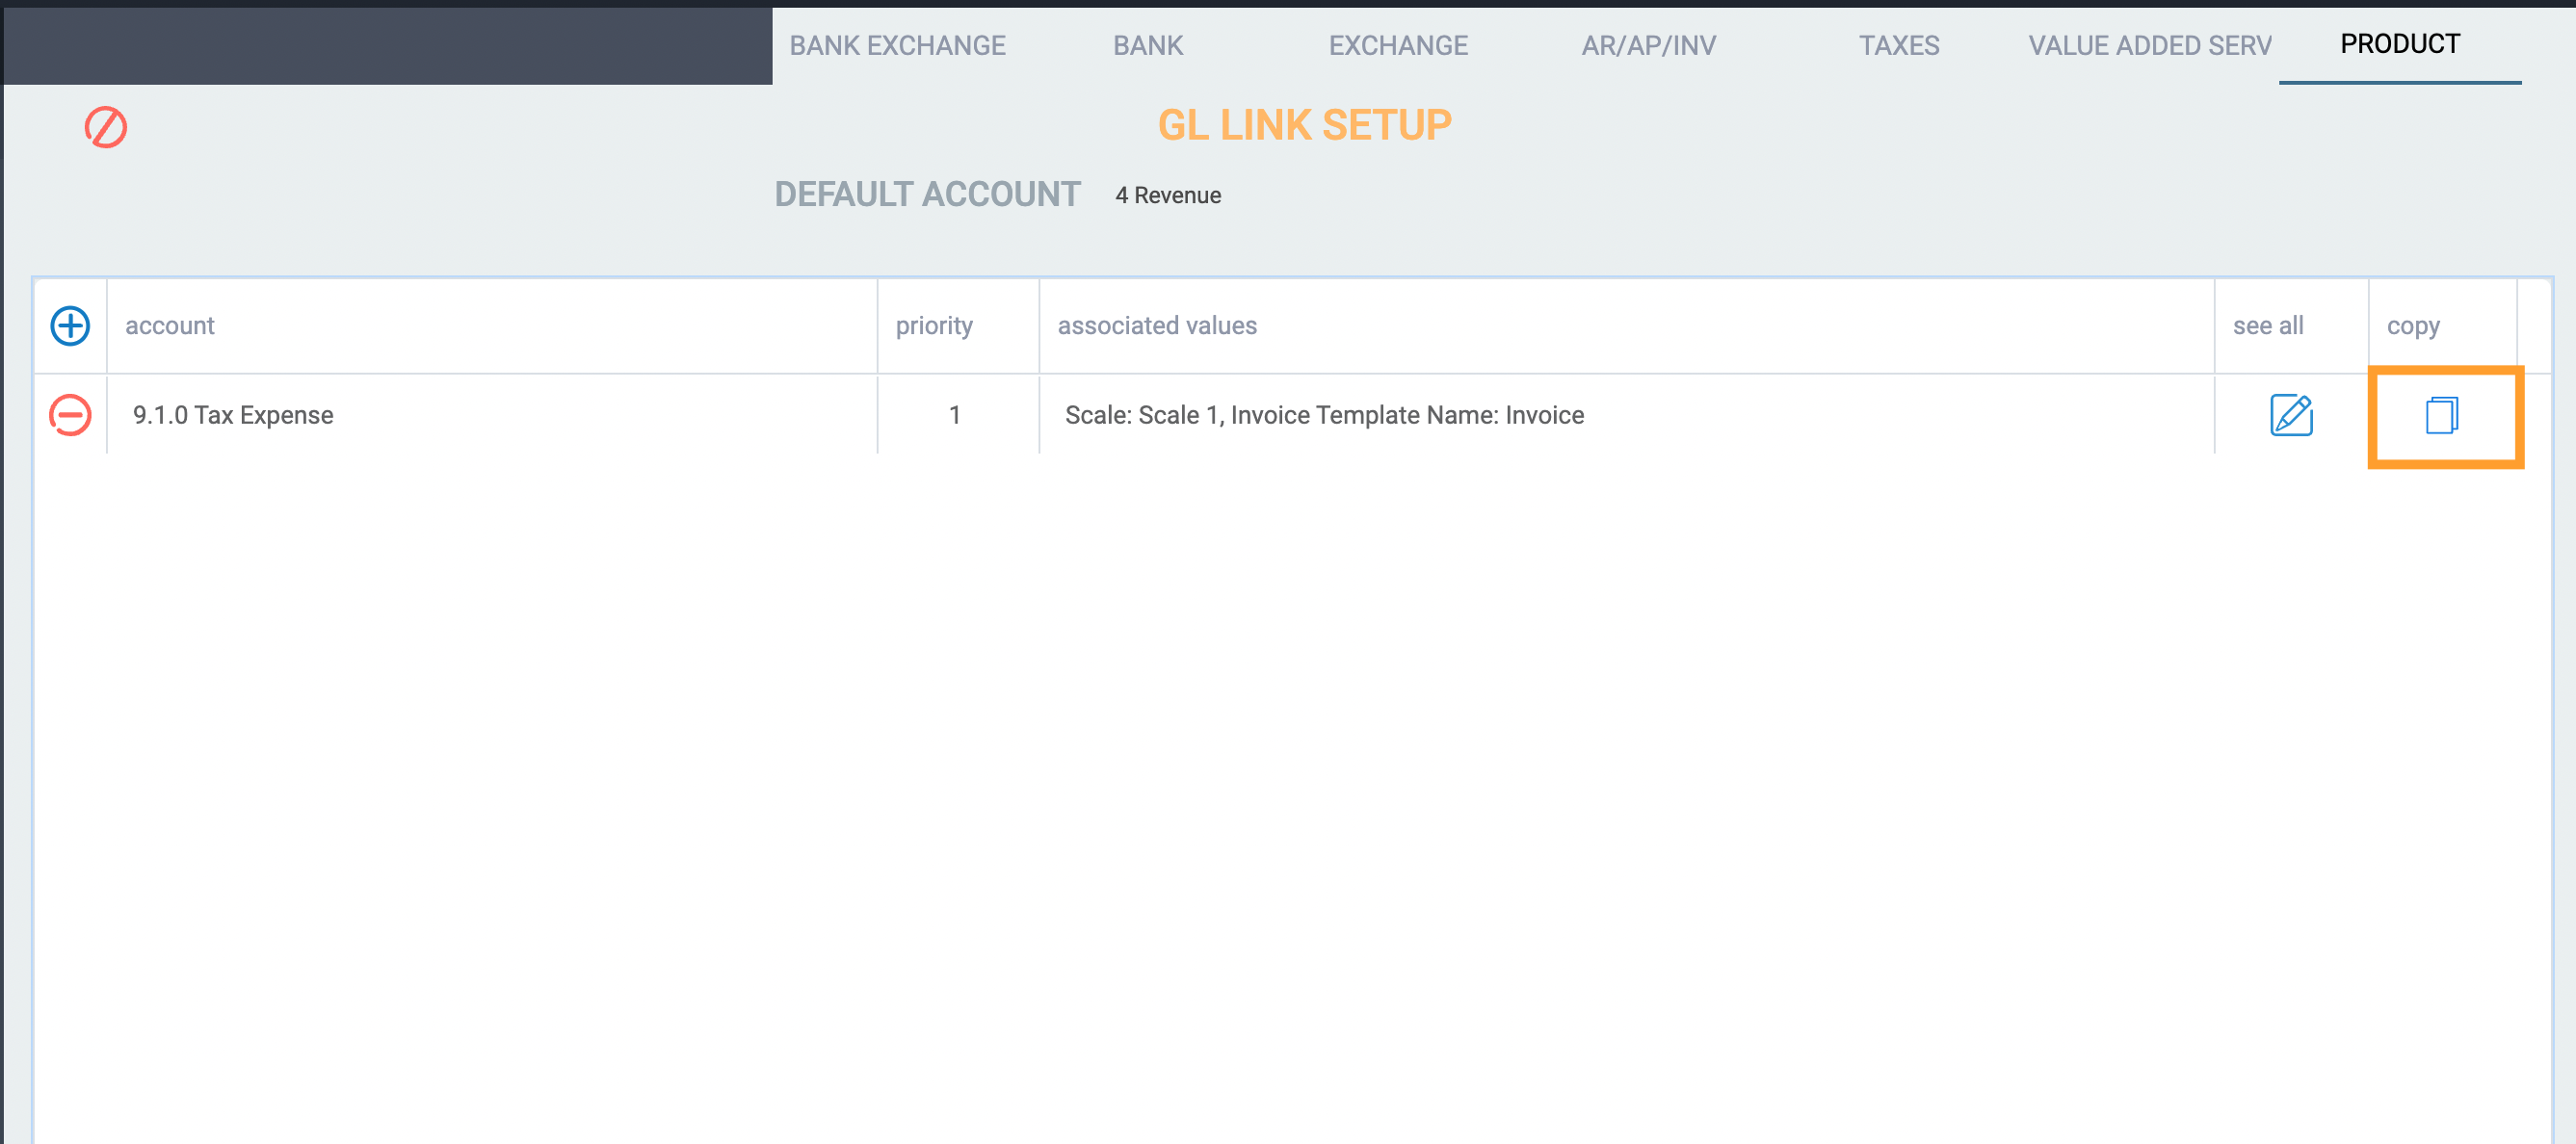
Next, choose the GL link which has the associated values you would like to copy, then click the copy button, under the copy column.
On the new line that was created, associated values will be copied, the priority will be increased by 1, and the account drop-down list will be opened. Select the account you wish to link.
You can also edit the associated values by clicking the edit icon situated under the see all column.
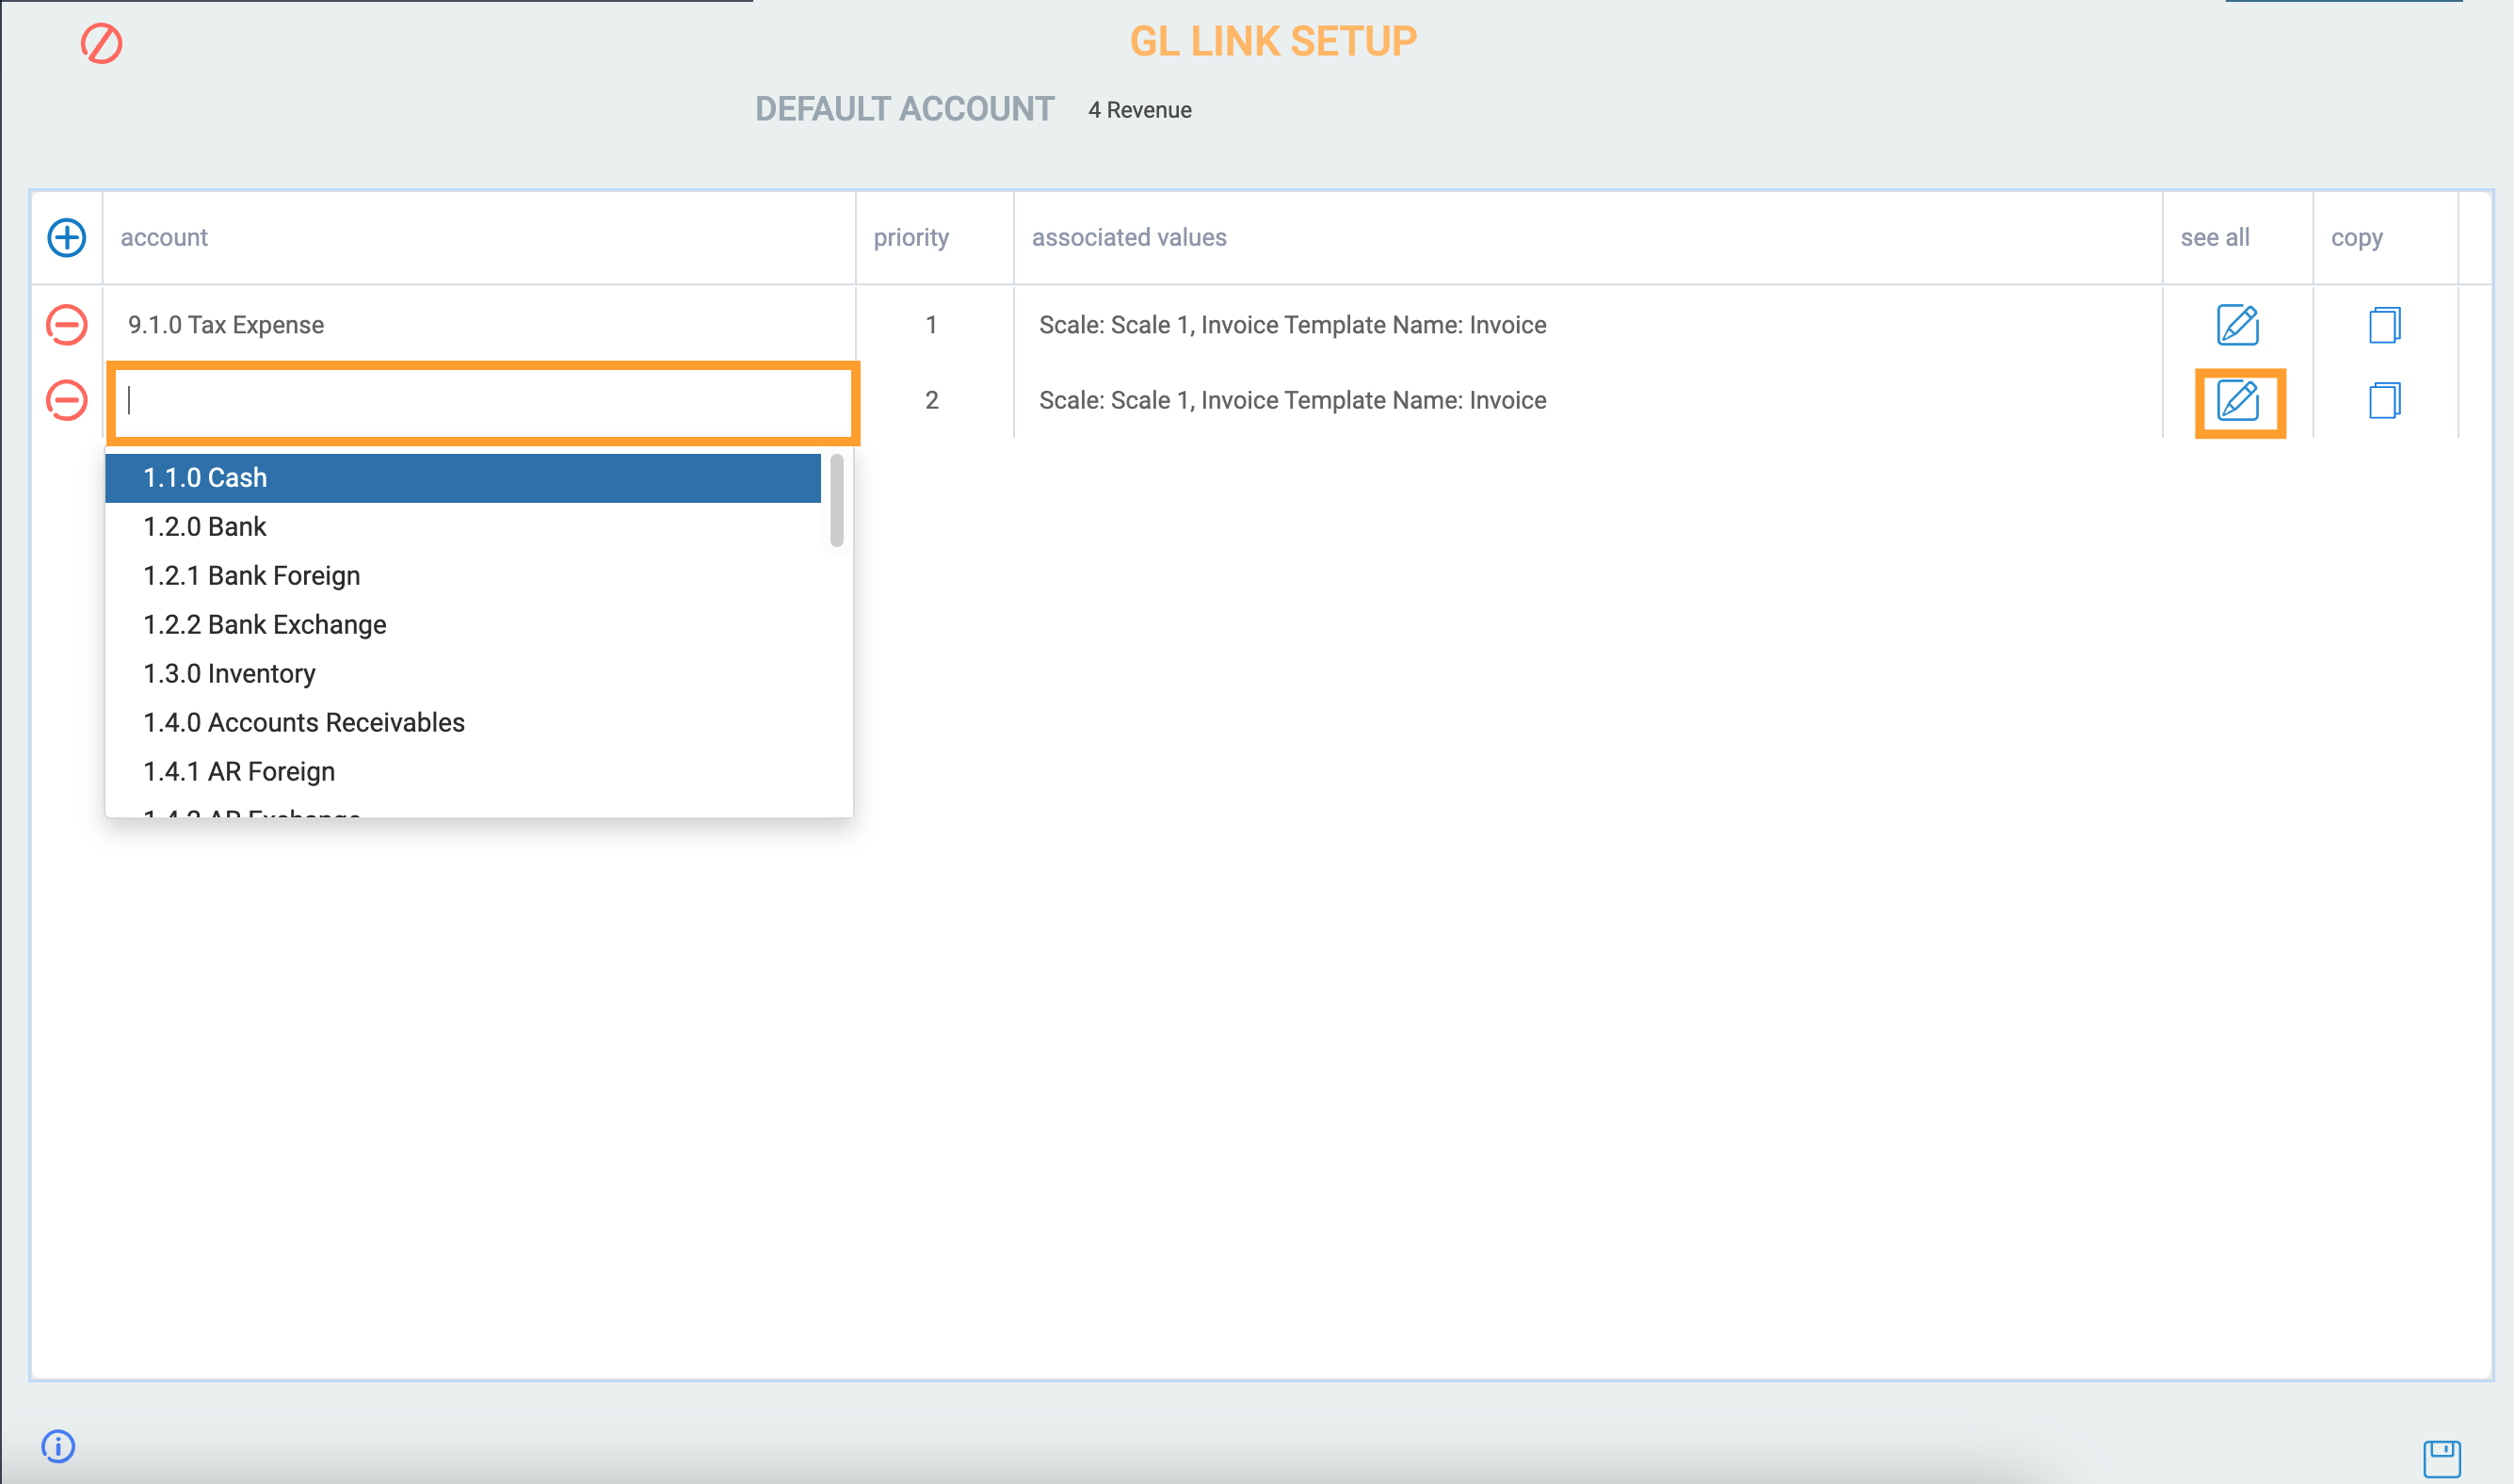
When you are ready to save your changes, click the save button at the bottom right.

What's Next?
Now that you have learned how to set up your GL, you can take a look at a few other financial processes that Paragon can assist with:
![paragon logo-1.png]](https://support.paragon-erp.com/hs-fs/hubfs/paragon%20logo-1.png?height=50&name=paragon%20logo-1.png)