![paragon logo-1.png]](https://support.paragon-erp.com/hs-fs/hubfs/paragon%20logo-1.png?width=240&height=75&name=paragon%20logo-1.png)
Introduction
Note that attributes must be setup before your transactions/reference screens.
Navigate to the screen setup
Select the module you'd like to set up
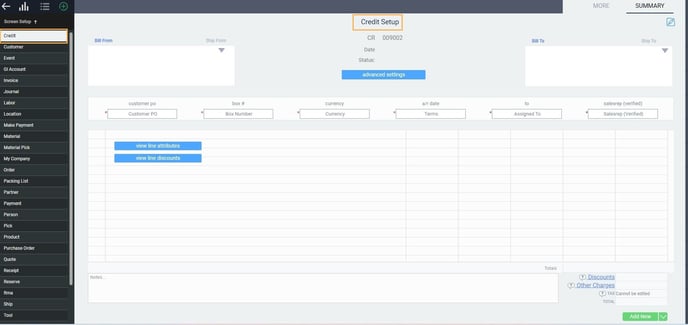
Edit the transaction ID
- The prefix can be an alphanumeric value that will appear at the beginning of every transaction. The default prefix for credit is CR.
- The second part of the transaction ID is a number. This number increments by 1 for every transaction of the same type that is created. On the screen setup you can decide the number at which the sequencing will begin. For example, credits can start at number 100000 (100001, 100002, 100003...), and invoices can start at number 300000 (300001, 300002, 300003...).
Only a 6 character number will be accepted in these forms. If the numeric value is not being accepted, the value will appear in red. To prevent this, make sure all numeric values are 6 characters long by manually entering 0's in front of the value. By example, 300 would become 000300.
You cannot enter in a lower number than what is already there (i.e. you cannot start your transaction numbering from 1 again after transactions have already been created)
Edit business terms
Make business terms mandatory, if applicable
- A red asterisk denotes that a field is mandatory, meaning that a transaction cannot be created without entering a value.
- A grey asterisk indicates that the field is not mandatory and the transaction can be created even if it is left blank.
Edit tax security
You may want to check with your accounting department before changing the tax setting to can be edited.
Edit line attribute
- Assign the order of the attributes: This is done by assigning numbers, starting at 1, into the ordinal column.
- Make the attribute mandatory: If you check off this box, the attribute must be filled in before the reference/transaction is issued.
- Allow the attribute to be added to the module more than once: This is useful for information like phone numbers and email addresses.
- Make the attribute always show on the screen: When you are creating a new reference, you are given a list of default attributes to fill in based on the setup you're doing here. If you want an attribute to always be part of this default list, check off always show. If you do not check this off, the attribute will be found in the blue plus button of the reference screen
Edit line discount
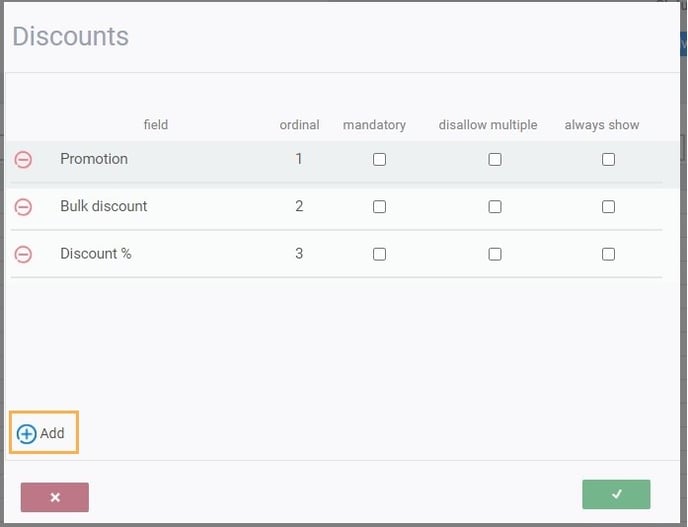
- Assign the order of the attributes: This is done by assigning numbers, starting at 1, into the ordinal column.
- Make the attribute mandatory: If you check off this box, the attribute must be filled in before the reference/transaction is issued.
- Allow the attribute to be added to the module more than once: This is useful for information like phone numbers and email addresses.
- Make the attribute always show on the screen: When you are creating a new reference, you are given a list of default attributes to fill in based on the setup you're doing here. If you want an attribute to always be part of this default list, check off always show. If you do not check this off, the attribute will be found in the blue plus button of the reference screen
Check out the more tab
- Assign the order of the attributes: This is done by assigning numbers, starting at 1, into the ordinal column.
- Make the attribute mandatory: If you check off this box, the attribute must be filled in before the reference/transaction is issued.
- Allow the attribute to be added to the module more than once: This is useful for information like phone numbers and email addresses.
- Make the attribute always show on the screen: When you are creating a new reference, you are given a list of default attributes to fill in based on the setup you're doing here. If you want an attribute to always be part of this default list, check off always show. If you do not check this off, the attribute will be found in the blue plus button of the reference screen.
Locking feature
Save and logout
How to use the locking / unlocking feature
Note that permissions are set per module, and not Paragon as a whole. In the example below, we are showing the permissions for the credit module.
If your user access permission is set to Create for that module
Bulk Lock / Unlock
The following bulk action feature can only be used if you have activated action button rules with the help of our support team.
For now, there is no way to know which transaction is locked or unlocked from the list view. You would have to make note of that.
Edit transaction creation workflow
Enabling custom BoM
What is a custom BoM?
For example, your product has a standard BoM which was created when you initially set up your product. Sometimes, a customer would like a specific modification on that product. So, Paragon allows you to customize that product's BoM on the transaction itself instead of changing the product's BoM. A product BoM is the breakdown of the various components that make up that product. This is usually used in manufacturing or assembly.
Remove lines with 0 quantities on issue of transactions
By default, all modules are set to NEVER