![paragon logo-1.png]](https://support.paragon-erp.com/hs-fs/hubfs/paragon%20logo-1.png?width=240&height=75&name=paragon%20logo-1.png)
Introduction
Here, we'll walk you through how to unpack items directly from a receipt. This is another step in ParagonERP's boxing function. It allows you to unpack items from the receipt and flag them for movement to specific valid locations. It will also produce barcoded labels to place on the boxes for identification when they are moved to the locations.
If you are not familiar with the format of transaction screens, get yourself oriented on transaction screens here.
Open the receive module
Select the receive module from the right hand navigation bar or from the more menu.


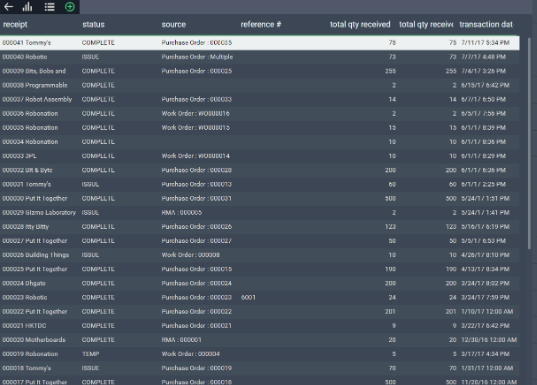
Select your receipt
Your list of receipts will be displayed. Select the receipt you would like to unpack by double clicking on it or by clicking the list view button at the top left side of the screen.

The receive transaction screen will automatically appear after selecting your receipt.

Click the action button at the bottom right of the screen and the unpack option will be available.

Create your unpack list
This screen will automatically appear after selecting the unpack function.

Click on the add button to view which products you want to unpack and mark for specific locations in your warehouse.
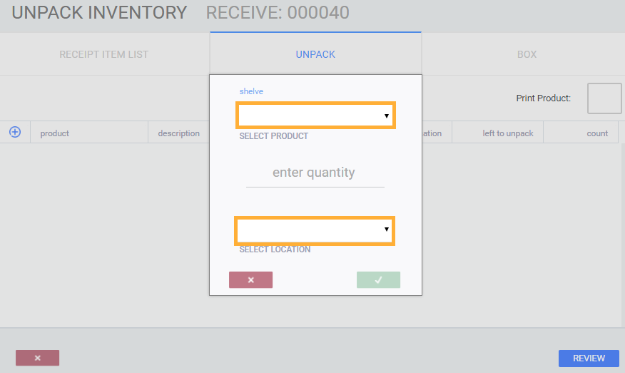
From a drop down menu, products from the receipt can be selected.
If the receipt contains different products or multiple orders, each product can be individually selected from the drop down and quantities can be manually entered.
Selected products can then be set to be stored in valid locations.
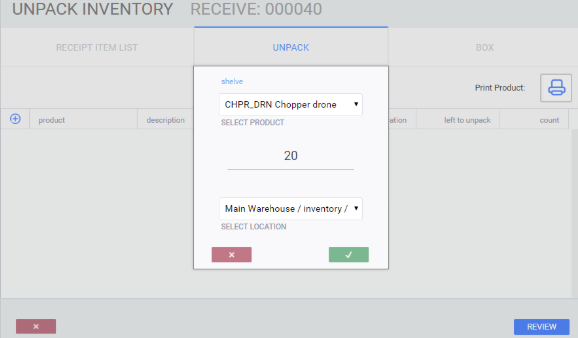
Click on the check mark on the right to proceed or cancel by clicking on the red X to the left.
After proceeding, more products, quantities and locations can be added to your unpack inventory list.
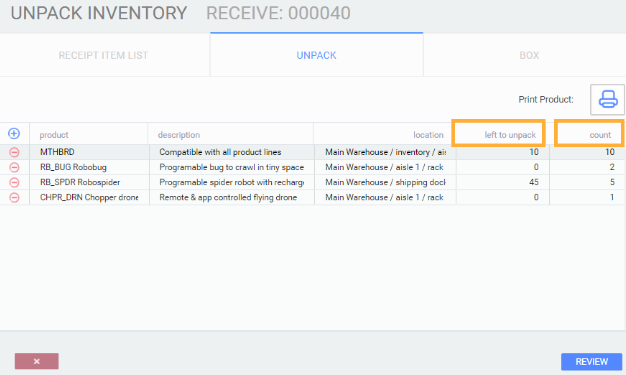
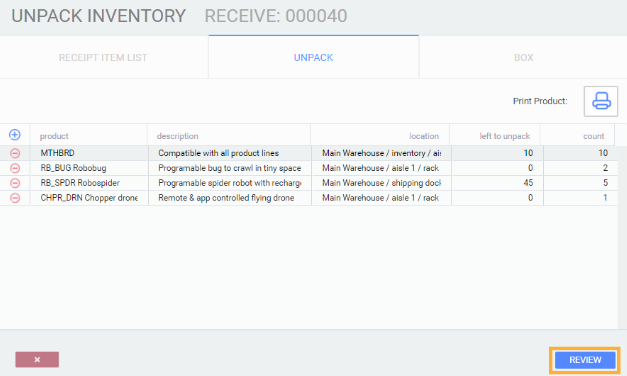
After adding all products that you want to be unpacked, the product quantities left to unpack are listed, along with the count of the products already set to be unpacked.
Review and print item label
To review, click on the review button.
This screen will automatically appear.
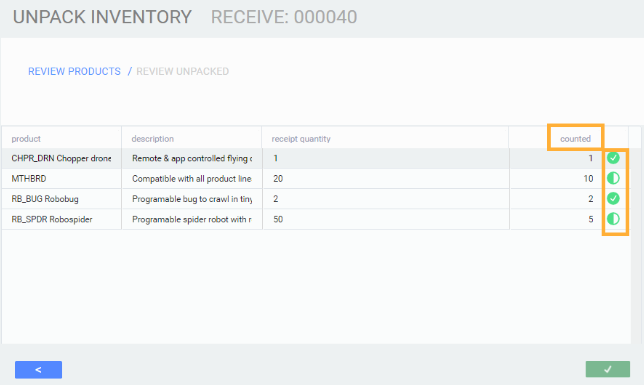
The items unpacked are listed as counted. If the full order of the chosen product has been unpacked, a check mark will appear at the end of the product line. If the order has only been partially unpacked, with products left to still be unpacked, a half filled green icon will appear on each line.
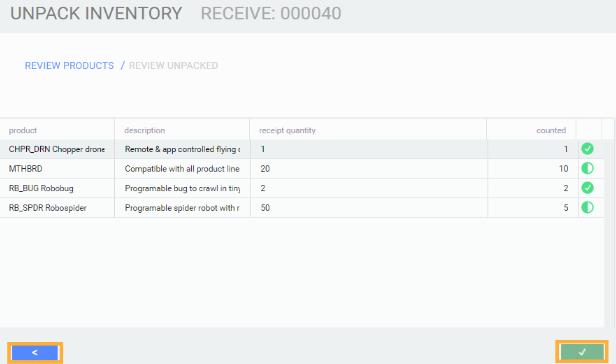
If the information is correct, exit from the unpack screen and return to the receipt screen by clicking on the green check mark.
To return to the unpack inventory screen, click on the blue arrow on the left.
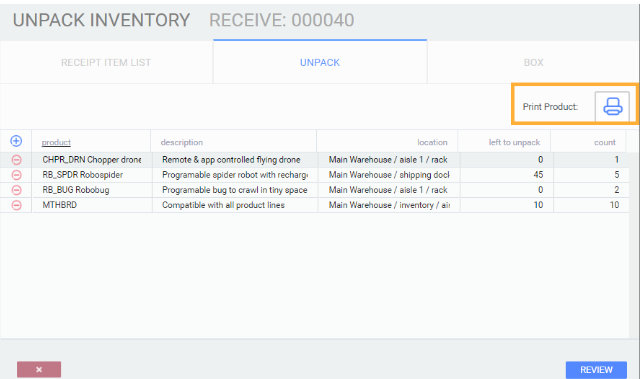
The unpack inventory screen will appear, with the option to print item labels from the product unpacking list.
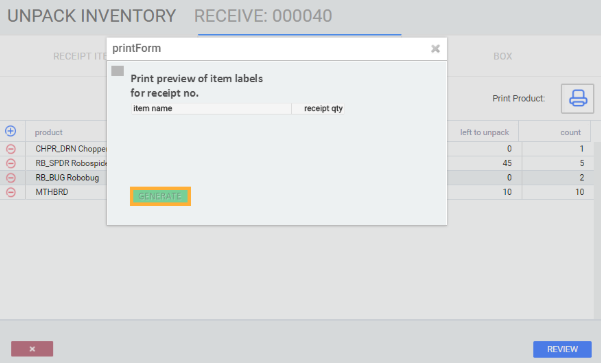
An unpack inventory with item labels can be previewed and printed by clicking on generate.
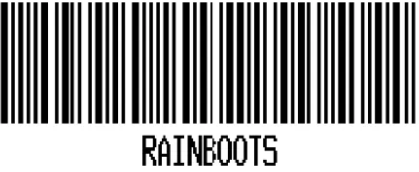
You may need to label each item you've unpacked with a bar-coded version of its unique identifier (for example, SKU or UPC). An example of a printed item label would look like the following:
What's next?
Maybe you would like more information on our boxing function. Check out these articles: