Using the Bulk Reservation Function
Introduction
The Bulk Reservation function allows you to reserve inventory in bulk by selecting multiple orders that you want to create reservations for. In this function, you can filter through your issued orders by an item's style/color, as well as an optional attribute of your choice.
Each business can have different needs when reserving in bulk. In this article, we are using a subdivision attribute to explain the functionality of the Bulk Reservation feature in Paragon. However, you can configure a list attribute and its associations to suit your business needs. For example, you could use a list of product brands, or order types to help you filter your orders.
Setup
![]() Note that this function only works if pivot view is configured
Note that this function only works if pivot view is configured
For the Bulk Reservations function to work, you will need to make sure certain things are configured correctly.
Click on settings in the top right corner and then click on My Company.

Click on the edit button.

From there, you will be able to select a list attribute by which you can filter your bulk reservations (this attribute must be a list to choose from type attribute). In this example, we will be using subdivision.

Click on save. You will need to log out and log back into Paragon before the changes take effect.

You can also set the module configuration to be empty. This will mean that when you use the bulk reservation function, you will only be able to filter by style/color in the first step of the workflow.
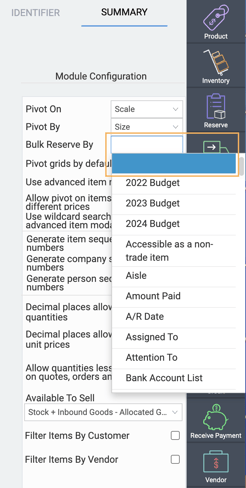
If you want to filter using a different drop-down attribute than subdivision, you can select another one. You may need to create a new attribute to suit your needs.
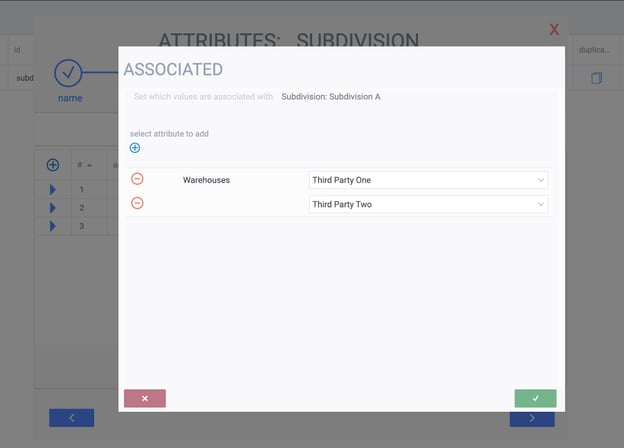
The next step is to configure which warehouses each subdivision is allowed to reserve stock from. This is done using attribute associations.
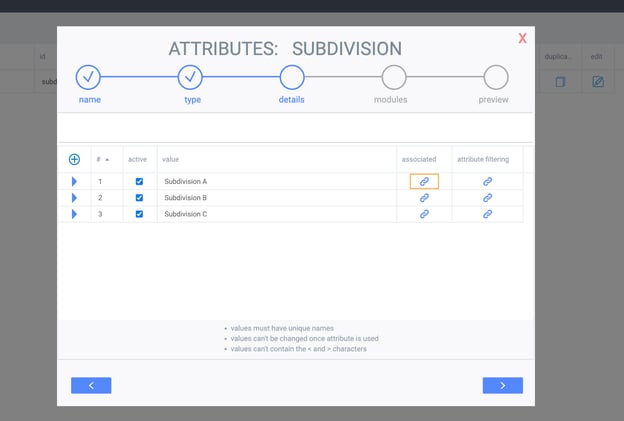
In attribute setup, associate each subdivision with at least one warehouse. This tells Paragon how much of an item's stock is available to sell per subdivision, which will be needed later.
Navigating the module
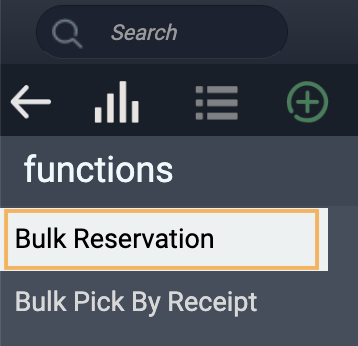
From the more button anywhere in Paragon, select the functions module.

From there you can click on the bulk reservation tab on the top left to begin.
Bulk reservation screen
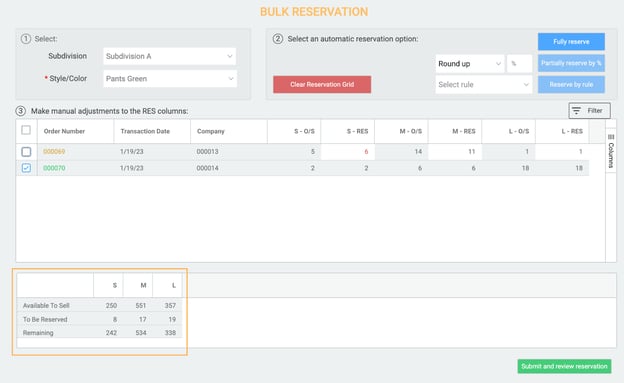
There are 3 main sections on this screen and each is labeled with a number to help guide you through the most efficient workflow for using this feature.
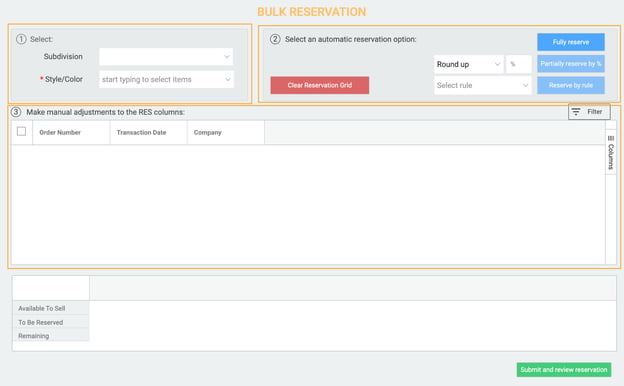
Section 1 - Fill in the required information
The first field is not mandatory. If you left the Bulk Reserve By attribute blank in MyCompany, the field will be empty.
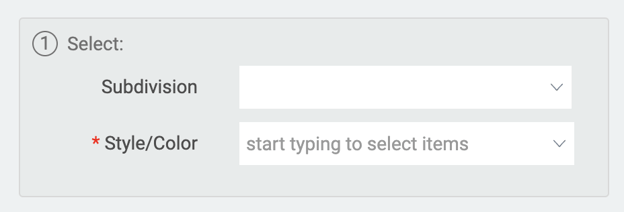
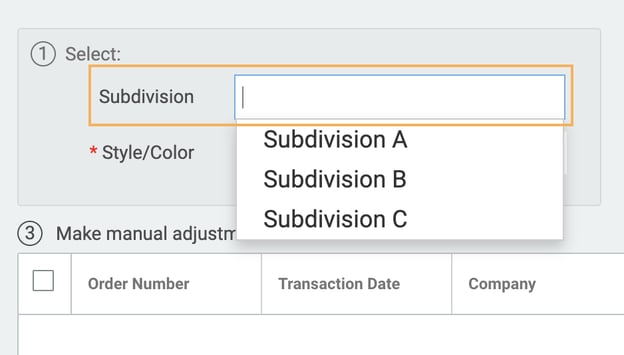
Subdivision - (This will be whichever attribute you configured earlier on in My Company.) This will list all active subdivisions that you have set in attribute setup. Click on subdivision to see a list of options.
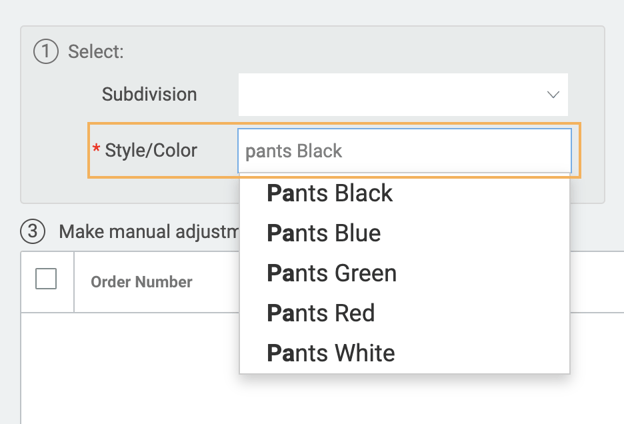
Style/Color - This will list all products by style and color. Start typing in the style/color field to see a list of items that can be reserved for specified locations.
Section 2 - Select an automatic reservation option
This section allows you to fill the sales order grid automatically based on certain criteria rather than manually filling one cell at a time. There are three options for this automation:
- Fully reserve - Selecting this will fill all of the RES columns with the full outstanding quantity if there is enough stock available to sell for that entire order line. Use this option when you want to reserve all units for the selected orders.
- Partially reserve by % - This option will allow you to enter a percentage to apply to all RES columns for the selected orders. To enable this button, enter a percentage in the adjacent field. (You can also decide to have the units round up or down if the percentage calculation does not come out to a whole number.)
- Reserve by rule - This option will allow you to select any predetermined rules that you may have to calculate the number of units to be reserved for the selected orders. For more information about rules, please contact us at support@paragon-erp.com.

Section 3 - Make manual adjustments to the RES columns
Section 3 will list currently open sales orders that match your section 1 selections in a grid format.

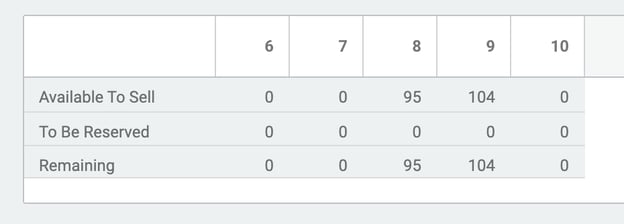
As you edit the reservation values in each order, the small grid at the bottom of the screen shows the following information for the selected style/color (by size):
- available to sell units (summed across all warehouses associated with the selected subdivision)
- the number of units to be reserved (from the RES columns filled in the grid above)
- any units still remaining (not yet reserved)
Filtering your orders
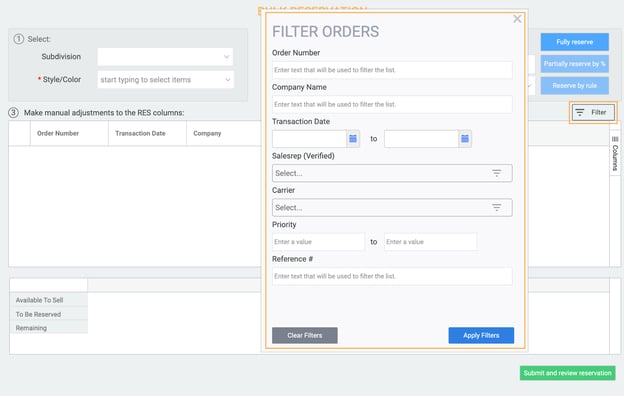
If needed, you can filter the orders in the list by any attribute that has been configured on the order module list view. For example, this can be used to make allocations for your highest priority orders and most loyal customers first.
To use this feature, click the filter button at the top-right of the order grid. You will see a list of possible filtering attributes that you can use.
Creating reservations
Now that you have an understanding of each option within the bulk reservation feature, it's time to use it to create some reservations. Here's a step-by-step walkthrough of the process.
Select subdivision and style/color
Using section 1 of the screen, select a subdivision from the drop-down. Once that is selected, you can begin typing to select which style/color you wish to reserve for your sales orders.


As soon as both of those criteria have been chosen, the order grid will be filled with any order lines that match your selections.

Now that the grid has been filled with order lines, you can fill the required units by order and size by either manually editing the number of units in each RES column, or using section 3 of the screen to use automatic options.
Manual edits
To fill the RES columns manually, simply click into a size column and type the number of units you would like to reserve for that order.
When filling in values:
- If the number of units you fill is more than what was ordered, the units will become red in color.
- If the number of units entered in the RES columns is equal to or less than the ordered quantity by size, the units will remain the same color as the rest of the line - shown below.

Note that if the order line has been reserved in full, the order number will turn green. If the order is only partially reserved, the order number will turn orange.

Furthermore, the mini-grid below at the bottom-left will reflect the number of units that have been reserved with respect to the number of units still available to sell for the warehouses associated to the selected subdivision.
Once you are satisfied with the reserved units by order/style/color/size, you can click on the submit and review reservation button in the bottom right corner.
A modal will appear allowing you to prioritize which warehouse to reserve the items from. Use the ordinal column to choose the order of warehouse priority. If the reservation quantity exceeds the ATS (available to sell) in the first priority warehouse, then it will automatically fill the rest of the reservation from the next warehouse. If you don't want to reserve from a specific warehouse, you can delete its line ordinal value to omit it.
Accepting the modal will create 1 reservation for the style/color per warehouse. This will increase the allocated quantity and therefore reduce the ATS for that style/color so that it cannot be over-allocated. The reservation number will be added as an attribute on the order lines that it was created for. This will make it clear which orders have already been reserved already when pick tickets are created later on.

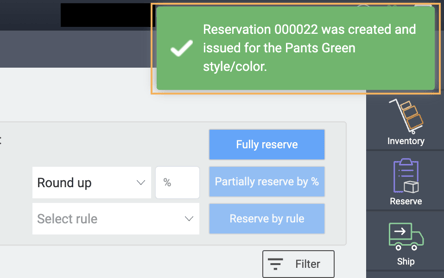
If you accept and your reservation is created, you will be shown a notification with the reservation number.
If you did not fill in any of the RES columns or use the automatic reservation options in section 2, you will see a notification telling you that no reservations could be made.

What's next?
Now that you have created your bulk reservation, you can either carry on making more reservations for different items or navigate to the reservation that was made.
As mentioned earlier, reservations are used to reserve stock for certain orders. Once you are ready to start the shipping process, you can create pick tickets directly from the reservations.
![paragon logo-1.png]](https://support.paragon-erp.com/hs-fs/hubfs/paragon%20logo-1.png?height=50&name=paragon%20logo-1.png)