What is pivot view, and how to enable it
Introduction
Products in Paragon are set up by SKU or, unique ID. This means that there is a different product record for every style, color and size. That, in turn, means that a new product needs to be added to a transaction for every size of a style/color/scale that is required. If you deal with large size ranges and many scales, this results in many lines on a transaction.

Pivot view allows you to combine the multiple lines into one, with the size buckets displayed horizontally instead of line by line. This is commonly referred to as an apparel grid. Your records will combine into one line for each product and the scale will be displayed across the top of the transaction grid.

In this example, all the t-shirts are on one line and the size scale, small to large, is displayed horizontally across the top of the transaction grid.
Enabling pivot view
Set up sizes - It is important to ensure the attribute size is configured properly in your attribute set up.
Set up scales - In order for pivot to work, scales must be set up specifically to pivot view.
Set up attributes for pivot view
If you already have created the size and scale attributes, use the attribute filtering option to determine which size links with which scale.
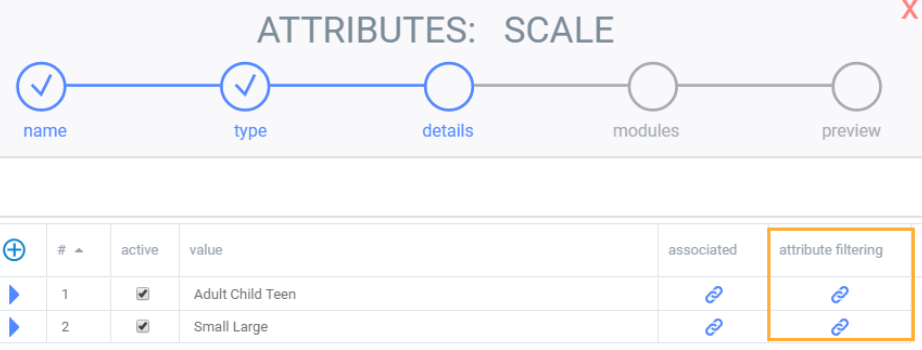
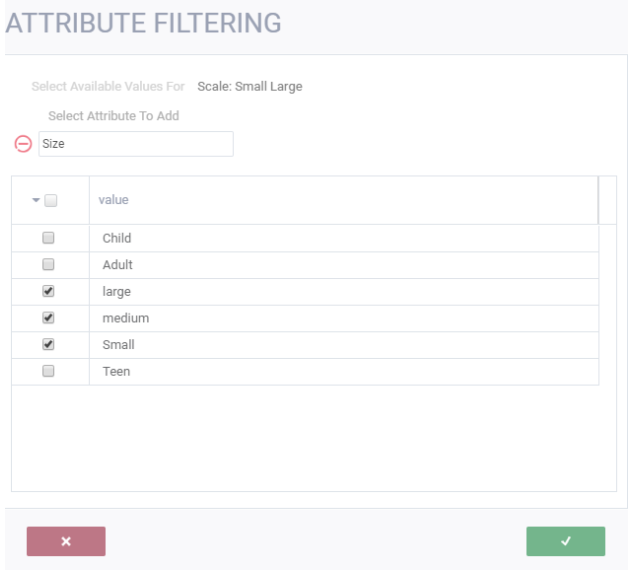
Sizes and scale attributes must exist for you to use the pivot view option. Create the appropriate attributes then learn how to set up scales for pivot view.
Activate pivots in my company
Click on the settings button.
![]()
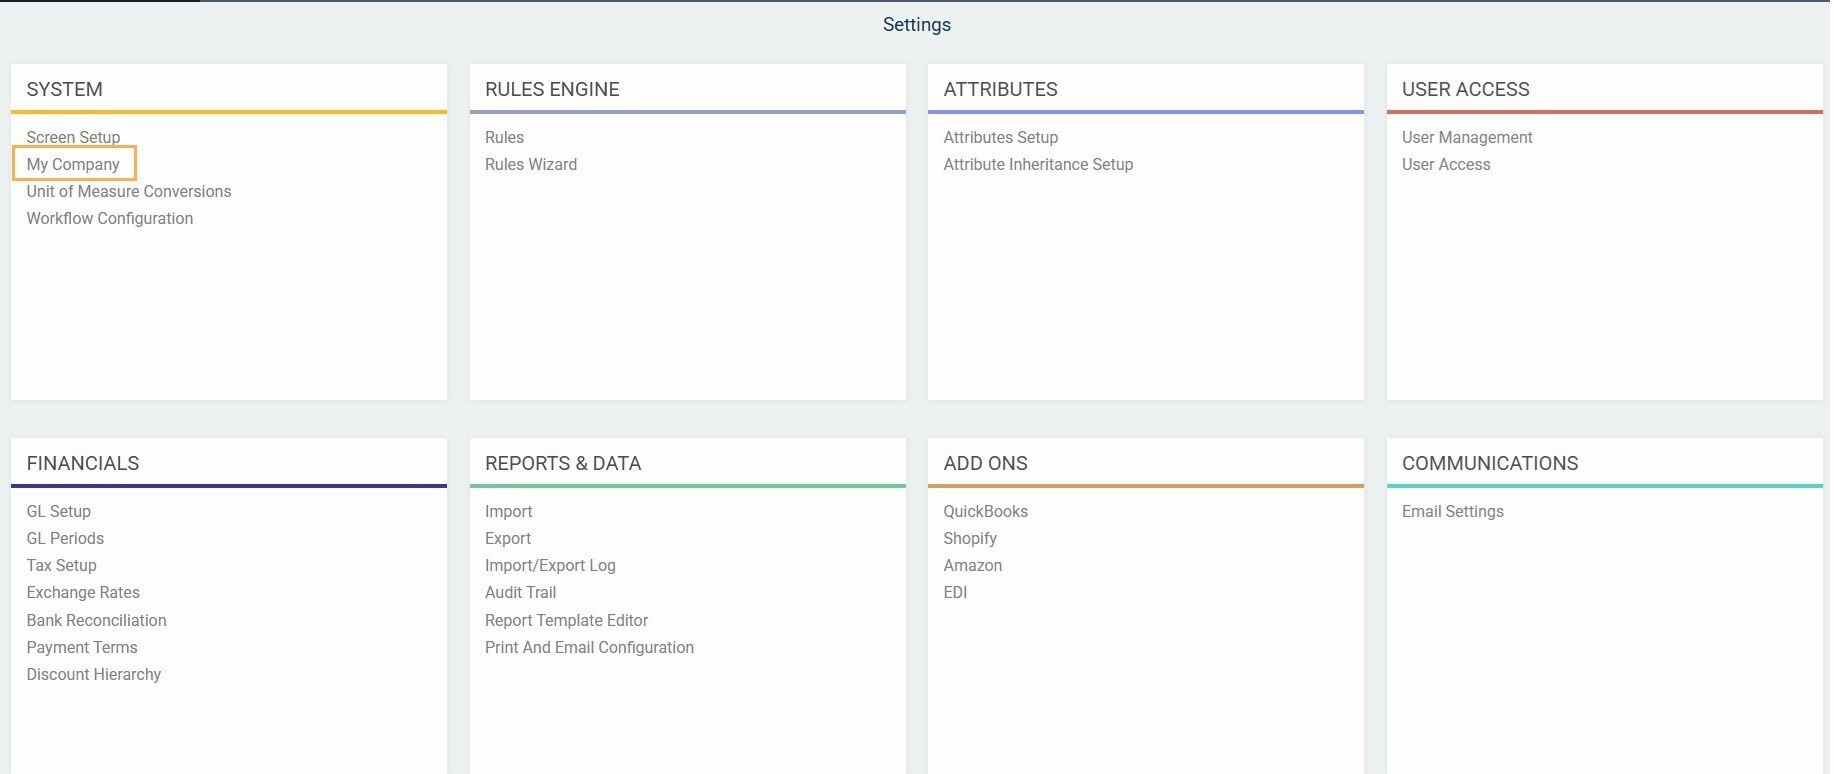
Click my company on the system card.

From the my company modal, click the edit button at the top right-hand corner to make changes.

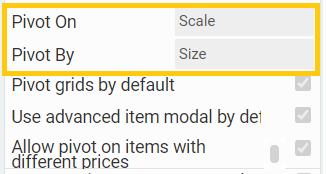
Under module configuration, you will see various pivot options. Set the pivot on and pivot by attributes.

Click the save button. You will be asked to log out of and back into Paragon to save your changes.

Set the identifiers in my company
Changing the identifiers settings in Paragon has system-wide ramifications and changes to this feature should not be made lightly. Please contact us at support@paragon-erp.com for more information.
Click on the settings button.
![]()
Click my company on the system card.

Go to the identifier tab
![]()
Click the edit button

Delete the item record
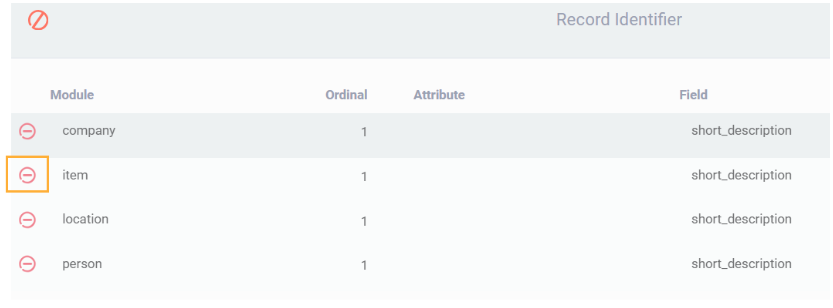
Add 3 new item lines - one for each style, color, and size
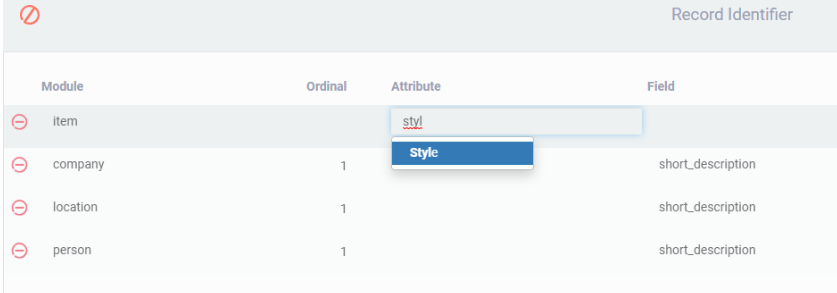
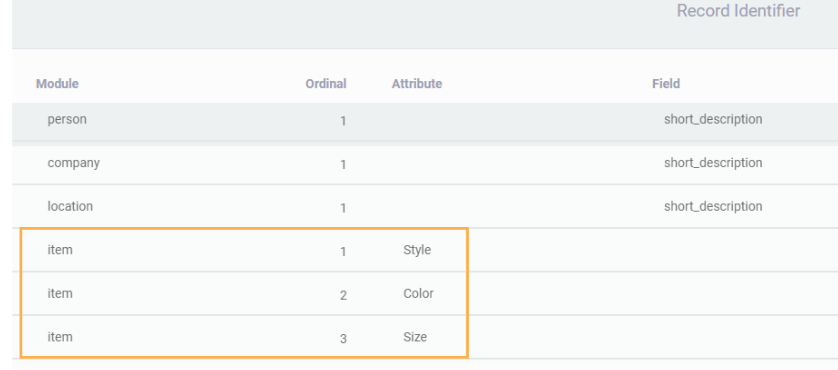
Make sure the last attribute matches the pivot attributes in the my company summary page. In our example, we want to pivot by size, so the ordinal for size must be set to 3.
Click the save button. You will be asked to log out of and back into Paragon to save your changes.
Return to the identifier tab.
![]()
Select any item attribute.
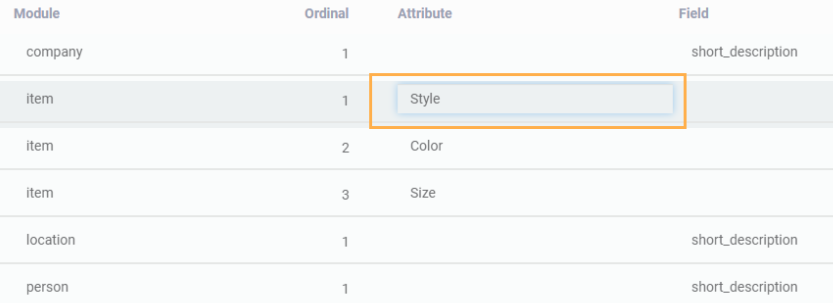
Click the rebuild record identifier: item button.

Once the process is finished, the message rebuild complete will be displayed:

Set up the product attributes
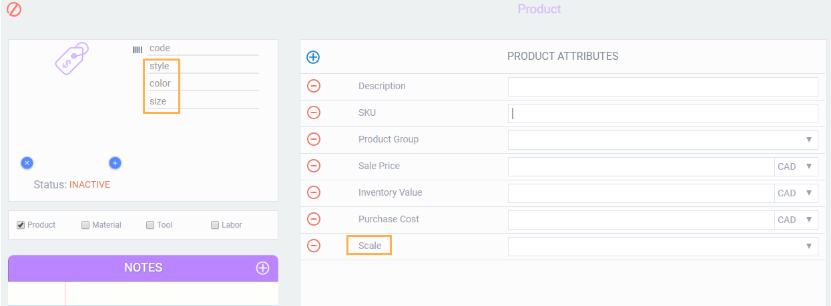
Fill in the attributes chosen in the identifier tab, as well as the attribute that you want to pivot on.
In this example, we have set style, color, size and scale.
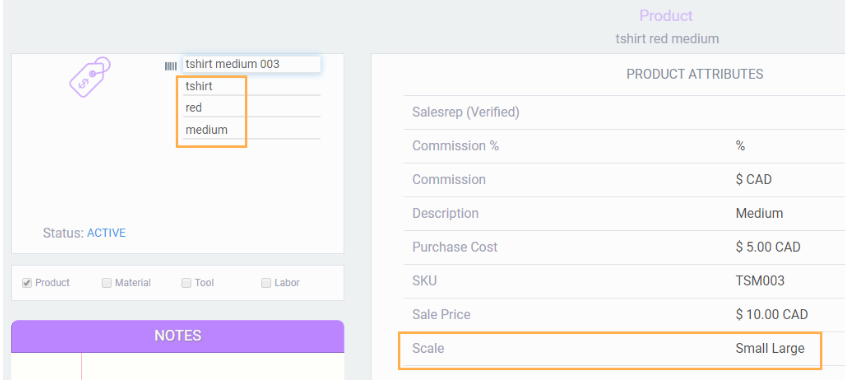
Please note that the lines on the transaction will only combine together if they are for the same style, color, scale, and have the same sales price.
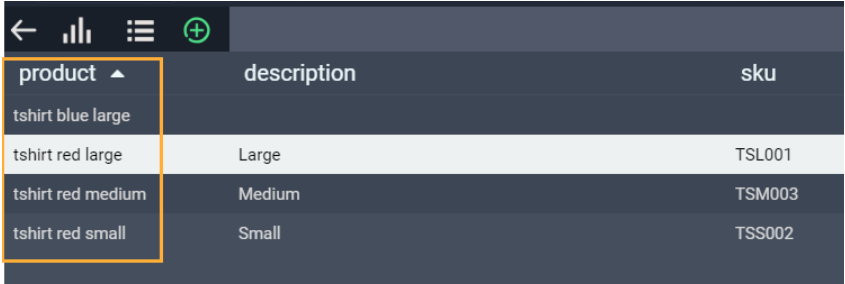
The first column of the list view for the product module is based on the identifiers selected in my company:
Activate pivot view in a transaction
Entering transactions can be a long and arduous process, made only more complicated as more and more lines are added to the transaction. For customers that use pivots, the lines will be grouped by variety and in-group sorting will be done by the ordinal of the pivot by attribute in my company settings.
To activate pivot view, click the pivot button on the transaction grid.

If you identify your products by style/color/size and have your pivots set to scale and size, your size runs will stay grouped together and sorted within the group by the size ordinal. If you manually edit a line number, the entire product variety will move together and be renumbered accordingly.
![]()
Sorting pivoted lines
Paragon gives you the ability to sort your pivoted lines in a transaction alphanumerically or by ordinal. When sorted alphanumerically, for example, products of the same style/color can be quickly viewed together in a transaction. However, sorting pivot view by ordinal can be particularly useful when items were purposefully entered in a specific sequence, allowing you to view the transaction lines in the same order in which they were originally entered.
Changes to this setting are also implemented when printing transactions in pivoted templates.

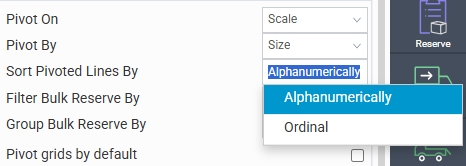
Changes to this setting will be implemented to all users.
What happens if I change the price for one record of a product?
The previous examples showed the pivot view on multiple lines of a product that all had the same price. However, what happens if you change the price of one line? Two options are available:
- Combine the lines and leave the price blank
- Do not combine the lines
To select which behavior you wish in your system, head over to the settings page, and click on my company. Then, click the edit button at the top right hand corner.

Under module configuration, you'll find the allow pivot on items with different prices option.

If the box is unchecked, the lines with different prices won't be combined.
For example, let's take this product that initially had the same price for all sizes.

Let's say we change the price for the x-small item. To do this, switch back to non-pivot mode, and edit the price.
Then, switch back again to pivot mode. Only the lines with same prices were combined.

However, if you decide to check the option in my company, the lines that contain different prices will be combined. However, no price will show up on that line.

Using pivot view in transactions
In this section, we will show you the easiest way to find and select your products so that the pivot view of all the sizes can be accessed.
An existing transaction will automatically show you the transaction line with sizes displayed horizontally.
Click on the pivot button in the middle-left of the screen. This will pivot the transaction line showing the scale vertically or horizontally.

If you just want to view the product using the horizontal or vertical vantage point, just click on the pivot button. However, if you want to make changes, you must be in edit mode.
What's next?
Now that you've enabled pivot view, you can print the pivoted view by using our report template editor.
![paragon logo-1.png]](https://support.paragon-erp.com/hs-fs/hubfs/paragon%20logo-1.png?height=50&name=paragon%20logo-1.png)
