![paragon logo-1.png]](https://support.paragon-erp.com/hs-fs/hubfs/paragon%20logo-1.png?width=240&height=75&name=paragon%20logo-1.png)
Introduction
In Paragon, you can import and export files containing reference items or transactions. In this article, we will show you how to export, edit, and re-import inventory, thereby allowing you to complete mass adjustments.
Settings
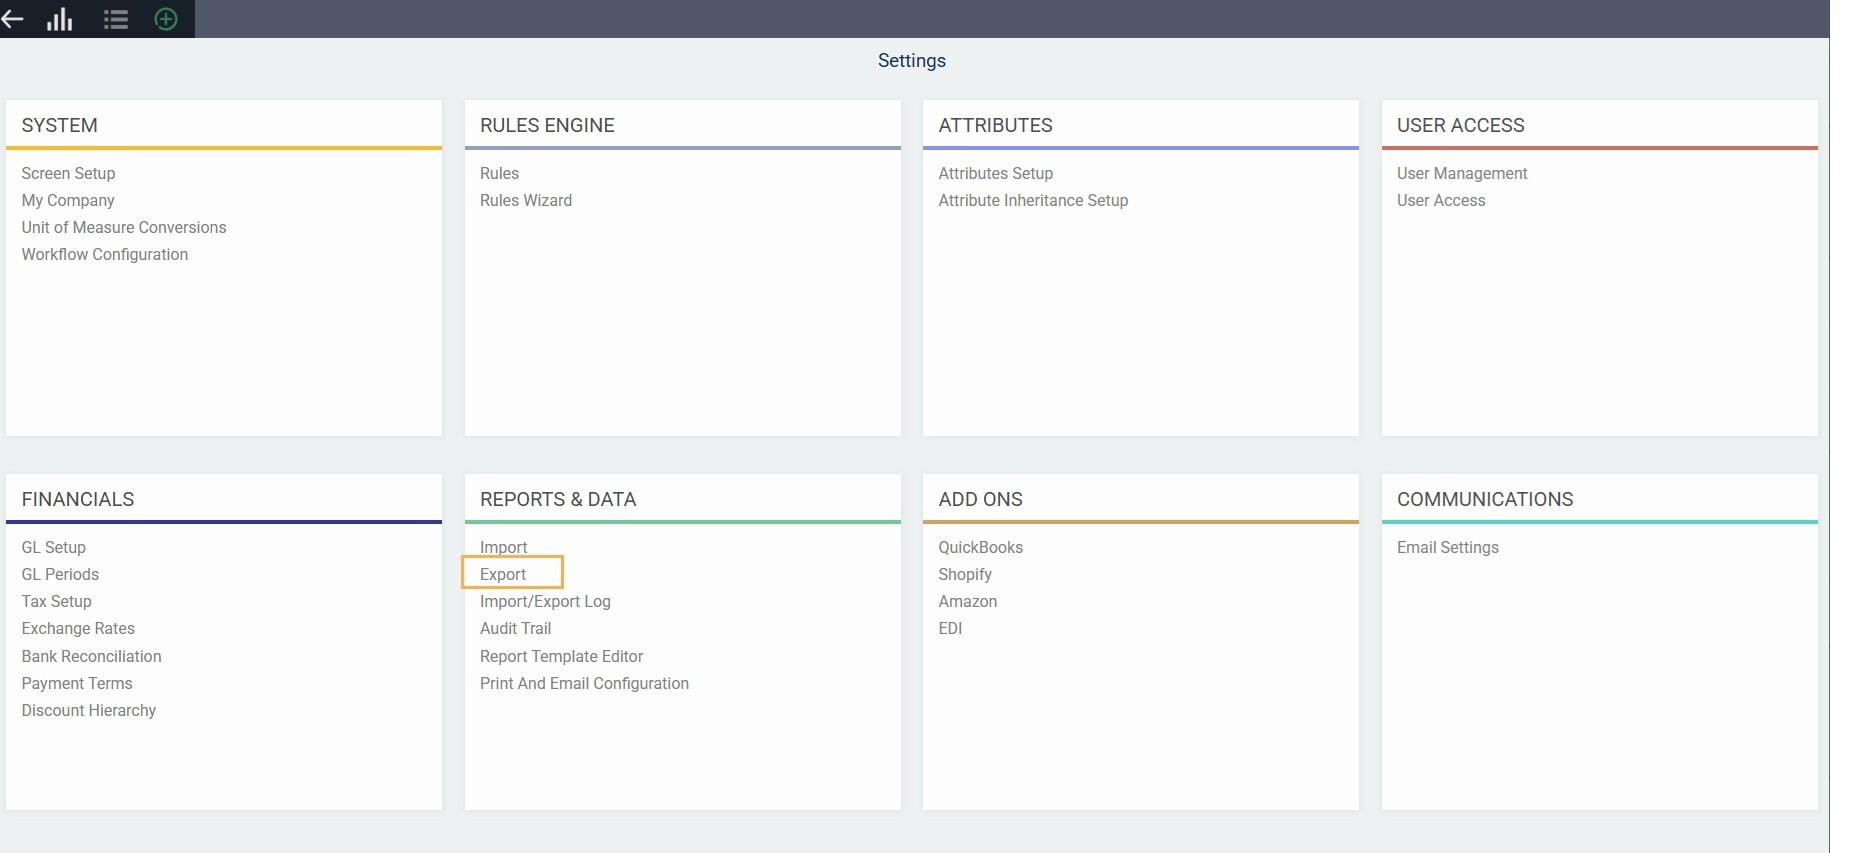
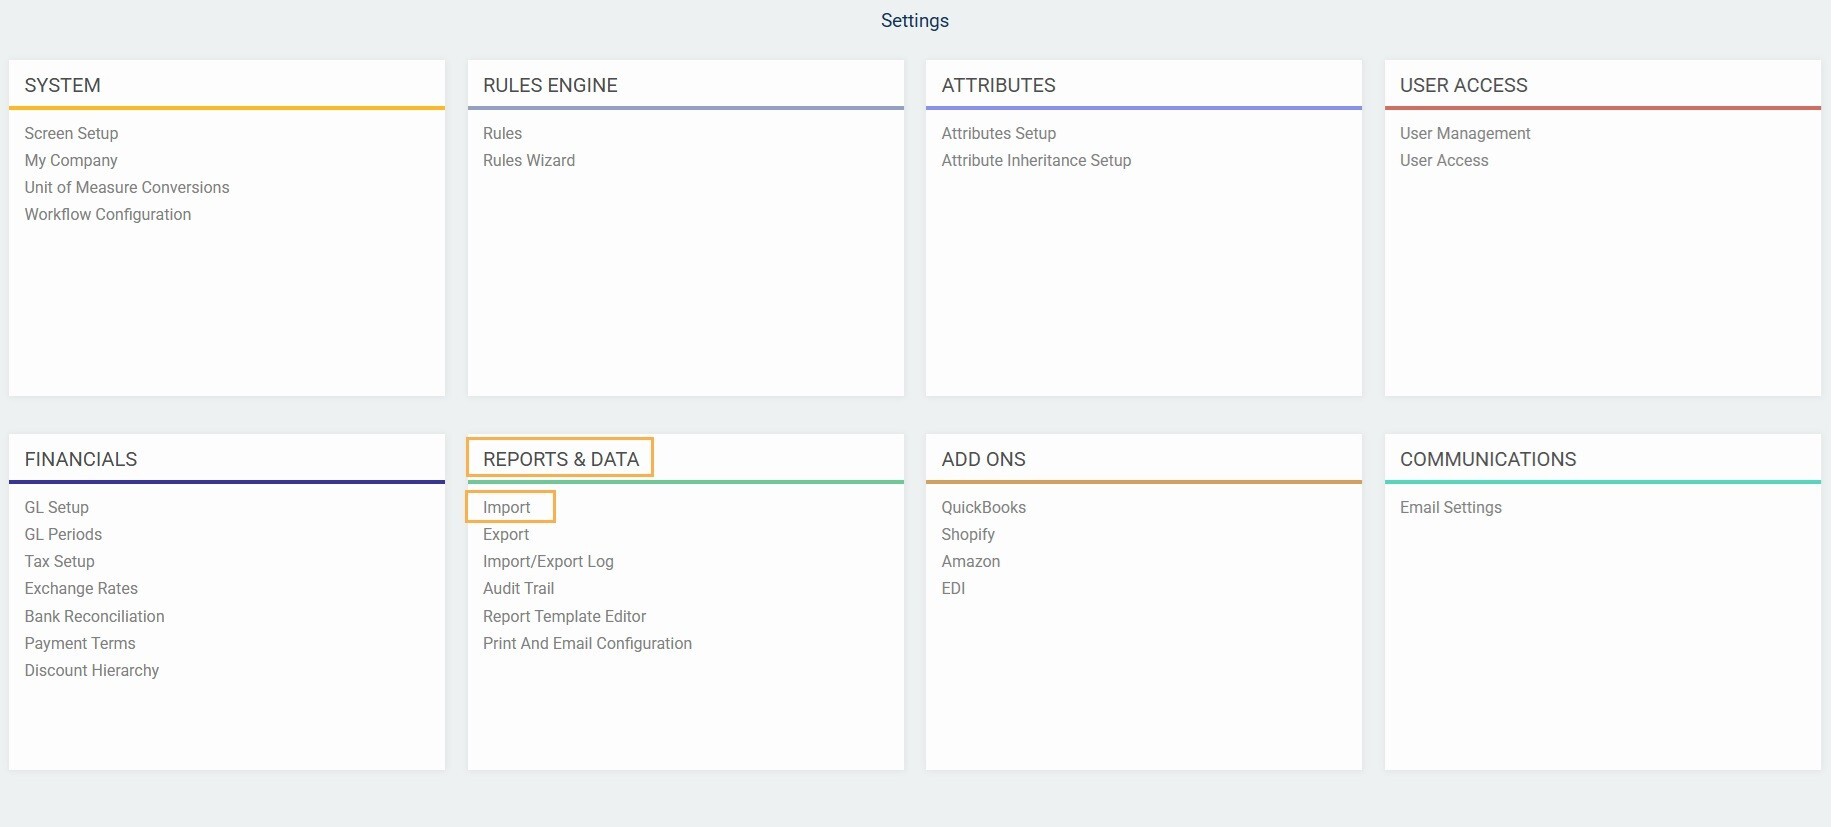
From the home screen, click the settings button at the top right corner.
Now, from the reports and data card, click export.
Export inventory
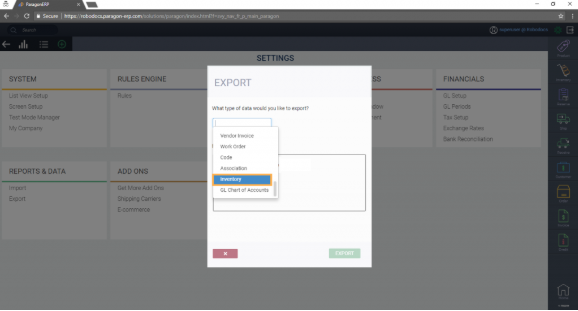
A modal will pop up and you'll be prompted to choose what you would like to export. Here, we chose inventory. Once selected, click the export button. Inventory will be exported by warehouse location.
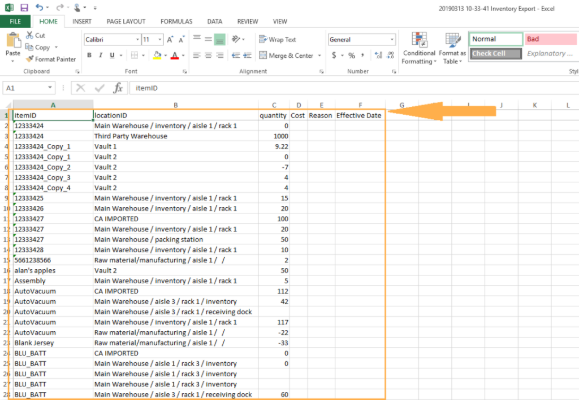
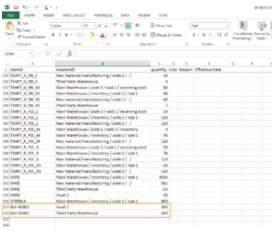
You will be notified once your export is complete, and you can now open the Excel file relating to your inventory in Paragon. The Excel file will display column titles such as ItemID, LocationID, quantity, cost, reason and EffectiveDate.
Note that the inventory is shown by location. This means that the Excel file displays what is included in the history tab of the inventory module in Paragon. If you have a product with no inventory, and no adjustments made, the product will not show up on the Excel sheet.
Adjust inventory quantity, cost, reason and effective date
From the Excel file, you can edit the quantity of inventory, the cost per unit, and/or enter a reason code. Note that reason codes must match exactly to the ones you have already set up in your Paragon system. You can also enter a date in the effective date column if the date of the actual stock change is not the date that you are importing the inventory file into Paragon.
In this example, we are making an adjustment to a product that had no inventory (Item BLK-ROBO). We are therefore adding the product to the excel sheet, entering the location (warehouse) in which we would like the inventory to show, and adjusting the quantity. You can also add a unit cost, and reason code if need be.
It's important to note that the column headings must remain exactly the same when re-importing your inventory data.
Import Inventory
Click the settings button at the top right hand of the screen.

From the settings screen, click import from the reports & data card.
The import modal with pop up and you will be prompted to choose what you would like to import. Here, we will choose inventory.

Choose your automatic journal entry creation method
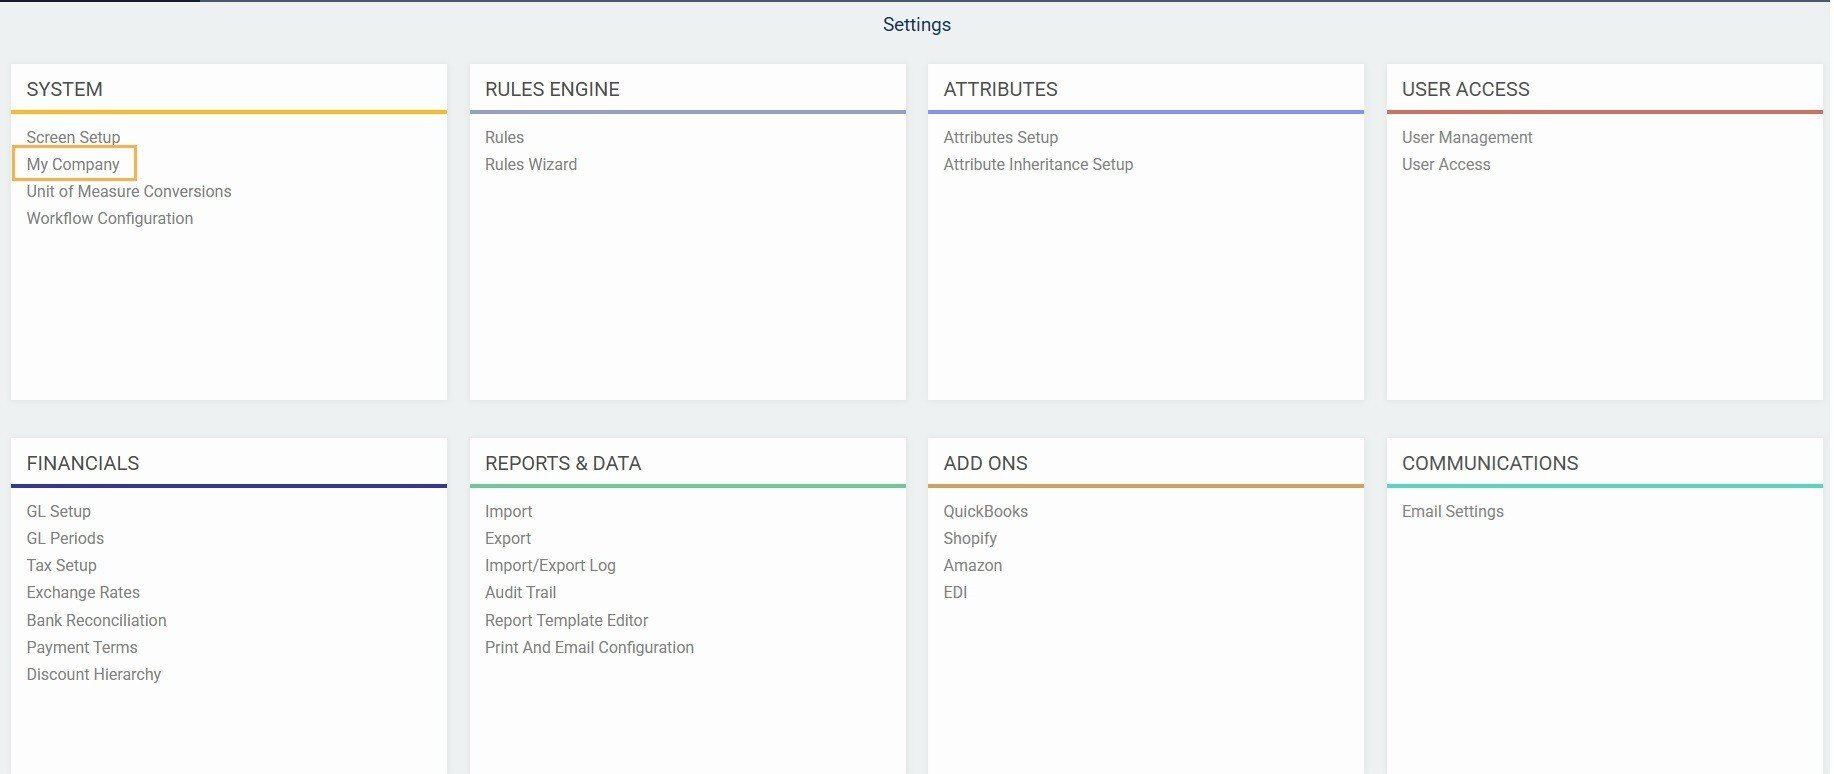
This step is only necessary if you selected to have journal entries generated for inventory. To verify this, access the settings page, then click on my company.
Then, click on the financials tab, and verify the setting for automatic journal. If the option is not set to one of the inventory options, go ahead and skip to the next step.

If you are set to use inventory in the automatic journal option, when you import your inventory you will have the option to either create one journal entry per item you modified, or one journal entry for all items.
The first option will create one journal entry for every inventory change the system detects in your file.
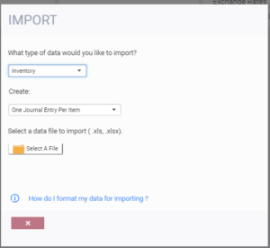
The second option will calculate the total value of the inventory changes in your file and create only one journal entry. This wiki gives more information about the creation of journal entries regarding stock adjustment.
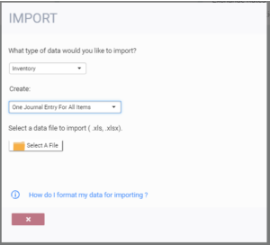
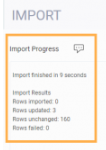
Once chosen, click select a file and choose the updated Excel file. Once selected, click upload. The modal will notify you of the progress, and let you know if any of the rows failed to import properly, and if so, which row exactly.
Once the process is complete, click the back button to get back to the settings screen. From there, you can select the inventory module, and see the changes to your inventory.
View changes
Navigate to the inventory module from the more button. Click the history tab to see how your inventory was adjusted.

What's next?
Once you have imported your inventory values, you may want to run some reports to show you the results of your inventory movements.