![paragon logo-1.png]](https://support.paragon-erp.com/hs-fs/hubfs/paragon%20logo-1.png?width=240&height=75&name=paragon%20logo-1.png)
Introduction
In this article, we will walk you through how to create a pick ticket in ParagonERP manually, as well as how to create picks from orders and reservations. The pick ticket module is based on Paragon's standard transaction screen.
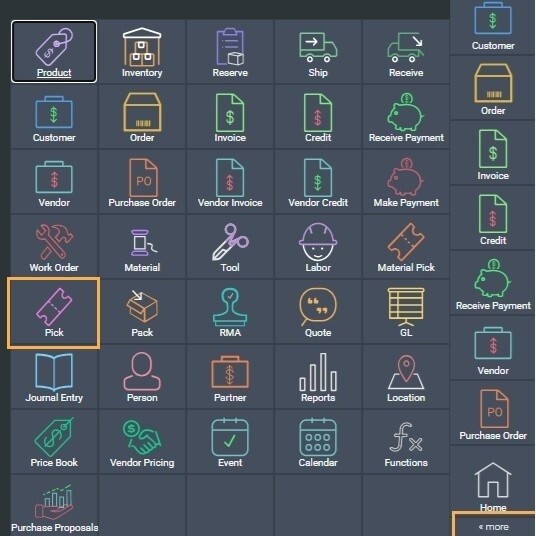
Open the pick module
Open the pick module by clicking the more button on the navigation bar from anywhere in Paragon and selecting pick.
Creating a pick ticket manually
Enter in general information

You can select from the drop down list of companies. If you do not see the company that you are looking for, click on the three dots to the right of the search field to get a full list of available companies to choose from.

Once the company is selected, it will auto-populate all the addresses from the customer file.

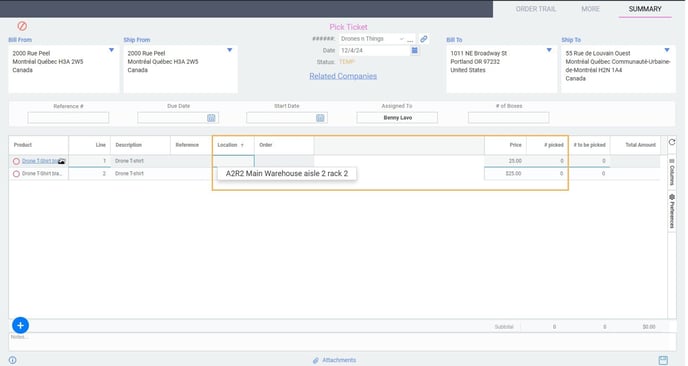
Select addresses
If you want to choose another address, click on the arrow to the right of each address type; bill from, ship from, bill to or ship to, to see a drop down of all available addresses to choose from.
If you do not see the address that you are looking for, you can create a new address.
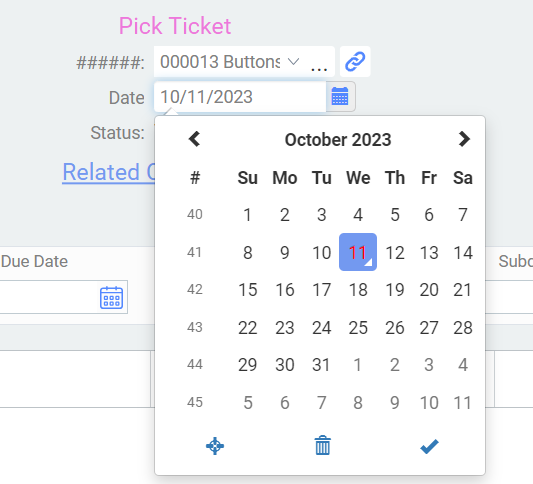
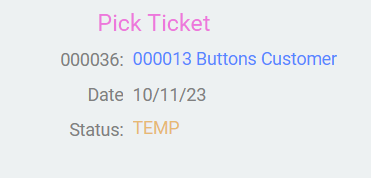
Note that the pick ticket will not have a transaction number until the pick ticket is saved. Once a transaction number is assigned, it will replace #####.
Pick ticket date
Select the date by clicking on the calendar icon and selecting the appropriate date, otherwise it will default to today's date.
Note that your attribute panel may appear slightly different based on how your system was configured.
Add products to your pick ticket

Select all the items you would like to add to your pick ticket by checking off the boxes on the left.
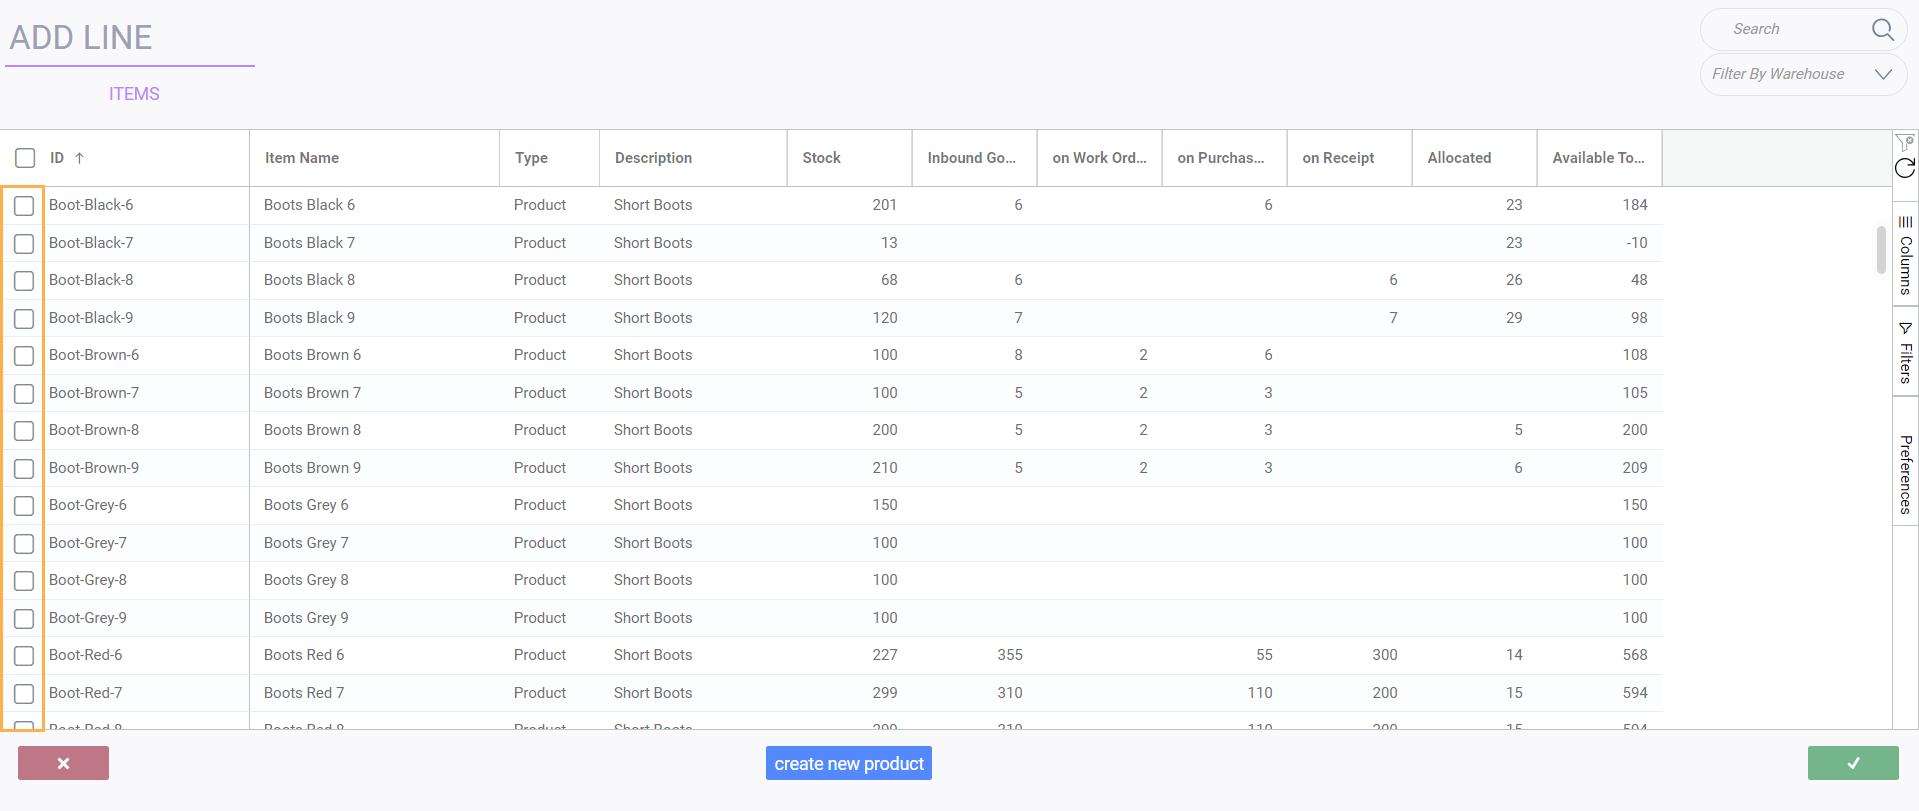
If you would like to cancel the addition of line items or products, click cancel. To add all the products that you selected, click accept.
Each item line must have a location assigned before your pick can be issued.
You can always add more line items by selecting add product again.
Pick date on product lines
It is possible that you will pick your product lines on different days within one pick ticket. In order to see this information for each line, right-click on the line, and choose view line attributes.

The pick date for that line will show here. You can modify the date for each pick line if required.
Add notes and attachments

Canceling a pick ticket

Saving a pick ticket

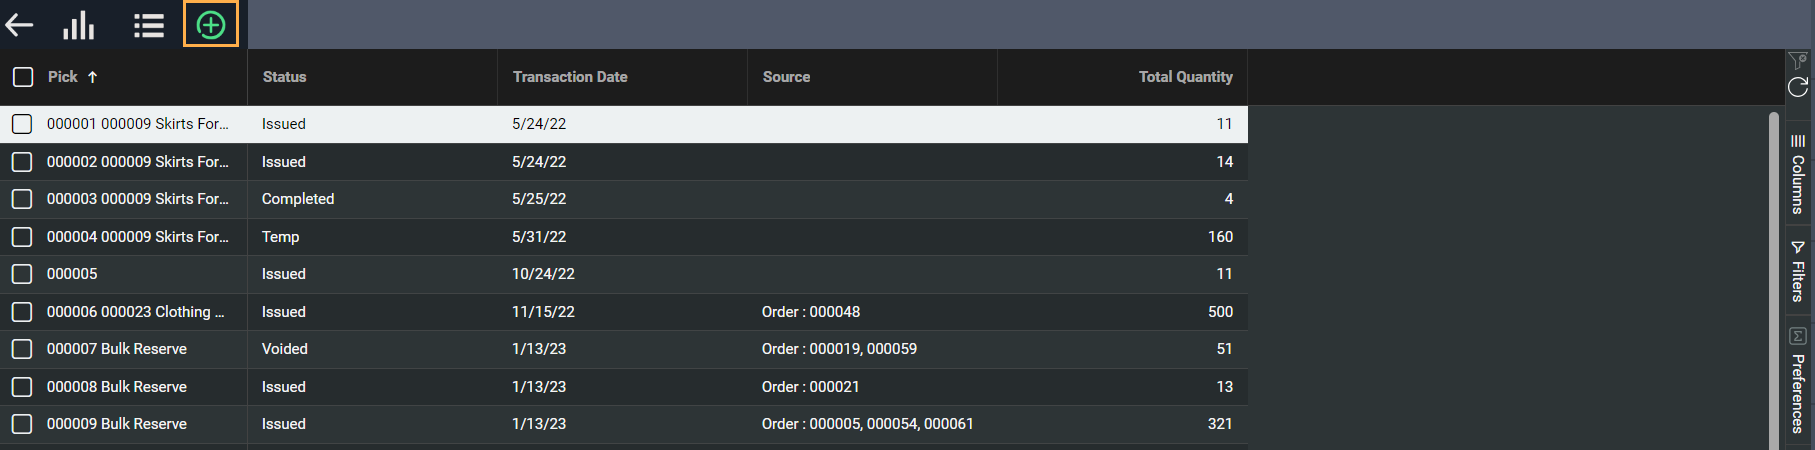
Number of lines to be picked
Once the pick has been created, you can view the number of lines to be picked on the list view screen for the picks and material picks. This will allow picking managers to make quick and accurate decisions when planning for the picking departments.

Action button
Once a pick ticket has been created you can proceed in a number of ways using the action list arrow button in the bottom right-hand corner. The default action button option can be set using the workflow configuration page in settings.
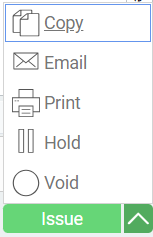
Once a pick ticket has been issued, the action list will show these options:

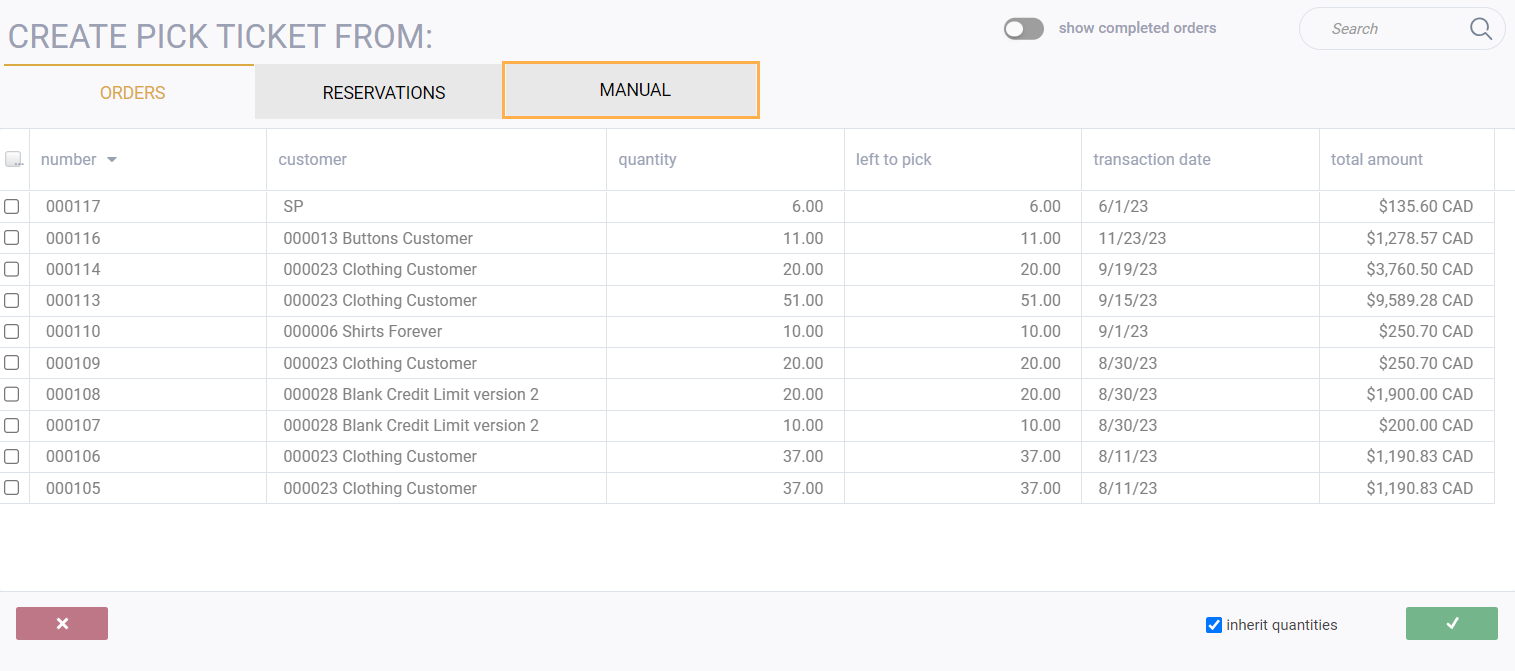
Create a pick from an order
Create a new pick and select the transaction you want to create from. In this case, make sure order is selected. It will be highlighted in orange.
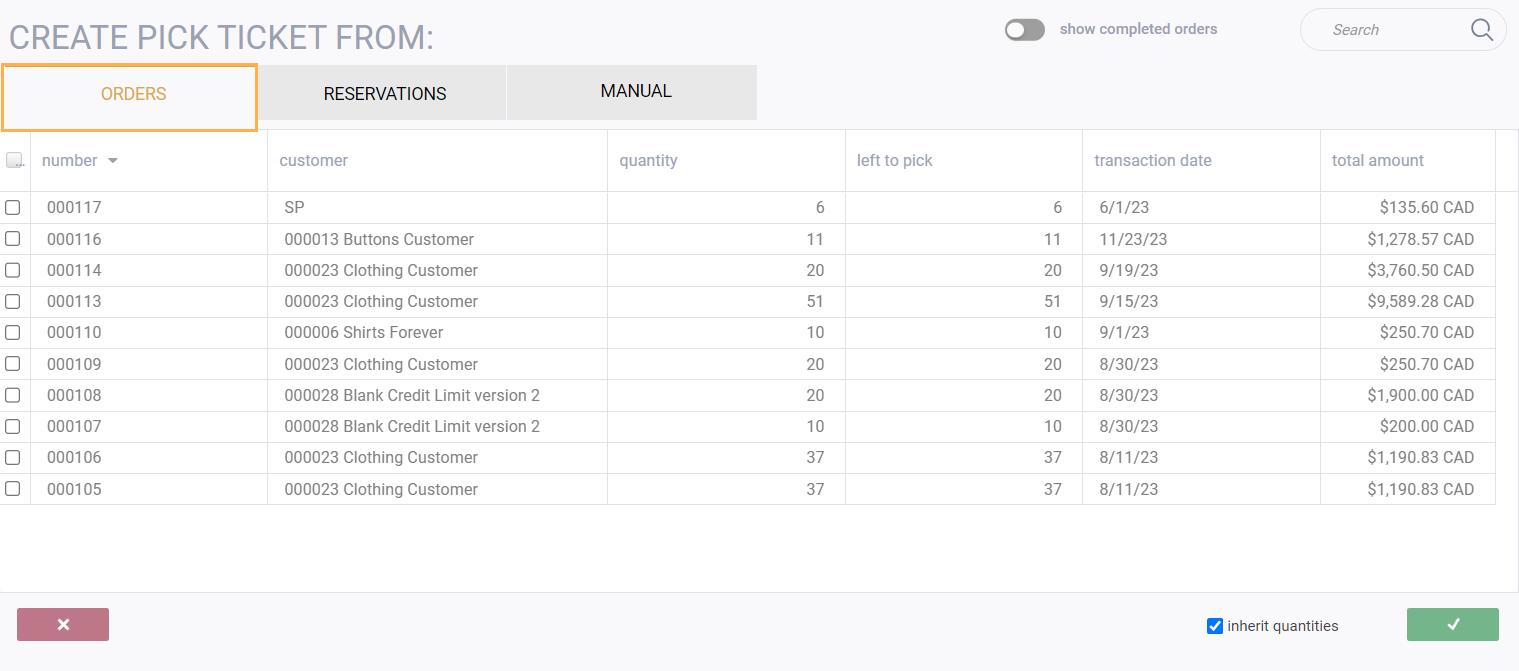
Select the order you want to use to create the pick ticket by checking the corresponding box on the left.
To deselect an order, uncheck the box.
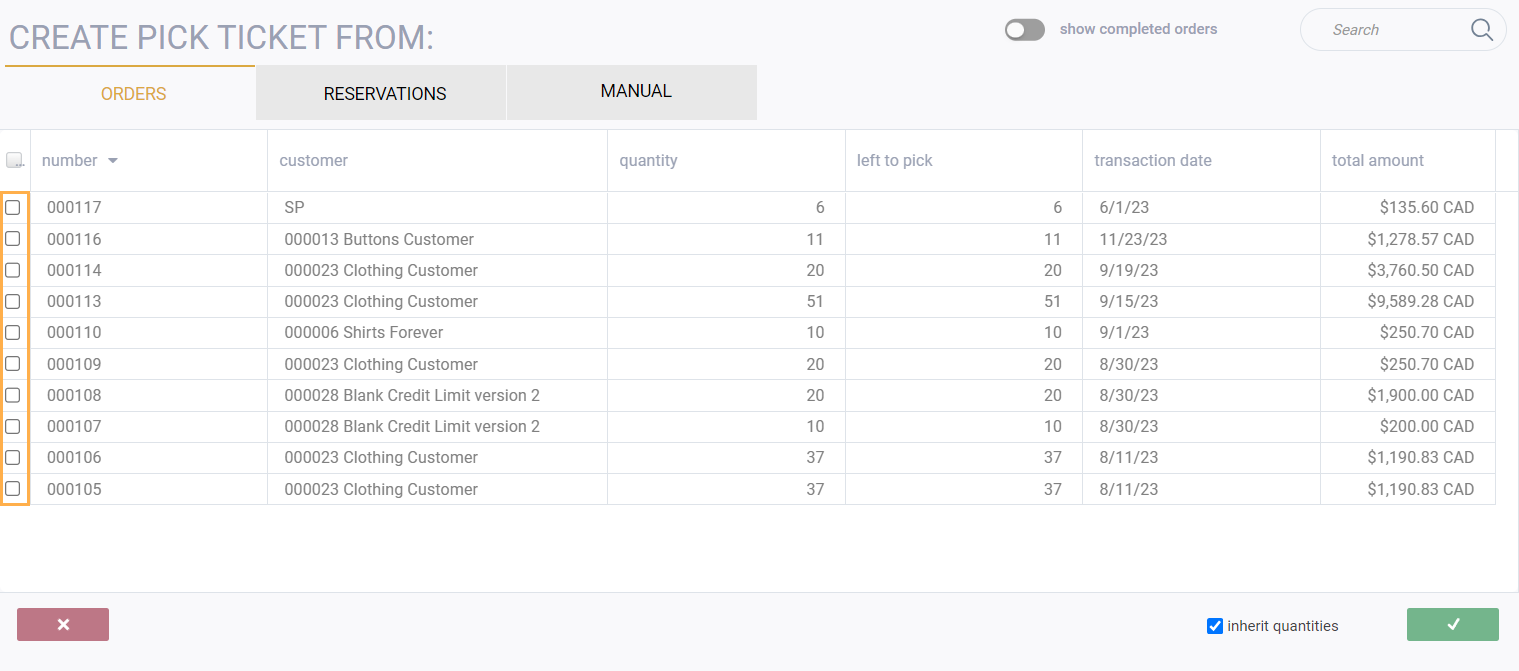
Once the pick is saved, it will automatically be assigned a transaction number and a temp status.
Create a pick from a reservation
Create a new pick and select the transaction you want to create from. In this case, make sure reservation is selected. It will be highlighted in orange.
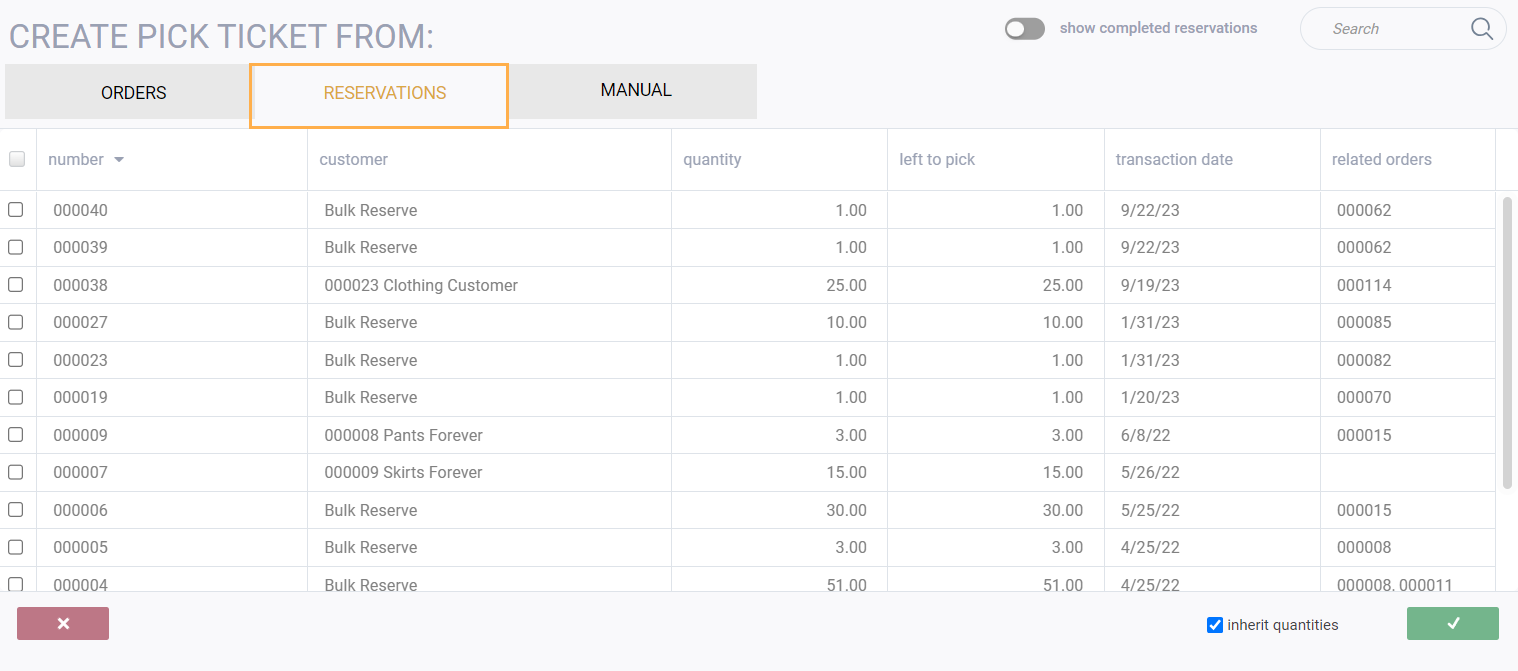
Select the reservation you want to use to create the pick ticket by checking the corresponding box on the left.
To deselect a reservation, uncheck the box.
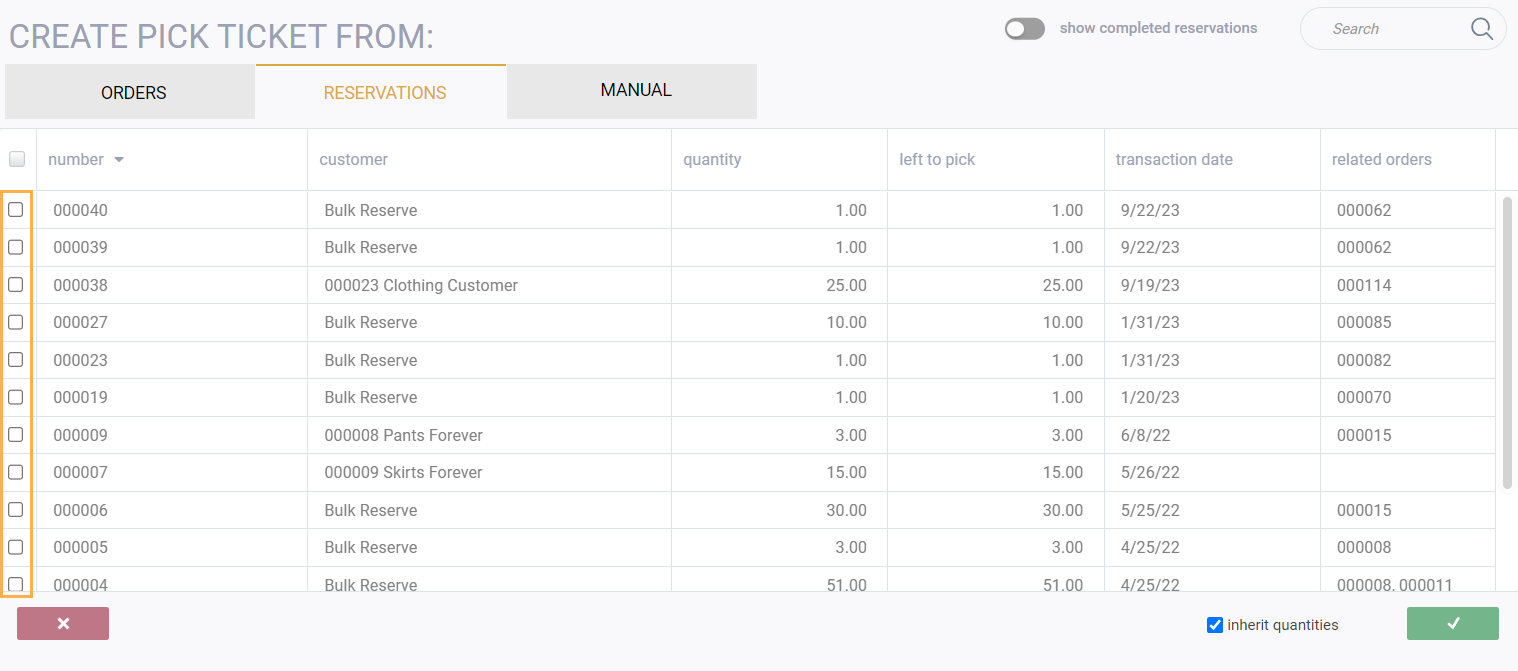
Once the pick is saved, it will automatically be assigned a transaction number and a temp status.
What's next?
For more information on transactions and transaction screens, why not take a look at some of these handy articles: