![paragon logo-1.png]](https://support.paragon-erp.com/hs-fs/hubfs/paragon%20logo-1.png?width=240&height=75&name=paragon%20logo-1.png)
Introduction
In Paragon, you can configure the list view for any module - including inventory. This means that you can decide which information is important to you and you can configure which attributes are visible from your inventory and see them in the list view.
Screen Setup
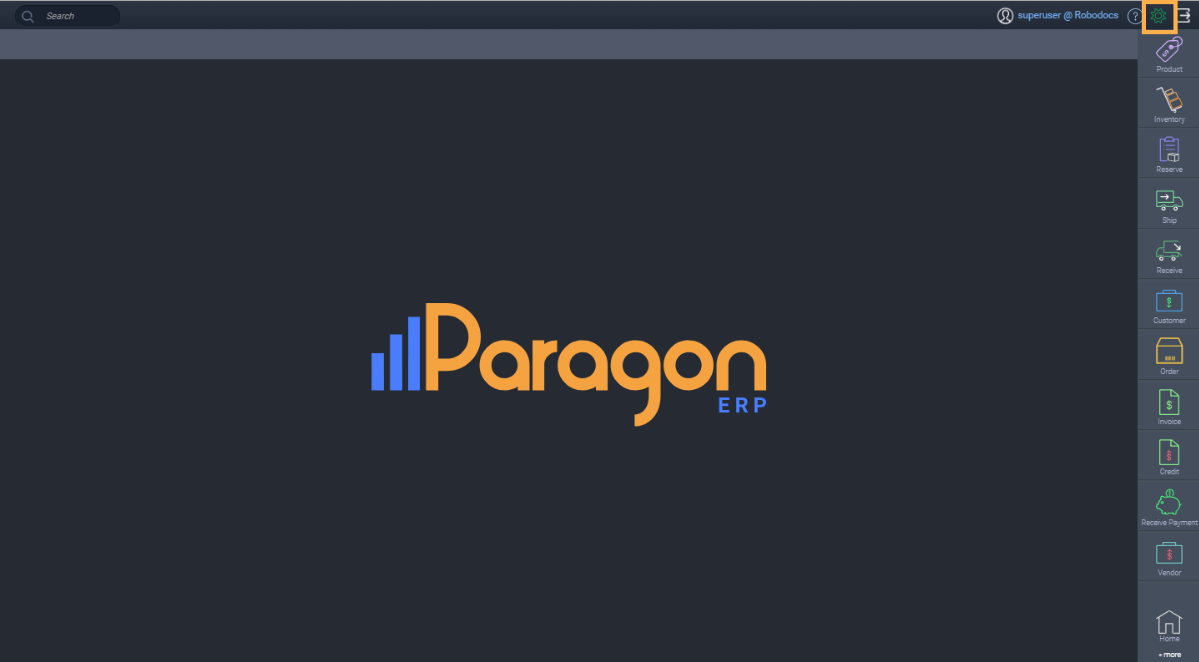
Click the settings button from the home screen.
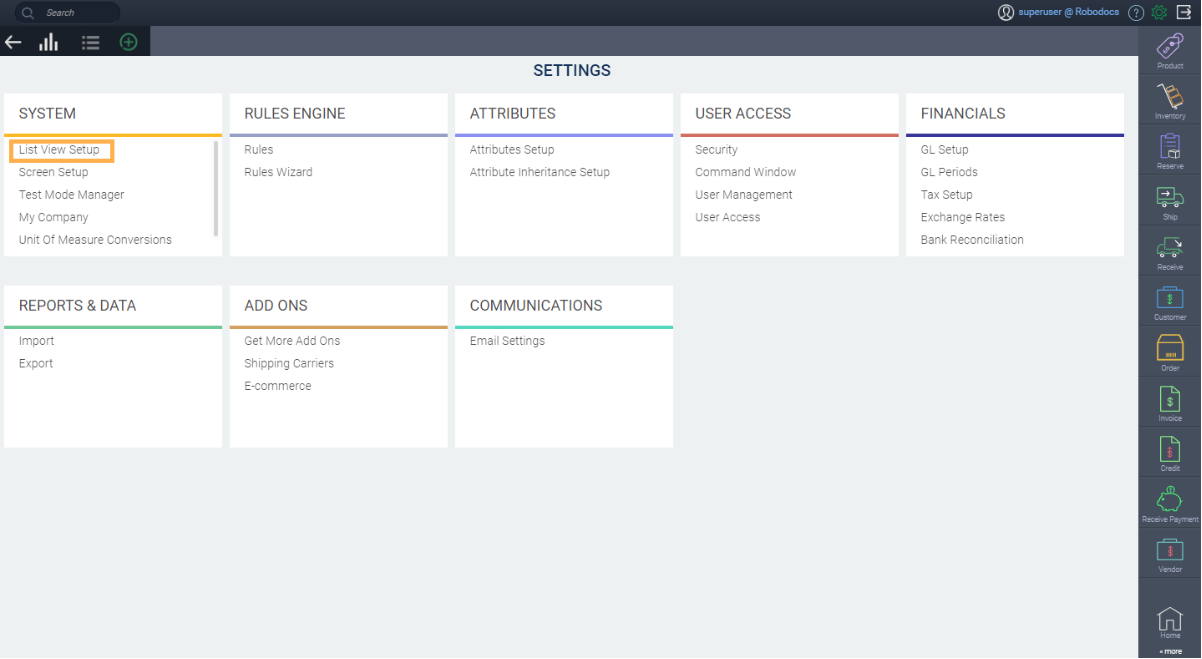
From the settings screen, click the List View Setup.
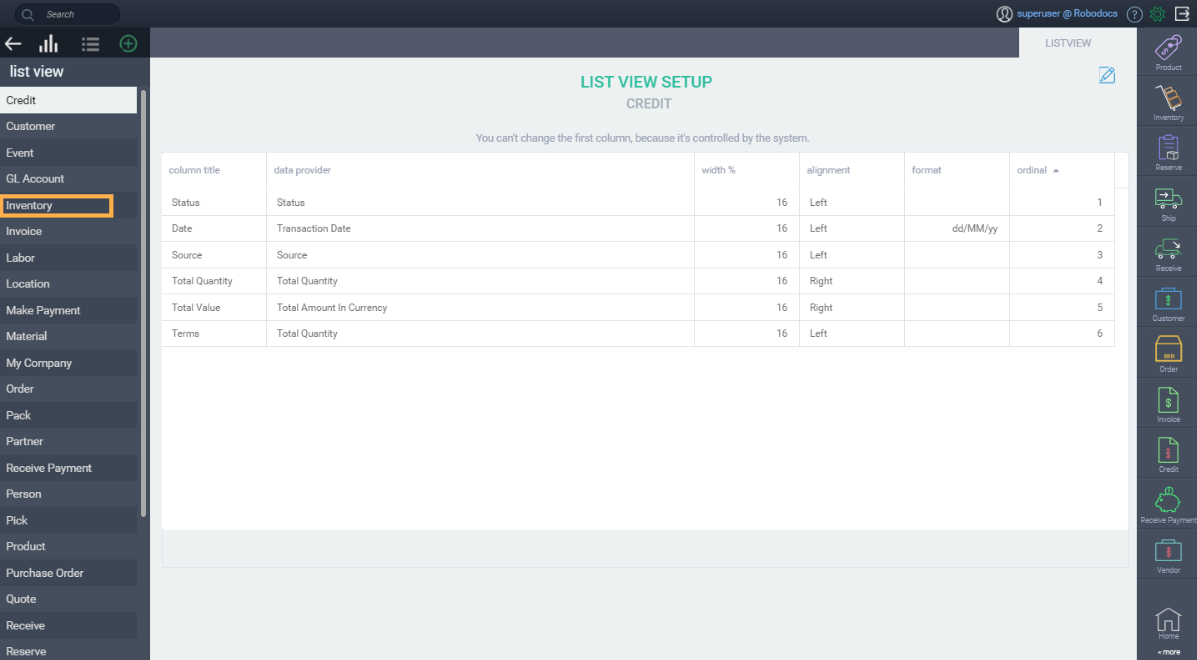
From here, click Inventory from the left side bar.
Configure your list
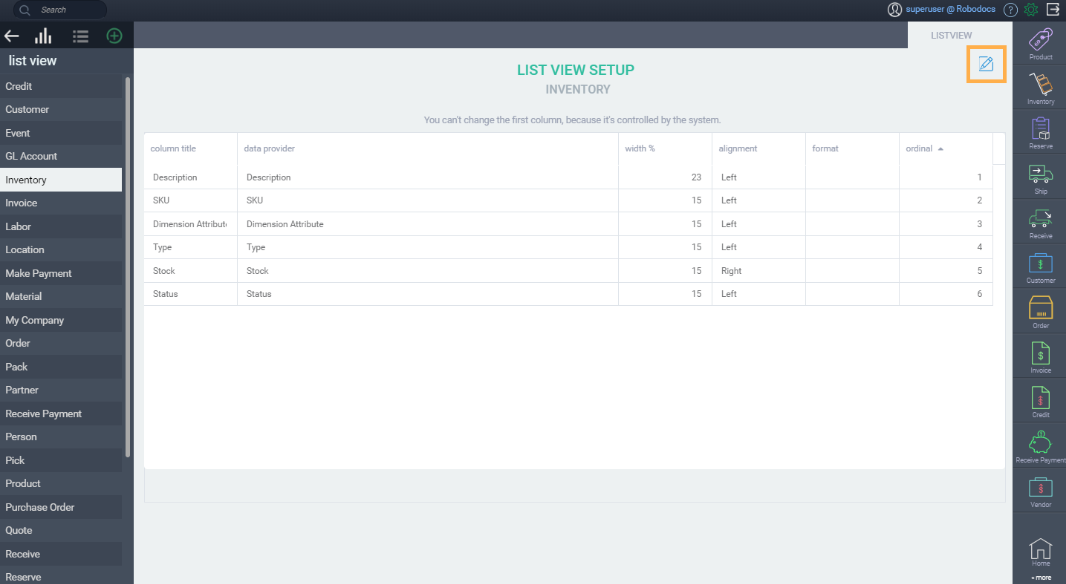
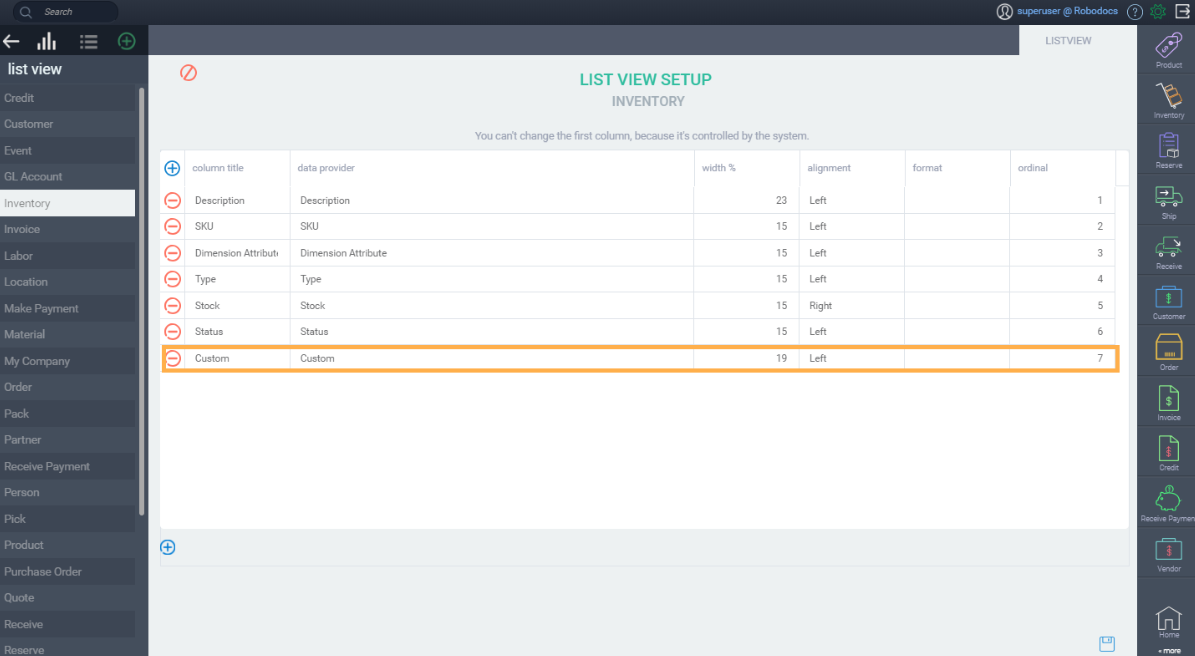
Now that you're on the Inventory List View settings page, you can begin to add/modify/delete any attribute(s) that you'd like to see in the list.
In this example we'll be adding a Custom attribute to the list, and we'll be deleting the type attribute.
Add an attributeFrom the list view page, click the edit button.
Once in edit mode, click the blue add new button.

A blank field will pop up. In the Data Provider column (which is a list of all attributes available for this module), select the attribute you wish to add to the list from the drop down. Here, we'll add Custom. Please note that that column title will automatically be filled with the attribute name that was selected in the data provider field. You can always change the name in the Column Title if you wish.
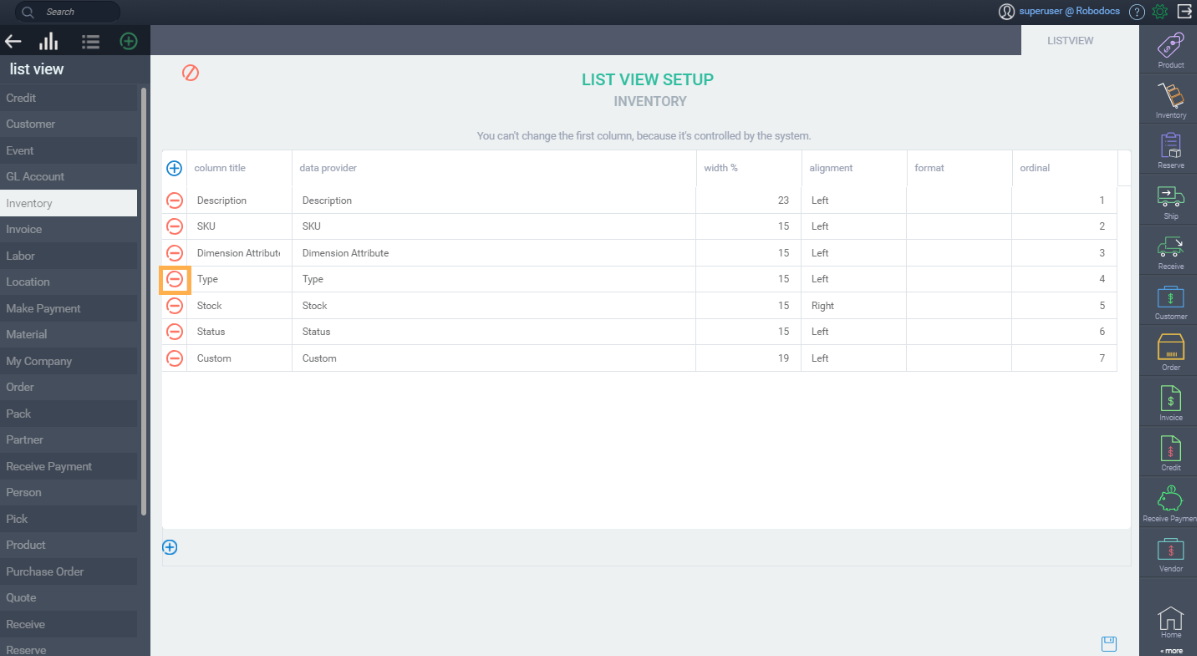
Delete an attribute
While still in edit mode, click the red delete button next to the attribute you'd like to remove. Here, we'll remove the Type attribute.
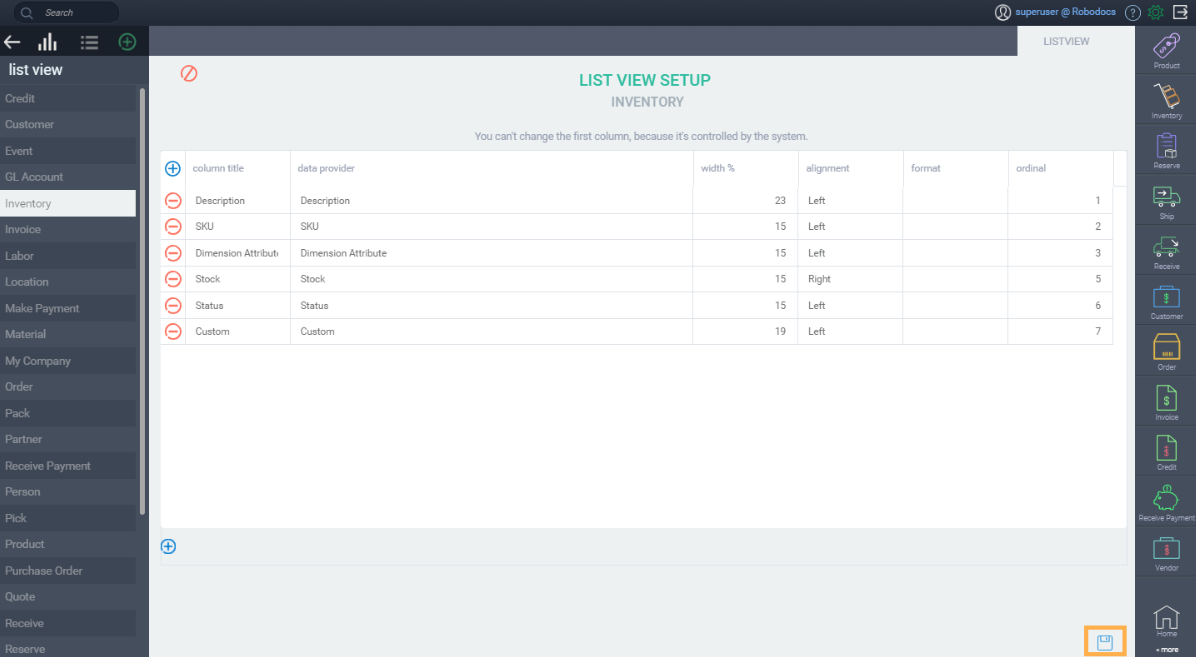
Once you've finished, click the save button.
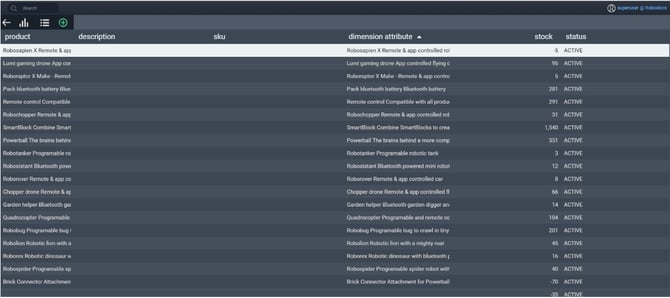
View the modified list view
Now that you have saved your changes, you can go to the inventory list view screen to see the results:
What's next?
For more information on the list view function, check out this article: