Importing transactions from QuickBooks Online into Paragon

Introduction

Once you are up and running and Paragon is connected to your QuickBooks account, your reference data is likely automatically imported in Paragon upon setup (such as customers, vendors, and products). If so, you are ready to start importing your existing financial transactions from QuickBooks Online into Paragon.
 

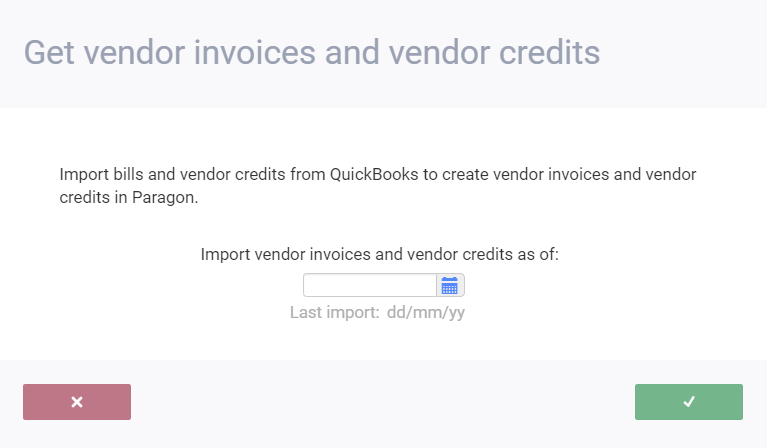
Import vendor invoices and vendor credits from QuickBooks Online to Paragon


If you have already imported your customer, vendor, and product data, you will find this process very similar. Paragon makes this process simple and efficient by allowing you to import vendor invoices and vendor credits simultaneously. From anywhere in Paragon, navigate to the QuickBooks setup screen from settings/add ons


Hit the action list button at the bottom right of the screen and hit the import bills and supplier credits button to start the process.
 
 
Once you hit the button you will have the option to start pulling vendor invoices and vendor credits from a specific date. Select your as of date and hit the accept button to proceed.


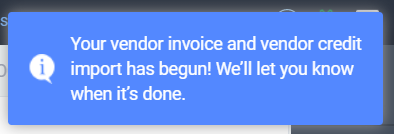
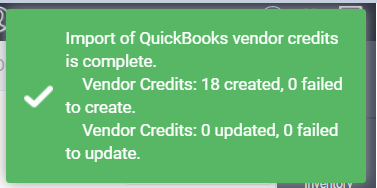
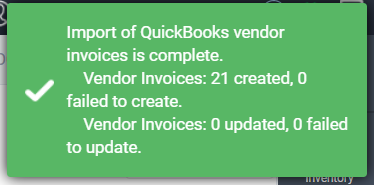
Vendor invoice and vendor credit import notifications

You will see a notification when the import of vendor invoices and vendor credits has begun:
 
A success notification is displayed as soon as the import of vendor invoices and vendor credits has been completed:


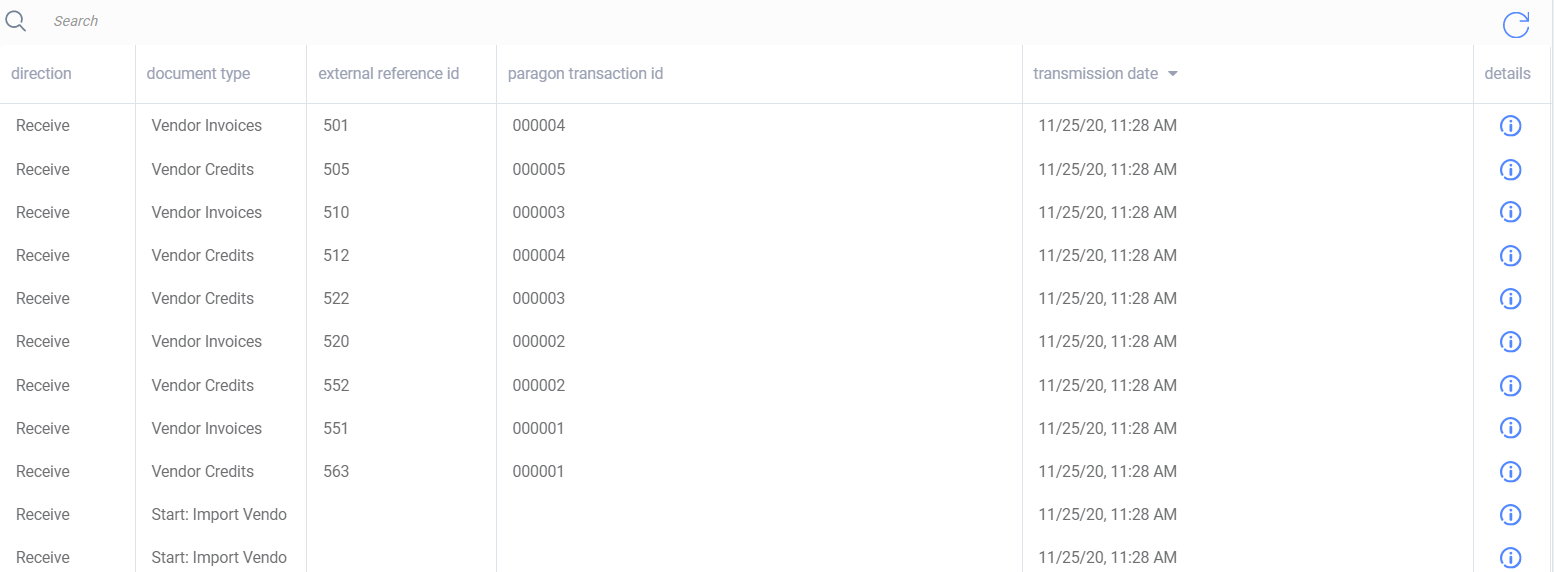
Vendor invoice/ vendor credit import logs

To view your past imports, navigate to the log tab on the QuickBooks setup page.


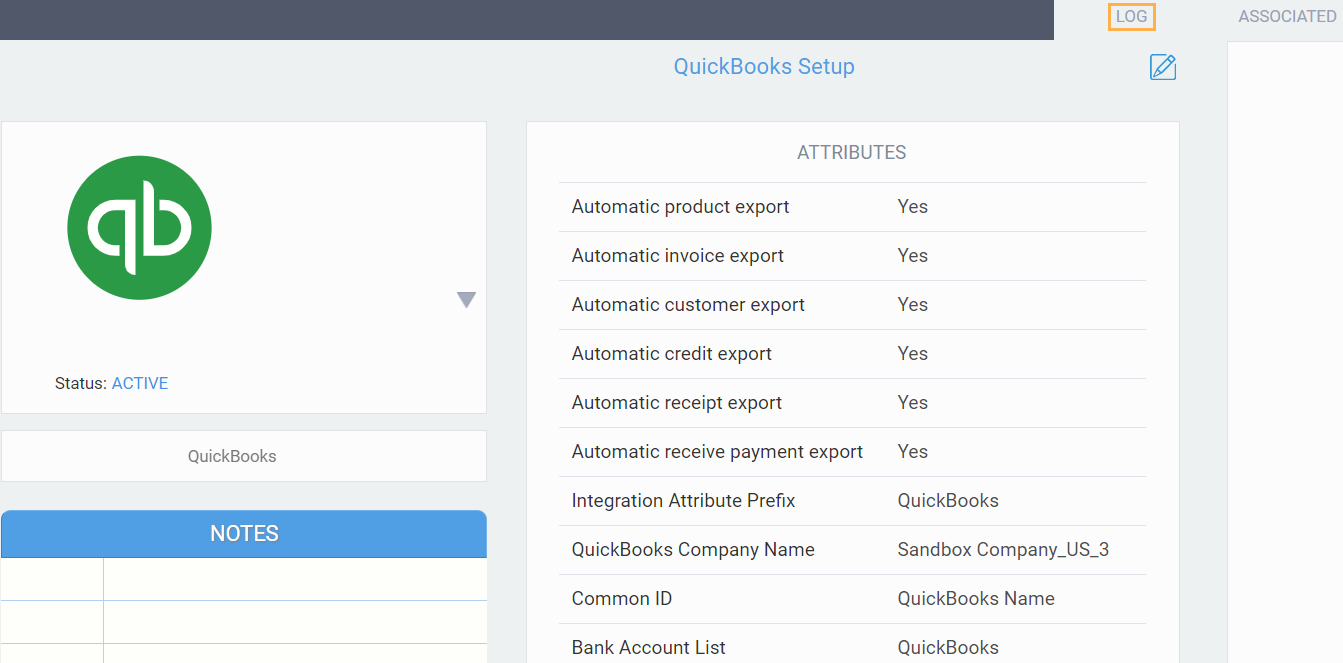
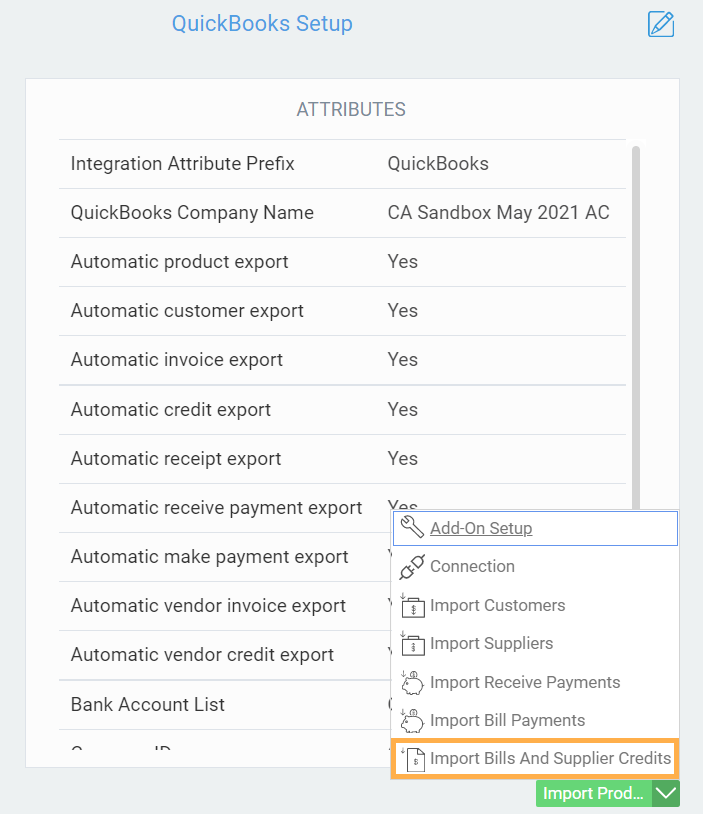
Vendor credit and vendor invoice more tab

To view the QuickBooks information associated with your imported transactions, navigate to the more tab of either your vendor credit or vendor invoice.
 
Vendor invoice:
 
 
Vendor credit:


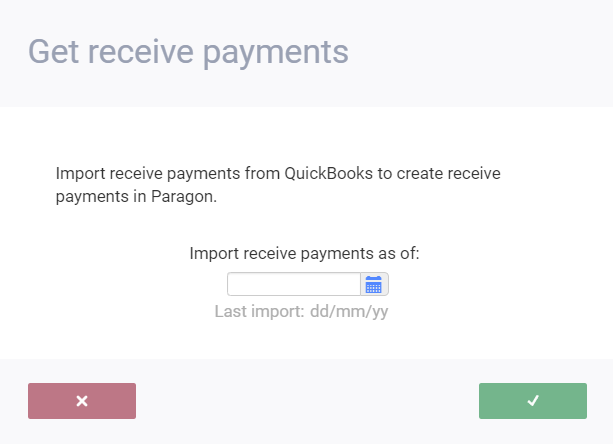
Import receive payments from QuickBooks Online to Paragon


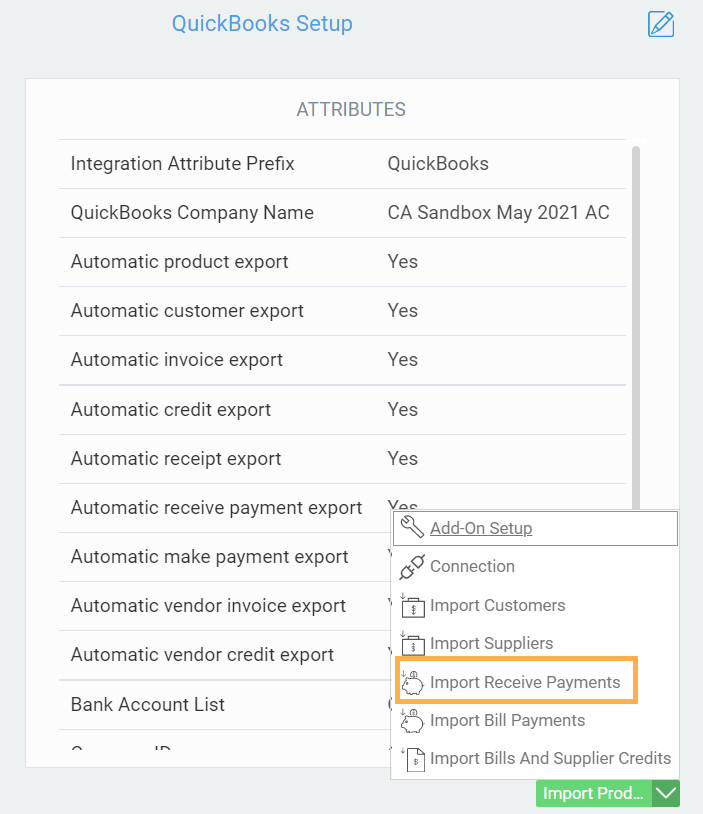
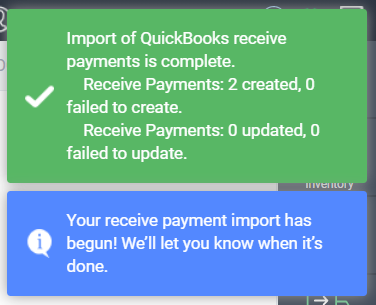
Following the same steps as illustrated in the previous process, hit the action list button at the bottom right of the screen and hit the Import Receive Payments button to start the process.


The following modal will be displayed. Here, you have the option to import receive payment transactions from a specific date. Select your as of date and hit the accept button to proceed.


Receive payment notifications

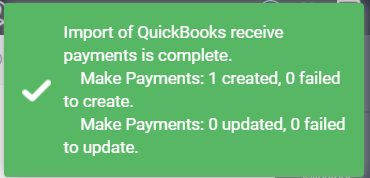
You will see a notification when the import of receive payments has started and when it is completed:


Receive payment import logs

Verify your imports from the log tab in the QuickBooks setup page:


Receive payments more tab

To view the QuickBooks information associated with your imported transactions, navigate to the more tab on your Receive payments page.


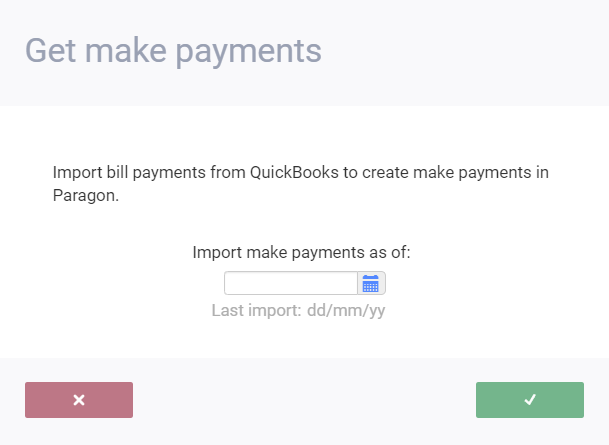
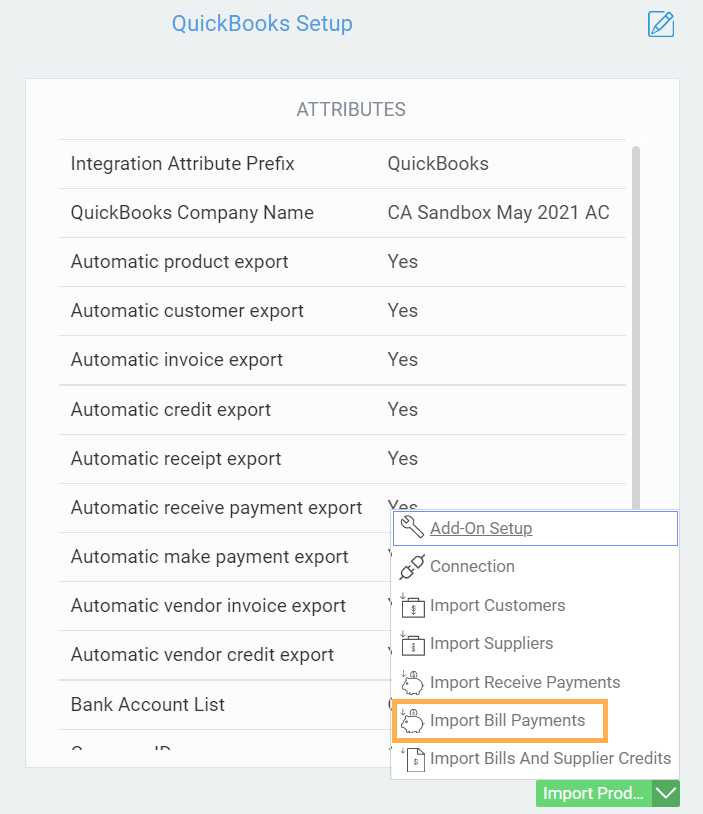
Import make payments from QuickBooks Online to Paragon

Following the same flow as before, hit the action list button at the bottom right of the screen and hit the import Bill Payments button.


You will be brought to this modal and have the option to import make payment transactions from a specific date. Select your as of date and hit the accept button to proceed.


Make Payment Import notifications
Import of Make Payments has begun:
 
Import of Make Payments has been completed:
 
Make Payment Import logs
Verify your imports from the logs tab on the QuickBooks setup page. You can also navigate to the more tab on each transaction in the make payment modal.


What's next?

Check out some of our other articles about Paragon and QuickBooks: