
Introduction
This article deals specifically with exporting invoices and credits from ParagonERP to QuickBooks. You will have already connected your QuickBooks shop to ParagonERP, and imported all the reference data that you need to get started (such as customers, vendors, and products). Now you are ready to start creating financial transactions in ParagonERP and have them automatically exported to the QuickBooks company that is linked to ParagonERP.
If you have not yet connected ParagonERP to QuickBooks, please refer to the article links in the what's next section at the end of this article.
Creating transactions in Paragon
You've shipped goods or delivered services to your client(s) so now you need to be paid for the work you've done or for the goods that you have sent out. ParagonERP has many options for creating invoices easily and quickly from a number of other transactions (such as a quote, sales orders, and/or shipments). Once the invoice is created and set to an issued status, it will be sent over to your QuickBooks company automatically (as long as the automation for this integration has been activated).
In the event that a credit note is required, you can always create a credit in ParagonERP to resolve the request. Credits can also be created from a variety of existing transactions, such as an invoice, return authorization (RMA), or a receipt.
Automating the export of invoices and credits to QuickBooks
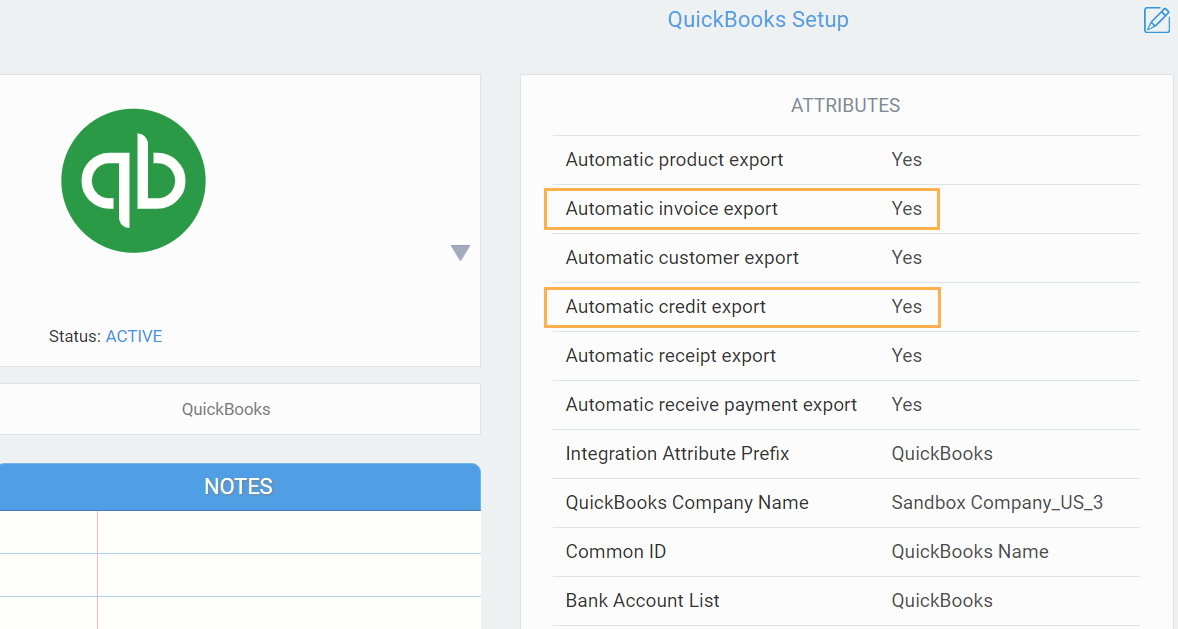
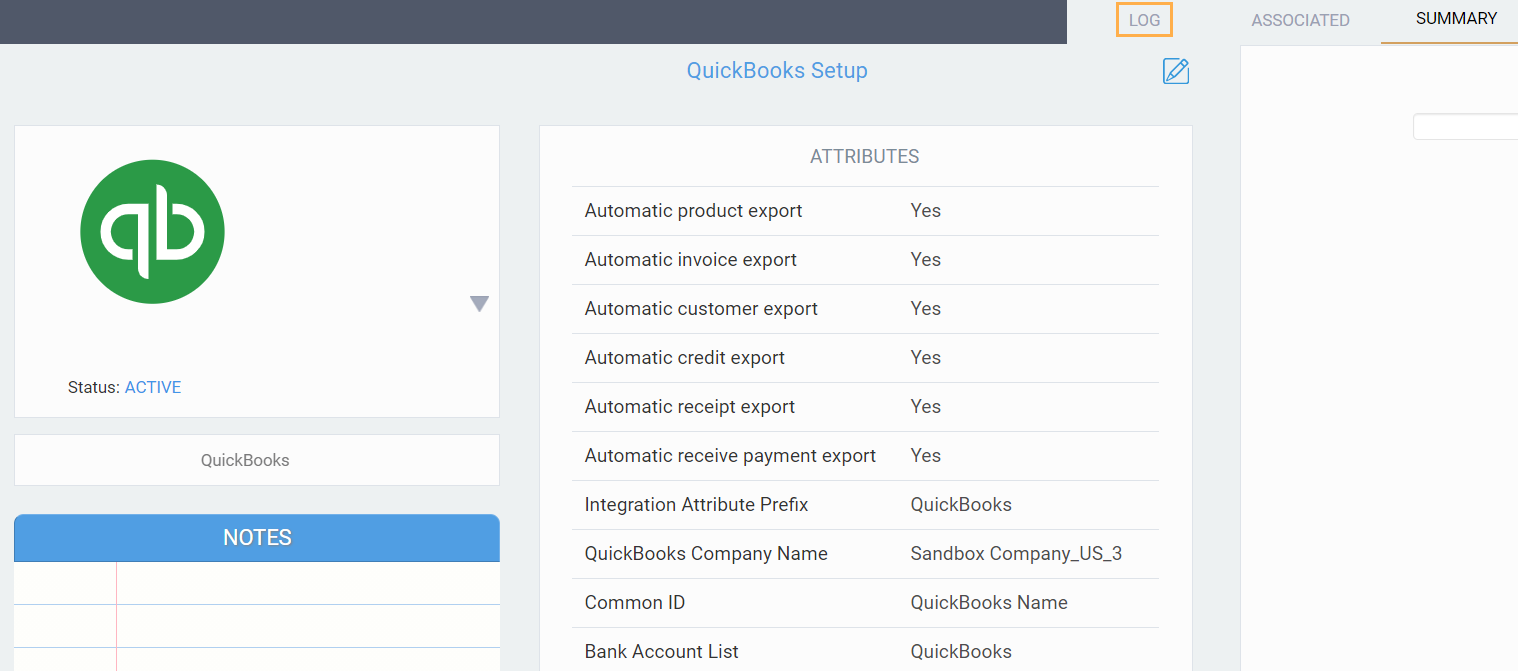
You've created and issued your invoices and/or credits in ParagonERP. How do you ensure that they are transferred over to QuickBooks Online? Simple - activate the automated feature(s). From anywhere in Paragon, navigate to the QuickBooks setup screen from the settings page.
Make sure that the option for automatic credit/import export is set to yes. Once the automation is activated, any invoice or credit created in ParagonERP will be sent to QuickBooks in seconds.
Verifying QuickBooks information linked to your ParagonERP transactions
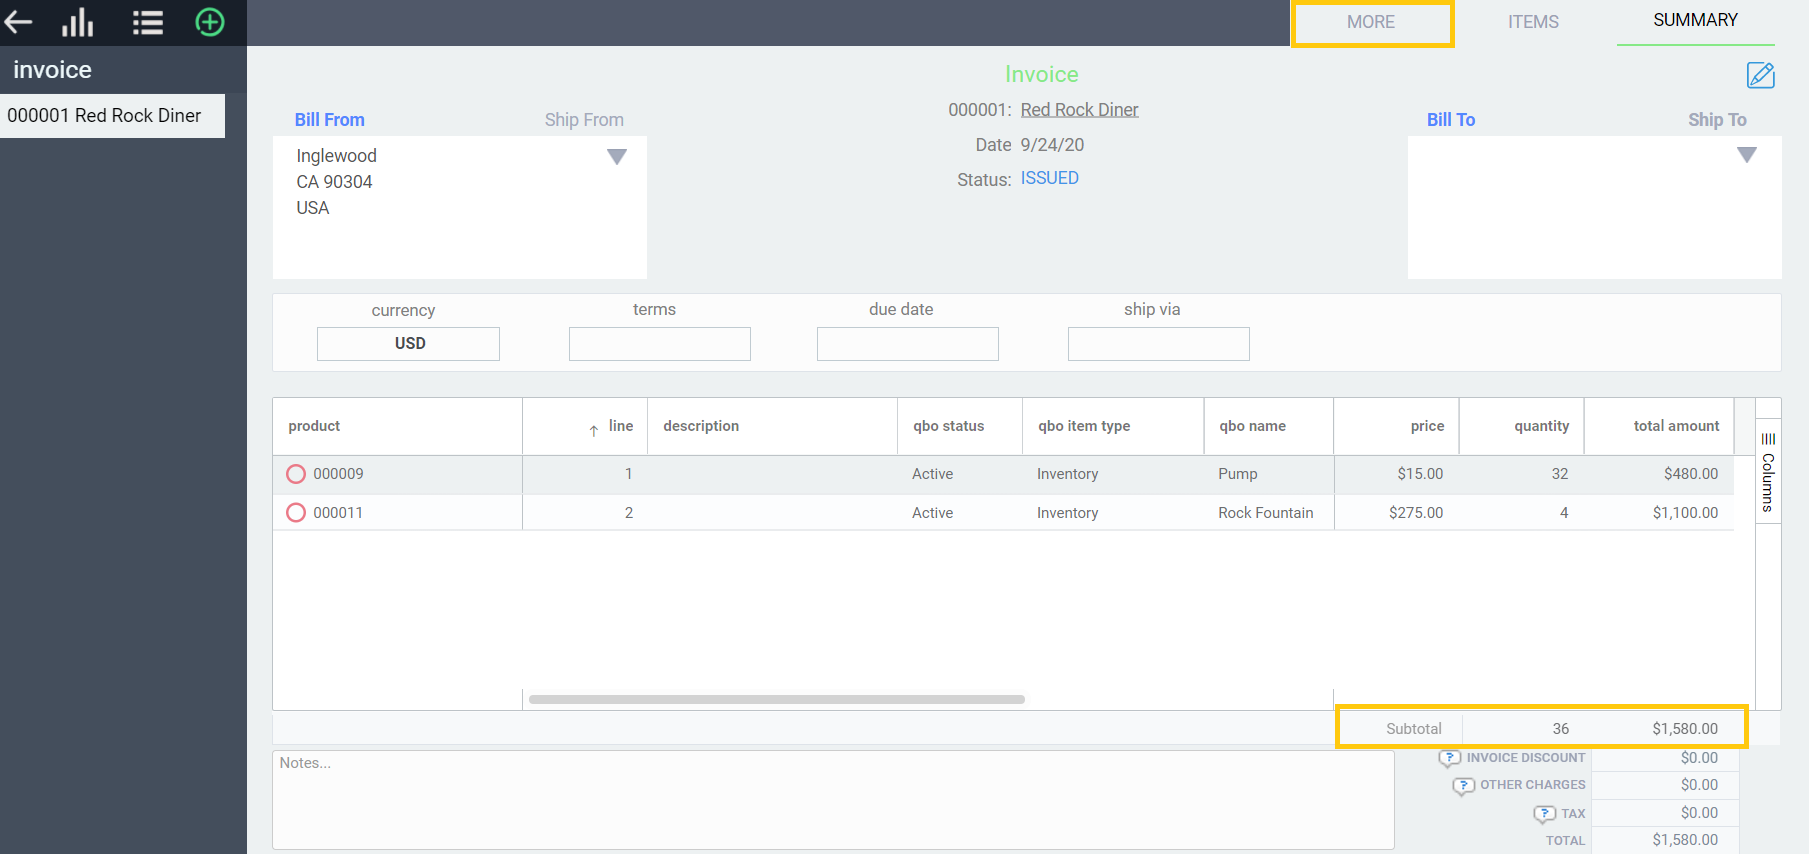
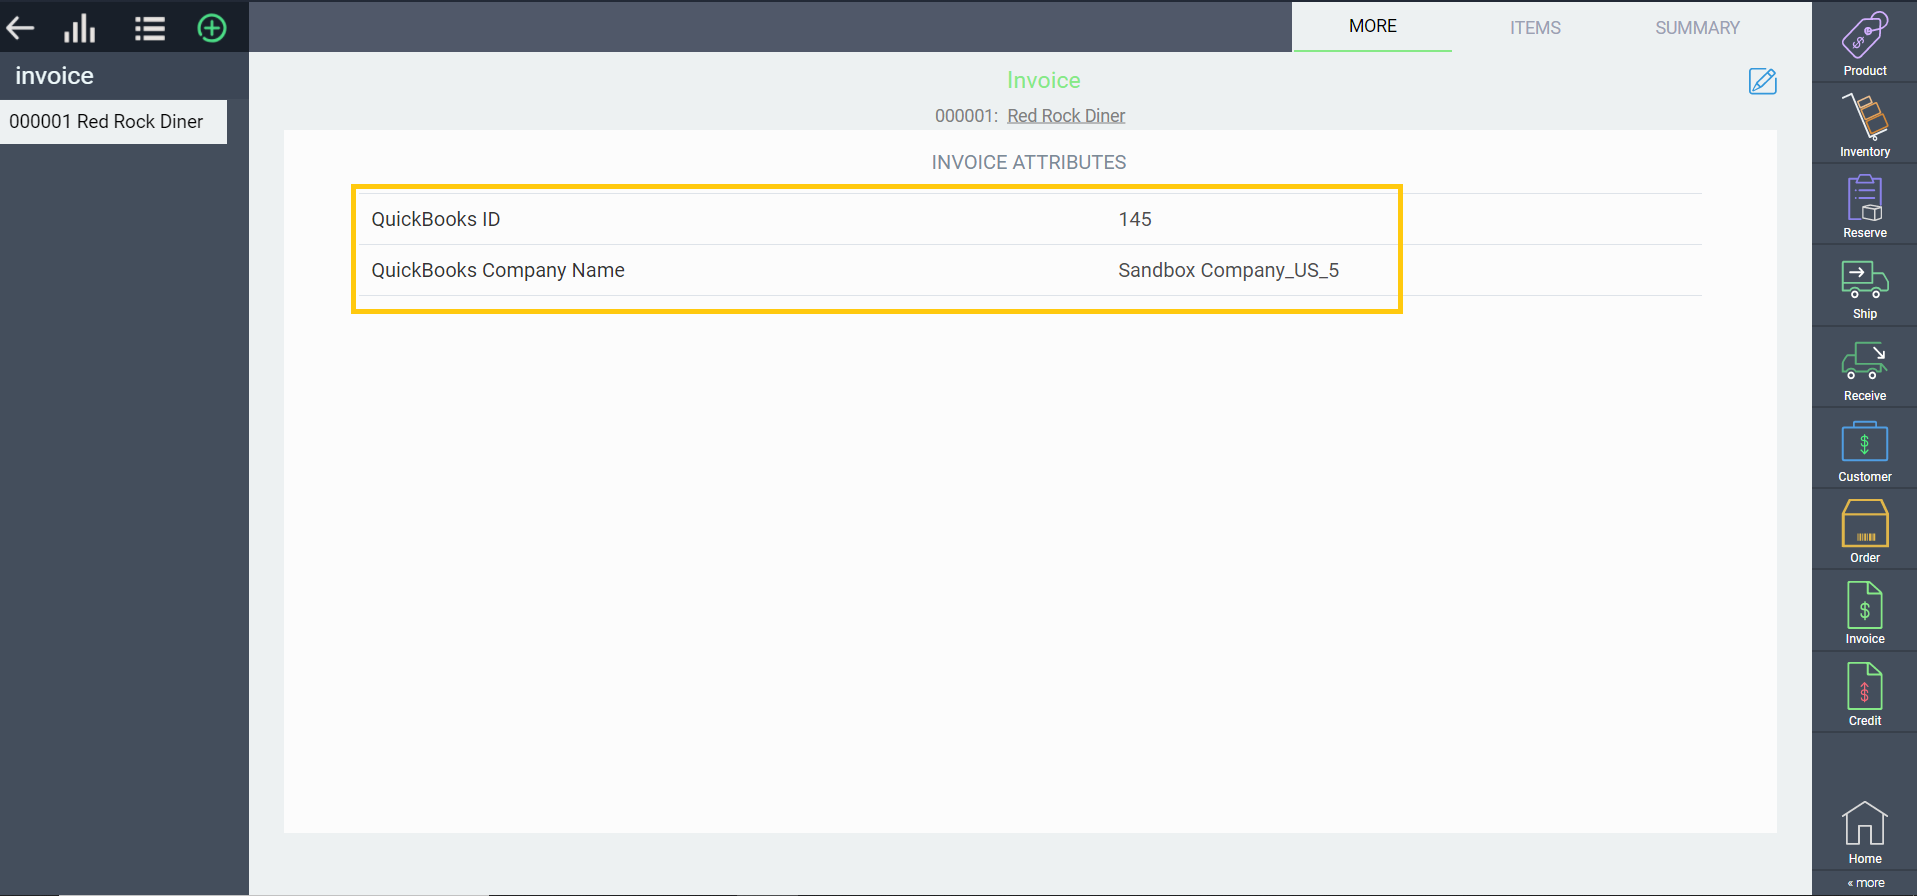
To confirm that a financial transaction in ParagonERP is in fact linked to a QuickBooks company, navigate to that invoice or credit and view the more tab. The related QuickBooks ID and the QuickBooks company name will be filled. For this example, we will be using an invoice.
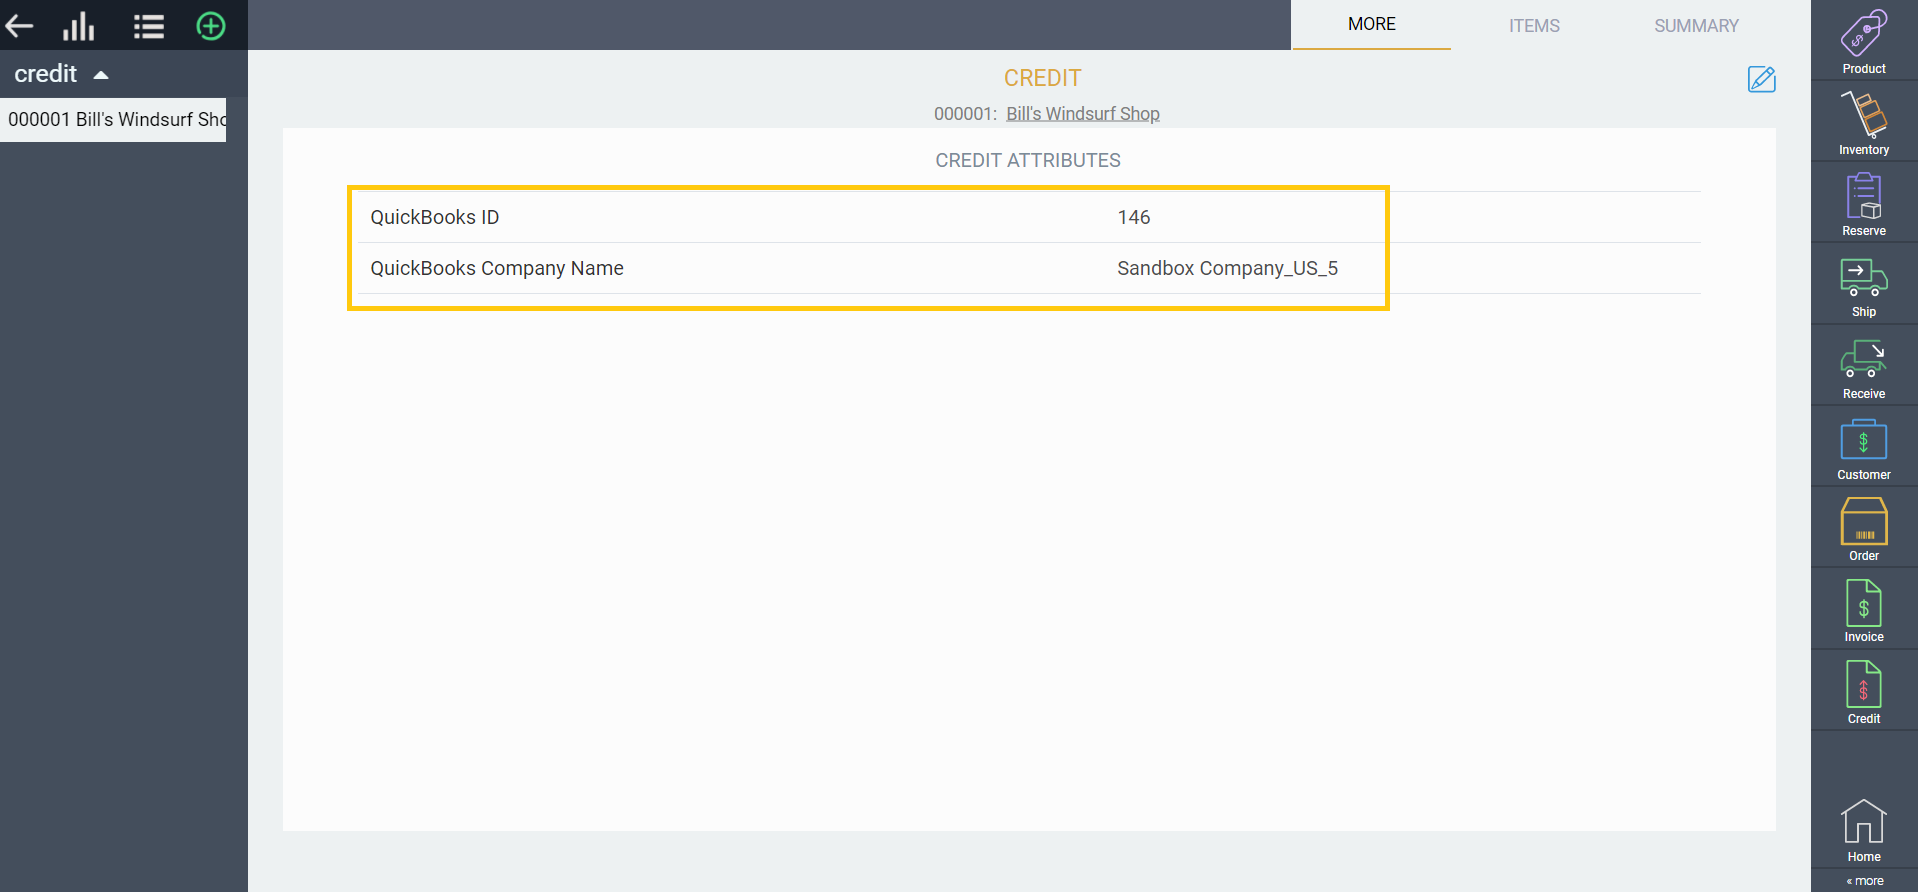
Follow the same process to verify your credit transactions. Once the credit is issued, navigate to the more tab to see your QuickBooks ID.
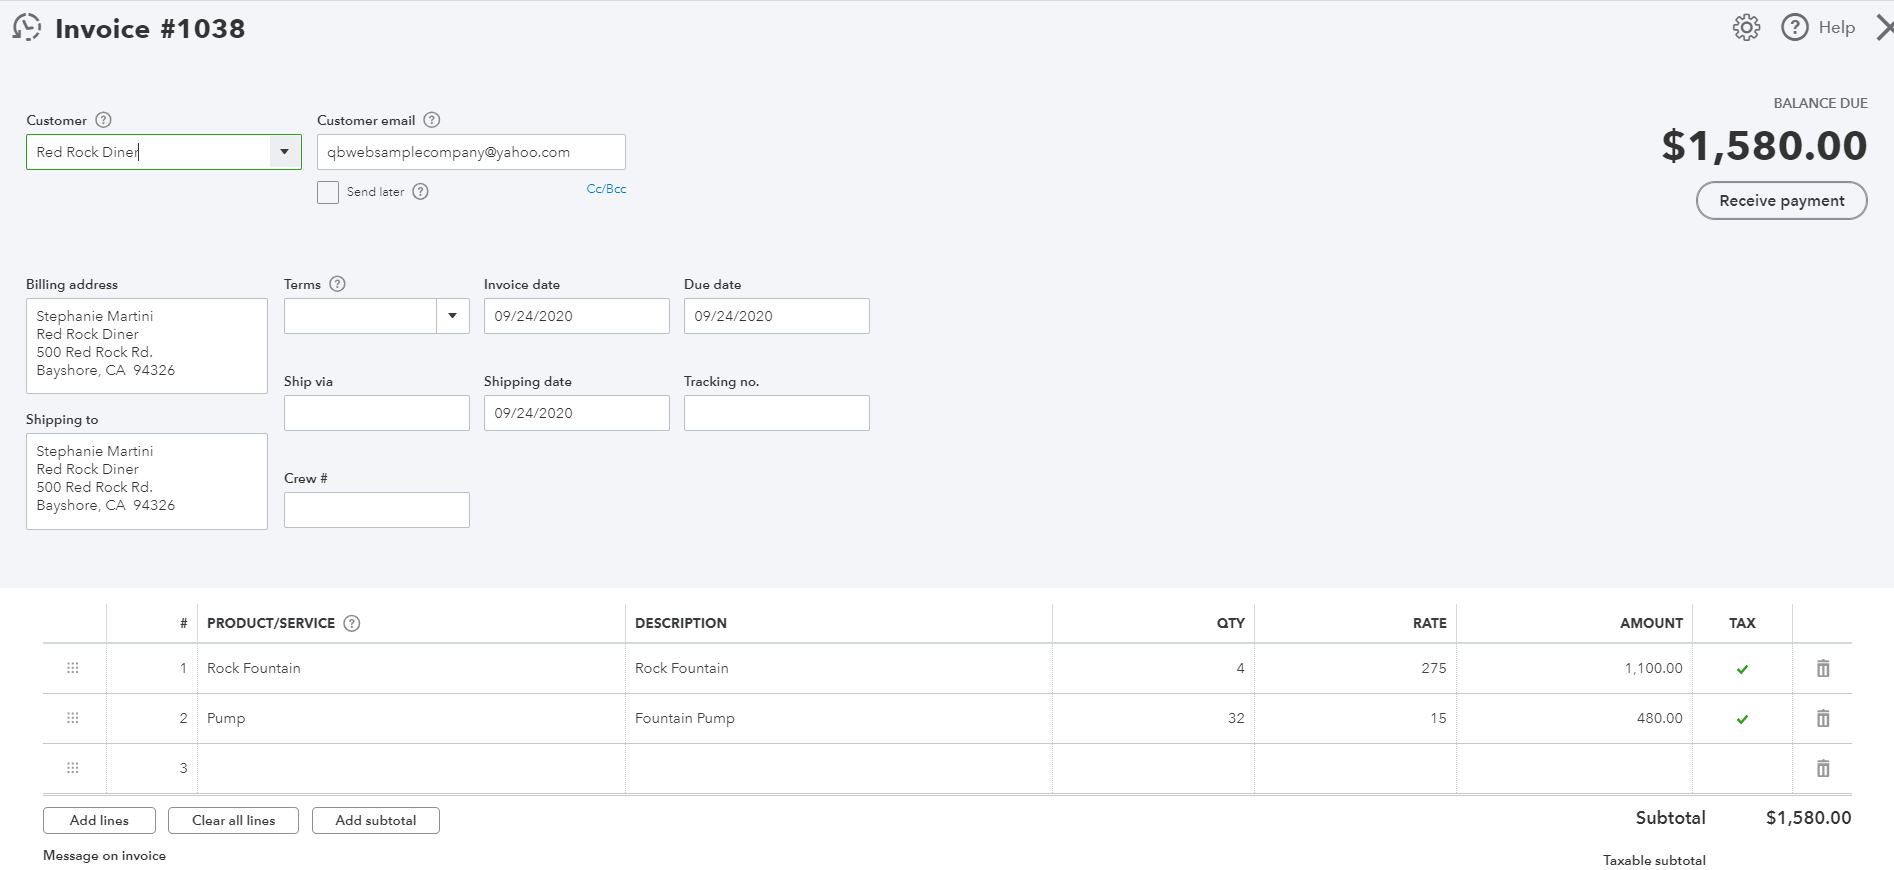
You should now be able to see these transactions in QuickBooks Online under the sales tab. Select the transaction you want and you will be directed to the summary. For this example we have chosen an invoice.
Checking the logs
To keep track of your exported transactions, you can view your logs by navigating to QuickBooks setup and clicking log. From here, you will find your list of transactions along with their external reference IDs and transmission dates.

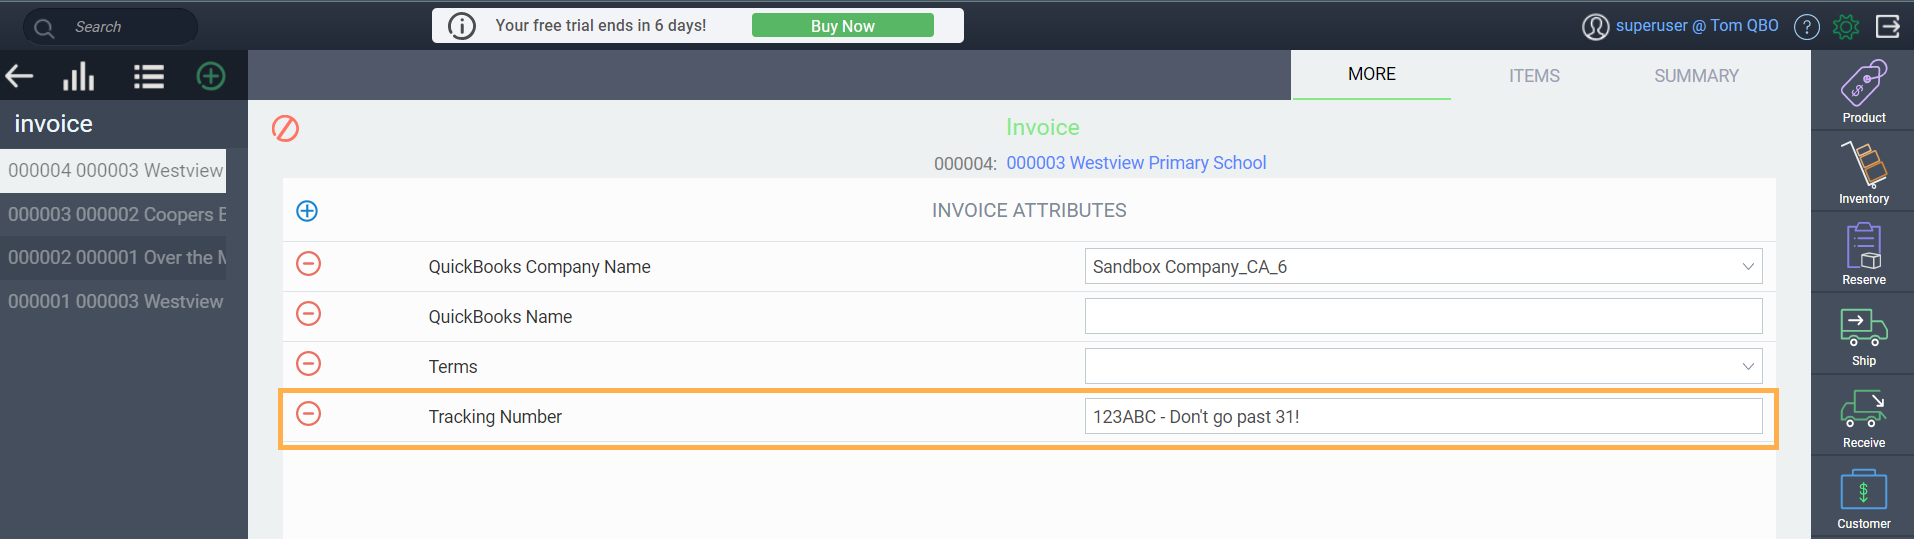
Adding a tracking number
When you create invoices in Paragon to export to QuickBooks, you can add a tracking number in the more tab.
Although there is no limit in Paragon, QuickBooks has a set limit of 31 characters per tracking number. Do not exceed this limit.
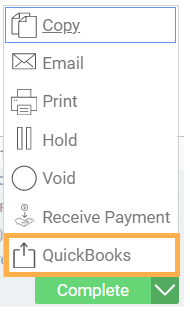
Manually export invoices and credits to QuickBooks
A great benefit of this feature is that if something went wrong while exporting a completed transaction to QuickBooks, you can correct the issue and then resend the transaction. To manually export an invoice or credit to QuickBooks, click the action list button and click the QuickBooks export button:
If the status of your transaction would not allow it to be sent, you will be notified and prompted to either issue or complete the transaction before trying to export it again.

What's next?
Now that you are well versed in exporting invoices and credits from ParagonERP to QuickBooks Online, there may be other integration options that would be interesting to you - here are a few:
How to connect and disconnect Paragon from QuickBooks Online
How to export purchase orders from Paragon to QuickBooks Online
How to import transactions from QuickBooks Online into Paragon