Calculate Actual Costs

Introduction

Actual costs refer to an updated item value that includes any additional fees or charges incurred after shipping or receiving goods. These fees are usually not known at the time of the shipments or receipts. The invoices for these fees are received later - possibly months afterward. So, estimate costs are included on the initial transactions (receipt and/or shipment) and vendor invoices or credits are used to track and calculate the actual charges later on. Paragon allows you to automatically calculate your actual costs on all items with the method outlined in this article.
 

Setup and configuration


Before we start to create transactions for this process, we need to be sure that Paragon has been correctly configured for this feature. First, let's be sure that Paragon has been configured to track inventory and financial calculations: 
 
Navigate to the mycompany screen by hitting the settings button from anywhere in Paragon, then selecting the mycompany option from the company setup card: 
 
 
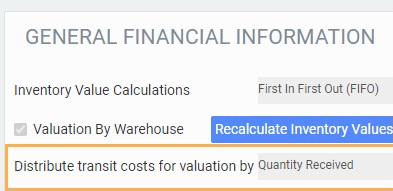
Make your way to the financials tab and make sure that the inventory value calculations are set to either LIFO or FIFO.
(Setting this option to none would mean that Paragon will not track inventory values at all.)
 
 
Next, choose how you would like your transit cost to be distributed. Paragon allows you to distribute it based on either quantity of each item being received or shipped, or by the valued amount of said items.
 
 
Let's break down how those costs are calculated for each scenario.
  1. Quantity Received
    1. Transit Cost = (The sum of total transit charges on the transaction) / (The total quantity of the transaction)
    2. Unit value = (Your item's purchase cost) + The Transit Cost from the previous step
  2. Amount Received
    1. Line value = (Total amount of the transaction line) / (Subtotal transaction amount)
    2. Transit Cost by line = (Line value) * (Total transit charges on the transaction)
    3. Transit Cost by unit per line: (Transit Cost by line) / (Transaction line quantity)
    4. Unit value = (Your item's purchase cost) + (The transit cost by unit per line)
 
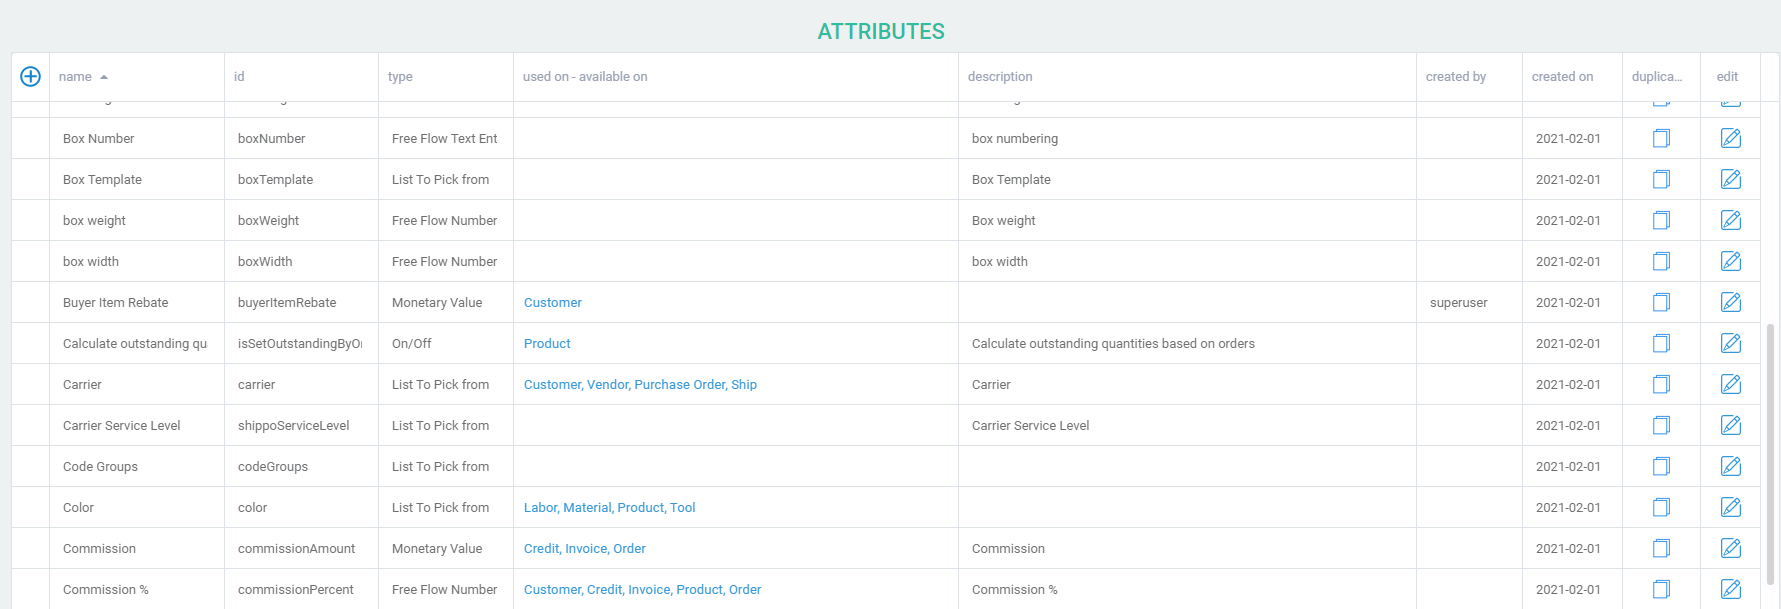
Now, let's get acquainted with the attributes we will use for this feature: hit the settings button from anywhere in Paragon and then hit the attribute setup option in the attributes card (shown below). 


Transit charges


We will need to create any attributes that will be used to track transit charges such as shipping costs and fees. Some attributes (such as freight and duty) are already available when you start using Paragon - others can be created as you need them. These charges can be classified as either percentage or money attributes. 
 
Once you have created all the transit charge attributes you want to use, we need to configure them on the transit charges modal in receipt and shipment screens.
 

Receipt and shipment list attributes


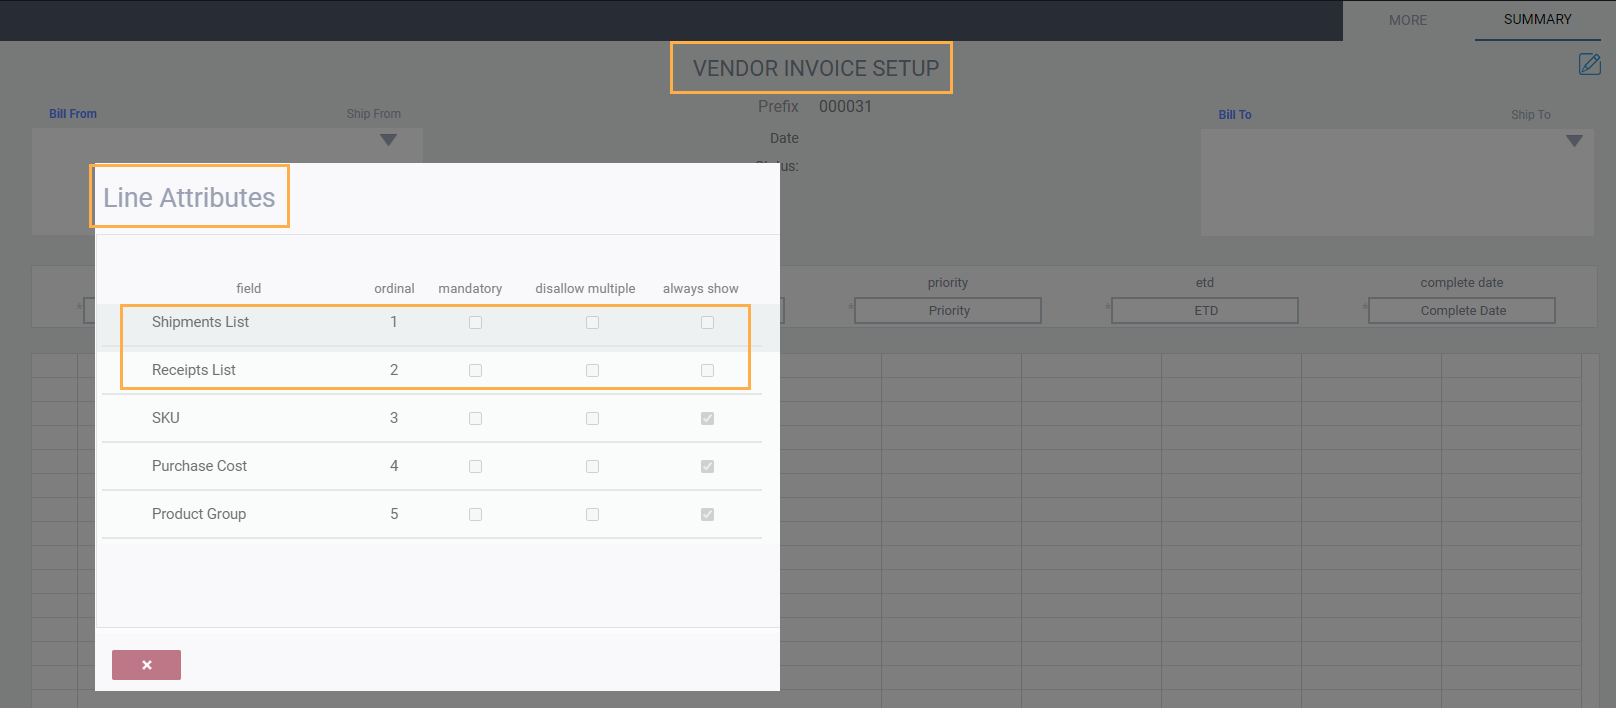
There are two other attributes used in this workflow that are included with Paragon when you signup. These are the receipt and shipment list attributes. They are solely used for listing any receipts or shipments that are in issued status when you create vendor transaction lines. You cannot adjust these attributes and they should already be available in the attributes setup page and they should already be configured on the vendor invoice and vendor credit screens .


Receipt and shipment screen setup


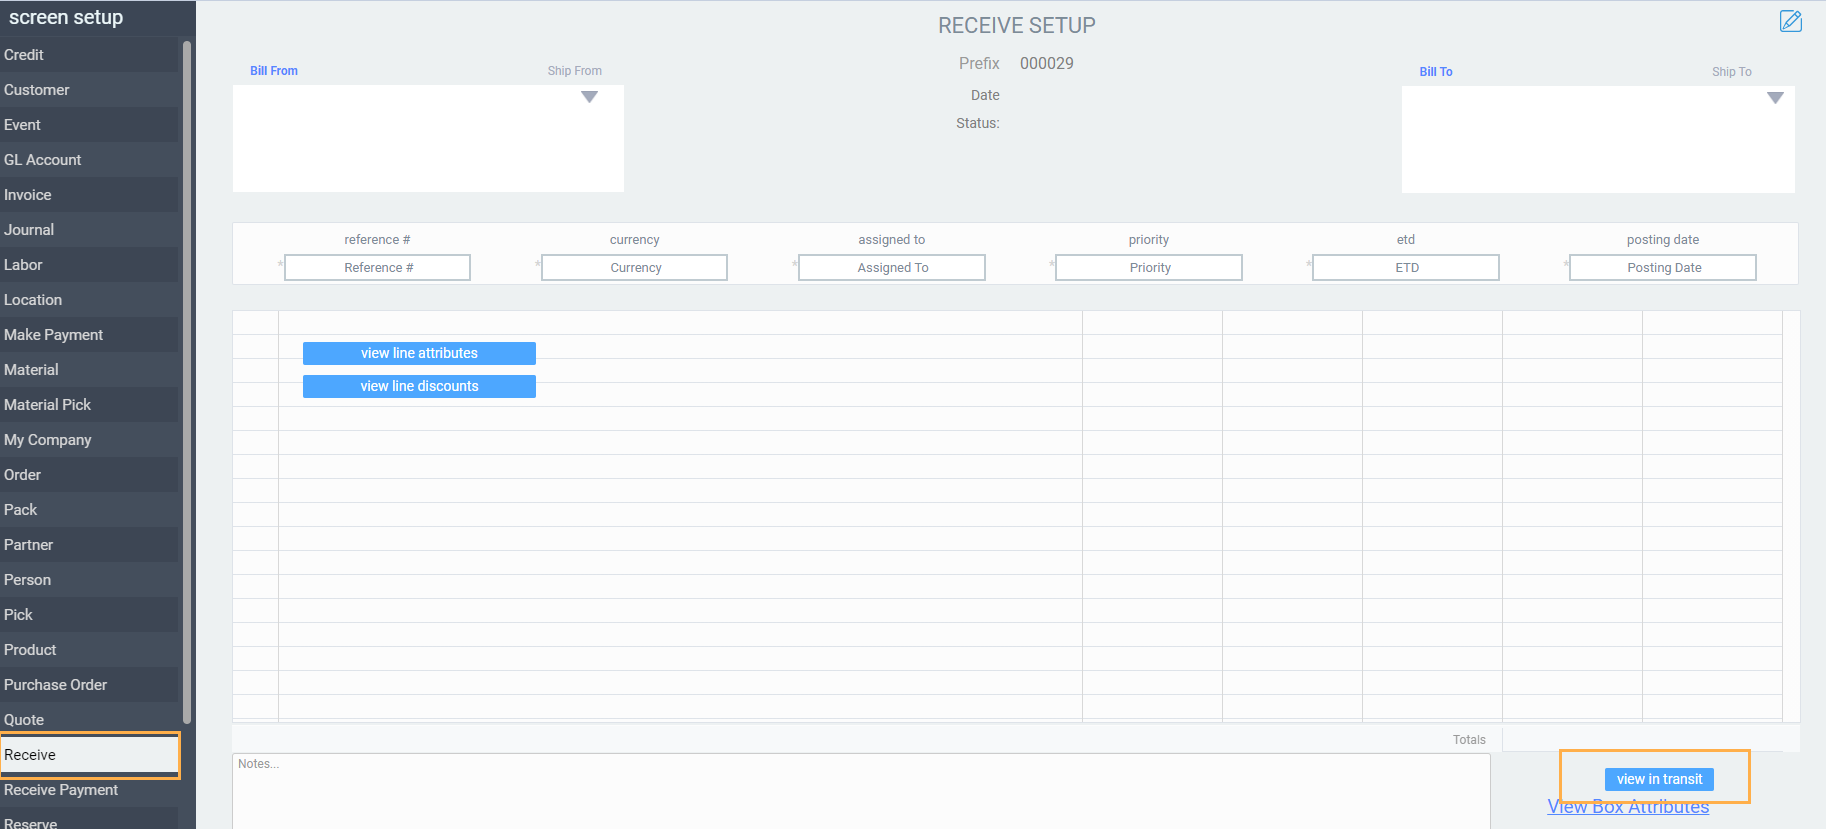
On each of these screens, there is a button called transit charges. Hitting this button on either screen will open a modal where you can add any fees that you have to pay to your vendor(s) when shipping or receiving goods. We'll use the receipt module in this example.
Navigate to the screen setup module by hitting the settings button from anywhere in Paragon and then selecting the screen setup option from the system card (shown below).


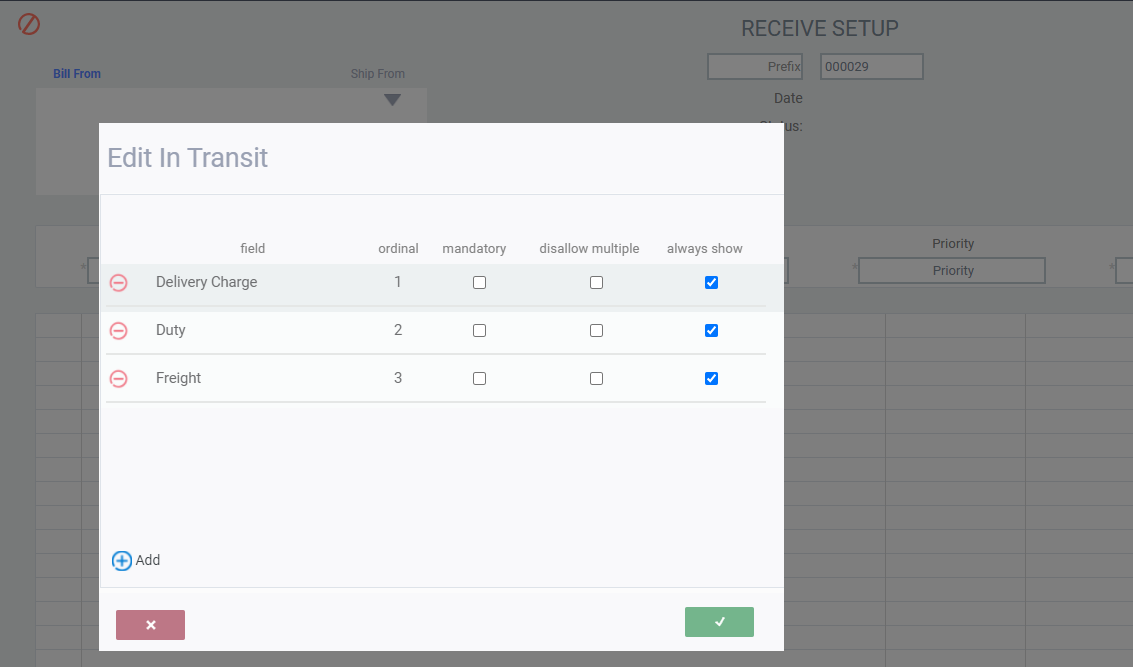
Once the receipt setup screen opens, you can hit the view in transit button to see the modal.
 
This modal shows you any attributes that have already been assigned as transit costs to be tracked on this transaction. If you would like to edit the list of charges you can hit the edit button on the receipt setup screen and return to the transit cost modal to adjust the list as needed. Any attributes that are added to this modal will be listed as options in the transit charges list later on.
 
 
You can repeat the above process for the receipts screen set up as well - this way you can track transit costs both when shipping or receiving goods.
 

Materials


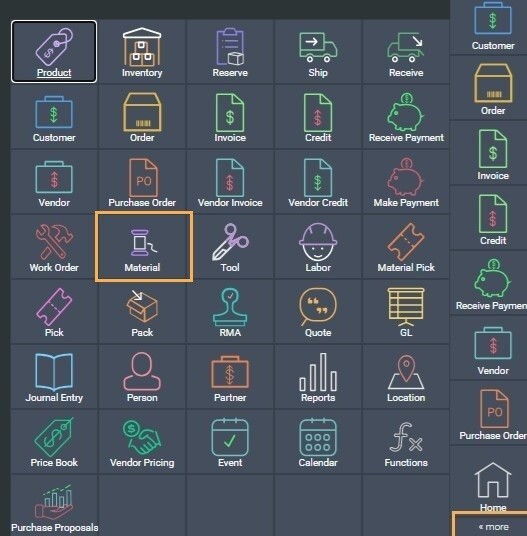
Now we will be creating material items to represent each transit charge we have configured on the receipt and shipments screens. These are material items that will be used to help link the transit charges to your receipt and/or shipment lines. Make your way to the materials module by opening the more button from anywhere in Paragon and selecting the materials option: 
 
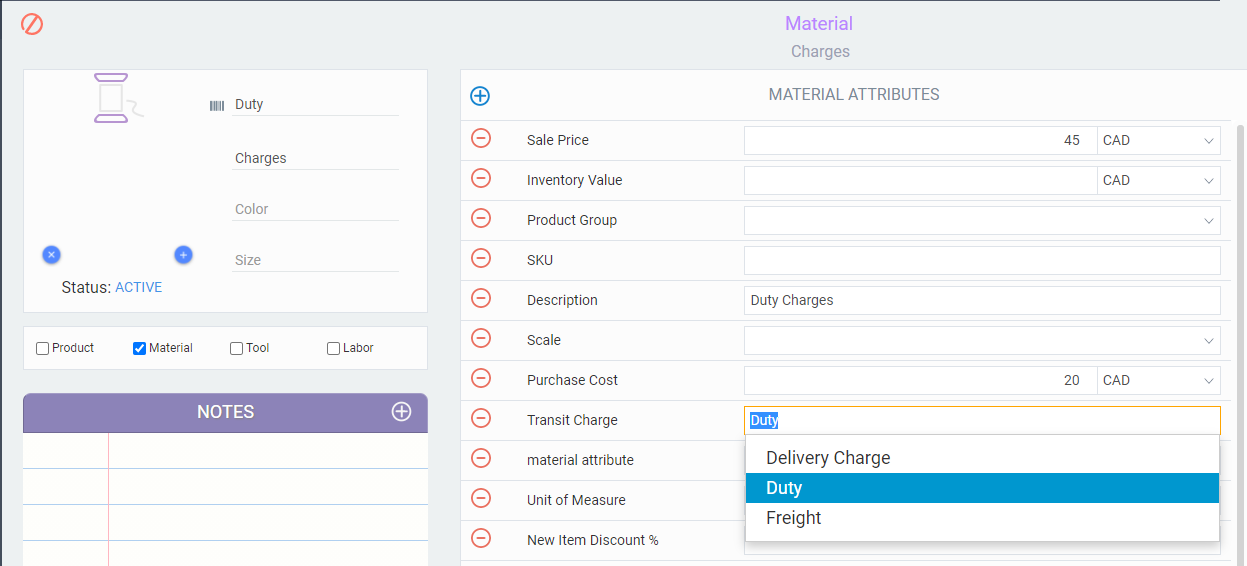
Create a new material . Though you can name these transit materials any way you like, we strongly recommend naming them exactly the same way you named your transit charges in the attribute and screen setups earlier (to avoid confusion later). The transit charge attribute should already be configured on the material screen for you and will include a list of any attributes you have configured in the in transit modals in screen setup earlier in this article. All you have to do is select the appropriate charge from the list - in the example, we chose to use duty.


Using vendor transactions to calculate actual costs

The scenario we will explore here involves calculating the actual costs of your goods based on how much you paid for them and any charges you incur from shipping and/or receiving goods. The tricky part is, these fees are usually only known sometime after the actual goods have been moved. For example, you ship 1,000 units to a client in January. That shipment includes the value of the goods shipped and estimates for any freight or delivery fees that you will have to pay. Your shipper/carrier will then likely send you an invoice for the freight charges - but that may only be in February or March, depending on a variety of factors. Let's take a look at how we can use Paragon to re-calculate the value of your shipped goods based on vendor invoices received for those shipments. 


View the inventory value of the items to be received

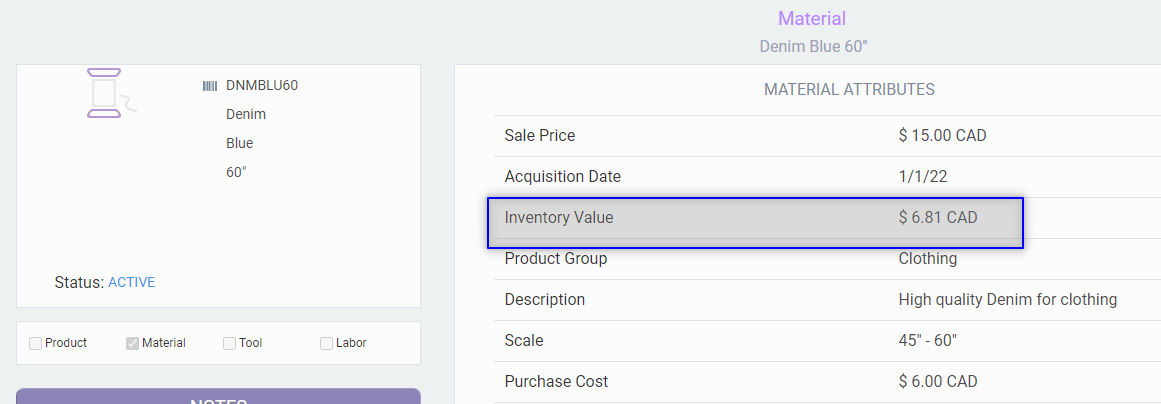
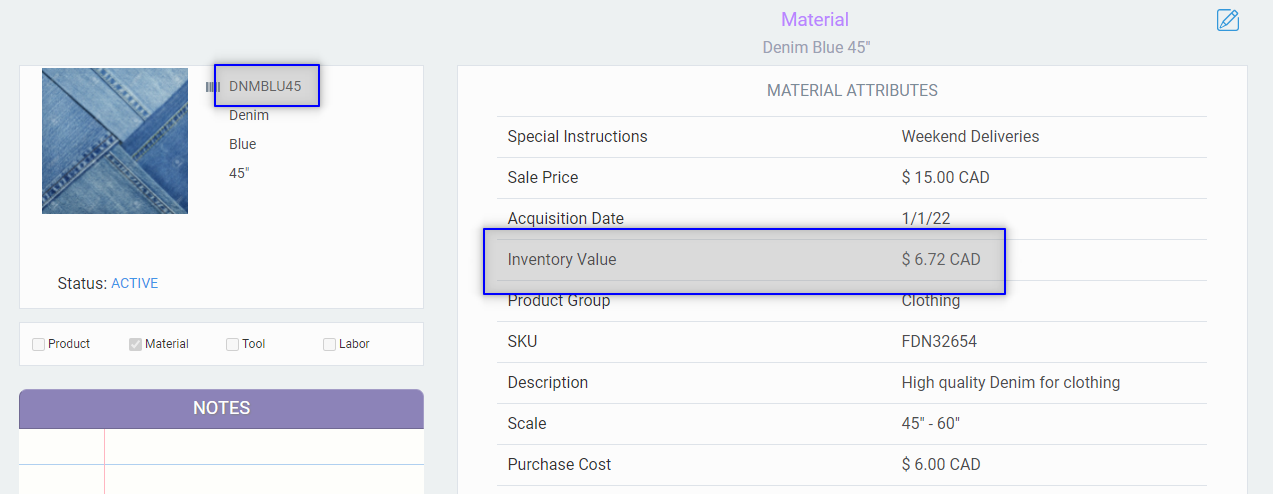
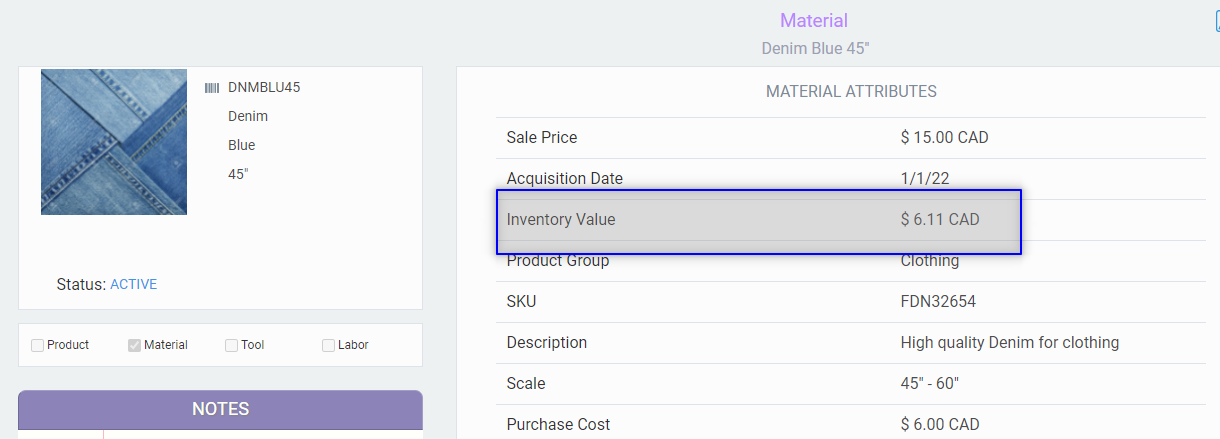
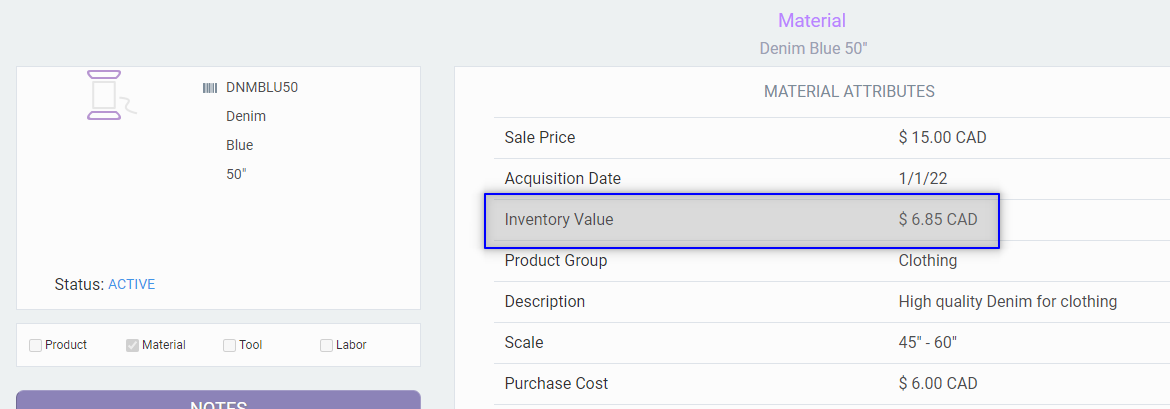
Before starting any receipt process for your goods, first, verify what the current inventory value is. In this example, we have used a few raw materials to work with.


Create a receipt for the goods being received to stock

You can create a receipt manually or from a number of transactions in Paragon. A common workflow is to create a receipt based on a purchase order from a client. 
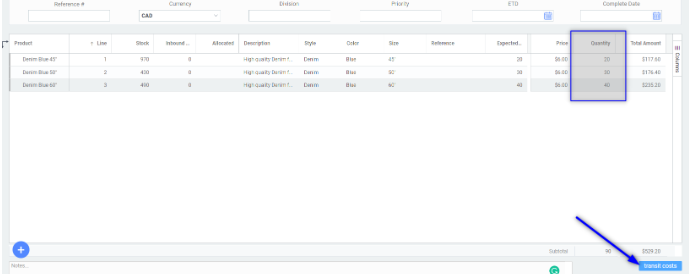
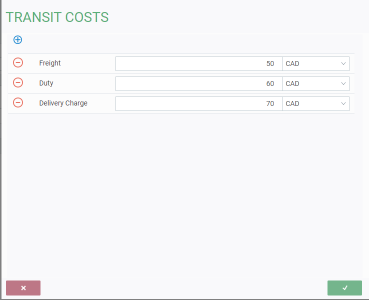
Create the receipt as you normally would and then be sure to hit the transit costs button to view/edit any charges to be applied. 
 
 
Fill in, add, or remove charges as required for this shipment and hit the accept button to save your changes. 
 
Save, issue, and complete the receipt. It can now be used to create or to link to your vendor invoices. 


Note that these costs are estimates only at the moment. They will only be considered actual costs after processing the vendor invoices for the transit charges.
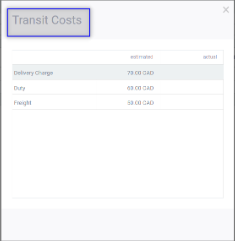


Completing the receipt will automatically update the cost of the items you received based on the inventory value of that item.
 

Create a vendor invoice for the transit costs

Your supplier will invoice you for the shipment of goods you just received. You can create that vendor invoice as usual from the receipt we just created.

However, when you eventually receive charges from your shipper/carrier, you would create another set of vendor invoices to represent those charges and fees. 
For the purposes of calculating your actual costs, we will create a manual vendor invoice from your freight forwarder or carrier when they send you the bill for any charges you incurred for your shipments and receipts. This vendor invoice is only for the delivery charges or fees you are being charged by this carrier, and not for the goods that were actually received.
Create the vendor invoice for your carrier vendor and add a line for the material we created earlier for duty charges. The cost of that line should match the amount you are being charged: 
 
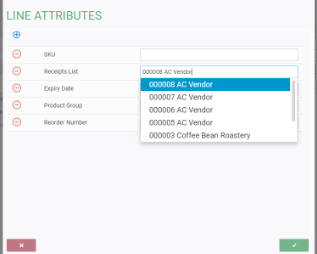
Now that this line for the duty charge (for example) has been added to the vendor invoice, you must link that charge to the receipt you completed earlier as a line attribute:
 
Repeat the above for each line for transit charges.
When you save these changes and issue the vendor invoice, an automatic journal will be created and will be applied to the appropriate GL account and the inventory values of the raw goods will be adjusted to reflect these actual transit changes.
 
View the inventory values of the received goods and view the actual transit charges on the original receipt
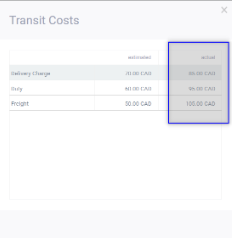
Now that the transit charges have been applied to the receipt that was made earlier, you can see the actual costs on the receipt from the transit cost modal:
 
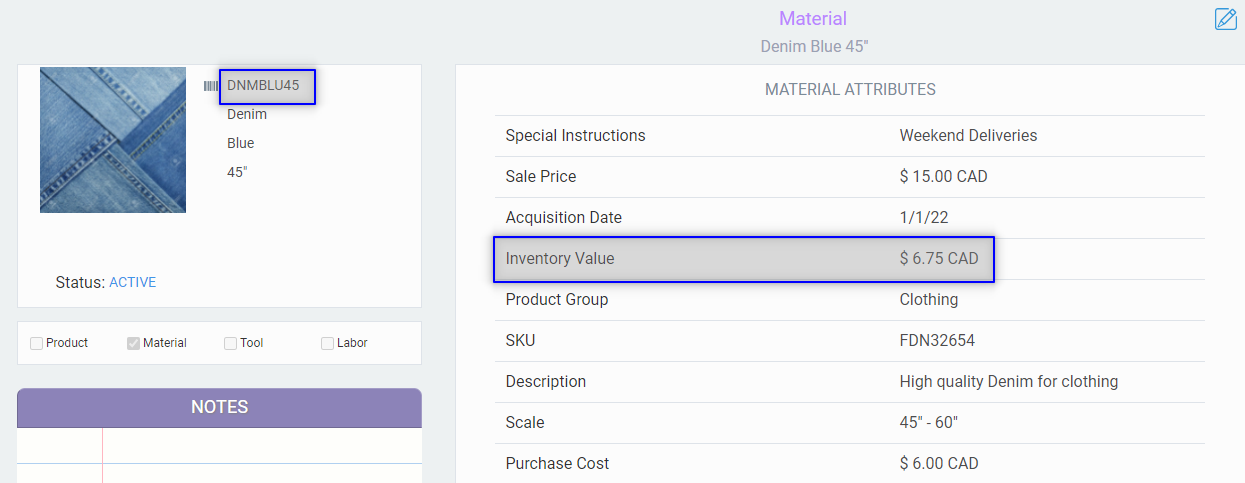
And the inventory values of the goods that were received should have been adjusted to reflect this: 


What's Next?

Now that you have learned how to use Paragon to calculate actual costs for your goods, you might be interested in some of these other Paragon features: