Creating a material pick ticket

Introduction

What is a material pick ticket and how is it used? Good question. Most businesses use pick tickets to get their goods pulled from shelves, racks, or bins in the warehouse to prepare them for shipping to customers. These documents are used to tell the warehouse worker which goods are needed, how many to pull and where to find them within the warehouse. What happens if you are a manufacturer and you need raw materials to be pulled off the shelves for work orders? Paragon features a transaction that works exactly like a pick ticket - but is used for picking materials or any raw goods that are needed in order to produce a product. Here, we'll walk you through how to create a material pick ticket in Paragon.
 

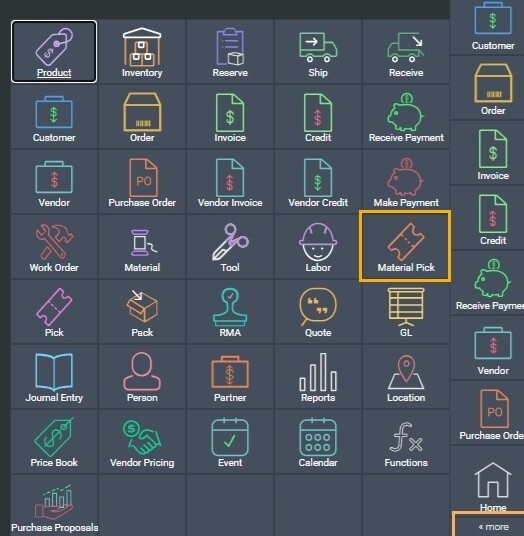
Access the material pick module

The material pick module is very similar to the pick ticket module, which is based on Paragon's standard transaction screen. If you are not familiar with the format of transaction screens, take a look at our guide: How do transaction screens work
Select the material pick module by clicking the more button under home.


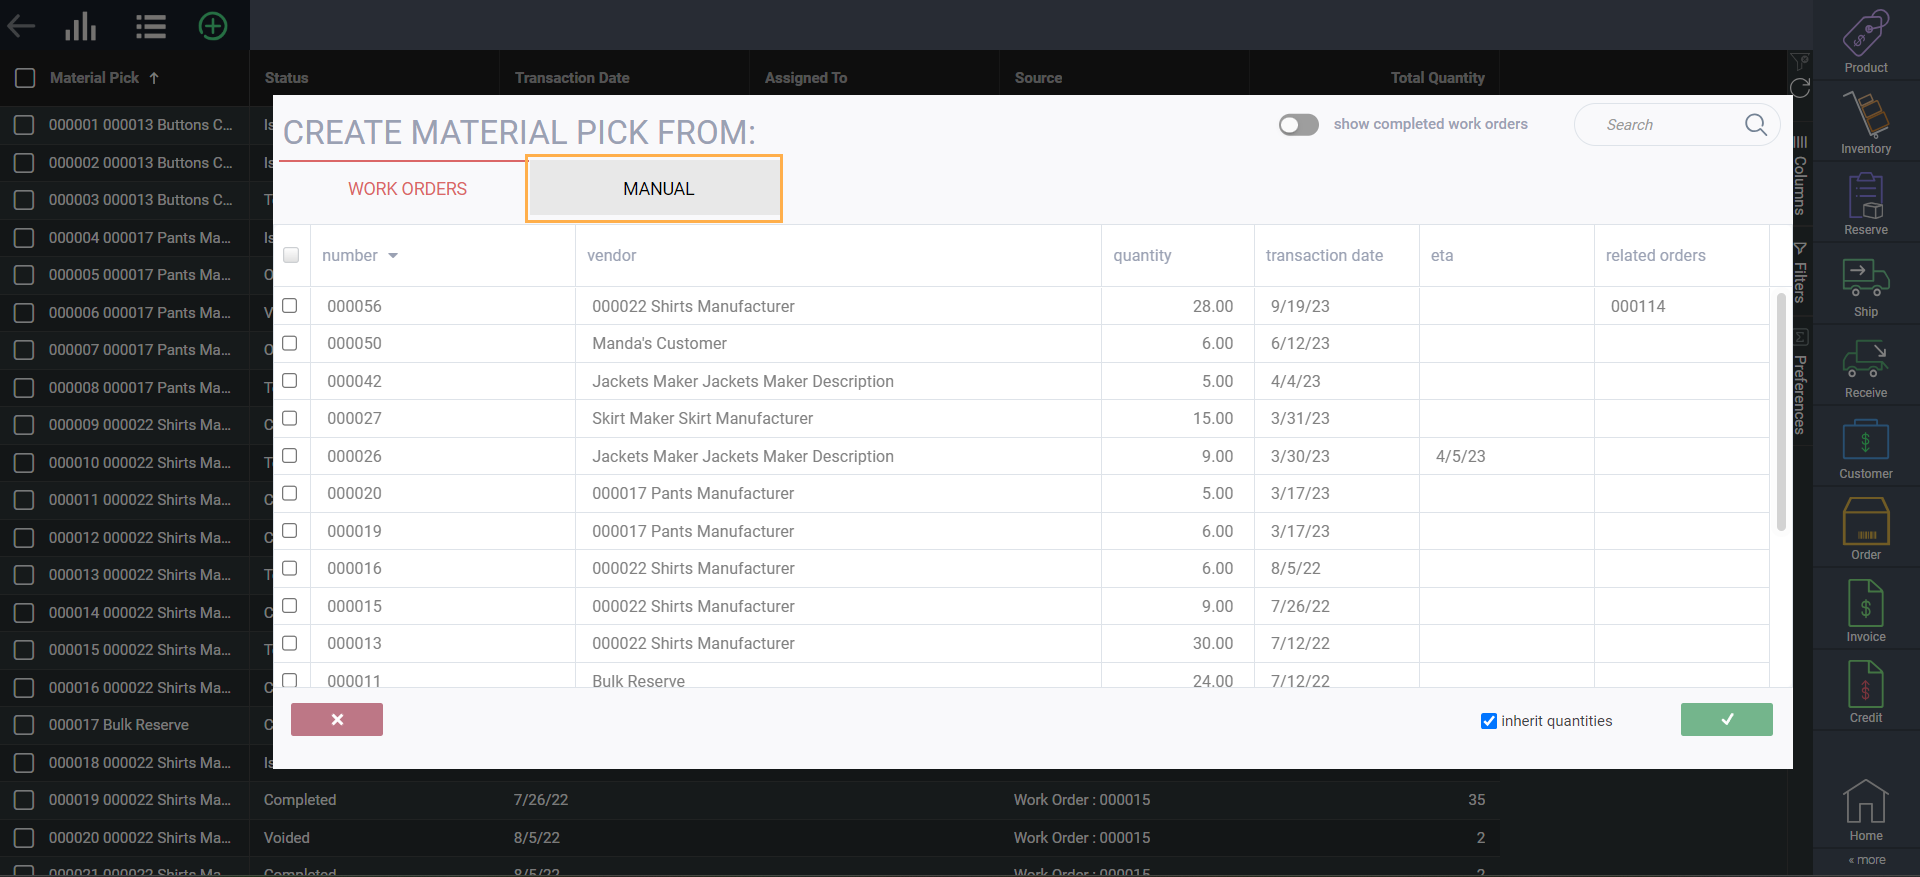
Create a material pick manually.

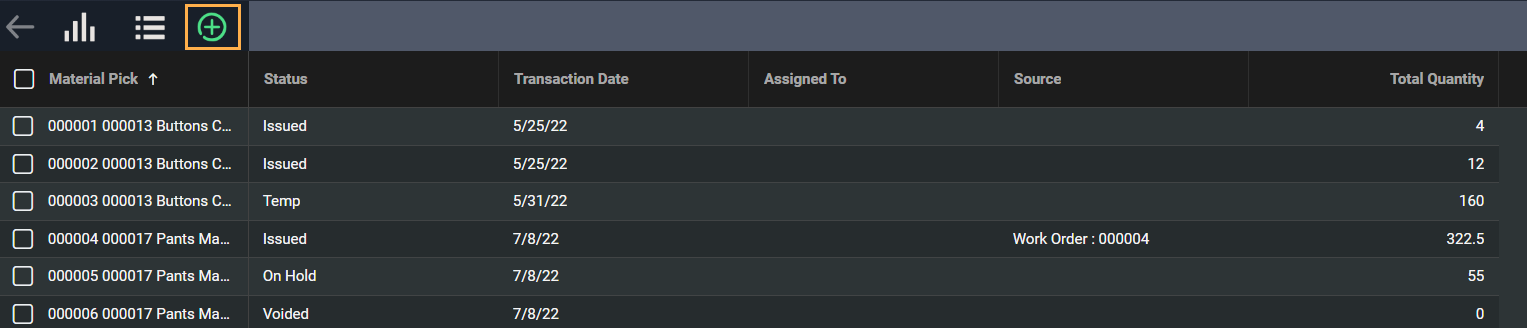
Click the add button on the left-hand corner of the screen to create a new material pick ticket.


Select the method you want to create the material pick ticket from. In this case select manual.

 
Select the company name from the drop-down menu. This drop-down list will include your own company (if you are making the finished products yourself) or the vendor/contractor who will be doing the manufacturing for you.

 
Once the company is selected, Paragon will auto-populate the billing and shipping address fields from the data in either my company or from the vendor file, depending on which one you chose from the drop-down list. 
 

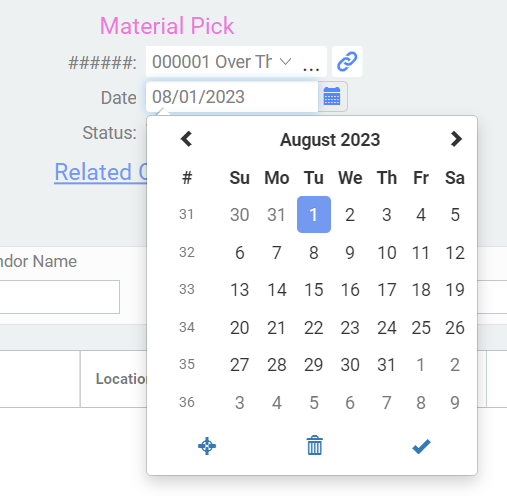
The ##### is a placeholder for the material pick ticket sequence number. Once you finish creating the pick ticket and save it, the placeholder will automatically be replaced with a sequential pick ticket number (which is determined on the screen setup page for material picks).


You can change the auto-populated addresses by clicking on the down-arrow which will open up a list of address options. In the example below, you would be changing the bill from address, which is why the color of the text is blue.


Next, you can select the date of the material pick. If you leave this blank, it will default to today's date when you save the ticket.
 
 
Enter information in the business terms section of the screen by clicking on the field and typing in or selecting the information if the attribute was created as a list. 


Note that the business terms may be different from our sample, based on how your transaction screen was configured.


Add products to your material pick 
Click the add button to add an item to your material pick.


You can search for any item by typing in keywords, and you can filter by warehouse. Check the boxes on the left-hand side for the items you want to include in your material pick. Click the accept button on the bottom right-hand corner to add the selected items to the ticket.

 
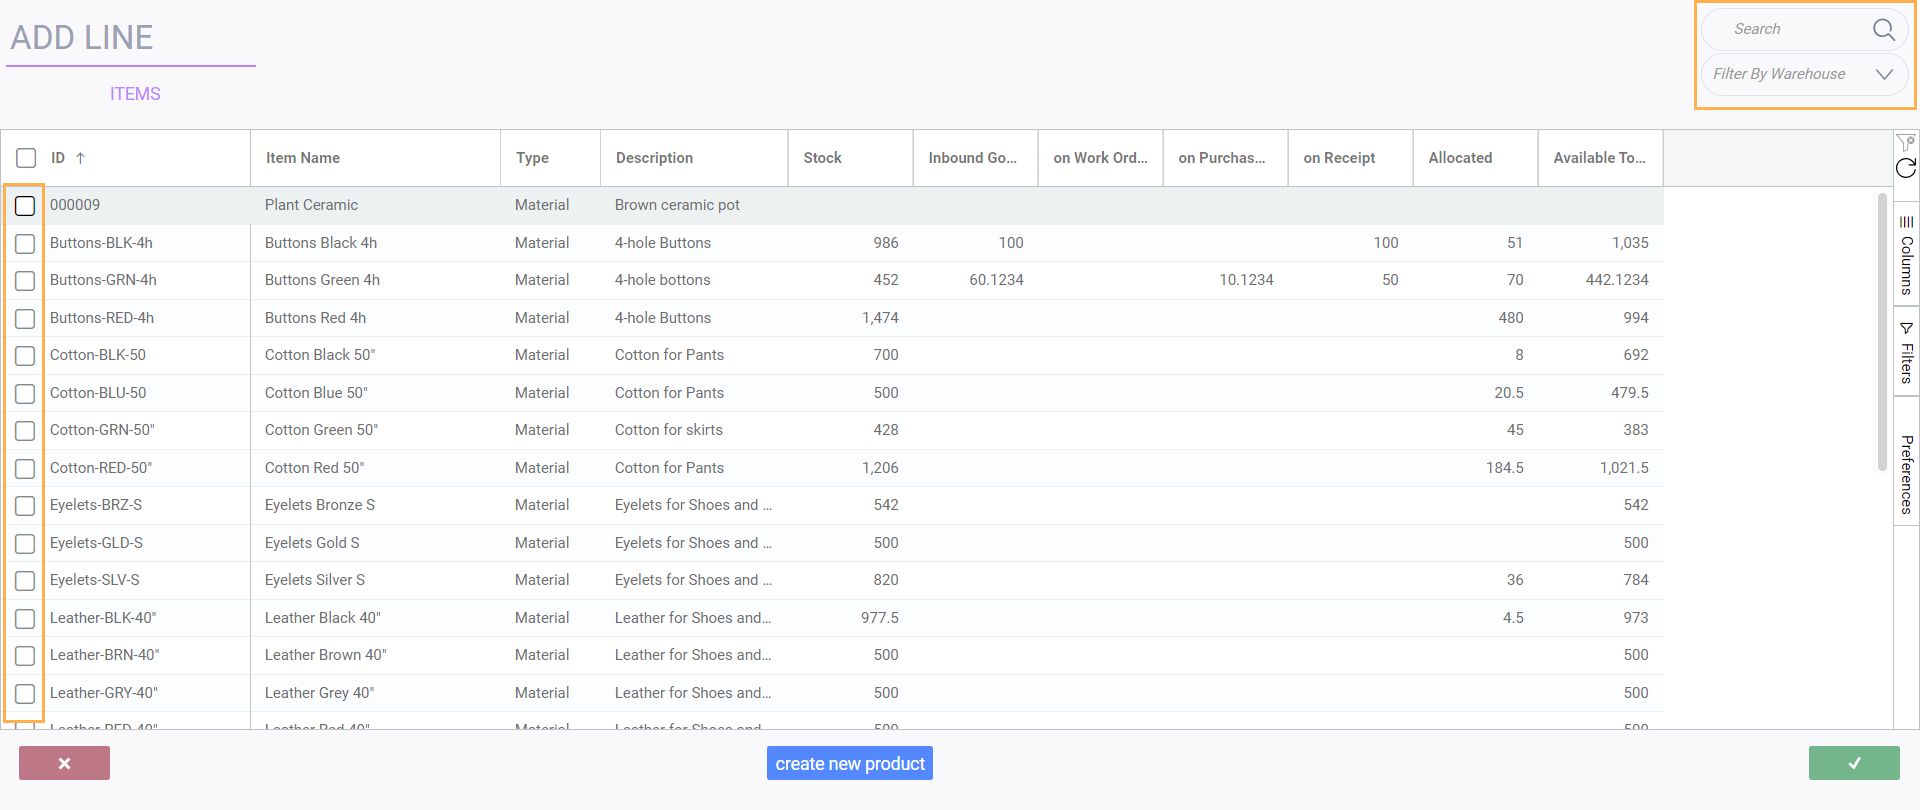
  1. In locations, you must indicate where the item will be picked from, e.g. raw materials warehouse.
  2. Type in the number of units to be picked in # to be picked. Update the # picked field as you pick your items.

You can always add more line items by clicking the
add button.

Add notes and attachments

If necessary, add any relevant notes by typing in the notes section. These notes won't affect anything in the system and can be used for reminders or internal communication. You can also add files or URL attachments by clicking the attachments button.


Canceling a material pick

A material pick can be canceled at any point before it is saved by clicking cancel in the upper left-hand corner. 


Saving a material pick

Once you have filled in all the relevant information you can save your material pick by clicking  save in the bottom right-hand corner. 


Once the material pick is saved, it will automatically be assigned a transaction number and be assigned a temp status. 


Creating a material pick from a work order

Select how you would like to create the shipment. In this case, make sure the work orders tab is selected. It is selected when work orders is highlighted in red.

You can select the work orders you want to use to create the material pick by checking the corresponding box on the left. To deselect a work order, uncheck its box.
 
A material pick can be canceled at any point before it is saved by clicking the  close button in the bottom left hand corner.
To create and save a material pick from the work order(s) you selected, click the  accept button in the bottom right hand corner.
Once you click the accept button, the material pick will be created.
 

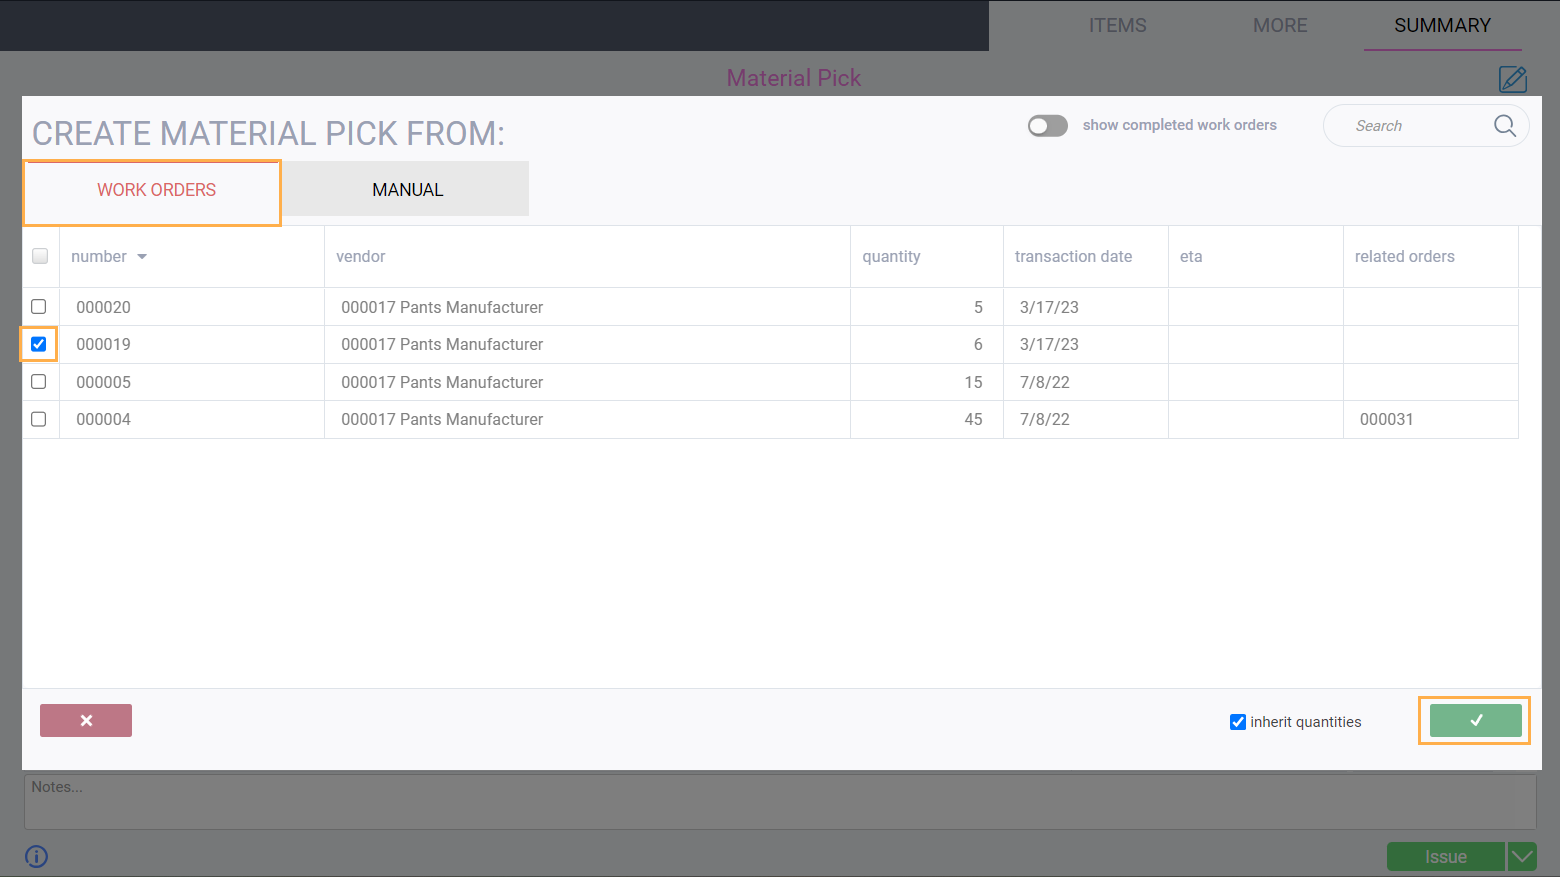
Note that once the material pick is created, it will automatically be assigned a material pick number and be assigned a temp status.


The transaction created will have the custom bill of material listed as products, and the same company addresses as the work order. Under the reference column, you will also see which work order it was created from. 


Add the warehouse locations to your product

If you need help doing this, you can refer to the Add products to your material pick section of the article. Don't forget to save and issue.
 

I've created my material pick ticket. Now what?

Once a material pick ticket has been created, you can proceed in a number of ways using the action button in the bottom right hand corner:


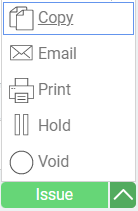
  • Copy the ticket to create a new ticket in temp status that has inherited the line items and quantities 
  • Email the ticket
  • Print the ticket
  • Put the ticket on hold
  • Issue the ticket
  • After it is issued, you can complete the ticket


What's next?

For more information on transactions and transaction screens, take a look at these handy articles.