![paragon logo-1.png]](https://support.paragon-erp.com/hs-fs/hubfs/paragon%20logo-1.png?width=240&height=75&name=paragon%20logo-1.png)
Introduction
Shipping goods to your clients is pivotal for any business. This article will walk you through how to manually create a shipment as well as how to create shipments from other transactions such as packing lists, orders, invoices and material picks.
The ship module is based on Paragon's standard transaction screen.
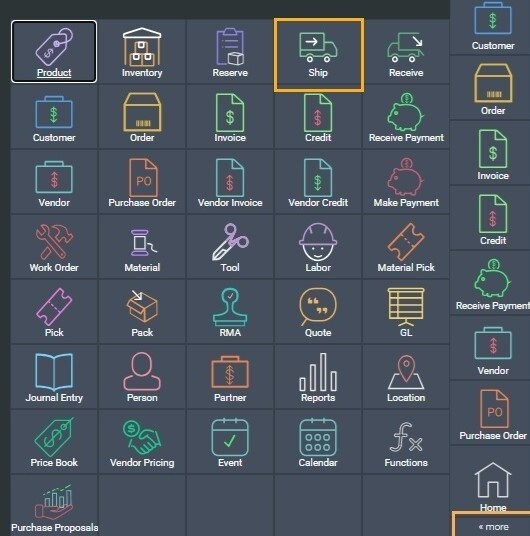
Open the ship module
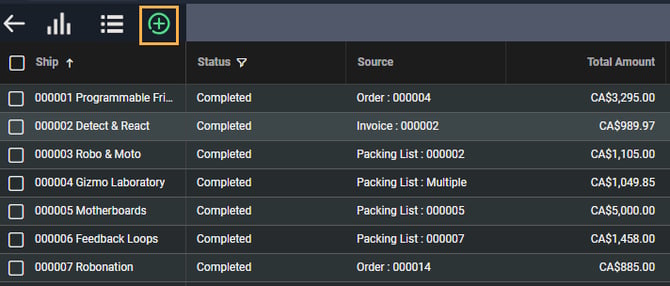
Create a shipment manually
This is the list view of the shipment module. To add a new shipment, click the add new button.
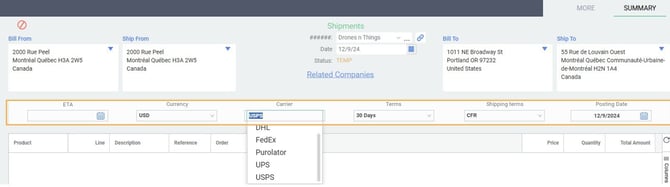
Add shipment information

Note that the shipment will not have a transaction number until it is saved. Once a transaction number is assigned, it will replace #####.
The shipment date will default to the current date. Click on the calendar icon to choose another date if required.
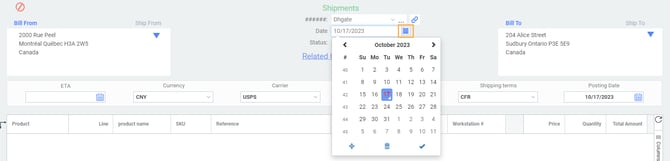
Enter information in the business terms
Every transaction in Paragon has a header section, called business terms, that includes up to six pre-configured attributes (this is determined in screen setup). Fill the business terms by clicking on the appropriate field and typing in the correct information or selecting it from the drop-down menu that appears when you click on the field.
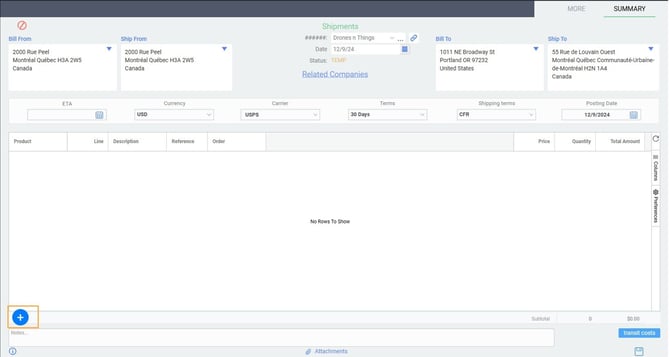
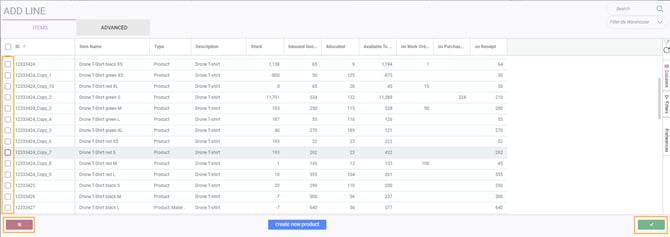
Add products to your shipments
To add a product or line item to your shipment, click the add product button at the bottom left-hand side of the line item area.
Line attributes and attachments
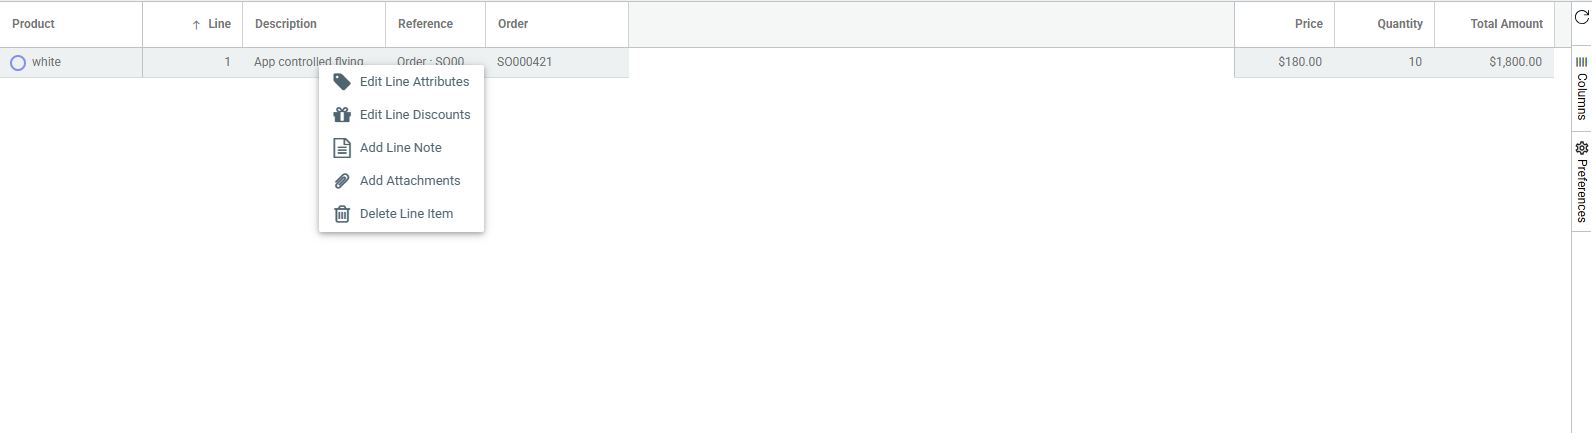


Don't forget to save after adding your notes and attachments.
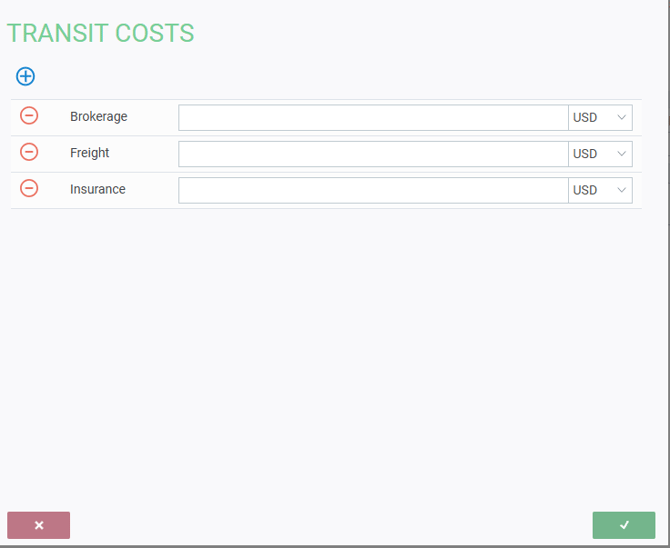
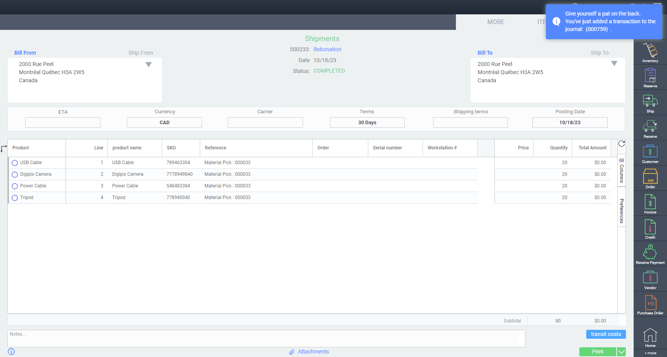
Transit Costs
Use the transit costs button to enter costs when you receive the various invoices from your vendors for these costs.
![]()
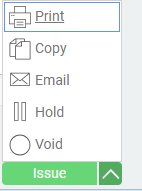
Issue the shipment
Click the default action button to issue the shipment.
![]()
Creating a shipment from an invoice
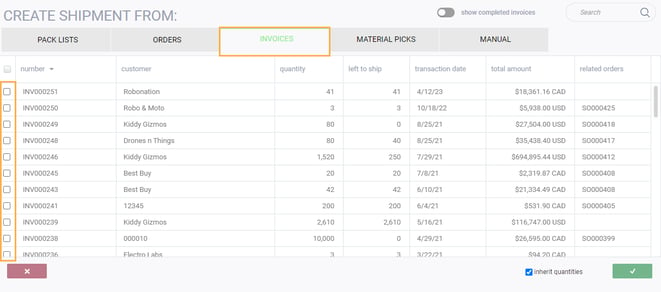
To create and save a shipment from the invoice(s) you selected, click the accept button in the bottom right-hand corner.
Once you click the accept button, the shipment will be created. Note that once the shipment is created, it will automatically be assigned a shipment number and a temp status. Once you are satisfied with the shipment, click the default action button to issue it.
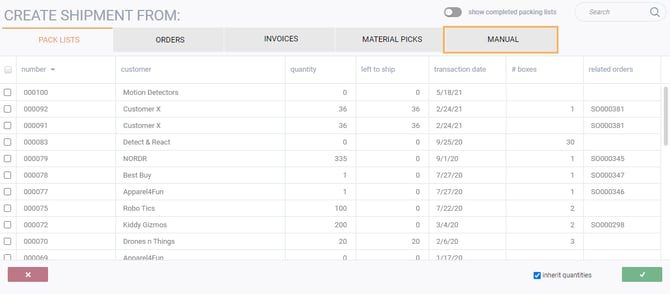
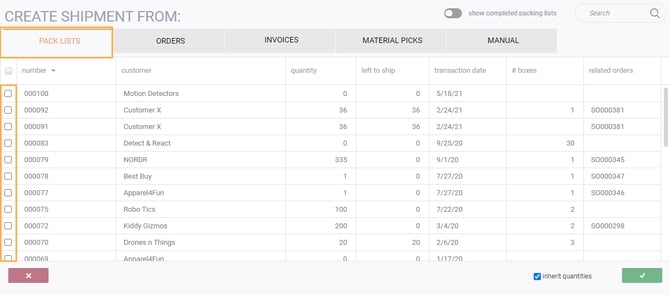
Creating a shipment from a packing list
Select how you would like to create the shipment. In this case, make sure the pack lists tab is selected. It is selected when pack lists is highlighted in orange. Select the packing lists you want to use to create the shipment by checking the corresponding box on the left and clicking accept. To deselect a packing list, uncheck its box.
Confirm or cancel shipment from a packing list
To create and save a shipment from the packing list(s) you selected, click the accept button in the bottom right-hand corner.
Once you click the accept button, the shipment will be created. Note that once the shipment is created, it will automatically be assigned a shipment number and a temp status. When you are satisfied with the shipment, click the default action button to issue it.
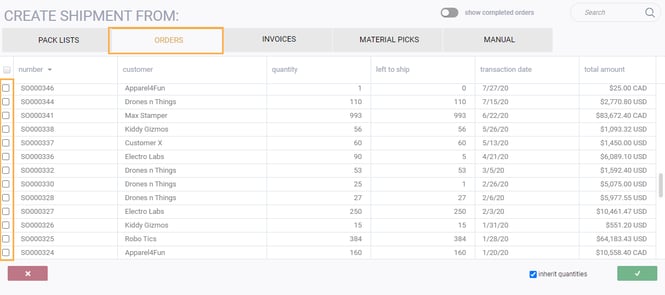
Creating a shipment from an order
Select how you would like to create the shipment. In this case, make sure the orders tab is selected. It is selected when orders is highlighted in orange.
Select the orders you want to use to create the shipment by checking the corresponding box on the left. To deselect an order, uncheck its box.
Confirm or cancel a shipment from an order
To create and save a shipment from the order(s) you selected, click the accept button in the bottom right hand corner.
Once you click the accept button, the shipment will be created. Note that once the shipment is created, it will automatically be assigned a shipment number and a temp status. If you are satisfied with the shipment that you created, click the default action button to issue it.
Creating a shipment from material picks
Create a work order
The expectation is that a vendor will be making the goods for you to ship the material, so do not use my company as the company on the work order - use the vendor or contractor that you are sending the material to.
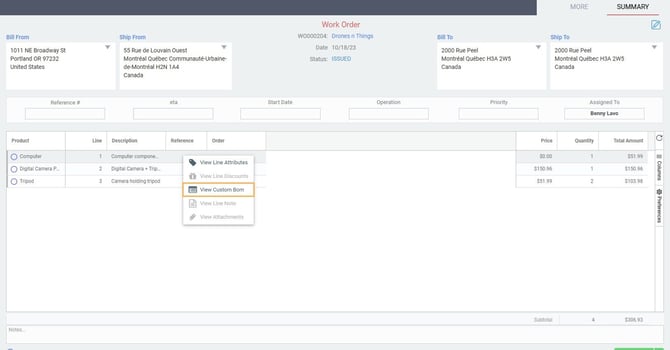
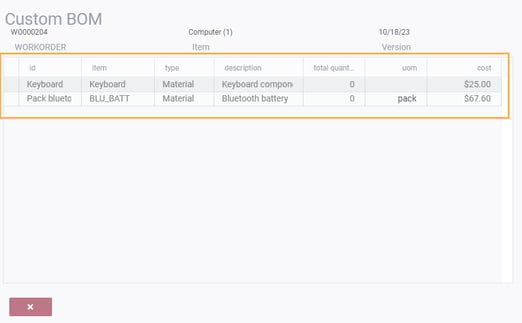
If the button is not available to click, it means the product does not have a custom bill of material attached. If you need help creating them, you can read our article on creating a Bill of Materials (BOM)
Create a material pick from the work order
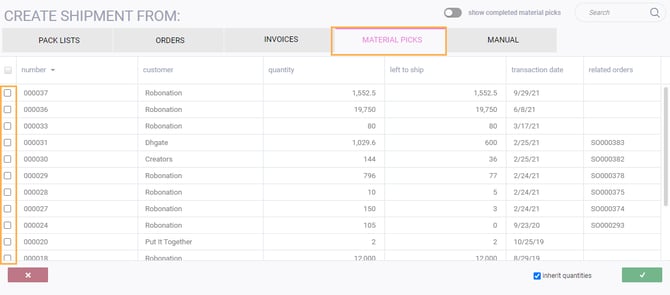
To create and save a shipment from the material pick(s) you selected, click the accept button in the bottom right hand corner.
Once you click the accept button, the shipment will be created. Note that once the shipment is created, it will automatically be assigned a shipment number and a temp status.

I've created my shipment, what else can I do?
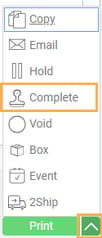
Once a shipment has been created you can proceed in a number of ways using the green action button in the bottom right hand corner.
Once your shipment has been issued, the options in the action button will be expanded.

What's next?
Here are two more articles related to shipments that you might find helpful: