![paragon logo-1.png]](https://support.paragon-erp.com/hs-fs/hubfs/paragon%20logo-1.png?width=240&height=75&name=paragon%20logo-1.png)
Introduction
If your supplier has refunded you on items that you have returned or perhaps for items that you received in error or with defects, they will often issue a vendor credit. This transaction would then be used to either buy more goods or to eventually receive a payment from your supplier. Now, we will walk you through all the ways you can create a vendor credit.
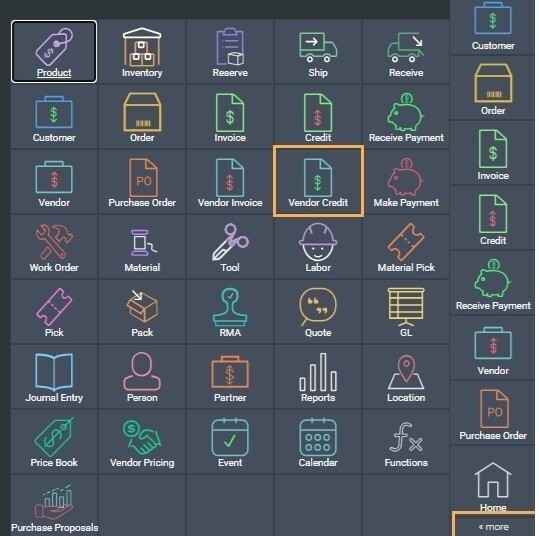
Open the vendor credit module
You can open the vendor credit module by clicking the vendor credit button in the more menu.
Creating a vendor credit manually
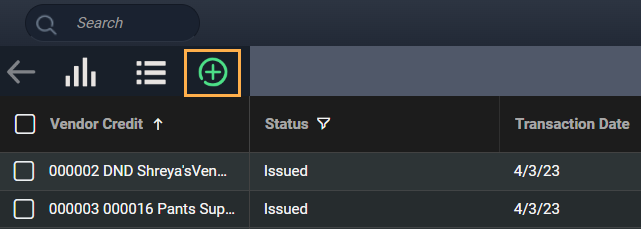
From the vendor credit list view, click the create new vendor credit button at the top left hand side of the screen.
A new screen will appear where you can select how you would like to create the vendor credit. In this case, make sure to select the manual tab.
This screen will automatically be displayed after selecting manual, and the vendor dropdown list will also be in focus.
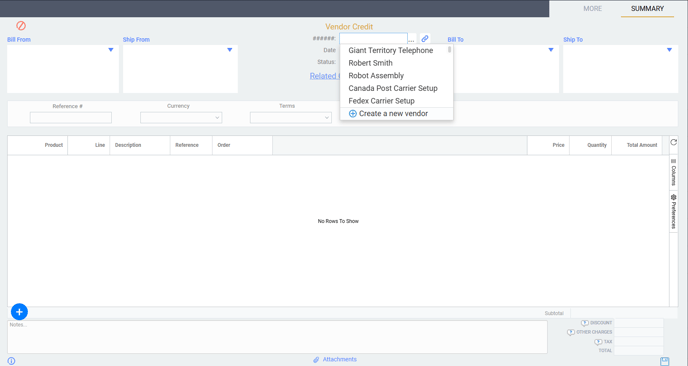
You can then select your vendor.
If the vendor you are looking for isn't part of the list, you can refer to our article on creating vendors and/or on creating vendors in transactions.
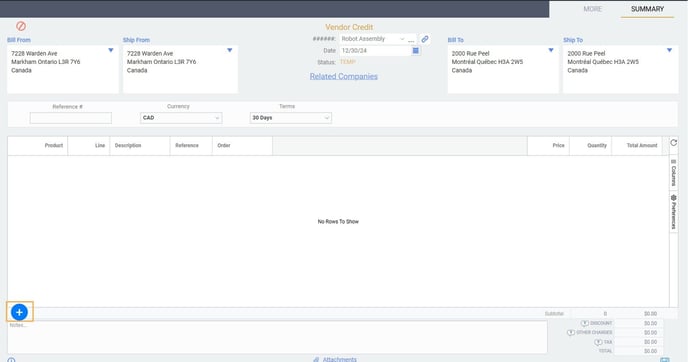
Once selected, the bill from, ship from, bill to and ship to addresses will populate.

Add products
Click the add new button.
This screen with the products listed will appear. The chosen products will be added to the vendor credit by checking the box(es) at the left side of the screen. If necessary, use the search field to find the products that you want to add to the transaction.
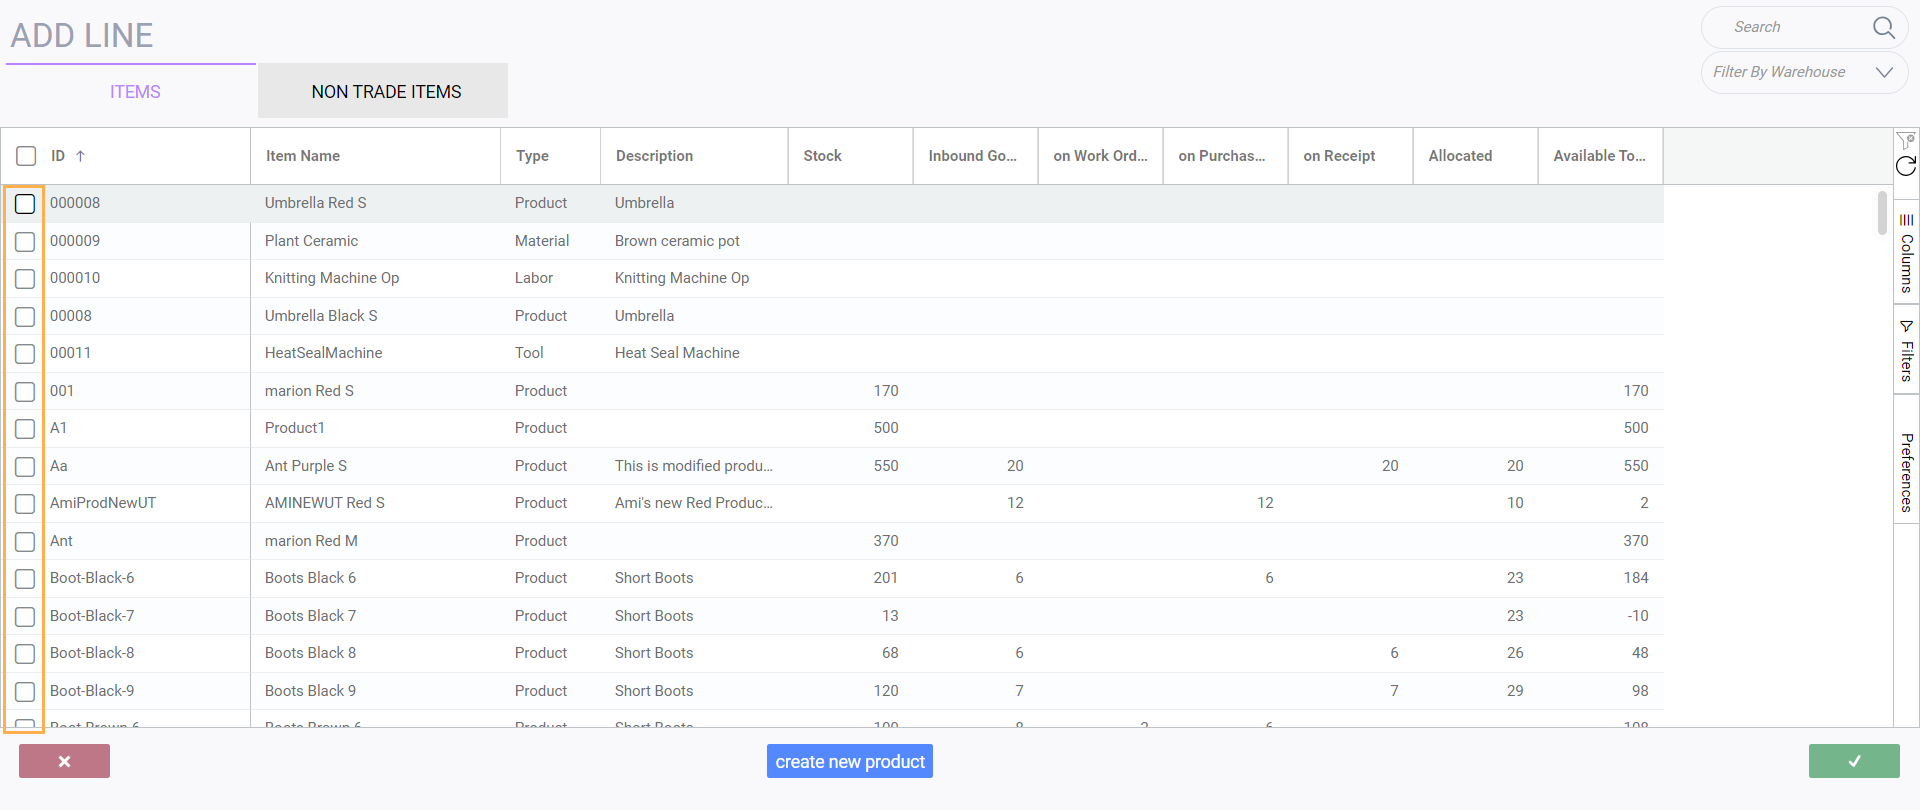
The selected item(s) will appear in the product lines once you click the accept button.
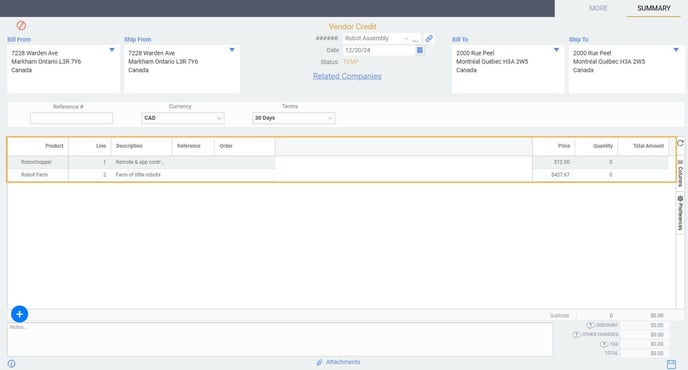
Enter the product quantities
Quantities for the chosen products can be manually entered in each product line. The total dollars for the credit will show at the bottom right of the screen.

To save your vendor credit, click the save button at the bottom right corner.
You can issue the transaction when you are ready to do so.

Creating a vendor credit from a vendor invoice
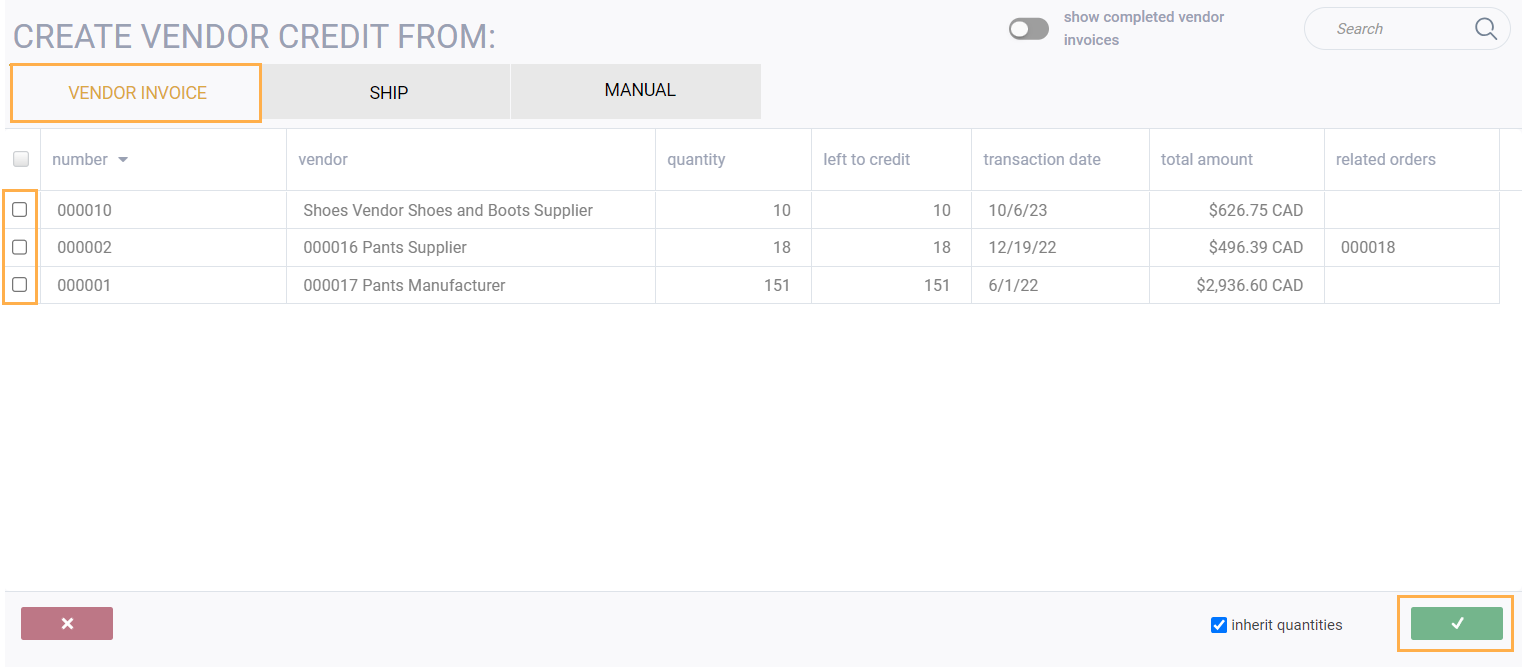
Select how you would like to create the vendor credit. In this case, make sure the vendor invoice tab is selected.
It is selected when vendor invoice is highlighted in orange. Select the vendor invoice(s) you want to use to create the vendor credit by checking the corresponding box on the left.
To deselect a vendor invoice, uncheck its box.
Confirm or cancel a vendor credit from a vendor invoice
A vendor credit can be canceled at any point before it is saved by clicking the close button in the bottom left-hand corner.

To create and save a vendor credit from the vendor invoice(s) you selected, click the accept button in the bottom right-hand corner.

Once you click the accept button, the vendor credit(s) will be created.
Accepting the transaction will automatically assign a vendor credit number in a temp status.
You can issue the transaction if you wish to do so.

Creating a vendor credit from a shipment
Sometimes a shipment is received from a vendor, but it is missing some items. In this case, you may want to create a vendor credit directly from the shipment. Select how you would like to create the vendor credit. In this case, make sure the ship tab is selected. It is selected when ship is highlighted in green. Select the shipment(s) you want to use to create the vendor credit by checking the corresponding box on the left.
To deselect a shipment, uncheck its box.
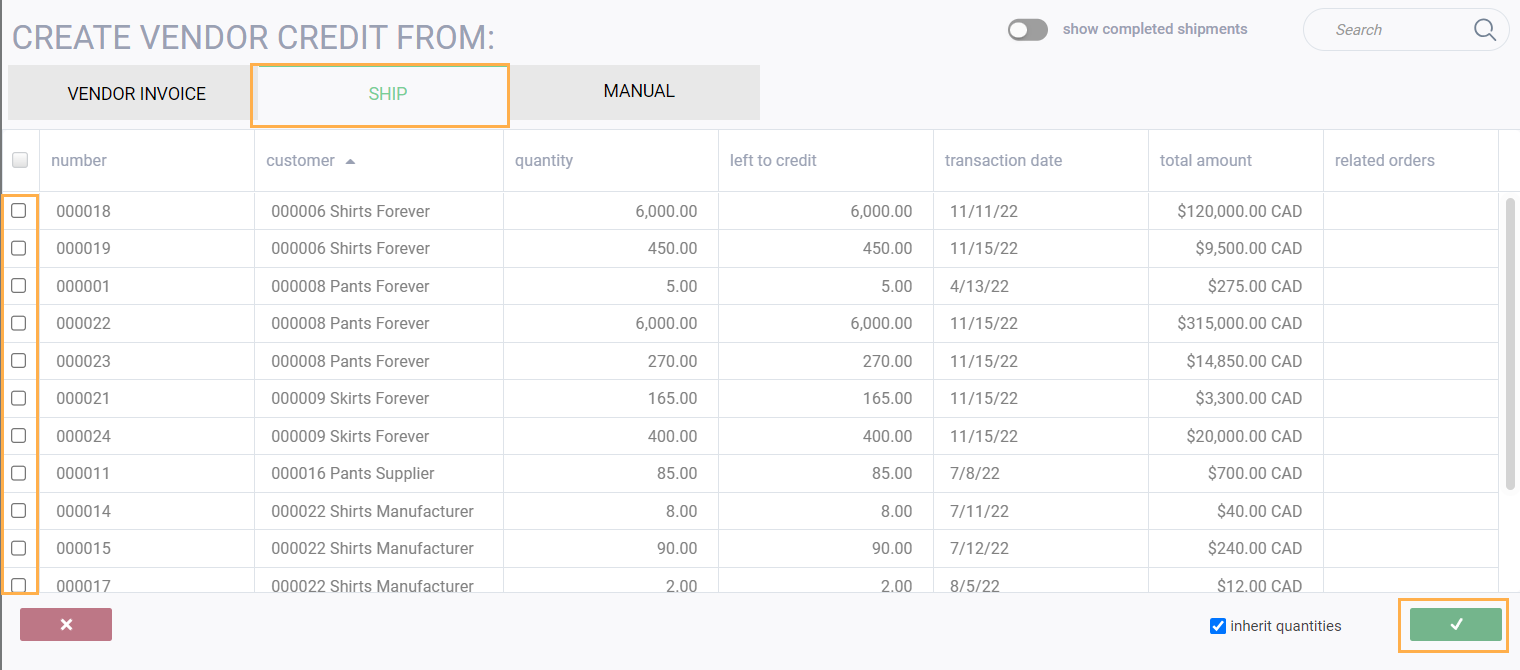
A vendor credit can be canceled at any point before it is saved by clicking the close button in the bottom left-hand corner.
To create and save a vendor credit from the shipment(s) you selected, click the accept button in the bottom right-hand corner.
Once you click the accept button, the vendor credit will be created.
Accepting the transaction will automatically assign a vendor credit number in a temp status.
You can issue the transaction when you are ready to do so.
I've created my vendor credit, what else can I do?
Once a vendor credit has been created you can proceed in a number of ways using the action button in the bottom right hand corner.
The following options are available before the vendor credit has been issued.
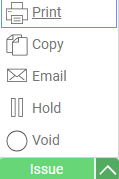
The following action options are available after a vendor credit has been issued.

What's next?