![paragon logo-1.png]](https://support.paragon-erp.com/hs-fs/hubfs/paragon%20logo-1.png?width=240&height=75&name=paragon%20logo-1.png)
Introduction
Here, we'll walk you through how to create a credit in ParagonERP. Credits can be created manually, from an invoice, an RMA or a receipt.
The credit module is based on Paragon's standard transaction screen.
Open the credit module
Open the credit module by selecting it in the right hand navigation bar or in the more menu.

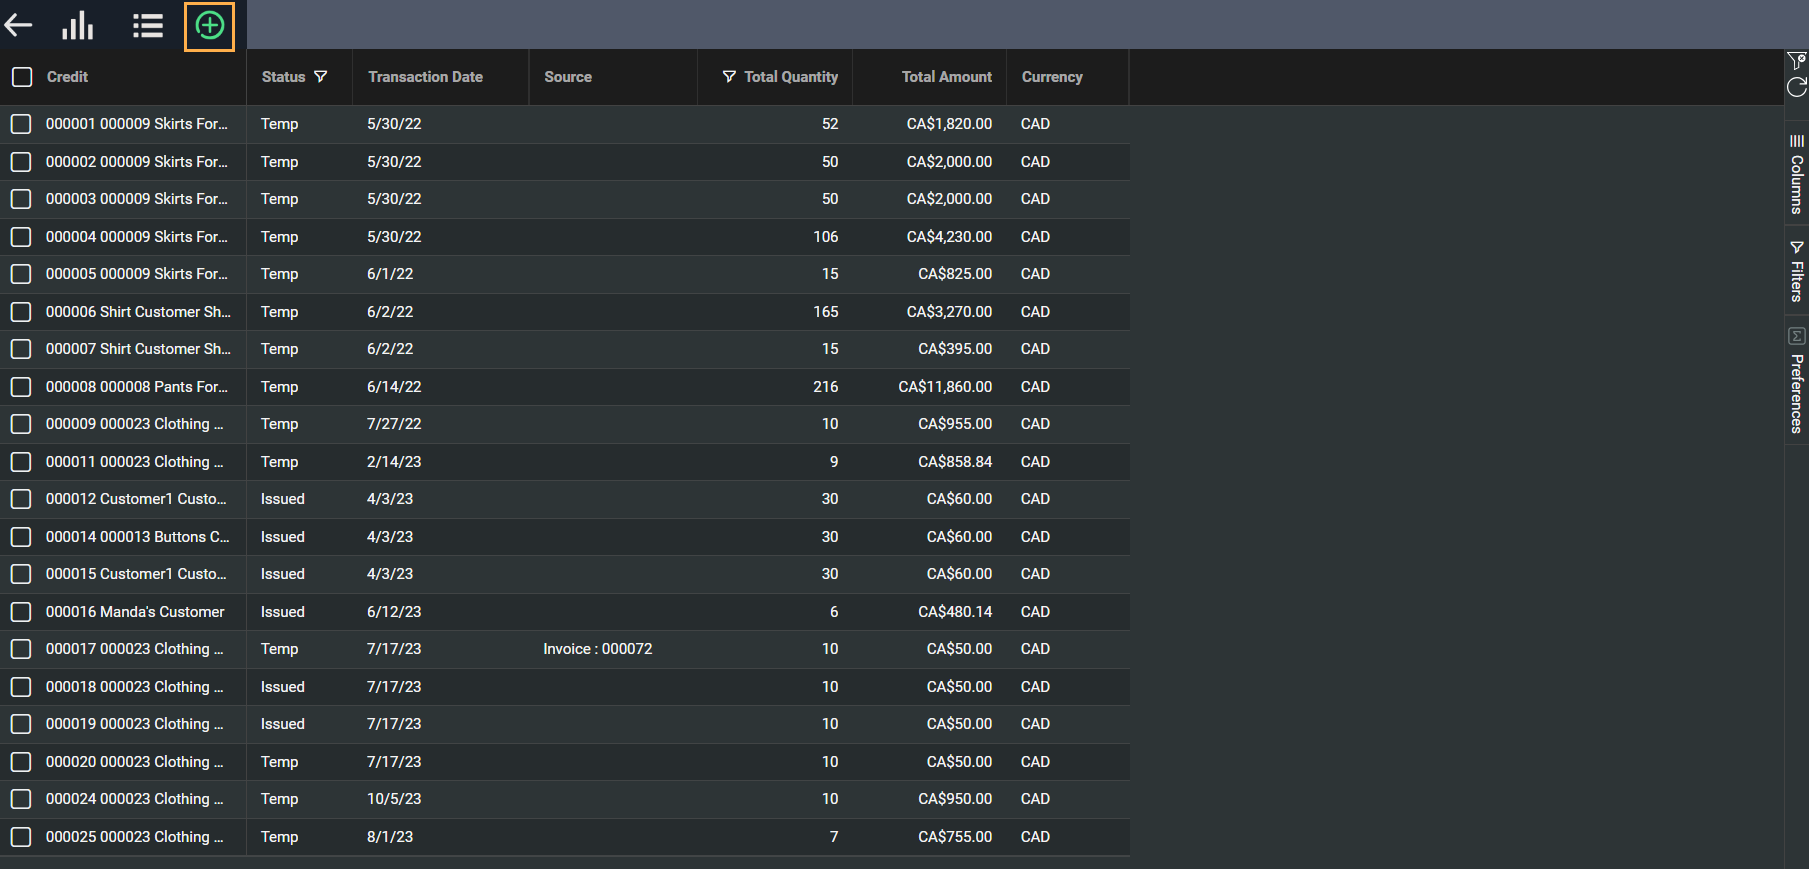
Add a new credit
This is the list view of the credit module. To add a new credit, click add new credit.
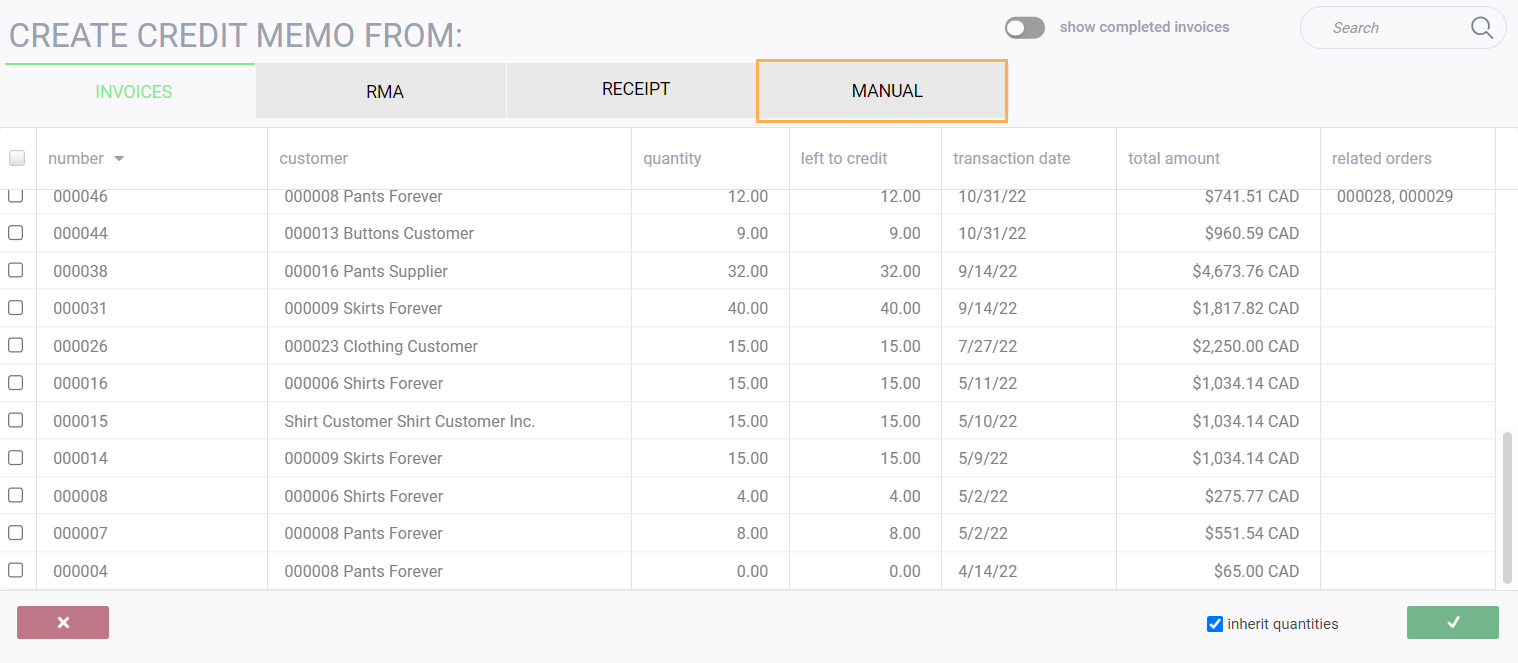
Manual method
Select the method you want to create the credit from. In this case select manual.
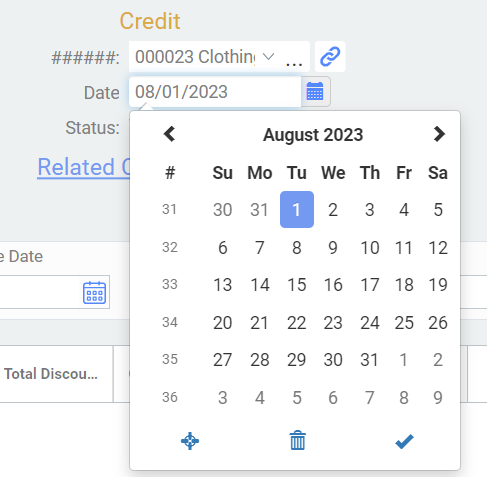
Enter in general information
Select the company name from the drop down menu.
Once the company is selected, it will auto-populate all the addresses from the customer file.
Note that the credit will not have a transaction number until the credit is saved. Once a transaction number is assigned, it will replace #####.

Select the date by clicking on the calendar icon and selecting the appropriate date.
Enter attributes
Enter information in the attribute panel by clicking on the field and typing in the correct information or selecting it from the drop down menu.
Note that the attribute panel will be slightly different based on how your system was configured.

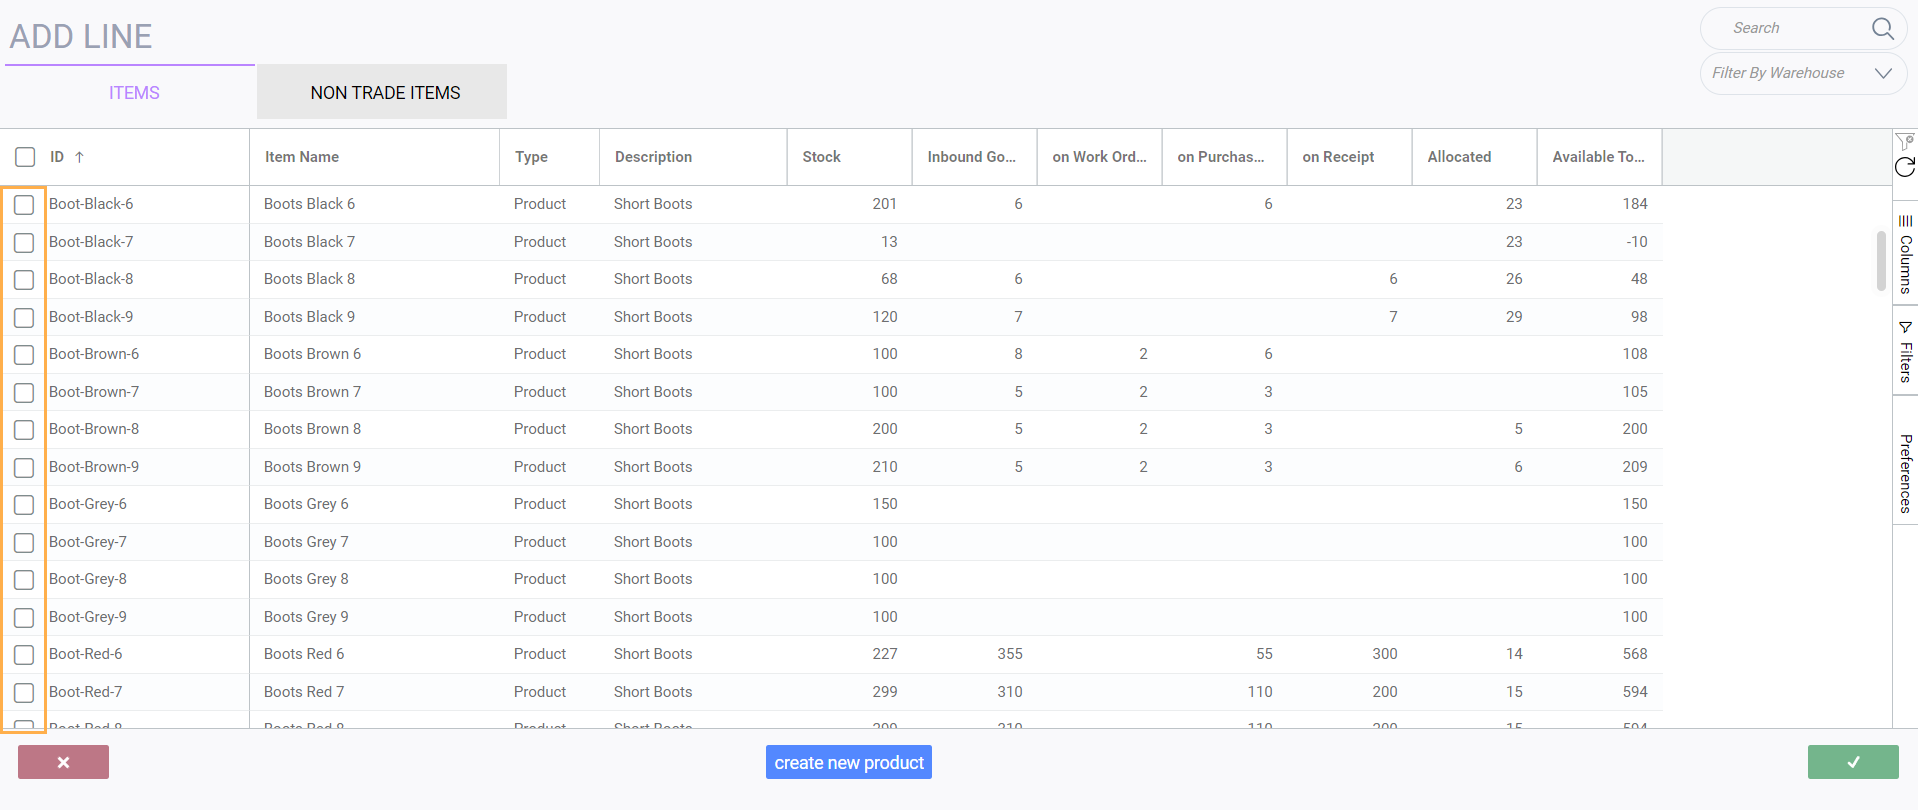
Add products to your credit
To add a product or line item to your credit, click add product in the lower left hand side of the line item area.

Select all the items you would like to add to your credit by checking off the boxes on the left. If you are happy with what you have chosen, you can press the accept button. Otherwise, you can click cancel.
Add notes
If necessary, add any relevant notes. These notes won't affect anything in the system. They can be used for reminders or internal communication.

Canceling a credit
A credit can be canceled at any point before it is saved by clicking cancel in the upper left hand corner.

Saving a credit
Once you have filled in all the relevant information you can save your credit by clicking save in the bottom right hand corner.

Once the credit is saved, it will automatically be assigned a transaction number and a temp status.

Creating a credit from an invoice
Select how you would like to create the credit. In this case, make sure the invoice tab is selected.
It is selected when invoice is highlighted in green.

Select the invoice you want to use to create the credit by checking the corresponding box on the left. Note that once an invoice is selected, only invoices for that specific customer will show on the screen.
To deselect an invoice, uncheck the box.

You can choose one or multiple invoices for that customer to create your credit. Click on the accept button to add lines from those invoices to your new credit.
![]()
If the credit is created from an invoice with no units left to credit, a blocker notification will be displayed and the credit will remain in Temp status.

ParagonERP will also issue a blocker if your credits are worth more (or are for a higher quantity) than the applied invoices.

Follow the instructions for a manual credit memo to finish creating your credit from an invoice.
Creating an credit memo from an RMA
Select how you would like to create the credit. In this case, make sure the RMA tab is selected. It is selected when RMA is highlighted in blue.

Select the RMA you want to use to create the credit by checking the corresponding box on the left. Note that once an RMA is selected, only RMAs for that specific customer will show on the screen.
Follow the rest of the instructions for creating a credit manually to finish creating your credit from an RMA.
Creating a credit from a receipt
Credits can also be created from a receipt. If goods are returned from your customer, when they are received into your warehouse, you can choose to create a credit note directly from the receipt.
From the main add new credit screen, click on receipt.

Choose the receipt that you want to use for the credit. Note that once a receipt is selected, only receipts for that specific customer will show on the screen.

You can create your credit from one receipt or multiple receipts.
I've created my credit, now what?
Once a credit has been created you can proceed in a number of ways using the green action button in the bottom right hand corner.
The following actions are available while your credit is in temp status:

The following actions are available when your credit is in issued status.

Edit a credit
![]()
What's next?
Check out these relevant articles.