
Introduction
Resource management and planning for the apparel industry can be extremely complex. While it requires you to be able to see all sizes for a style across the screen in a grid, it also requires you to be able to enter information based on each style/color/size, such as UPCs and SKUs. Paragon is made to accommodate and optimize your business workflows, across all industries. In this article, we will walk you through how to optimally set up Paragon for handling products and orders in the apparel industry. The pivot view function allows you to pivot from a size grid view to a vertical view for each product/color/size.
Enable and set up Pivot view
Set up sizes - It is important to ensure the attribute size is configured properly in your attribute set up.
Set up scales - In order for pivot to work, scales must be set up specifically to pivot view.
Enable pivot view - Pivot view is used to streamline your order entry. Enabling it tells Paragon to show your individual columns for different sizes of a specific style. Learn how to enable pivot view
Add products to a transaction
In this section, we will show you the easiest way to find and select your products so that the pivot view of all the sizes can be accessed.
Using an invoice or order, start by either creating a new or opening an existing invoice or order.
In your transaction (invoice, order, etc.) screen, you will be in edit mode by default if you created a new transaction. If not, hit the edit button in the top-right corner.
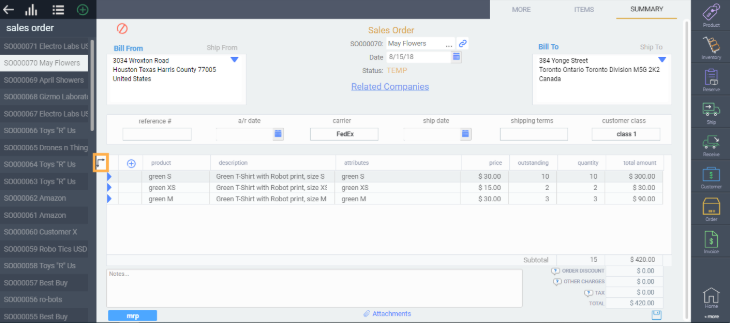
If pivot mode is not viewed by default, hit the pivot button in the middle-left of the screen to view it.
Add products
Enter the add product modal by hitting the add product button on your transaction screen.

Now, you can add as many items as you need for your order. In this example, we will add three different groups of products: tshrt_base, tshrt_green, and tshrt_red.
Here, we will type in tshrt_base in the search box and hit enter. When the associated products come up, we hit the add all button in the top left corner to select all.
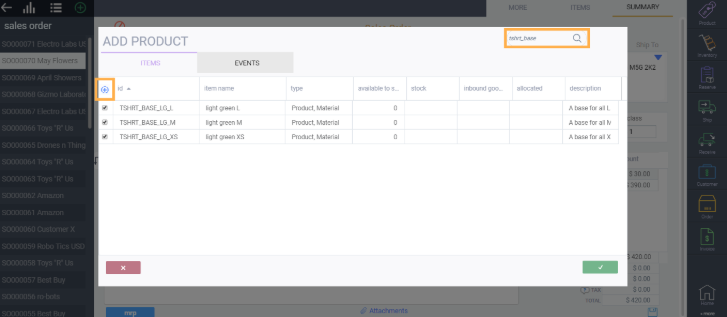
Without hitting the accept button, we can make a new search. This time for tshrt_g. Again, we hit the add all button.

Finally, we can do another search for tshrt_r and hit the add all button.
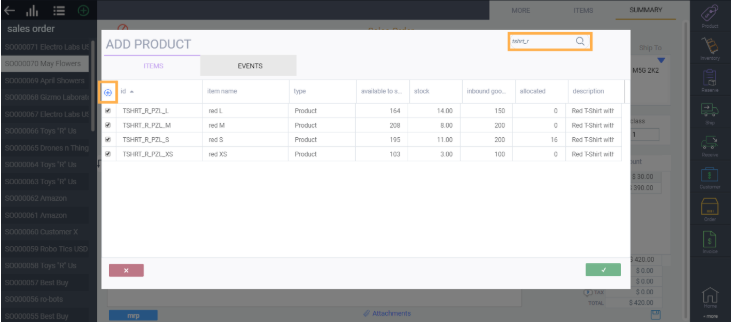
Now finally, with all three styles selected, we hit the accept button and exit the add product modal.

Enter quantities
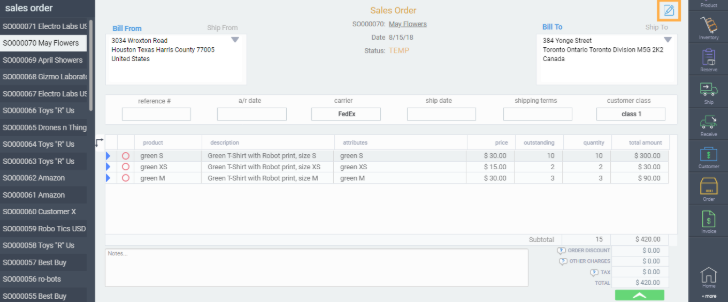
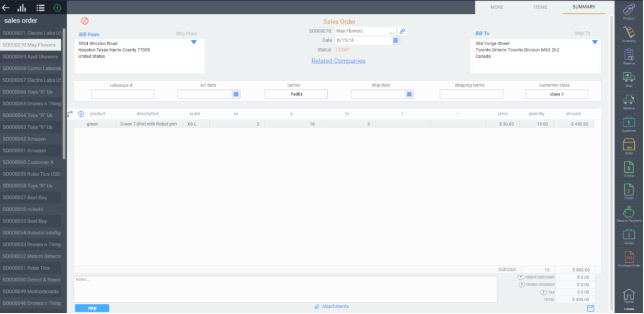
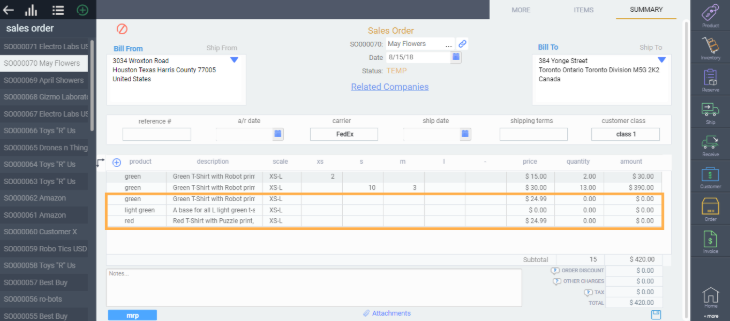
All three styles are added as row items in the pivot view. Their corresponding sizes are shown as columns. For styles with varying prices, an individual row is generated for each price point.
Paragon will not allow a user to enter quantities into columns for sizes that are not part of that style.
Now it is a matter of entering quantities for all required sizes.
Save
Don't forget to hit save.
Now your order is ready to go!
What's next?
The following article explains the pivot view functionality.