Introduction
Paragon ERPs grouping grid feature is an elegant solution to easy data entry and is an integral part of how users interact with the system. You will find it in multiple places in Paragon - one of which is in transaction lines throughout the software. Its purpose is to help you group and/or filter lines based on certain criteria or attributes.
How it works
Navigate to any transaction module and click the detail view button to open the highlighted transaction. The lines of the transaction provide general information about the items they represent. The default data will include the item name, the line number, the line value, quantity, and total. At the far right side of the lines is a hamburger with the word column.
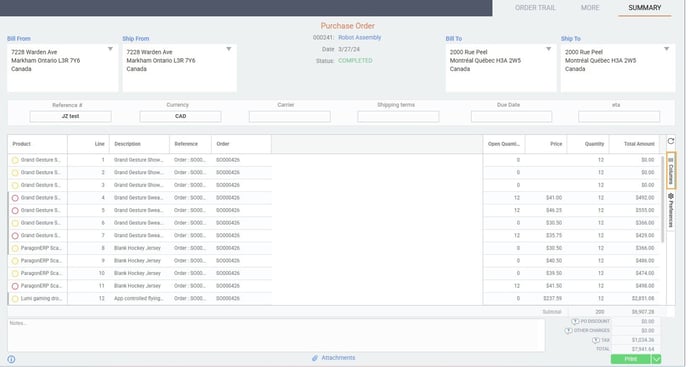
Columns panel
Clicking the hamburger will open a small panel where you can add or remove the columns or attributes being displayed in the lines.
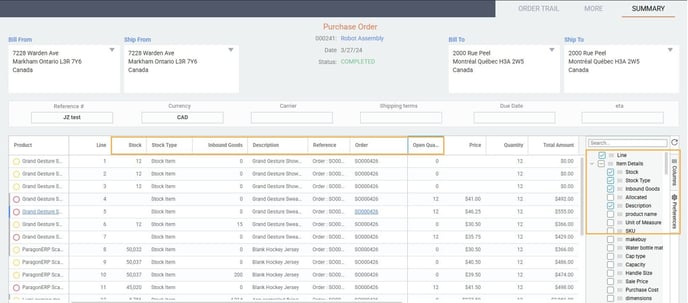
In the example above, we have added several attributes from the product module to help make analyzing the data easier. At a glance, you can see the full description of the item, how much is still in stock, and how much each item costs. Each type of attribute is grouped in the panel so you can select (or unselect) the entire group at once or one attribute at a time.
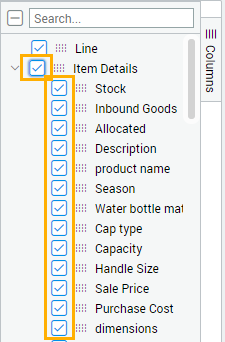
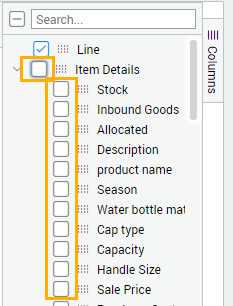
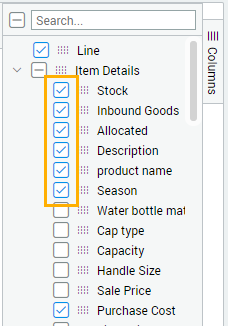
Once you are satisfied with the columns you have selected, you can collapse the column panel by clicking the hamburger again to get a better view of the columns you've selected.
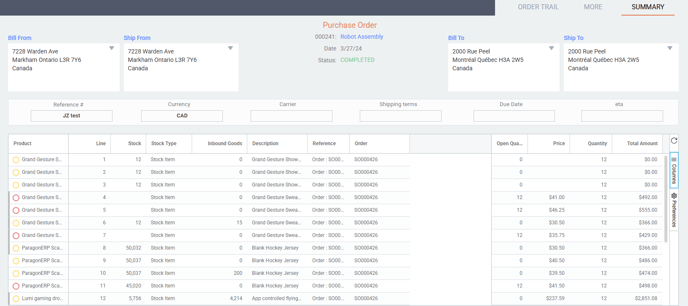
Roll your cursor over any of the column headings in the transaction grid. You can click and hold the column to drag and drop it anywhere in the grid. In the example below, we have moved description next to the product column.
You can also grab onto the hamburger next to any attribute in the column panel and drag it directly into the transaction grid instead of selecting the column first and then moving it around in the grid.
In this example, we dragged UPC directly from the column list into the grid.

Using this method, you can automatically drop the attribute into the transaction grid in the position of your choice.
Pin columns
Sometimes having certain columns stay in place while you work can help keep important information in view and help make data entry or inquiry easier. You can pin any column to the grid so they don't move when you scroll back and forth along the grid. To pin a column, mouse over the column heading until you see a little hamburger. Then you can left-click that button to see pinning options.

The no pin option is selected by default. If you change it to be pin left (for example) that column will remain on the left side of the grid until you un-pin it.
Sorting columns
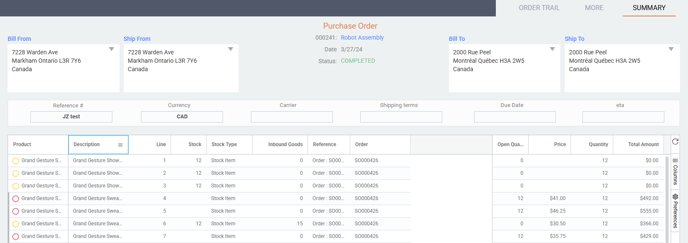
Once an attribute has been added to the transaction grid as a column, you can then sort most of those columns in ascending or descending order by clicking on the column heading. In the example below, we have sorted the grid on the description column - you can see a small arrow appear in the column heading when you sort by it.


Using the scroll bar
If you have added enough columns to the transaction grid that they cannot all be viewed on the screen at once, you will see a small scroll bar appear at the bottom of the grid. That bar can be moved left or right to help you see all the columns that have been added to a grid.

Security
The transaction grid will only allow you to see and manipulate attributes that you have permission to view in your user profile. So if sales rep commissions have been hidden from certain departments (for example), it will not be available to use on the column panel unless that user profile has been granted access to that attribute in that module..
Saving your selections and settings
The beauty of this feature is that the settings that are chosen are saved by user profile and transaction module. The preferences you have in the sales order module may not be the same preferences you would have in the packing module. Also, your settings don't interfere with the selections preferred by your colleagues. There is no need to actively save your changes. As soon as they are made, they are saved for you in that transaction module only.
What's next?
As mentioned earlier, the grouping grid feature is also available in other places in Paragon:
