![paragon logo-1.png]](https://support.paragon-erp.com/hs-fs/hubfs/paragon%20logo-1.png?width=240&height=75&name=paragon%20logo-1.png)
Introduction
A lot number is an identification number assigned to products indicating the batch or lot in which the product was manufactured or processed. Lot number tracking is the ability to track and trace products back to suppliers, through distributors or to customers by lot or batch.
Attributes and screen setup
First you're going to want to make sure that your attributes and screens are set up to handle lot numbers.
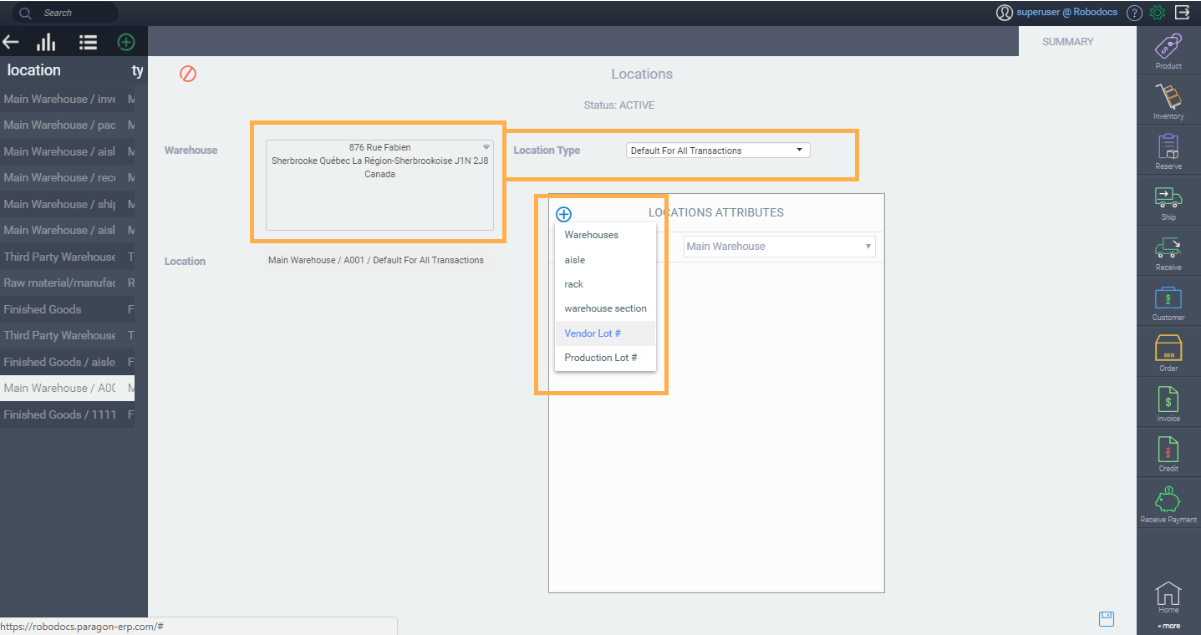
In attributes, add the vendor lot number and production lot number. Once this is done, add these attributes as line attributes to the following screens.
- Add production lot number to work order, pick, pack, ship.
- Add vendor lot number and production lot number to locations and receipts.
Locations for separate lot numbers
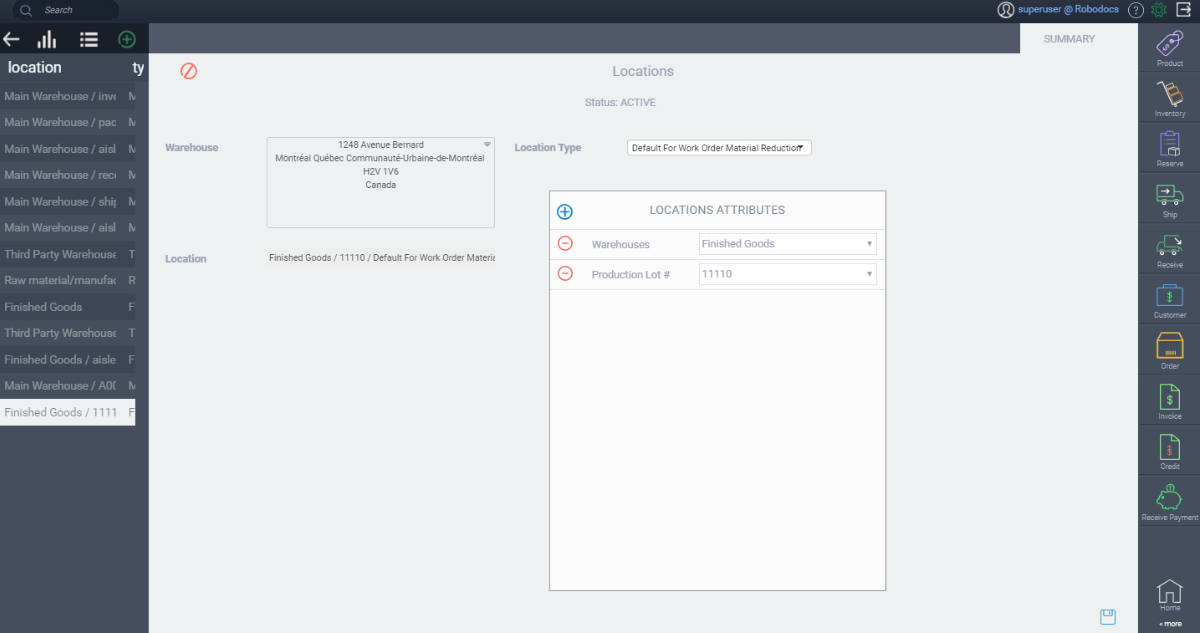
Once you've made sure the attributes and screens are setup, add two new locations; one for the vendor lot number, and one for your production lot number. The vendor lot will be used for the raw materials you receive to produce your products. Your production lot will be used for your finished products.
To do this, from the home screen, go to the locations module.

From here, click the create new button.
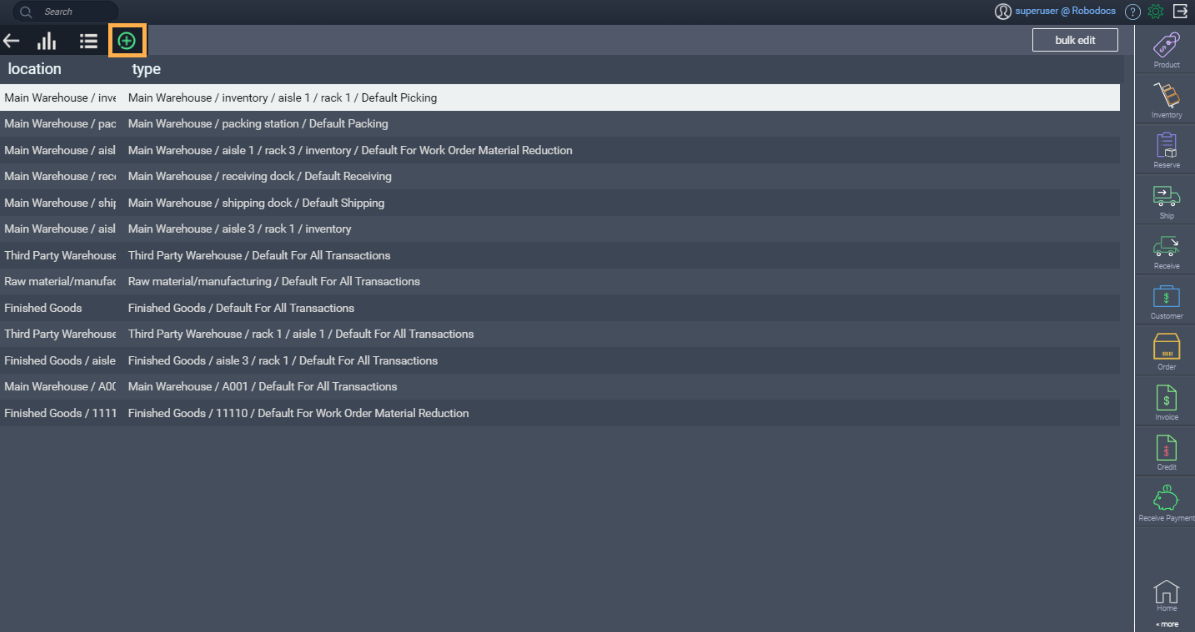
Create two new locations for the vendor lot numbers, and for your production lot numbers.
Linking receipts to vendor lots
Upon receipt of raw materials from your vendors, link the raw materials you receive to your vendor lot numbers by adding the vendor lot number as a line attribute on the goods you receive.
First, from the receipt screen, add the items you're going to be receiving from your vendors. Once added, right click on the item line, and click the edit line attributes. Add your vendor lot number here.
It's important to make sure that the ship to address is the location set up for the vendor lot numbers.

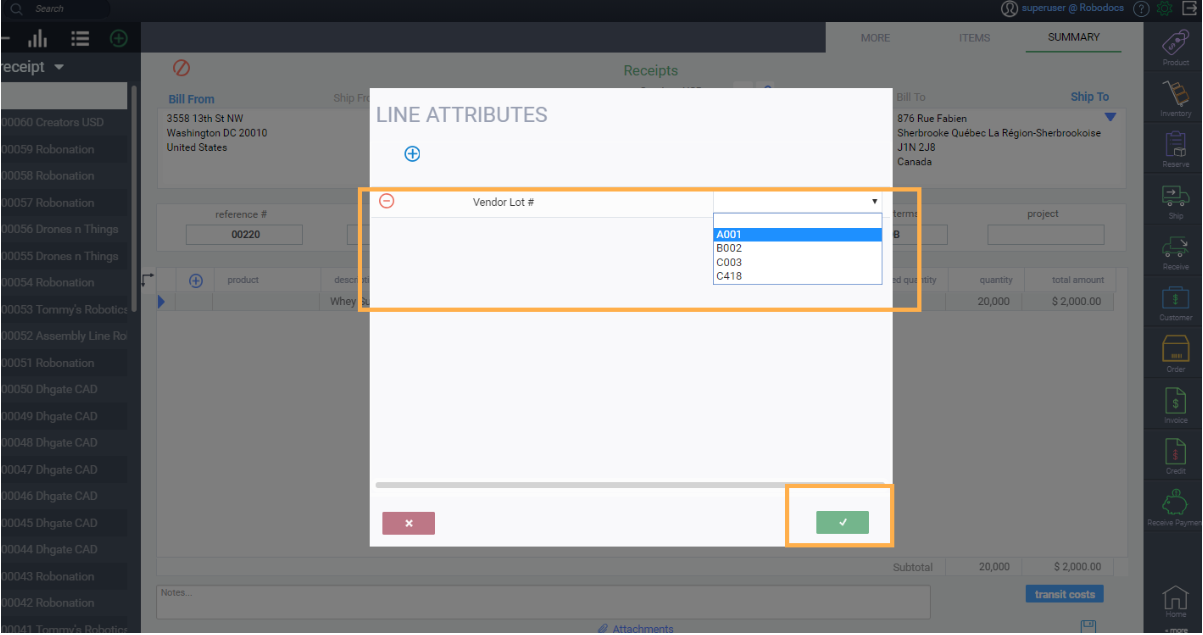
You can see that a line item has an attribute within it by the blue triangle that appears to the left of the line.

Once you're done adding all items, complete the receipt.

You'll now be able to see the material addition to your vendor lot location. Click the inventory module. From here, select your item, and click the history tab to see the history of movements.
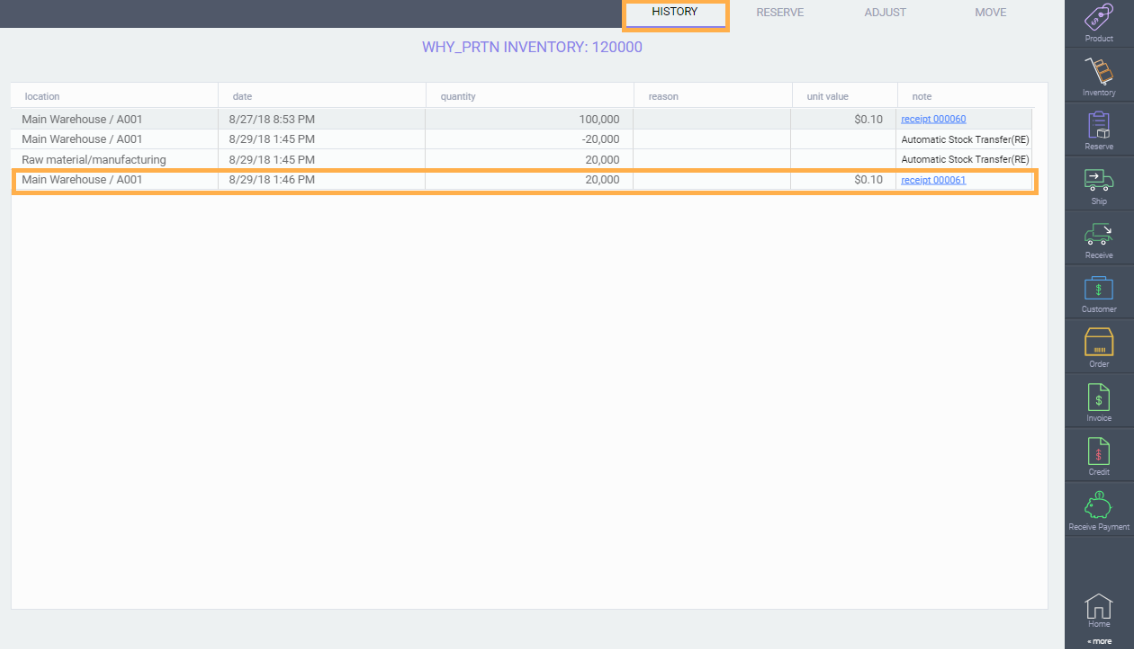
Because you're receiving the inventory into your locations, you will know where and how many units you have left for a raw material.
Issue and receive work order
Issue a work order using the material you've received into your raw material warehouse.
Make sure your ship to address corresponds to your production lot number warehouse.

Once issued, go to the receipt module. Receive your work order into your production lot warehouse.
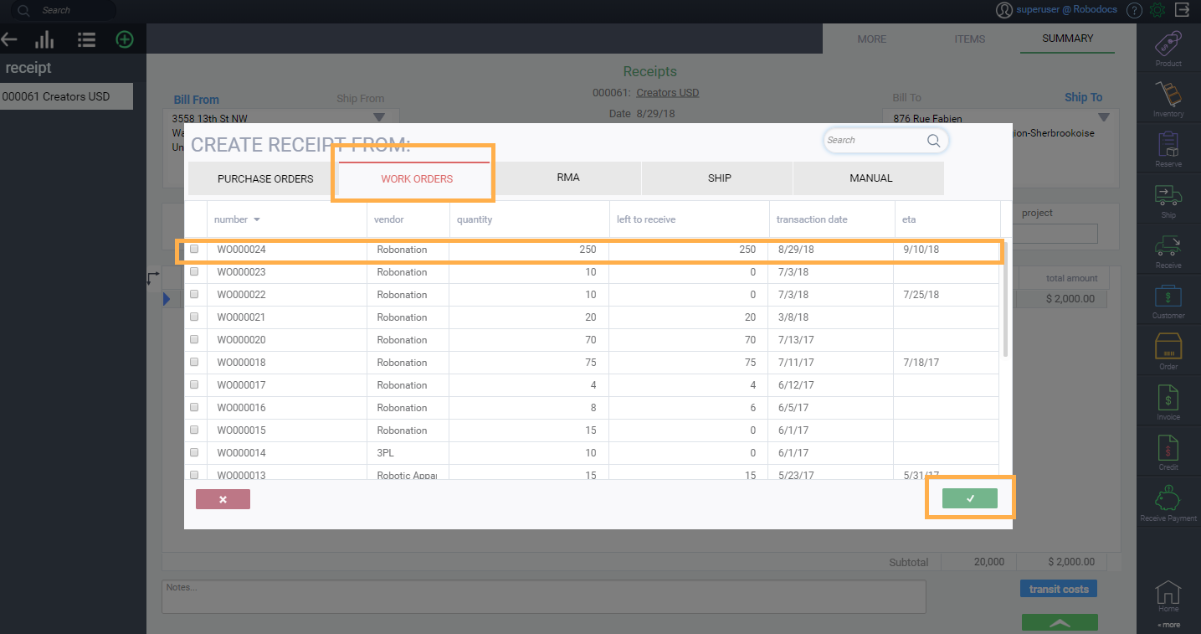
Add your production lot number as a line attribute on your line items. Once done, save your receipt, and complete it.
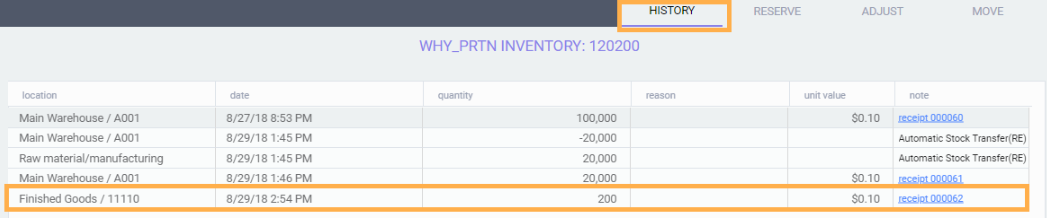
Once completed, you'll be able to see your items in your production lot warehouse. To see this, click the inventory module, find your product, and click the history tab. In this example, we can see the whey protein product, as well as the vanilla powder product.
Issue sales order and ship goods
When issuing a sales order, you'll pick, pack and ship from your finished goods warehouse and you can see the inventory being depleted from your finished goods warehouse (your production lot warehouse).
On any work order with product bom, you can see the custom BOM, i.e. all the materials, the tools or machines, and the people in operations that were required to manufacture this batch. This offers a lot of traceability on the production process.


What's next?
The following article relates to the product BOM, and may be of further assistance to you: