Introduction
Here, we'll walk you through how to create a credit from an RMA.
You can also create a credit from an invoice or manually.
The credit module is based on Paragon's standard transaction screen.
Open the credit module
You can open the credit module in two ways; by clicking on the credit button in the right hand navigation bar or through the more menu.

Create a new credit
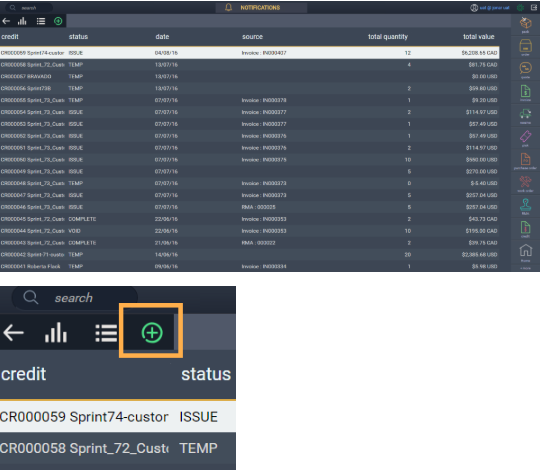
This is the list view of the credit module. To add a new credit, click add new credit.
Select how you would like to create the credit. In this case, make sure the RMA tab is selected. It is selected when RMA is highlighted in blue.
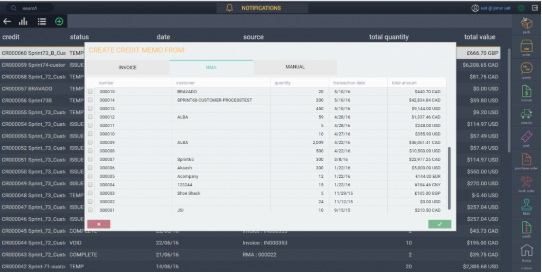
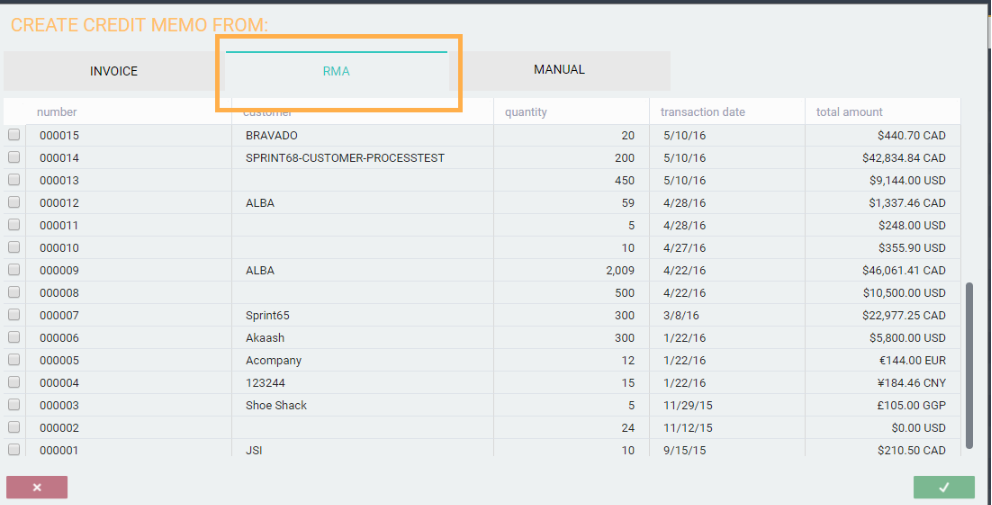
Select the RMA you want to use to create the credit by checking the corresponding box on the left. When you select an RMA, the list filters so that you can only see options from that particular customer.
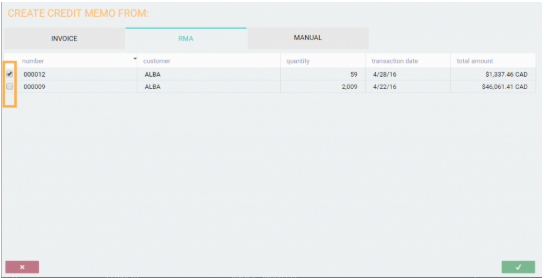
To deselect an RMA, uncheck the box.
Save or cancel the credit
A credit can be canceled at any point before it is saved by clicking the close button in the bottom left hand corner.

To create the credit from the RMA(s) you selected, click the accept button in the bottom right hand corner.

Once you click accept, the credit will be created and you will be brought back to the list view of the credit module. The credit that you just created will be selected.
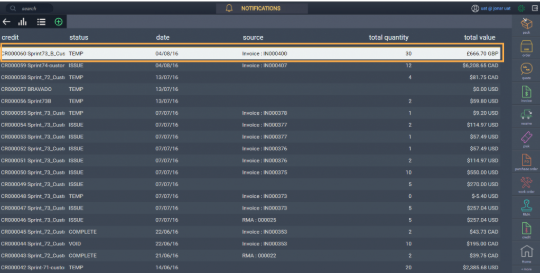
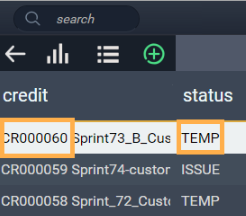
Note that once the credit is saved, it will automatically be assigned a transaction number and a temp status.
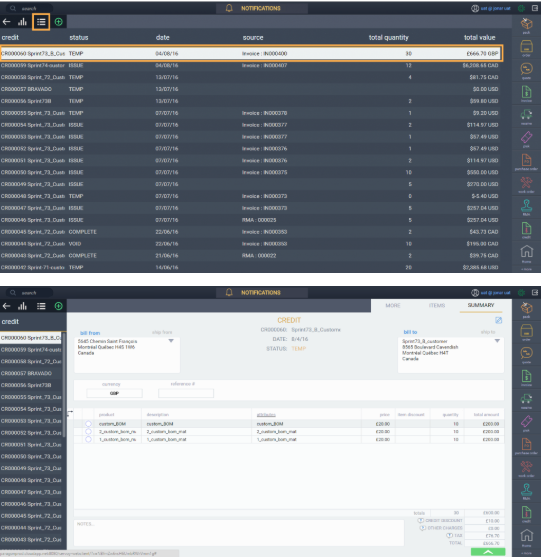
To see the details of the credit, double click it in the list. You can also see the credit details by selecting the record in the list (highlighting it) and then clicking the list-detail toggle button.
I've created my credit, now what?
- Copy a credit
- Email a credit
- Print a credit
- Put a credit on hold
- Issue a credit
- Void a credit
- Print New Template
You can also edit a credit in the detail view.

What's next?
Check out these relevant articles next!
