![paragon logo-1.png]](https://support.paragon-erp.com/hs-fs/hubfs/paragon%20logo-1.png?width=240&height=75&name=paragon%20logo-1.png)
Introduction
Materials can be used to manufacture or assemble your products using bills of material in ParagonERP. This article will explain how to create a new material.
Process description:
Step-by-step instructions:
-
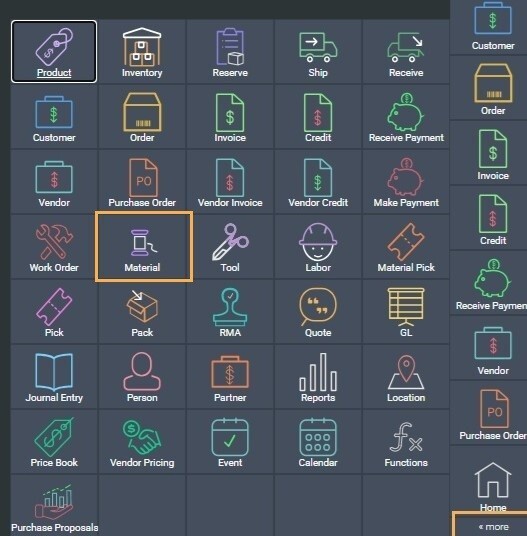
Step 1: Go to the material module
From any screen in ParagonERP, click the material button from the more menu.
-
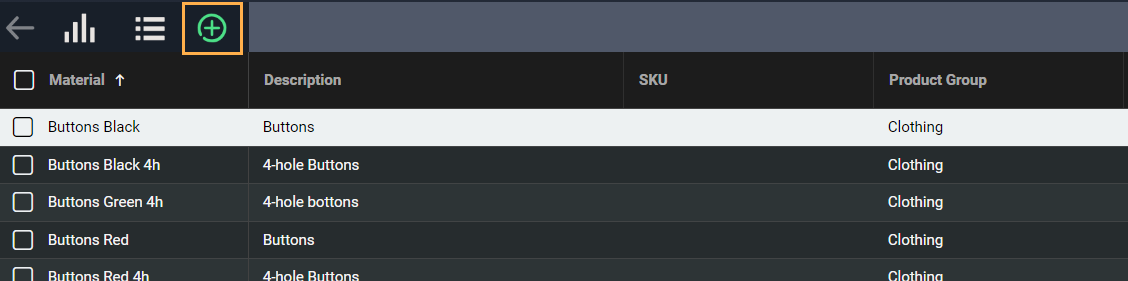
Step 2: Create a new material
This is the list view of the material module. To create a new material click the add new material button.
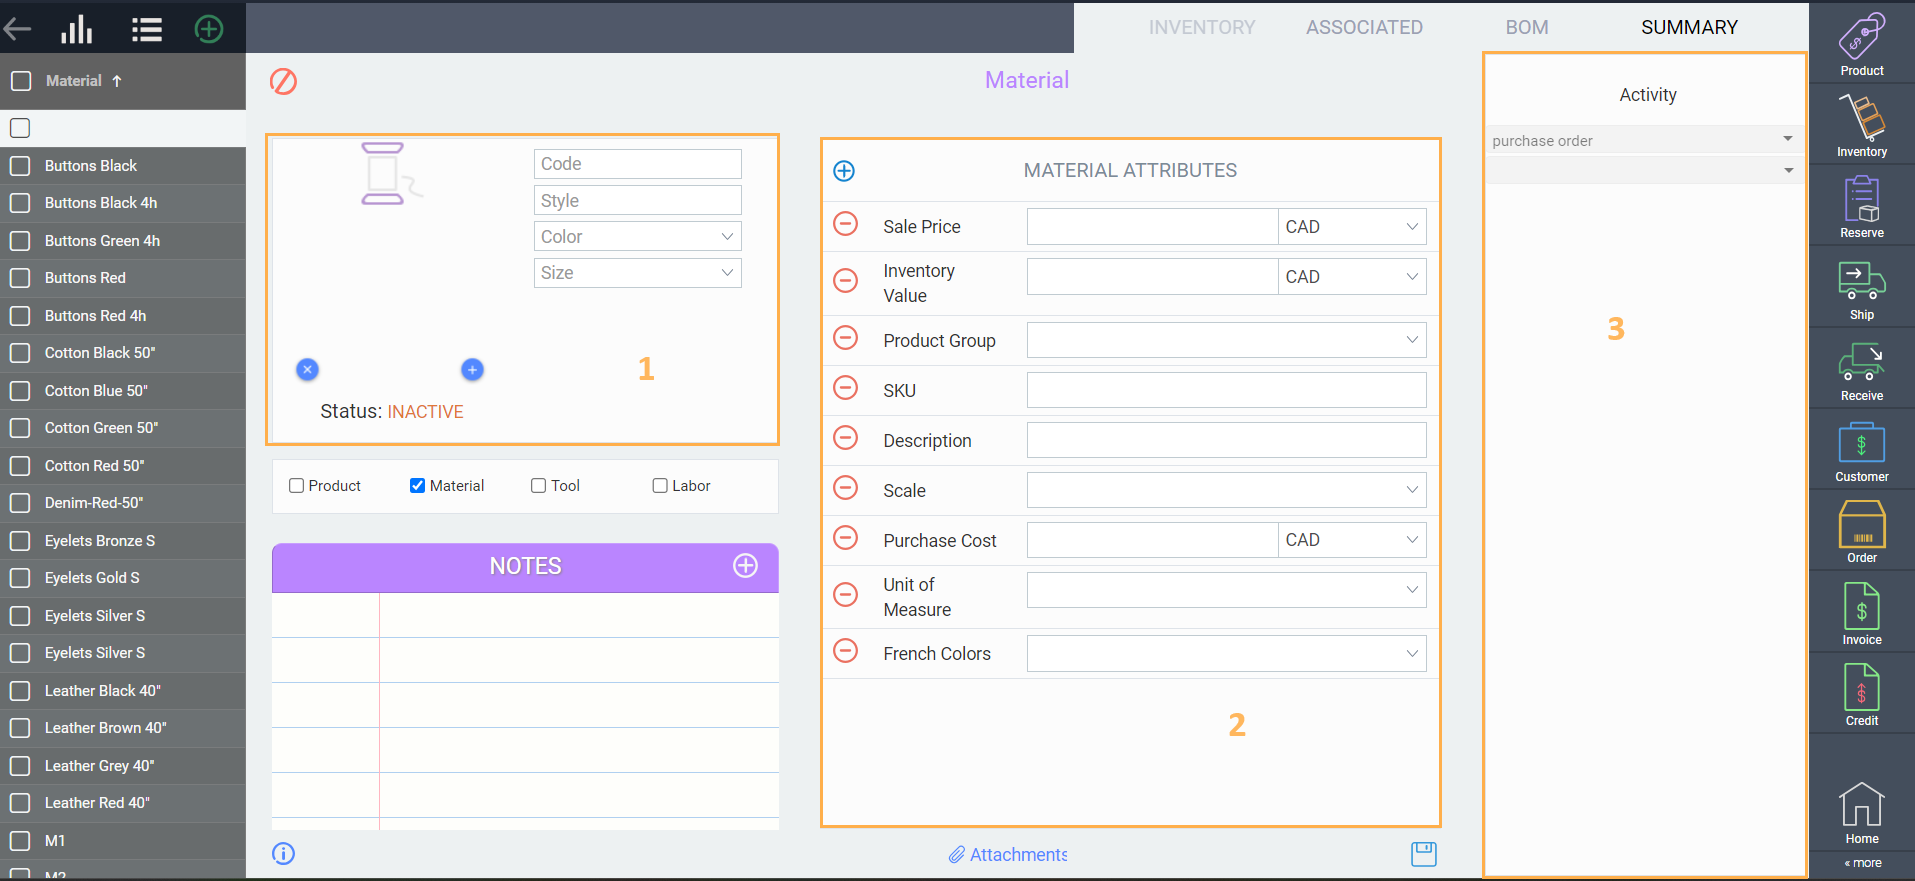
The material screen is separated into three parts - the business card, the attribute panel, and the activity panel. When creating new materials, only the first two sections (1 & 2) will be accessible to be filled out. Once you have transactions for the material, they will appear in the third section - the activity panel.
-
Step 3: Complete the business card
Enter the material information required for the business card. The first field, in this case code, is mandatory and must be unique. The other fields were set up in the material reference screen setup.

-
Step 3a: Add or remove images
You can attach images or logos for visual confirmation and ease of browsing. In edit mode, simply click the add button on the business card of your material.

When you click the add button the upload image module will open, where you can either select an image from your local files by clicking the add file button or simply copy and paste an image URL.
-
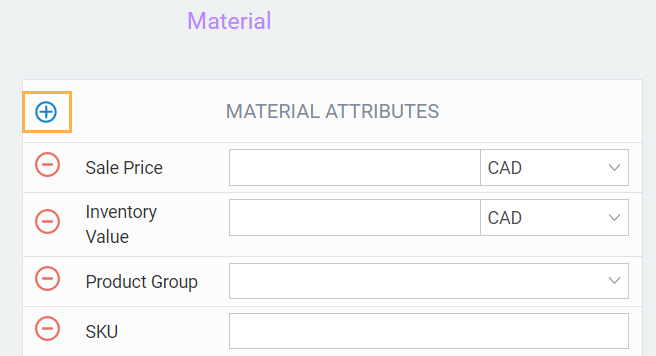
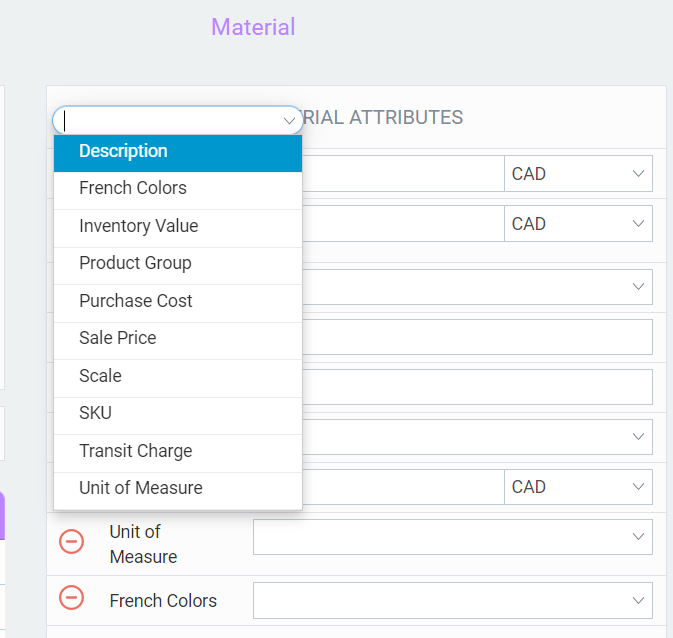
Step 4: Add more attributes and information
The attributes that appear on the material attributes screen were set up in screen setup as always show. To add attributes from the main screen, click the add new attribute button. To remove attributes from this screen, click the remove button to the left of the line. ![]()
-
Step 5: Save your material
When you are done entering all the relevant information, click the save button. Alternatively, you can click the cancel button, if you no longer want to create this item.
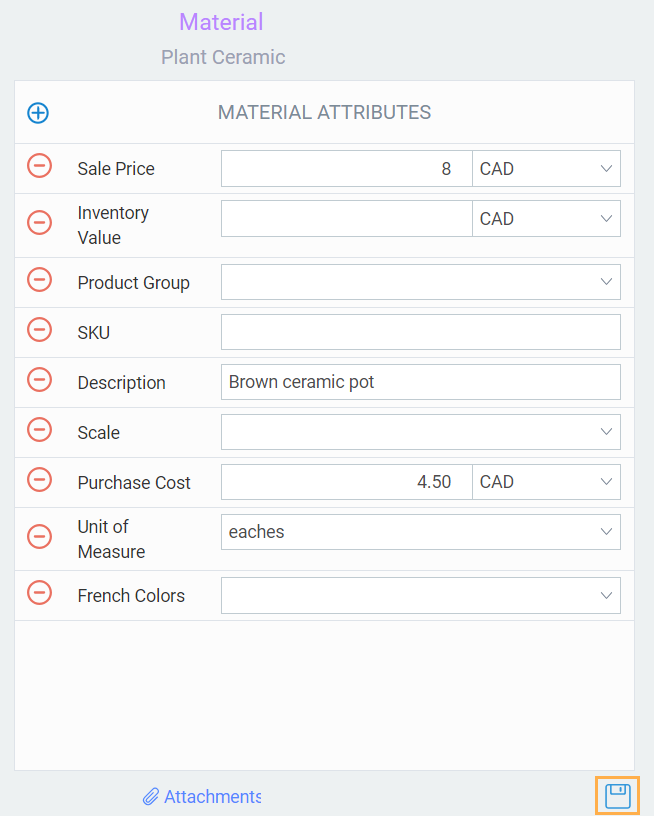
Any fields that are left blank will no longer show on the screen after saving.
-
Step 6: Activate the material

-
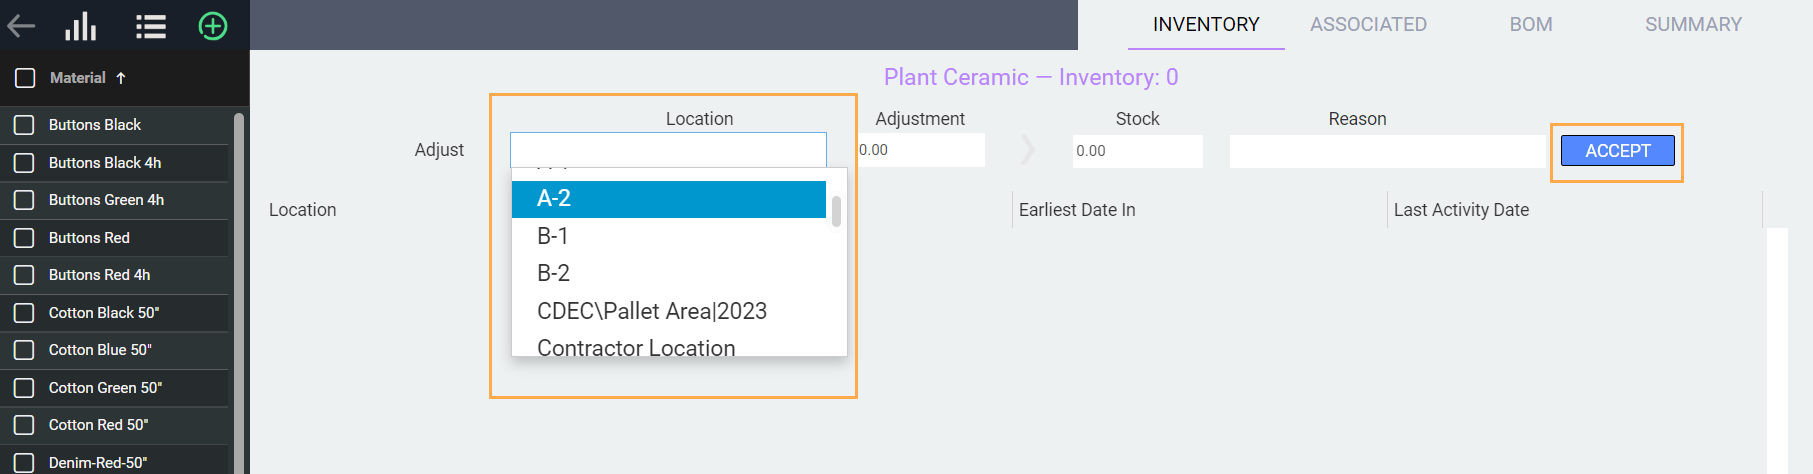
Step 7: Adjust material inventory
Once the material is active you can adjust the inventory directly in the module by clicking the inventory tab. To adjust your inventory, follow these steps:
-
Click the location bar to open a drop down menu of your locations
-
Select the warehouse location for which you wish to adjust the inventory.
-
Enter the adjustment quantity, select a reason if applicable, and click accept to validate your change.
Note that if you want to move stock from one location to another, or view the history of all inventory movements for that item, this will still need to be done in the inventory module.