Introduction
Manufacturing goods is a complex piece of any business. Paragon helps to simplify the product life-cycle by streamlining the path all products need to take. We would like to walk you through a typical manufacturing process while using ParagonERP.
Here, we'll outline what it takes to manufacture a product in Paragon, including all steps from issuing a sales order, to issuing a work order, and receiving that work order. We'll show you the movement of inventory as we complete our work orders and receipts of the work orders.
First, to get you orientated on the ERP jargon, we'll outline what we mean when we talk about the following:
-
Product: This is the finished good that you will be selling. This is what you'll ultimately be issuing work orders for.
-
Materials: These are the components that make up your finished good. You can think of these as your raw materials.
-
BOM: This is your bill of materials. It includes your raw materials, as well as any other tools or labor that may be required in manufacturing your finished good.
Create a product with material, tools, and labor
First, create a manufactured product with materials, tools, and labor. A product that is manufactured usually requires a bill of materials (BoM), which defines the different components that are required to make the product.
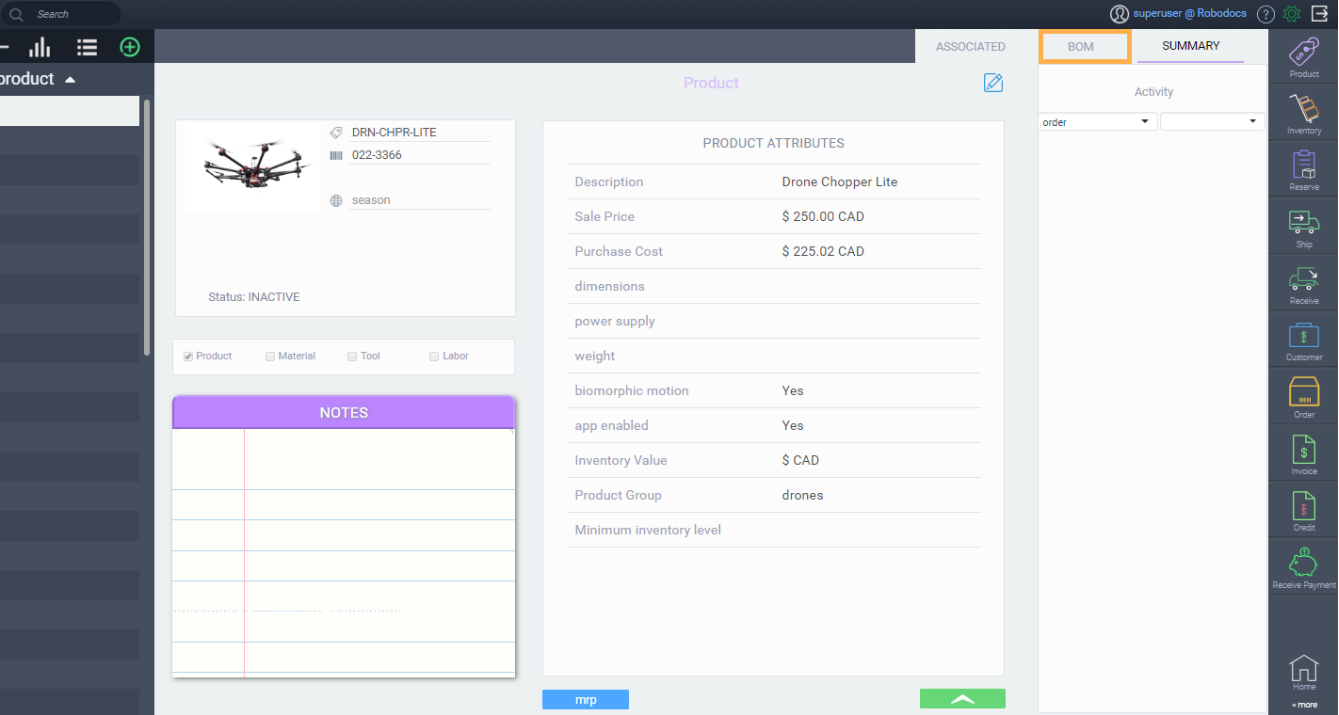
Here, we'll use product DRN-CHPR-LITE as an example. You can see the product's BoM by clicking on the BOM tab at the top of the screen.
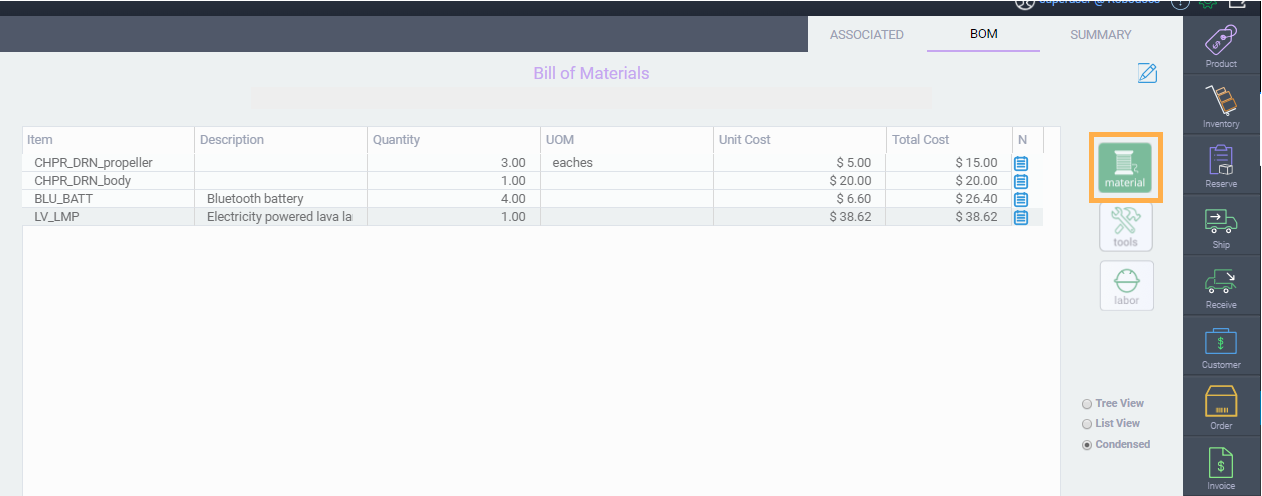
Once the BOM screen is open, you can select which raw materials are to be used to make the product. You can also select any tools or labor that are required.


Issue a sales order
Once you have your product listed and activated in Paragon, you can now enter and issue your sales orders. This is an order that is coming in from one of your customers.
Create and issue a work order
Create a work order for this product. It's important to make sure the ship to address is set to the location where your product is being manufactured. Once you've added all necessary information pertaining to your work order, issue it.
First, from the home screen, click on the work order module from the more tab.
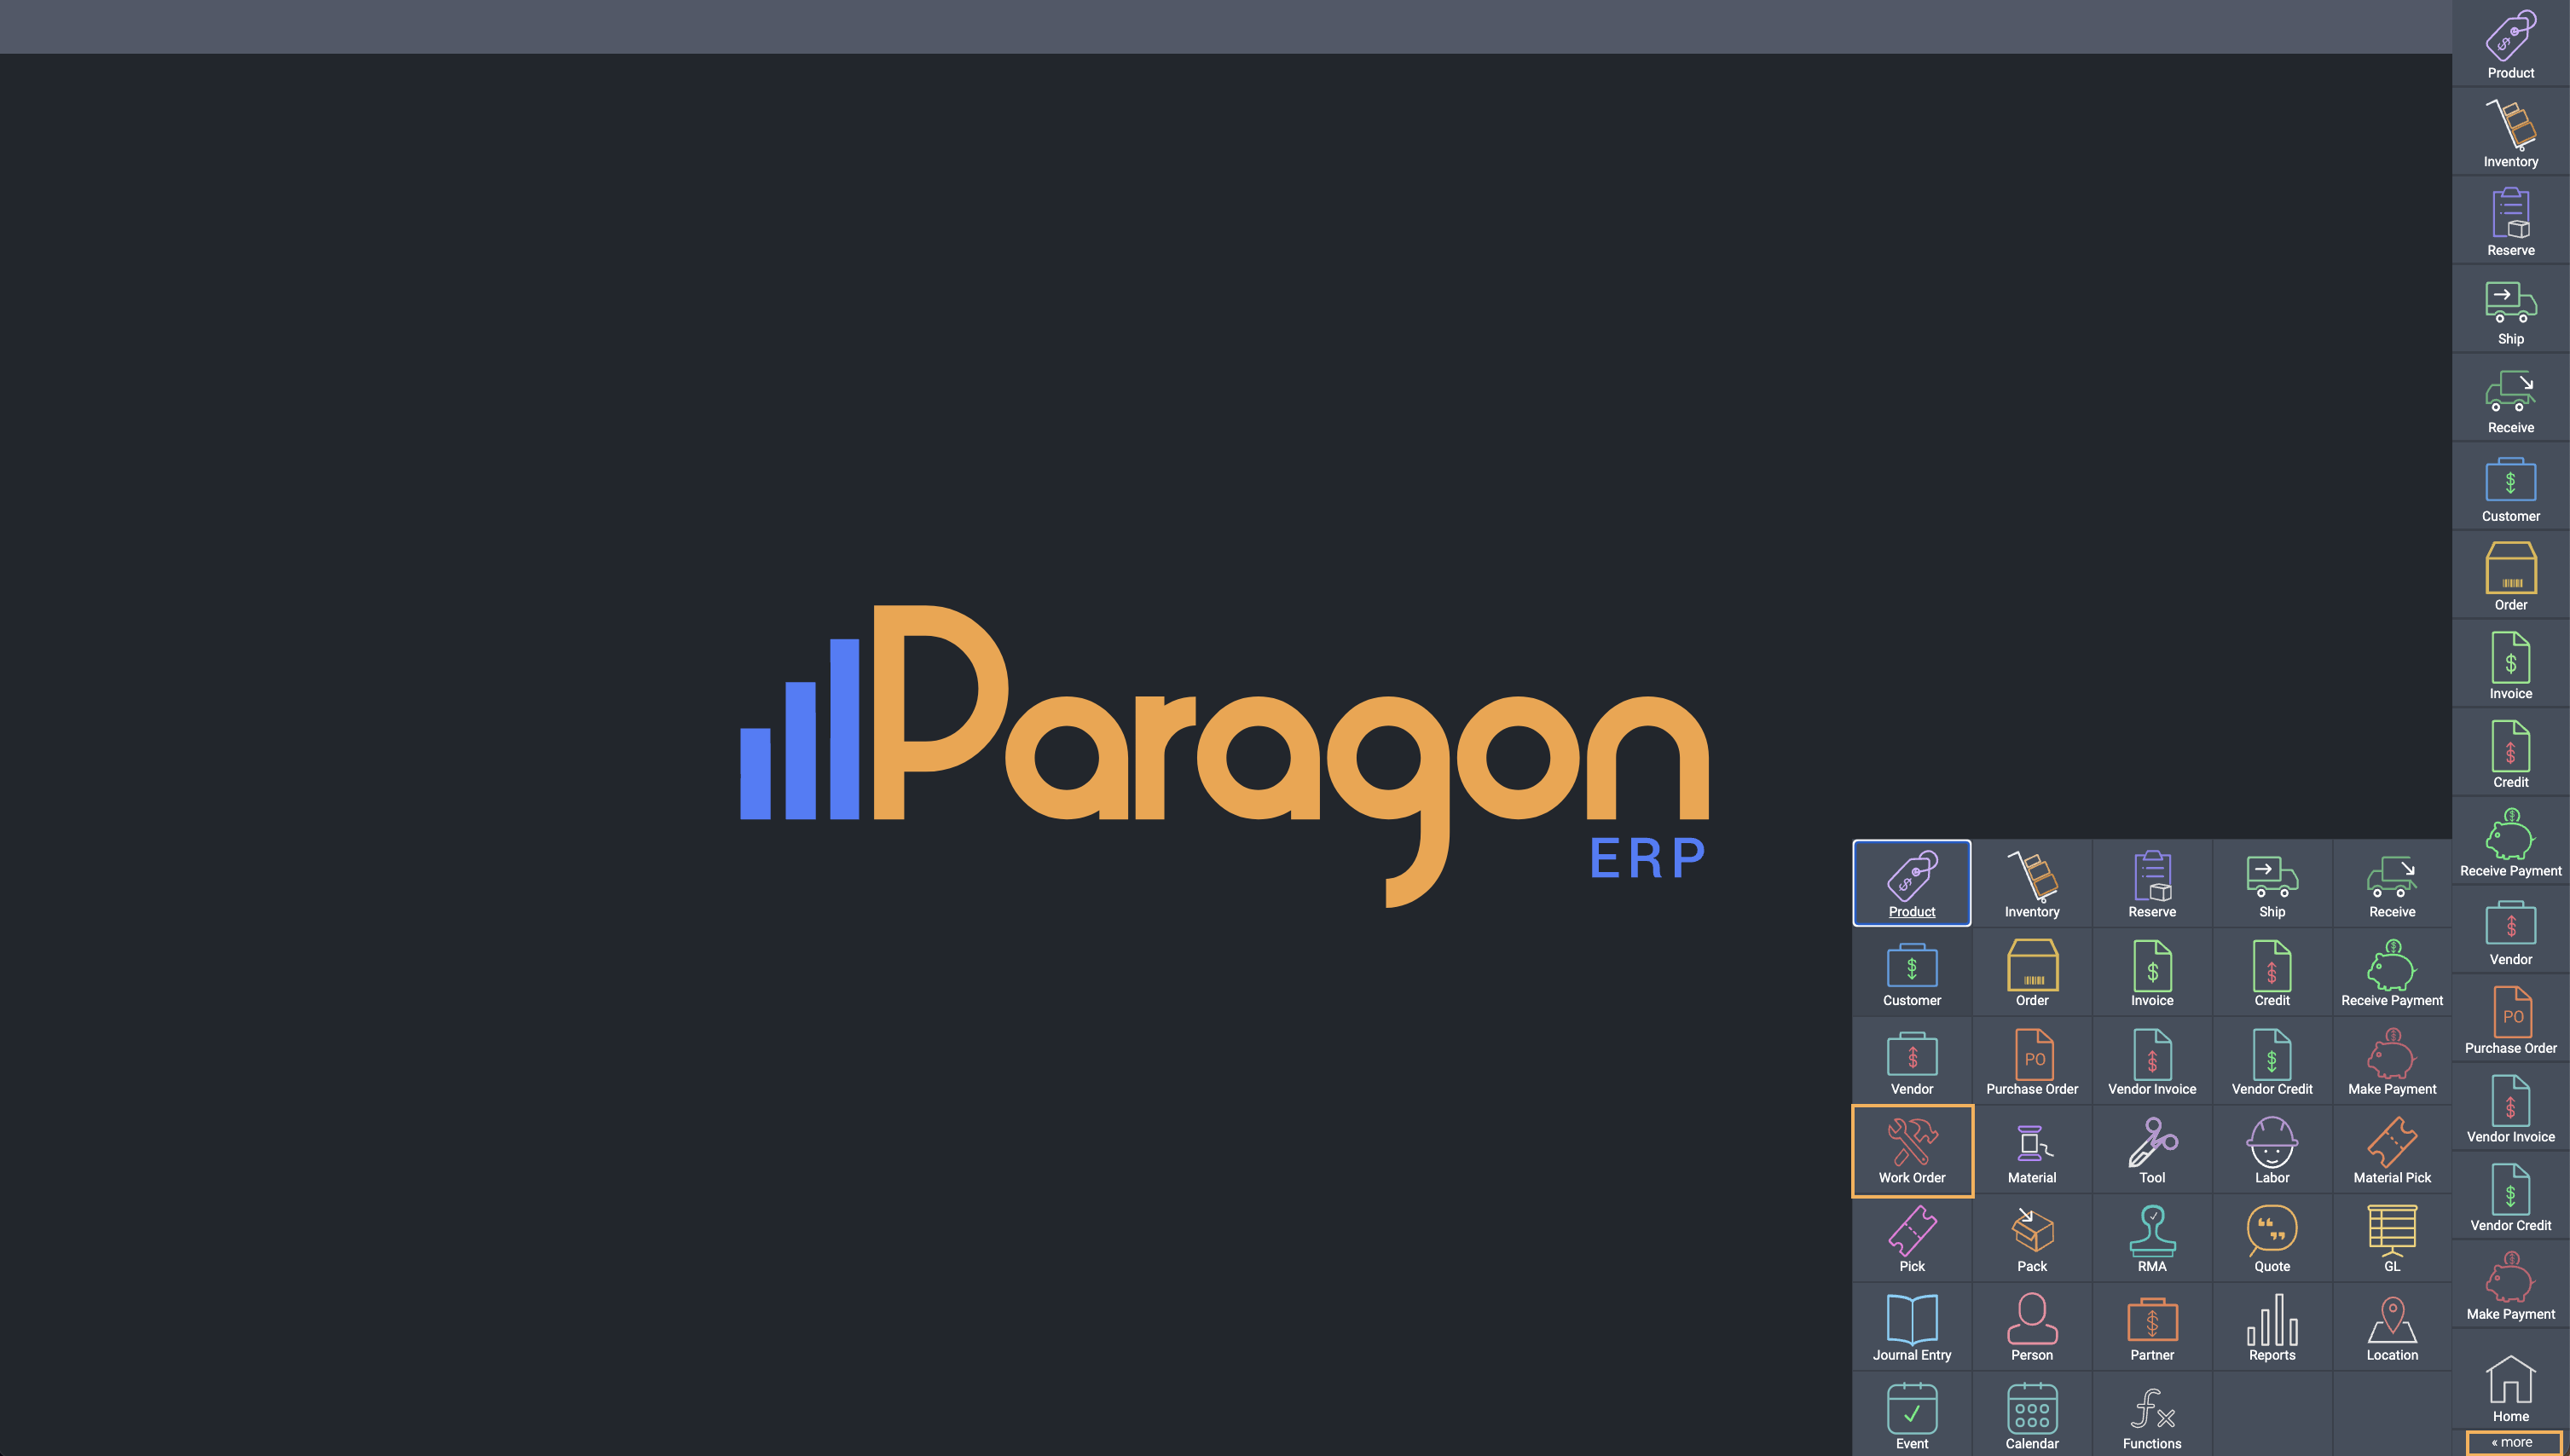
From here, click on the create new button at the top left hand of the screen.

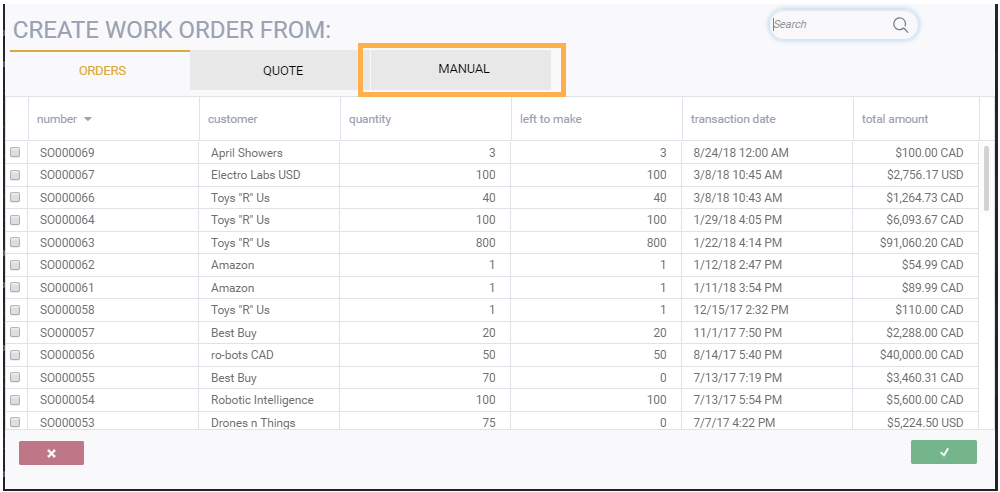
A modal will pop up, prompting you to choose what you would like to create your work order from. Here, click on the manual tab.
Now is the time to add the product you wish to manufacture, and select the warehouse location in which you would like to pull the materials from.
First click on the add new button. A modal will pop up prompting you to choose which item you'd like to add. Select the item and click on the accept button.
Then, click Ship To and click on the drop down arrow. Select the warehouse in which you'd like to pull the materials for that product from.
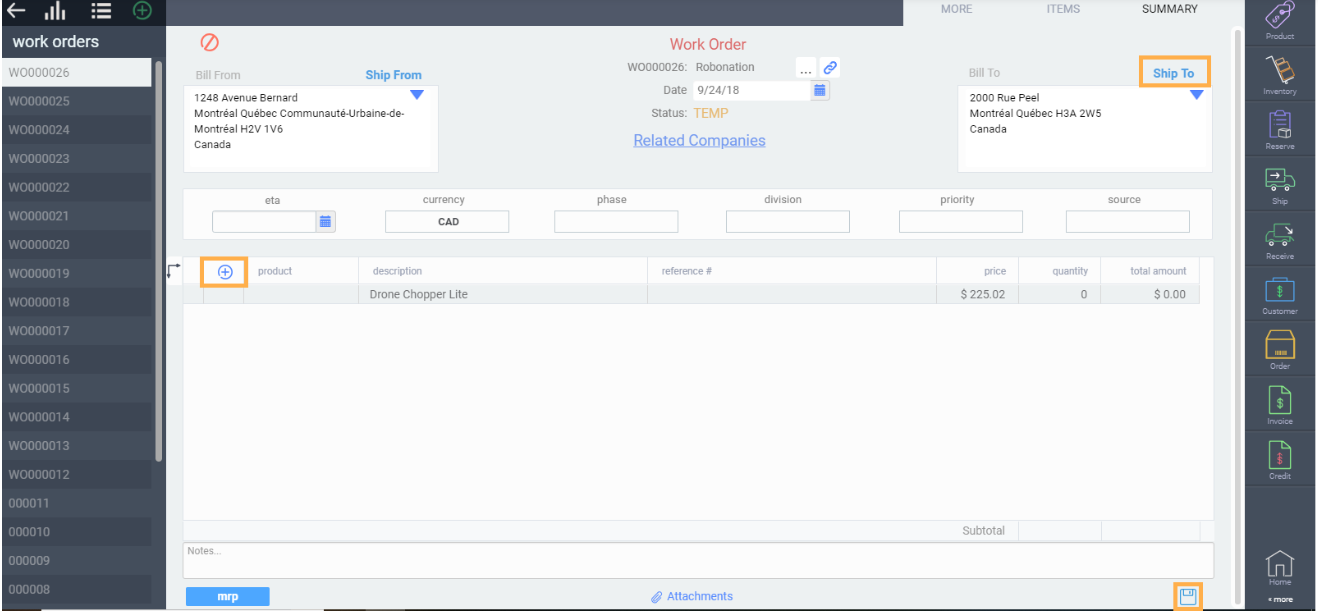
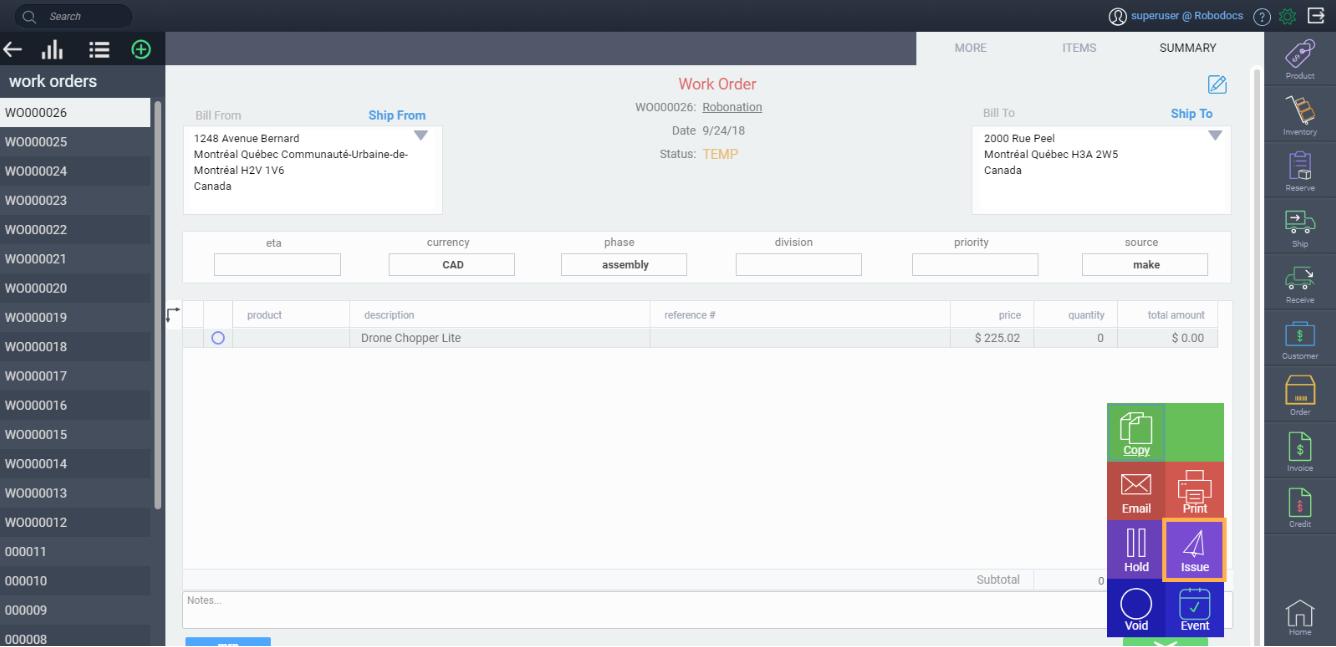
Once you're done, fill in the necessary fields, and save your work order. Now issue the work order.
Pick your materials
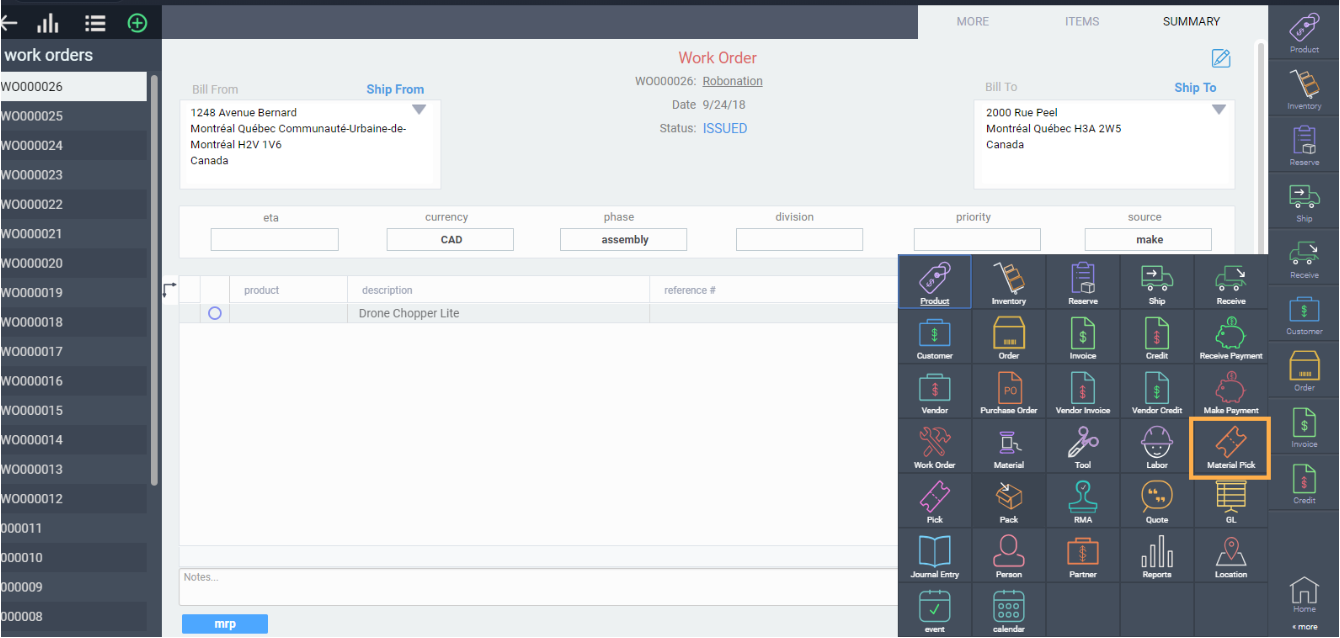
You're now going to want to pick/allocate the materials you'll need for that order. To do this, click on the more tab at the bottom right hand of the screen and go to the material pick module.
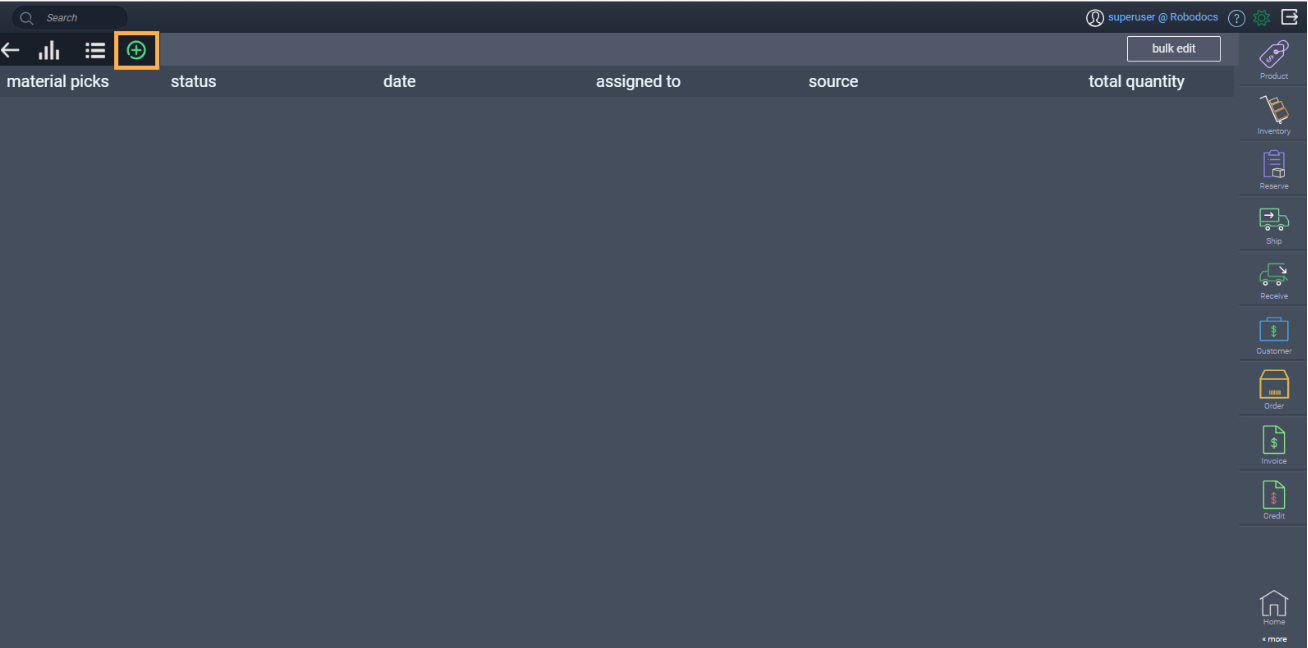
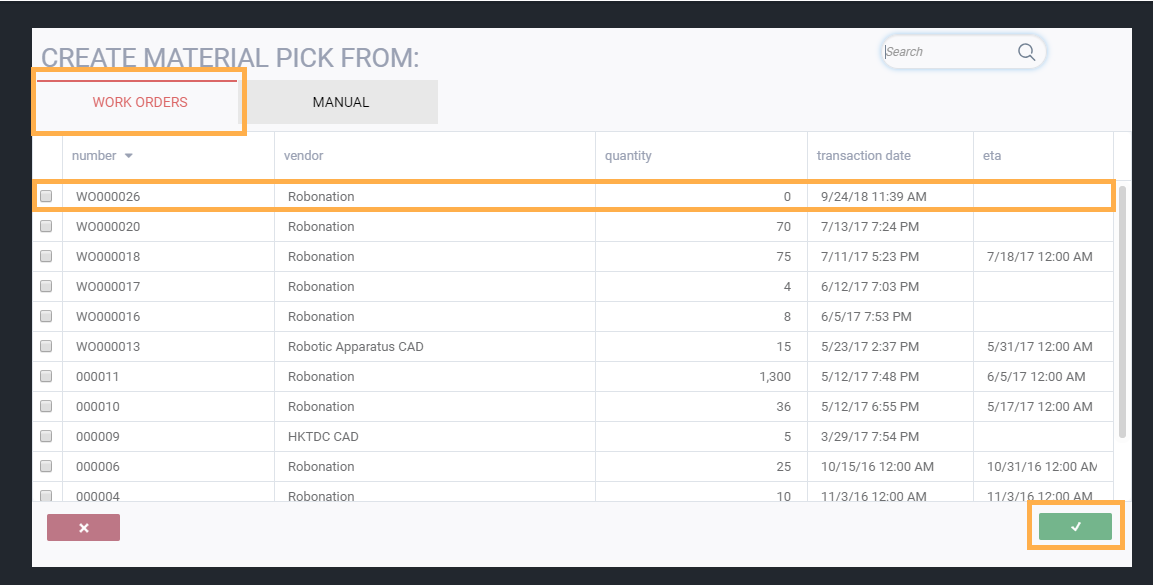
Click on the create new button at the top left. Here, a modal will pop up, and you can choose to create a manual material pick, or one from a work order. Choose the work order you've just issued.
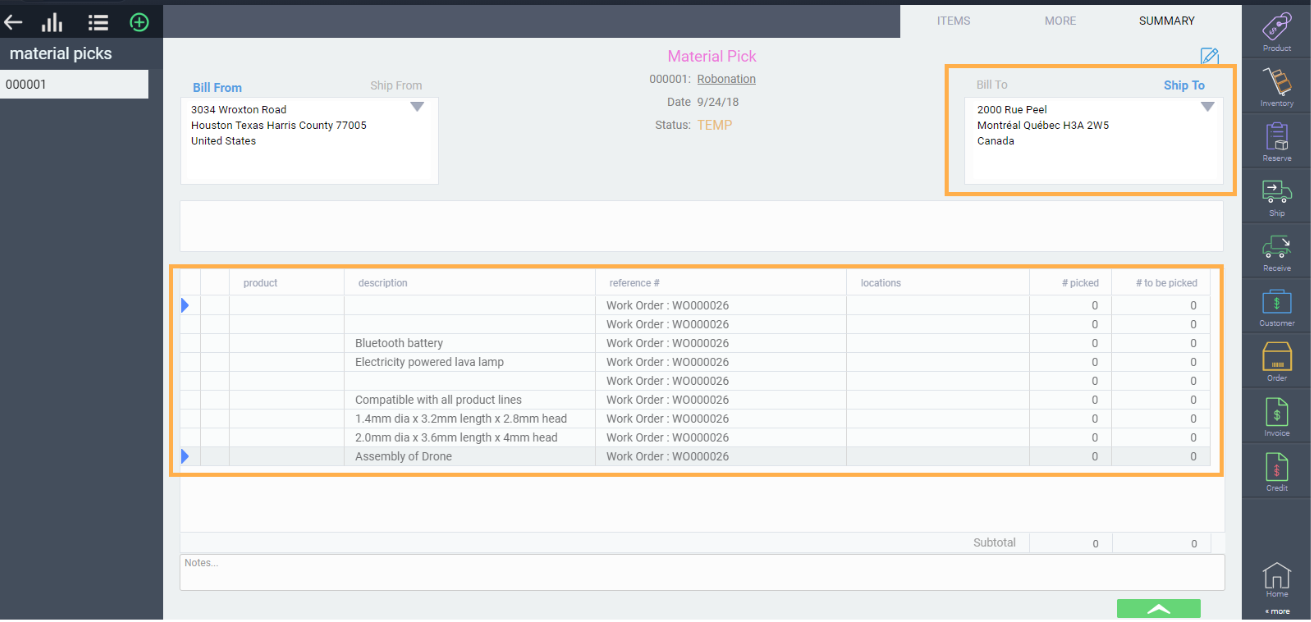
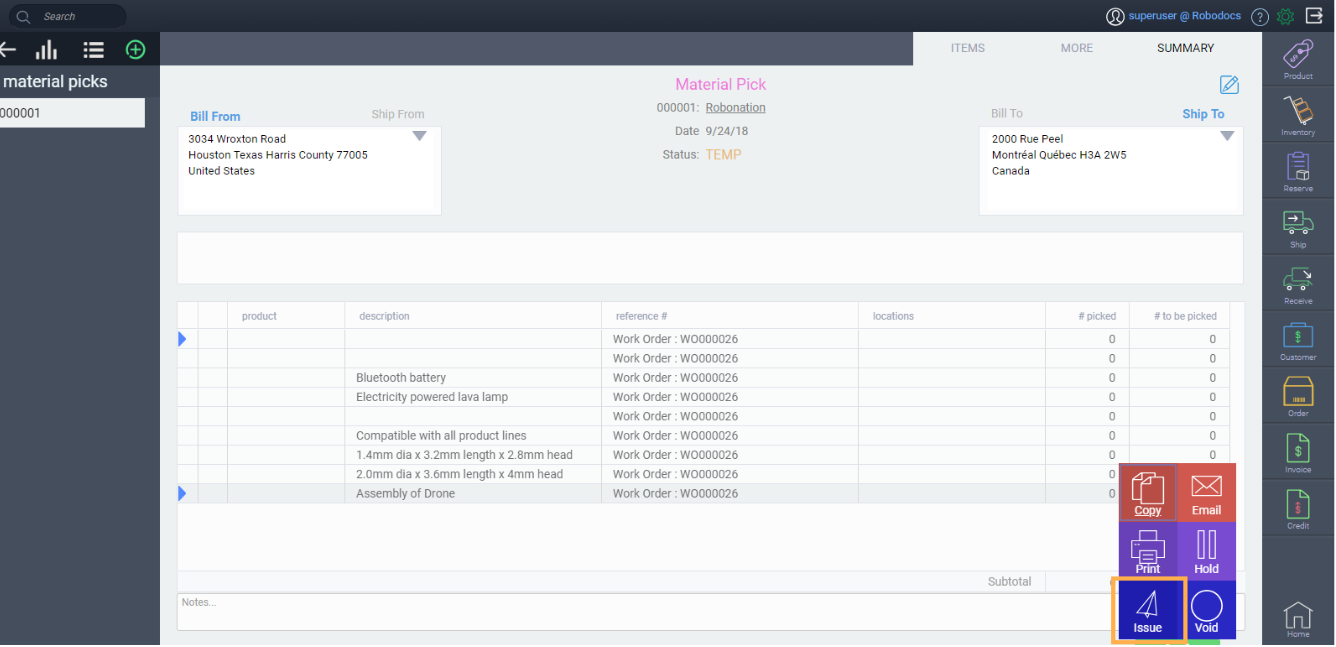
Once you've made sure all required materials are on your material pick, and that your ship to address is your raw materials warehouse, issue the material pick by clicking on the action button at the bottom right hand corner of the screen.
Receive the work order
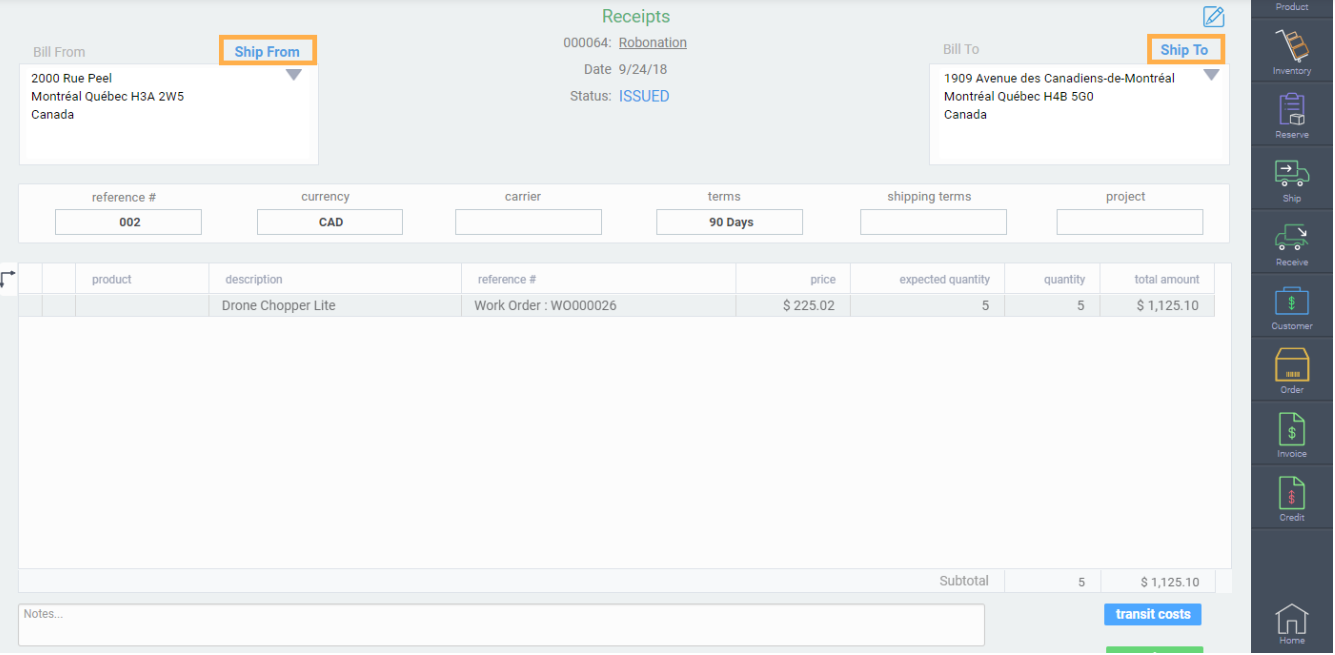
Once your finished product is ready to be received into your warehouse, click on the receipt module, and create a new receipt from a work order. Select the work order you've just issued.
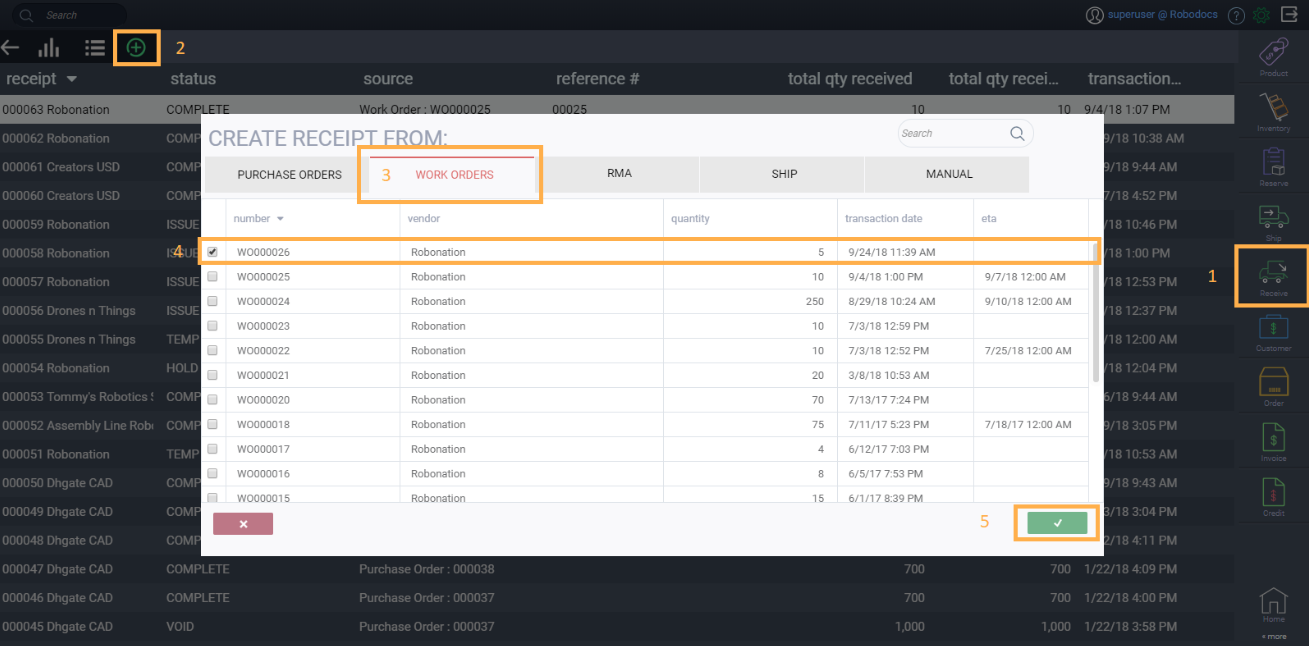
Once done, complete the receipt by clicking on the action button, and selecting issue and then clicking the action button again, and selecting complete. Make sure the ship to address is set to the appropriate finished goods warehouse location, and the ship from is the raw materials location.
View your inventory movement
Upon completion, the inventory for the finished product will now be added to your appropriate warehouse. To view the inventory level, go to the inventory module, and click on the history tab. Here, you can see the 10 units we received in our finished goods location.
What's next?
Check out our article on creating work orders:
